
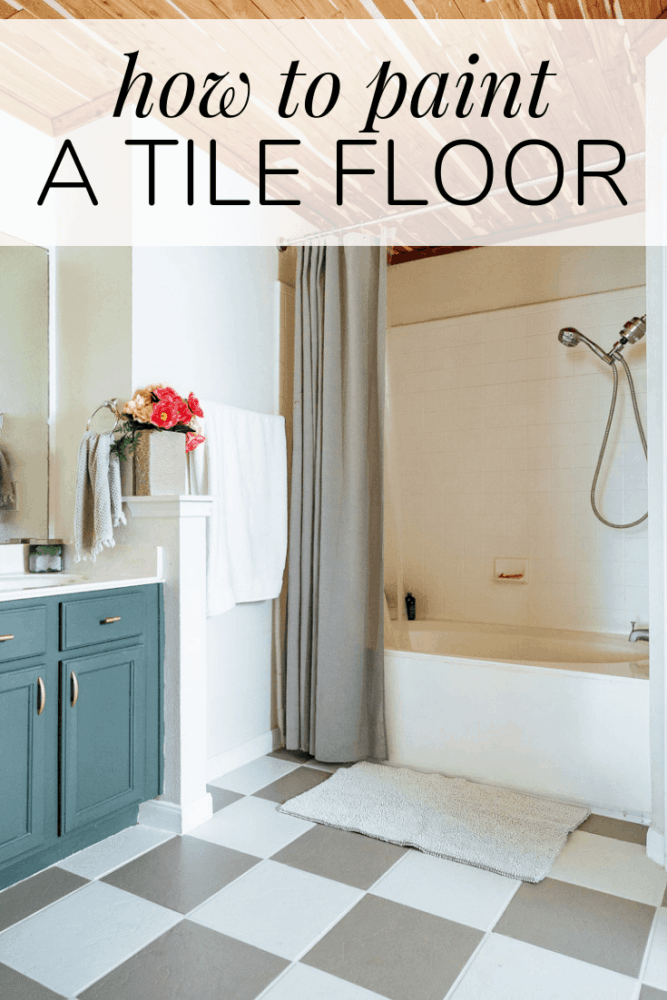
How to Paint Tile Floors
I often get asked, “can you paint tile floors?” And the answer is YES, of course you can! Painting tile floors in your home that you don’t love is really easy. I’m going to show you exactly how it’s done.
Anytime I’ve mentioned that we painted the tile floor in our bathroom, I get the incredulous question: wait, can you paint tile floors? YES! Yes, you can paint tile floors.
This is such a simple, quick, and affordable project. It’s an amazing way to give a space an entirely new look without a major renovation. So today, I’m taking you on a deep dive look at how to paint tile floor, and answering all of your questions. You know I love me some thorough and detailed tutorials, so read on for all the good stuff.
Let’s start with the obvious – what’s the best tile floor paint and where can you get it?
Rust-Oleum Floor Tile Paint
We used a product from my friends at Rust-Oleum called Rust-Oleum HOME Interior Floor paint. This paint is specially formulated for painting interior flooring. It can be tinted to a variety of different colors, and should be combined with the coordinating top coat for a finished look that will last for years.
You may wonder if you can use latex paint on your tile floor. Technically, you can. However, it won’t last like a specially-formulated floor paint will! If you really want a long-term solution that will be durable and last for years, this is the way to go. But, if you do go with latex paint, you would 100% need to add a bonding primer to the tile floors before starting!
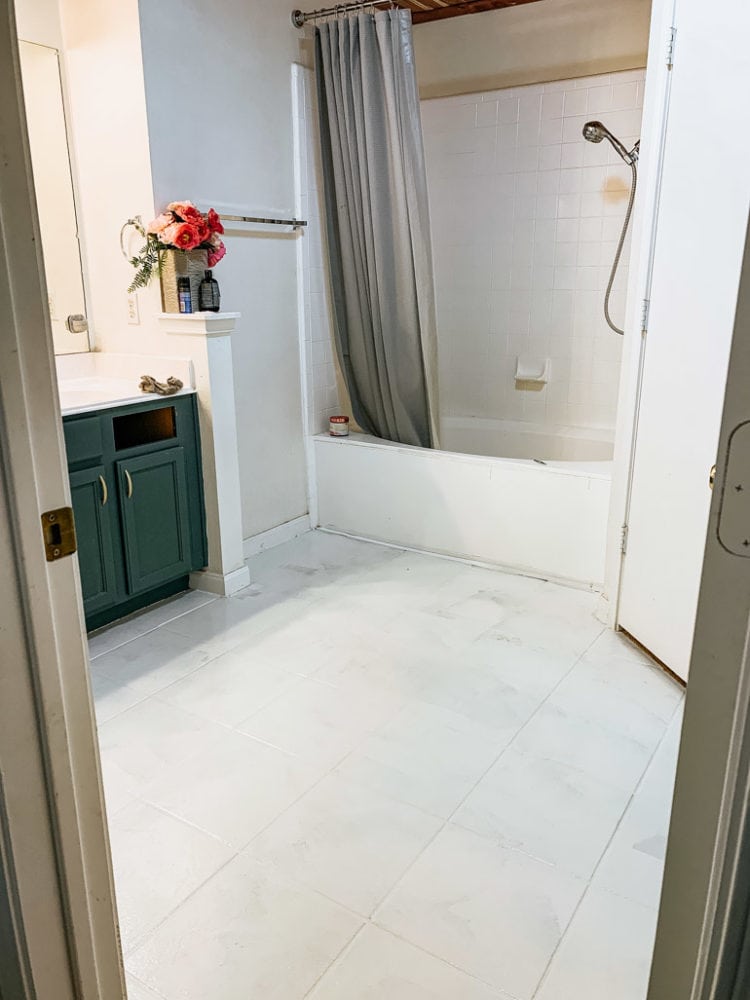
I’ve had questions from so many of you who are eager to try this for yourself. So, I’m hoping this post will be helpful and informative. Before we dive in, let’s take a look at what our bathroom floors looked like before we got started.
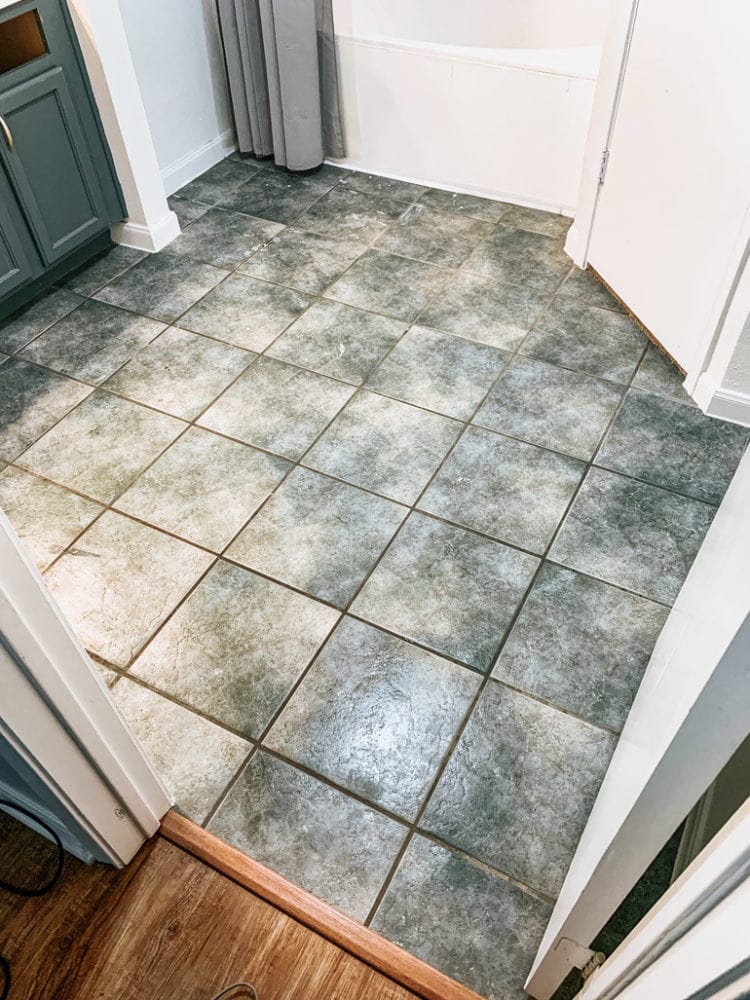
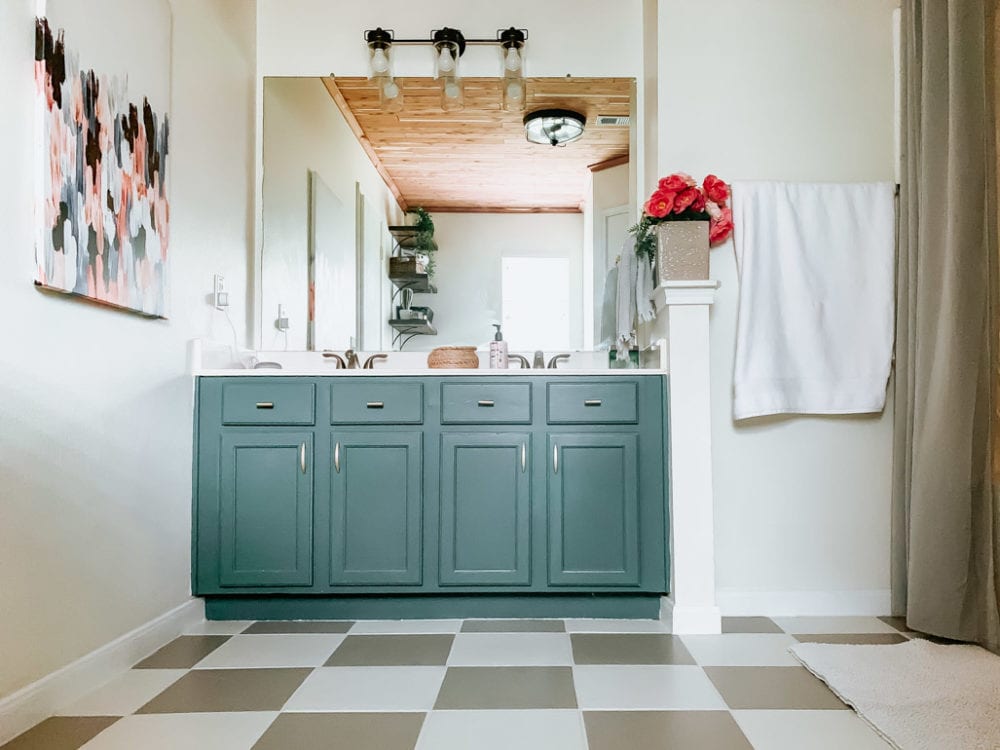
Ohhh that floor. It was so dark, and it made the entire room feel smaller and more closed in. I knew a fresh color would make a world of difference, and I still can’t get over how much brighter, cleaner, and more open the room feels now.
It’s pretty cute too, if you ask me.
I know you’re dying to hear all of the details, so let’s dive in!
What Kind of Tile Can I Paint?
Before we get to the tutorial – here’s a breakdown of the types of tile this will work on:
- Ceramic tile
- Porcelain tile
- Linoleum
- Concrete
- Hard wood
- Laminate
- Vinyl
Our bathroom had ceramic tile floor, and it worked great. I would love to also use this as patio paint for our back porch someday!
How to Paint a Tile Floor
Tools & Materials
If you prefer to shop in person, you should be able to find the paint in stores at your local Home Depot!
Rust-Oleum Tile Paint comes in a ton of different colors, and there’s definitely going to be something that suits your needs! See all the color options here.
Video Tutorial
Want to watch it all play out on video? Here’s a look at the entire process!
If you prefer to find your tutorials on a blog post (raising my hand here!), read on.
Step One: Clean the Flooring
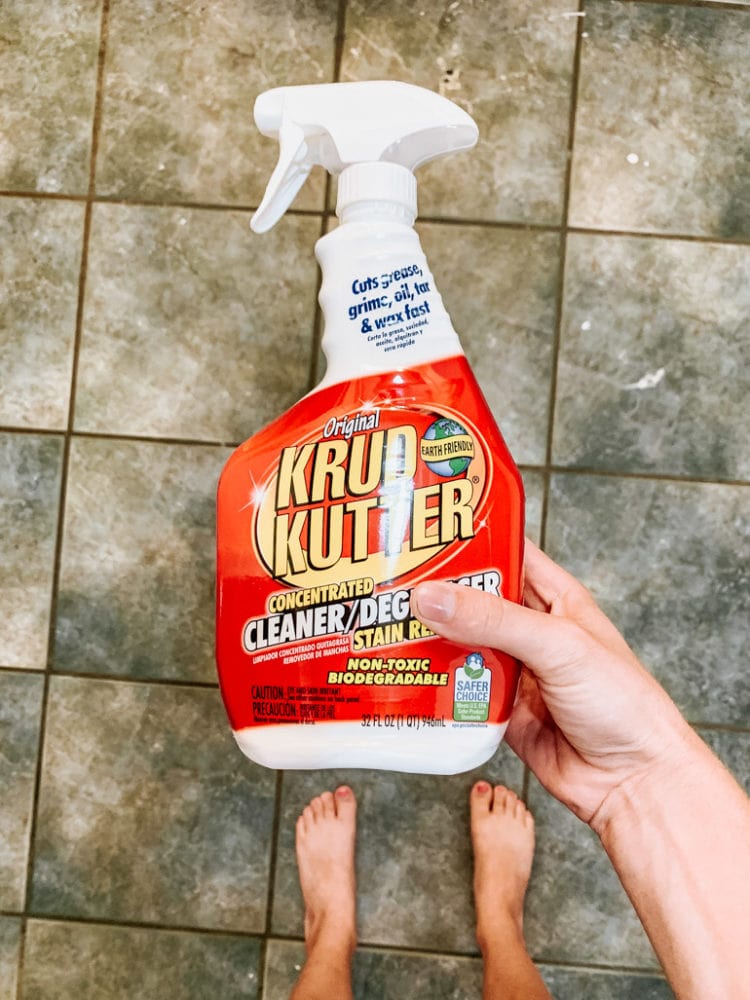
The first (and most important) step of the process is to thoroughly (!!) clean your flooring. I can’t emphasize to you enough how vital this step is. If you don’t have clean floors, the paint can’t adhere properly and won’t last as long. So, please don’t skimp on this part!
I started by sweeping, vacuuming, and mopping just like I normally would. Then, I went back in with the Krud Kutter spray and a rag and I scrubbed every inch of the floor. Be sure to pay special attention to the space along the baseboards and in the corners where dirt, dust, and hair can accumulate!
2. Prep Tile Floor for Paint
Once you’ve cleaned the floor thoroughly, and it has had time to dry, it’s time to prep the floors!
It’s recommended to remove caulk from around the tub and toilet before painting, as the paint will not stick to caulk. I didn’t do this, but I was extra careful in those areas and made sure to re-apply fresh caulk when the paint had dried.
It’s also a good idea to use painter’s tape to tape off any areas you don’t want to get paint on. This could include the baseboards, door and door frame, or vanity. I have a really steady hand and a solid amount of painting confidence, so I skipped this step too.
Some people recommend sanding the tile floor with 220 grit sandpaper prior to starting. This is not a required (or even recommended) step with the paint I used. But, if you choose to go with a different type of paint, be sure to check the directions to be sure. It would definitely be a good idea if you have any cracks in your tile or if there’s paint peeling already on them.
3. Cut In Around the Edges
Once the floor is completely clean, you’re ready to get painting. Priming is not required for this – it’s just a two step system (paint and topcoat). You should start the base coat by cutting in with a high-quality, angled brush. I liked to work in sections (so, I’d cut in one part and then roll that same area), but you can also do the entire room before grabbing the roller. It’s just a matter of personal preference!
Just be sure to move slowly and steadily. If you need some help with cutting in, I have a whole post with tips and tricks on how to cut in paint like a pro!
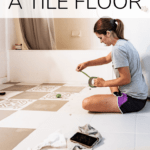
I started with Steam Gray, and painted the entire floor that color before doing the alternating squares.
4. Roll the Rest of the Floor
Once you’ve cut in, grab a 3/8″ nap roller and roll the rest of the floor. Be careful not to allow any drips to sit or paint to pool, or else it might create a texture in your finished product (ask me how I know).
You might want to use an extension pole to make this part easier if you’re working in a large space, but my bathroom was small enough that I just scooted around on the floor and painted with roller at the regular, short length.
You don’t need to worry about the grout lines. You can (and should) paint right over them without issue.
5. Determine If You Need a Second Coat
This paint does not require two coats – you may only need one! However, our floors were so dark and we were painting them so light, that I really needed to do a second coat after the first coat of paint was dry.
After you’ve painted the first coat, you need to wait a minimum of six hours before doing a second coat (or before sealing it, if you’re just doing one).
After you do the second coat, you only need to wait 1-2 hours before adding the squares (or sealing it, if you’re just doing one color all over).
6. Add a Design, If Desired
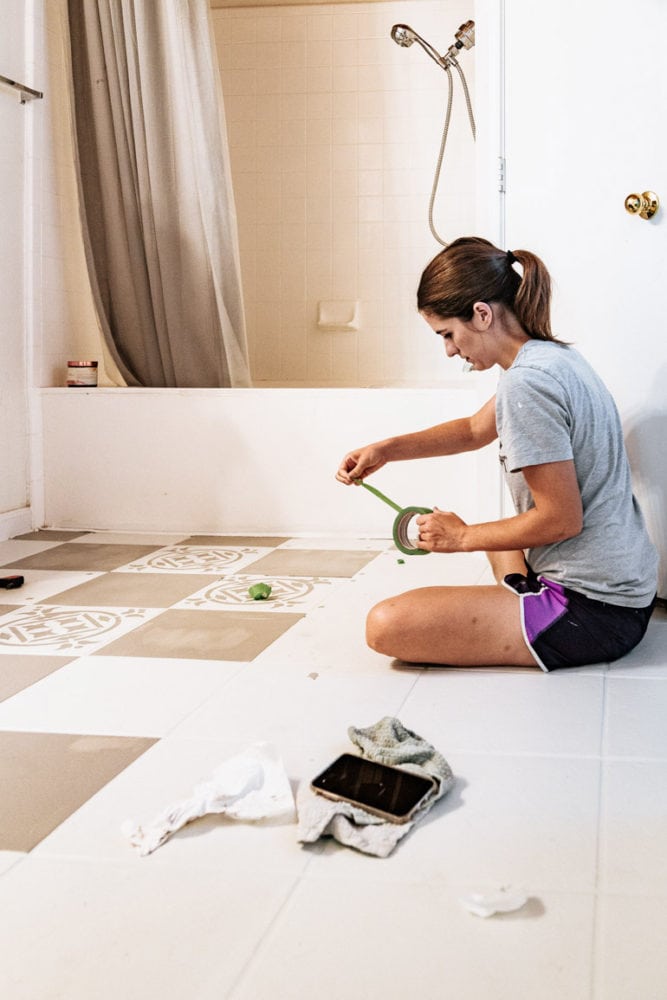
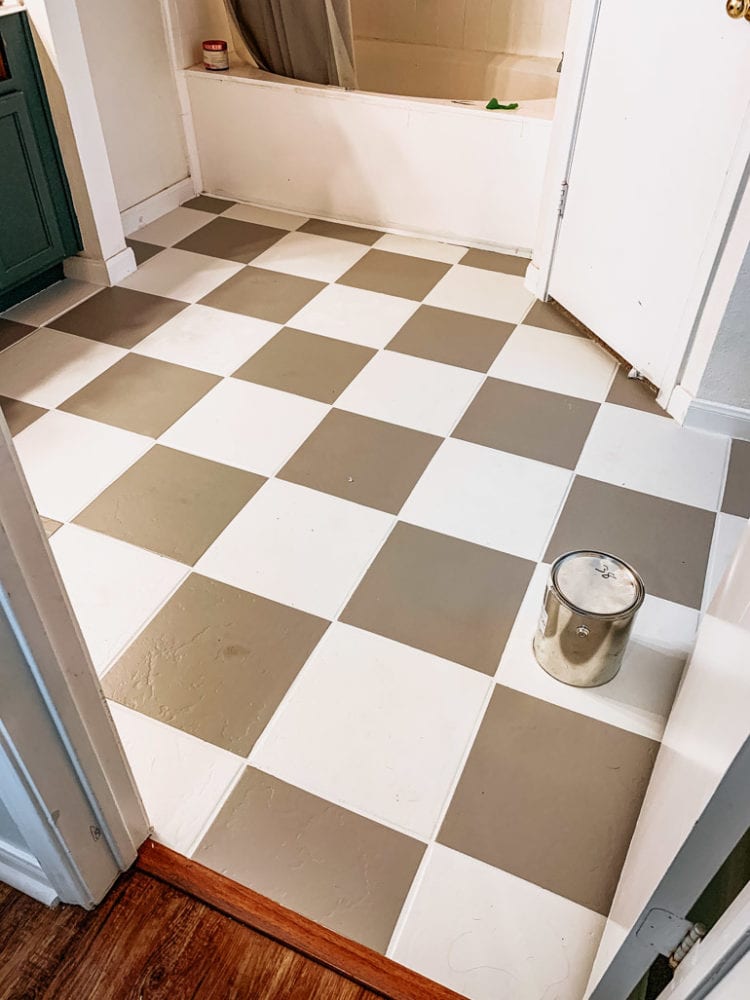
I decided to do a checkerboard pattern on my floor. I was going to do a stencil, but it ended up being a bit of a mess. This was much faster and easier, and I adore the finished result!
All I did was tape off alternating squares (I left the grout the lighter color) and painted them Windsor Gray. Be sure to use delicate surfaces tape – I didn’t, and some of the paint got pulled off the grout since it wasn’t fully cured or sealed! It was easy to touch up, but I think delicate surfaces paint probably wouldn’t cause that issue.
Be sure to remove the tape immediately after you finish painting the squares – if it dries with the tape still on, you could pull up the paint when you remove it.
Other options include stencil designs, free-hand painting a design, or taping off any sort of design your little heart desires!
7. Do Touch-Ups, If Needed
I had a few areas where the paint bled through the tape a bit, or where I had pulled paint off the grout with the tape. I went back in and quickly touched those up before sealing the paint.
8. Add the Sealer
Finally, you’re ready to add your sealer. The top coat is similar to a polyurethane, so it’s much thinner than regular paint. Simply do the same combo of brushing and rolling to apply it all over the floor, only this time you should use a 1/4″ nap to apply. Once you’re done, allow it to dry for 24 hours before you use the space!
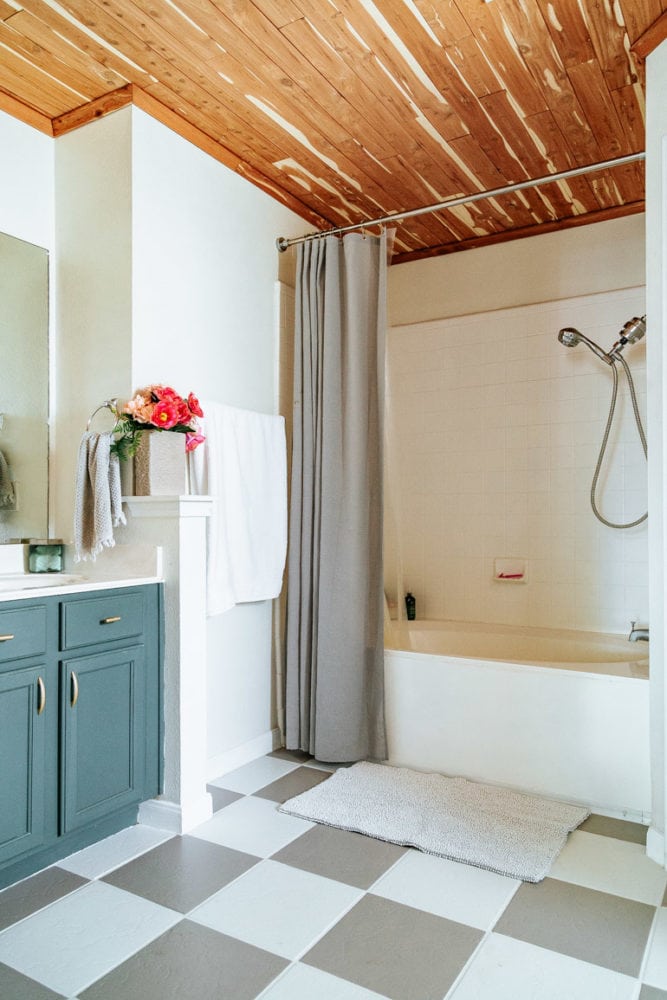
I’m so, so, so excited about how this turned out, and I can’t get over how much better the room looks now!
How Do You Clean Tile Floor Paint?
Let’s be honest – there’s a lot of grime and dirt that comes with tile floor. Especially in a high traffic room like a bathroom! So, cleaning is important.
You should avoid using any harsh chemicals or abrasive cleaners. Regular old soap and water is fine, though! When I clean these floors, I like to use a steam mop. It doesn’t use any cleaners or chemicals (just water!) and it does a really great job of keeping my floors clean.
Is Tile Floor Paint Durable?
Yes! It’s honestly so durable and reliable. We had no issues with chipping, scratches, or anything else. This stuff is formulated to be used on high-traffic areas, and should be able to stand the test of time.
If you do have any problems over time, the beauty of painted tile floor is that it’s easy to fix! You can keep the paint kit on hand and touch up any chips that show up over time.
This project wraps up the master bathroom refresh we’ve been working on for months. Click here for a full breakdown of everything we did so you can see how we turned this into an entirely new space with almost nothing but paint! It was a super fun project and I can’t believe how different the bathroom looks now.
If you want to learn more about Rust-Oleum’s Rock Solid Home floor paint, click here to see all of the color options! It’s so much more affordable than replacing tile, and it’s a high-quality product so you know it’ll last for years and years to come!
Did you only use the kit? My bathroom is smaller but the kit doesn’t look like it carries much volume. Thank you
Hi! Back when I did this, they came in gallon containers versus a kit. It took less than 1 gallon of each color for this space.
I’ve been looking for a while for tile painting, absolutely loving the idea, and I want to do it in my bathroom and kitchen but wondering if there away to take the paint off when I’m leaving my rent apartment?
No, this is meant to be permanent!
Hi, this looks great! Highly considering doing this in my kitchen. I noticed that you did not use a primer. I painted and stenciled my bathroom floors last year but I used several coats of primer first but I did not use this particular paint you used. Is a primer not needed because of the Rustoleum floor paint that was used here? I think omitting the primer would be a big help but at the same time, I would love to make sure my floors will hold up! Thank you for your tutorial!
Correct – this paint is specifically formulated for floors and doesn’t need a primer!
Hi Amanda! I love this project! I also had a question about grey vs. brown, do you think the colour is more accurate to the last photo (grey) or the direct overhead shot of the tile (photo 8, brown)?
Definitely depends on the lighting in your space! That overhead photo was probably taken later in the afternoon with less light. The color definitely reads more gray most of the time.
What kind of rollers did you use?
Hi! I used a 3/8″ nap roller for the paint and 1/4 for the sealer.
Hello! What a beautiful bathroom floor transformation! It has now been 2years, how are they holding up (scuffs, scrapes, scratches, or fading etc)?
Does Rustoleum state the “longevity” of this floor paint’s durability? How long it will last?
Thank you for the inspiration!
Thank you! The floor held up beautifully over time – this product is made to last for many, many years!
I have this paint on order from Home Depot! I ordered the ultra white base coat and I was going to do a stencil pattern on top of that! Can I use a different paint for the stencil or do you think I need to use the rustoleum brand for that? I also have the rustoleum top coat on Order in the semi gloss which makes me nervous because I dont want it too shiny but they are out of stock in the matte!
I’m sure you could use a different paint, but I’d recommend using the same stuff for best results!
Hello, not sure if you ran into this issue or it’s just me, but does your floor pick up all the dirt from your shoes? We painted our bathroom floor and we noticed when we walk in with our shoes the floor gets dirty with are shoe marks. It’s been very annoying and I’m trying to see how I can fix this issue.
Hi Cristal – I’ve found that any light painted floor is going to show more dirt than plain tile. We never wear shoes inside the house, so that helped for us!
Have you tried Rutstoleum Porch and Floor for the Interior floor? I was told this would work also. I can’t seem to find anyone that carries the Home Interior Floor Paint.
I’ve used it on exterior buildings (like a workshop) but not inside. I’m sure it would work,though!
We have a very small bathroom-floor area only 4 3/4 feet by 5 feet-but it IS our only bathroom. The ceramic tile floor is builder grade and ugly. Can I use the Rustoleum Home floor covering kit even though we can’t go 24 hours after topcoat before using it? Would just walking in socks be okay? Thank you. Linda
I can’t guarantee you won’t have issues if you can’t wait the full 24 hours as I haven’t tried it. However, if it were me I’d give it a shot and just be extra careful!
Hi, Beautiful job, thanks for sharing! I am looking at Windsor gray for my kitchen. In some pics it looks gray, in others it looks brown. On your opinion does it mostly look gray?
I think the images here are really true to the actual color!
Hi! Did you end up using Windsor gray for your kitchen? I had the same question, whether the colour looks more gray or brown!
I’m strongly considering painting the tile in my kitchen, but with two very active large breed dogs and the frequent wearing of work boots (farm life!), I worry about the durability of painted tile. My dogs also seem to have holes in their lips as they tend to walk away from their bowl with a waterfall coming from their mouths. Do you think that with proper prep cleaning and curing time that this will hold up? The ease of cleaning the grout has my attention!!
Hi Katie! Based on my experience with it, I would predict that if it’s prepped and sealed properly, it would hold up great! I don’t have experience myself using it in a high-traffic area, so I can’t say for sure, but I found it to be really durable and easy to clean in my bathroom!
Hi,
I have 2 questions. I have appliances coming and wonder if you agree I should wait to paint the floors until after they install them? Also I’m worried that my kitchen is going to be off limits for 24 hours. Did the painting of the second color extend the overall time of the project too much? Thanks so much for this post. Hugs 🤗
Hi Lidia! Actually, it depends – if you’re able to remove the existing appliances so you can easily access all of the floor, that would make it easier and I’d recommend painting first and just protecting the floor when the new ones come in. If that’s not possible, then I’d probably wait.
The first coat is what takes the longest to dry. Once that one is done, further coats only require a few hours before sealing. So, it shouldn’t change things too much!
Are the white looking tiles in Steam Gray indeed? I look up the rustoleum website. Steam Gray looks more gray than the pictures you shown here. My current bathroom tiles are in green, red and blue. OMG.. right? ha.. so I want to paint them in very light color. I was thinking of Ultra white. But Home Depot does not ship Ultra White, but steam gray color is available to ship. Thanks
Yes! Steam Gray is the lighter color – it’s not a pure white but a really beautiful light gray. It looks much more white next to the other gray, I think!
Hey there!
We took on a similar project and wondering if you felt your floors could have taken a 3rd coat. We had dark floors as well and painted over with white. Looks like a 3rd coat may help (albeit it looks fine from a far, we only see some of the original dark tile peaking through if looking very closely). Still, considering a 3rd coat but unsure if that would be too much/thick? Would love your thoughts, thanks!
A third coat definitely wouldn’t hurt anything!
Have you had any issues with scuffing or marks from shoes on the tile ?
No, not at all! We don’t generally wear shoes inside, but on the times we do, it’s never been a problem.
Hi Amanda! Your floors look awesome. I am nervously planning to use this paint in my half bathroom and fireplace tiles. Since your project, how’s it going in the mopping department? Can I use Bona when it comes to cleaning the floor?
Yes! You can use regular cleaners, just nothing super harsh like bleach!
Great job! What was the smell like? I’ve used the Rustoleum tub and tile paint before and it was horrible for a few days. I’d love to try this but dont think I can handle it if the fumes are bad.
It’s nothing like the tub and tile paint! It’s just like normal paint. I’ve used that stuff too, and it’s caustic, haha.
Your bathroom looks gorgeous! Floor looks amazing, but I’m intrigued by the ceiling. Is that cedar? I’ve never seen anything like that in a bathroom before. I think I’d like to try something like that when I renovate my bathroom. Thanks for the idea!
Thanks! Yes, it’s a cedar ceiling – you can find all of the details on it here.
One more question… (I’m really considering doing this!)… the previous owners of our home tiled the counter of the bathroom vanity with the same exact floor tiles in the room (whyyyy? ugh!). Do you think this floor tile paint would also work for the floor tiles that are on the counter surface of the vanity? Thank you!
Hi Katie! I would think it would work just fine, yes! I wouldn’t let water sit on it (just like any painted surface), but as long as you take care of it, I’d think it would hold up great!
Is there another product for tile shower walls? We have identical tile on the floor and shower and I’d love to paint them the same color.
Yes! I painted our bathtub and the tile on the walls – you can read more about it here!
Loving this! Did you paint over the grout?
What does is feel like underfoot? Does it still feel like tile or does it have a different texture? What about the grout?
It still feels like tile to me! And I painted right over the grout – it’s much easier to keep it clean now!