
How to Remove Drywall Anchors Without Damage
Have a drywall anchor that you need to remove? Here’s the full (and easy!) step-by-step guide to removing drywall anchors without damaging your walls any further!
If you’ve ever tried to remove a drywall anchor and ended up with a bigger hole than you started with, you’re not alone. The good news is, most drywall anchors can be removed cleanly (or at least cleanly enough) with the right approach. The trick is knowing what type of anchor you’re dealing with and choosing the least destructive method.
I’ll walk you through exactly how to do it, plus what to do if things don’t go perfectly.
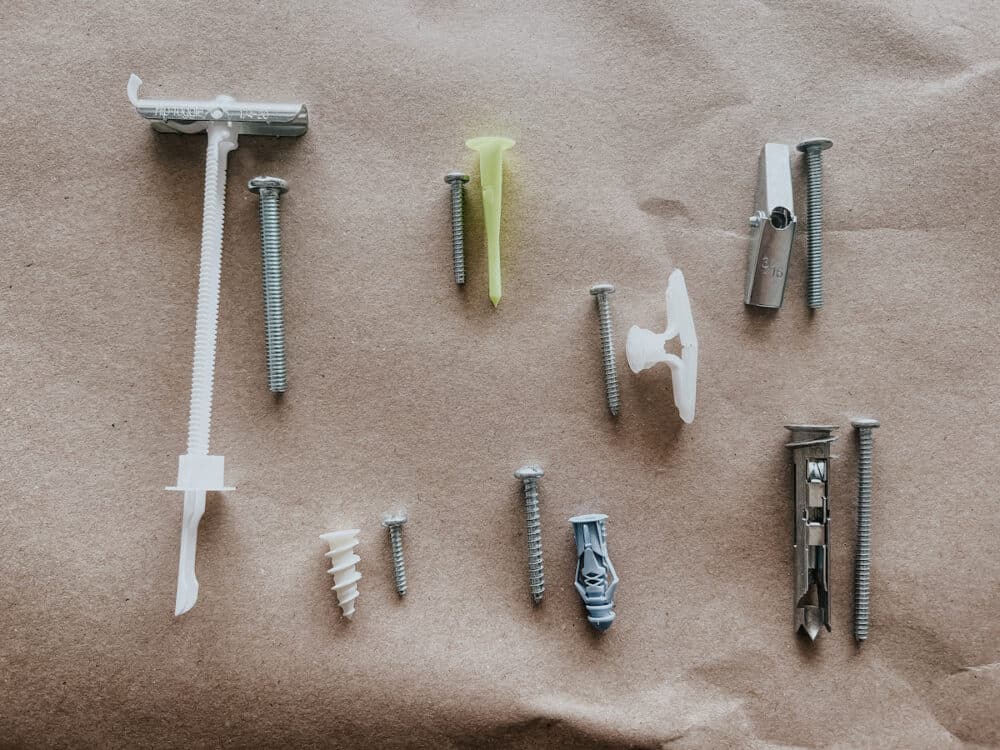
Identify the Type of Drywall Anchor
Before you start yanking anything out of the wall, take a quick look. The removal method depends on the anchor type.
Common ones you’ll see:
- Plastic expansion anchors (small, ribbed, usually white or blue)
- Self-drilling anchors (larger, often threaded, usually metal)
- Metal hollow wall anchors (molly bolts)
- Toggle bolts (spring-loaded wings behind the wall)
You can learn more about each of these types of anchors right here!
If you’re not sure, don’t overthink it. Just start with the gentlest method and adjust as needed.
Simple Methods to Remove Drywall Anchors
Method 1: Unscrew It (Best for Self-Drilling Anchors)
If the anchor looks threaded (almost like a screw), this is your easiest win. Simply:
- Insert a screwdriver into the anchor
- Turn counterclockwise slowly
- Pull gently as you unscrew
These are designed to come out this way, so no need to force it.
Tip: If it spins but won’t come out, apply light outward pressure with pliers while turning.
Method 2: Pull It Out Carefully (Plastic Anchors)
For small plastic anchors, you can often remove them with minimal damage.
- Grip the edge of the anchor with needle-nose pliers
- Wiggle gently while pulling outward
- Work slowly to avoid tearing the drywall
The goal is to ease it out – not rip it out!
Method 3: Push It Into the Wall
This is often the cleanest method, and the one I go to most often! It might sound counterintuitive, but it’s one of the least damaging methods, and is super easy!
All you have to do is:
- Use a sharp blade to cut off the plastic outer piece of the drywall anchor (the part sitting on top of the wall), by slowly and carefully sawing parallel to the wall.
- Use the tip of a screwdriver (or even a pen or pencil!) to gently push the anchor straight into the wall cavity.
This usually leaves you with a very clean hole to patch, and eliminates any possibility of the hole getting larger.
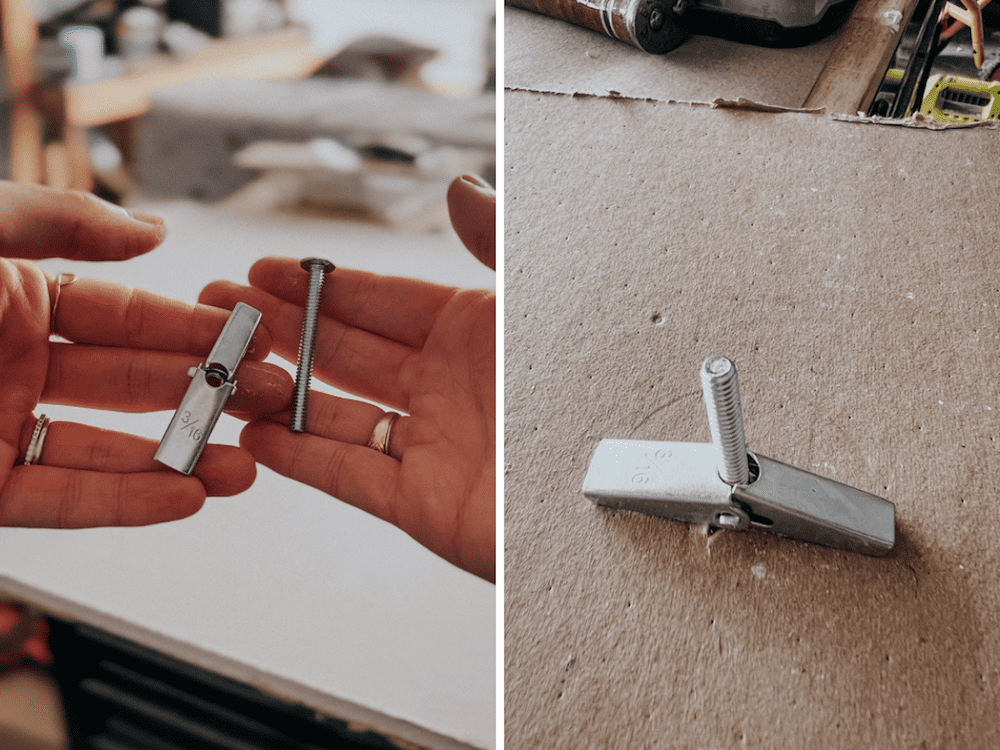
What About Toggle Bolts?
Toggle bolts are a more heavy duty drywall anchor and they are a little different. But, they’re super easy to remove! Once you remove the screw, the metal wings will simply fall behind the wall. You don’t have to worry about trying to fish it out or do anything else – it can live there now.
How to Fix the Hole After Removing an Anchor
No matter how careful you are, you’ll have at least a small hole left behind. You can check out this blog post for a full tutorial on how to patch small holes in your wall, but here’s a brief rundown:
For small holes:
- Use lightweight spackle
- Apply with a putty knife
- Let dry and sand smooth
For larger or damaged holes:
- Apply spackle in thin layers
- Sand between coats if needed
Finish with touch-up paint, and it’ll disappear.
Common Mistakes to Avoid
If you’ve tried to remove drywall anchors in the past and ended up with a big mess, it might be because you made one of these simple mistakes:
- Pulling too hard. This is the fastest way to turn a small hole into a big repair.
- Skipping identification. Different anchors = different methods. Guessing can cause damage.
- Forcing stubborn anchors out. If it resists, switch methods. Pushing it in is often better.
Removing drywall anchors from your walls is really easy and, when done properly, doesn’t really cause much damage to your walls at all! With these simple methods, you’ll be a pro in no time!