
How to Use Spray Paint {The COMPLETE Guide}
Looking for some spray painting tips and tricks? I’ve got you covered with this detailed guide on everything you need to know about how to spray paint.
I have a special place in my heart for spray paint because, like many people, it was my first love when it comes to DIY. I’m not sure what was in the water back in the mid-2000’s when I discovered it, but as soon as I put that first can of spray paint in my hand, nothing was safe.
I’ve spray painted lamps, I’ve spray painted furniture, I’ve spray painted accessories and frames and and and… Basically, if it sat still for long enough it was likely to end up painted.
Spray painting is a great beginner’s project. But, like anything, there are some important techniques and rules you should know if you really want your project to turn out well. And that’s what I’m here for today! I’m going to dump all of my spray painting knowledge on you. You’re welcome.
What is Spray Paint?
Let’s start with the very basics. What’s so special about spray paint, anyways? Simply put, spray paint is regular ol’ paint that has been put in an aerosol can. It’s affordable, easy to use, and doesn’t leave brush strokes or runs (when used properly).
You can purchase spray primer, spray sealer, spray paint…just about anything can come in an aerosol can these days! And, with the proper technique, it’s a perfect tool for painting all sorts of things.
What is the Best Brand of Spray Paint?
I’ll be honest – I’m a little biased here. I have always always always reached for Rust-Oleum spray paint for just about every spray painting project. Ever. I’ve been lucky enough to work with the brand a number of times for my blog, and they’ve never let me down.
But, there’s a reason they reached that status in my mind – they’re the best spray paint around! I promise I’m not just telling you this because I work with them – Rust-Oleum is by far the most superior spray paint brand.
Why is Rust-Oleum so awesome? Because of every spray paint brand I’ve ever tried (which is a lot – remember I used to be a spray paint addict!), their spray paint gives the most consistent and durable results, the best finish, has the fewest issues, and the best color options.
So, for this post, we’ll be focusing largely on the specific lines of paint from Rust-Oleum, because if you ask me that’s who you should be using. But, you’ll find that the tips and tricks can be applied to any brand!
Choosing Your Spray Paint
You may have noticed that within every brand of spray paint there are several different lines of paint. It can be incredibly overwhelming to know where to even start, so allow me to be your guide.
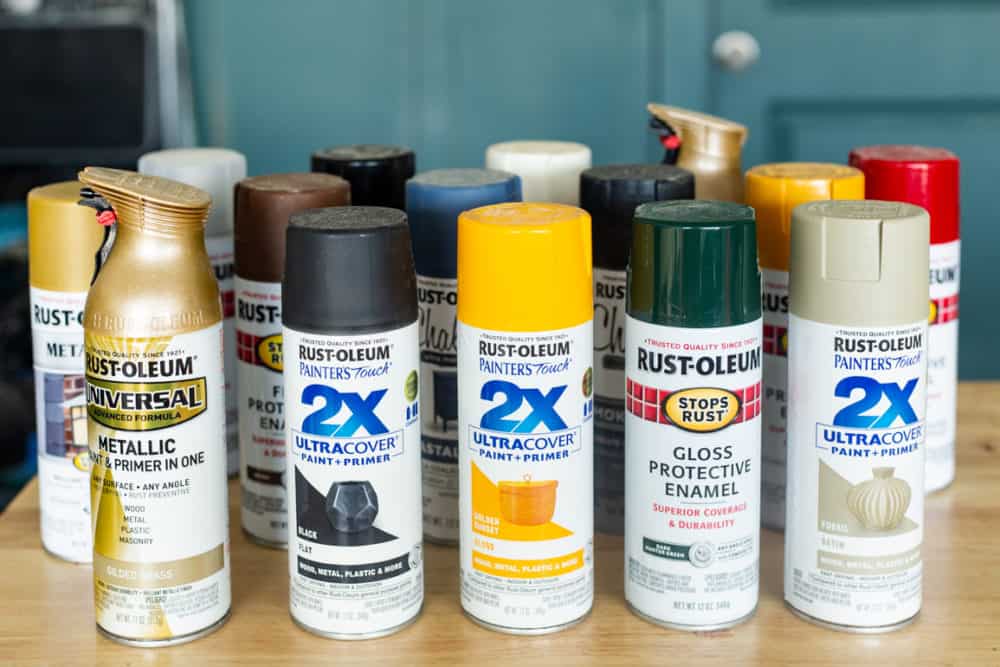
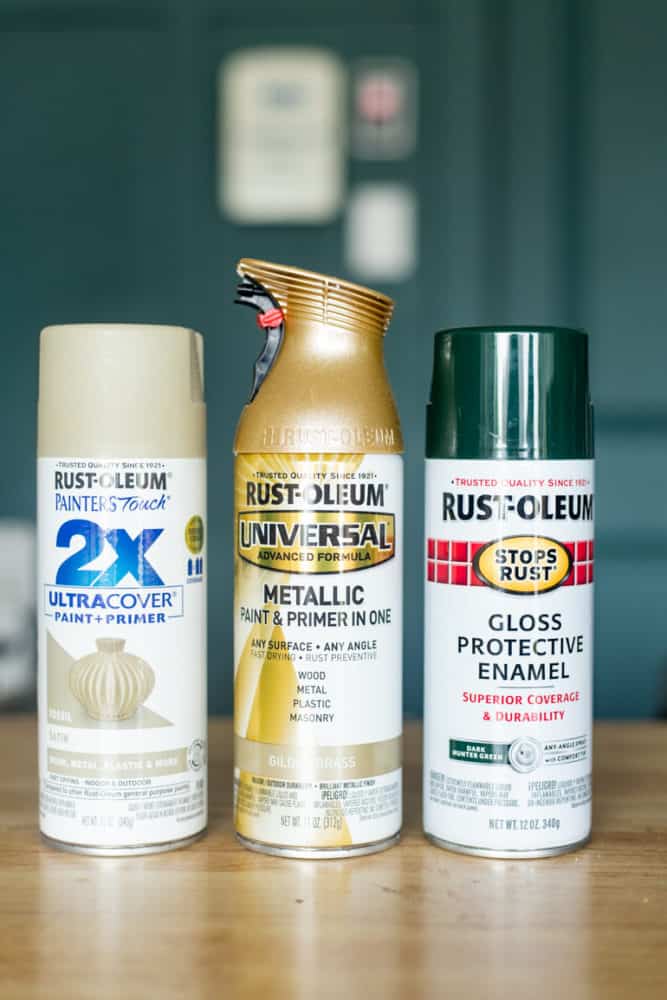
Rust-Oleum has several different lines of spray paint – I’m going to break down the differences of three of them here:
Rust-Oleum Spray Paint Lines
- Stops Rust: This line is most well-known for fighting against rust, but it’s incredibly versatile and can be used on tons of different surfaces (not just metal!). This is the go-to line when the most important factor in your project is durability and protection (especially for outdoor projects).
- 2X Ultra Cover: This line has the most color options, and is probably what I gravitate to the most. It has fantastic coverage and a quick dry time, and it’s very versatile – it can even be used on plastic!
- Universal: This line is considered Rust-Oleum’s premium line – it offers some really unique finishes (like metallic and hammered) in addition to regular spray paint, and it has a comfort grip trigger that helps reduce finger fatigue!
How to Prep Before Spray Painting
Once you’ve chosen the best paint for your project, you’re ready to begin prep work. This will vary depending on the material of the project you’re painting.
Here are a few tips and tricks for various materials you might want to work with.
TIPS FOR SPRAY PAINTING WOOD
- It’s always a good idea to sand wood projects before painting – you don’t have to unless you’re dealing with chipped paint or an old finish that you need to remove. But, you’ll never regret taking the time to sand for a better finish! Be sure to use multiple grits of sandpaper, starting with a lower grit and working your way up to the higher ones.
- If you’re working with raw wood, priming is always recommended because it will help the paint go on more evenly and prevent it from soaking into the wood. It will also help hide the wood grain!
SPRAY PAINTING METAL
- First, you’ll need to clean any rust or loose bits from your metal surface. Use a stiff wire brush to help you with this! If you do have any rust on your piece, I also recommend a coat of primer with Rust-Oleum’s Rusty Metal Primer. It will prevent any spreading and keep the rust from seeping through your paint.
- If the metal is glossy at all, you should lightly sand before painting, and if it’s something that will come into contact with high heat (like the exterior of a grill), be sure to use specially formulated high-heat paint!
- Be extra careful when cleaning up old or rusty metal – exposure to lead paint or the rust particles can be dangerous. Don’t forget a mask!
SPRAY PAINTING PLASTIC
- When you’re spray painting plastic, I recommend using a primer. Rust-Oleum has a primer meant specifically for plastic, and it’s meant to help bond to the plastic better than spray paint alone.
- After priming, you should be able to use any spray paint over it and get good results. But to get the best results, I recommend you stick to Rust-Oleum’s 2x line, which specifically says on the can it’s good for plastic (the Universal line is good for plastic too!). You won’t get great results unless you’re using the right paint!
- Be sure to wipe down any plastic projects with a rag and paint thinner or mineral spirits to really thoroughly clean them before you paint!
TIPS FOR SPRAY PAINTING GLASS/CERAMIC
- Glass and ceramic projects should be lightly sanded to scuff up the surface before applying paint. Don’t use a power sander (you could shatter it!), but a quick sanding by hand should be enough to do the trick.
- I’d always recommend priming any glass or ceramic surfaces before painting for the most durable finish.
How to Spray Paint: Step by Step
Once you’ve chosen your material and got it all prepped and ready to go, it’s time to paint!
This is where a lot of people seem to struggle a little because, while it’s very easy, spray painting requires a bit of finesse and patience that a lot of people overlook!
Here’s a rundown of how you should spray paint:
Prep & Safety Tips:
- Check the weather. Always double-check specific guidelines on the back of your paint can, but generally you shouldn’t spray paint if it’s less than 50 degrees or higher than 90 degrees, and the humidity should be no higher than 65%. Extreme temperatures can mess with how the paint cures and destroy your finish.
- Work in a well-ventilated area. Spray paint fumes are no joke, and you shouldn’t ever work in an enclosed space when you’re spray painting. It’s best to work outdoors if you can, but I’ve been known to spray paint in my garage (with the garage door open) when it’s too windy or wet to paint outside. On a windy day, you can end up with lots of debris in your wet paint, so be careful!
- Use Protective Gear. I’m not always great about this, but it’s wise to wear a mask, gloves, and glasses or goggles when spray painting. No one wants spray paint stains on their hands, or paint particles in their eyes or lungs! Spray paint has some dangerous solvents and compounds that aren’t great for your lungs, so keep yourself safe.
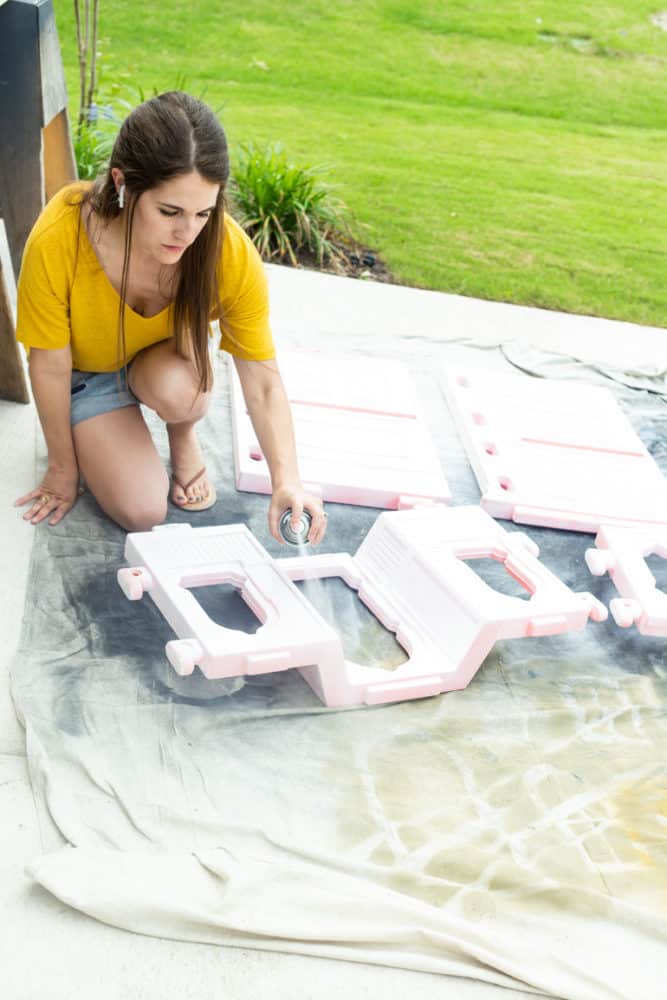
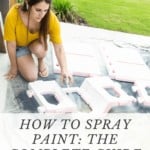
- Protect your work area. Some overspray is inevitable with spray paint. You should always lay down a drop cloth or tarp and cover up anything in the vicinity that you don’t want to accidentally get paint droplets on. Painter’s tape is your best friend here. If you’re working outside, it’s also a good idea to place your project in an area that’s relatively protected from the wind so you don’t get bits of leaves or bugs in the paint!
- Thoroughly clean your project. Rubbing alcohol or mineral spirits are both great options for cleaning your project and ensuring any lingering dirt is removed before you paint! Be sure to wipe any sanding dust off of wood pieces with a tack cloth, and allow the piece to fully dry from any cleaning solution before you begin painting.
The Step by Step:
- Start by shaking your can. You should shake it until you hear rattling, and then keep shaking vigorously for a solid minute before you begin painting. This is a tempting step to skip, but don’t do it! The more well-mixed your spray paint is, the better your results will be.
- Keep the can 6-8 inches away from your project. If you get too close, you’ll get drippy paint. But if you get too far away, you’ll have lots of overspray and uneven coverage! About 6-8 inches away is the happy medium for a nice, even coat that shouldn’t drip.
- Use long, sweeping motions. Keep your arm moving while you work and slowly sweep the can from side to side along your project. Try to begin pulling the trigger just off to the side of the project and spray all the way until you go off the other side. This will help prevent any drippy parts or excess paint along the edges!
- Do multiple, thin coats. This is key and where so many people struggle. Your first coat of spray paint won’t look good or cover well. Neither will your second coat. That’s how it’s supposed to be. You should do multiple thin coats of paint (plan on at least 3) over the entire project before you expect to see actual full coverage. If you try to cover the whole thing in one to two coats, it will be way too thick, very drippy, and just messy. Resist the urge! Also, for best results, it helps if you switch up the direction you’re spraying with each coat. For example, spray vertically the first time, then horizontally on the next coat.
- Wait about 5 minutes between each coat – no more than an hour! Always consult the back of your spray paint can for specific dry times. But, generally speaking you can begin your next coat about 5 minutes after you finish the one before it. Most of the time, if you wait more than an hour between coats then you have to wait for the entire cure time (usually 48 hours) before re-coating, or else the paint might bubble!
- Now, leave it alone! I find that spray paint generally requires a little more cure time than latex paint to really achieve full durability. I try to leave my spray painting projects alone for a solid 24-48 hours after I finish them. This allows the paint to dry all the way before I put it back into place.
Frequently Asked Questions About Spray Painting
Do you always have to prime?
The official answer: it’s always a good idea to prime, and you’ll never regret taking the time to do it. I recommend Stops Rust Universal Bonding Primer for great results on every project!
The unofficial answer? I typically only prime surfaces that I expect will have a hard time accepting paint. Things like galvanized steel, glass or porcelain, or plastic (and, of course, rusted surfaces). Wood should be primed if it’s a porous breed or wood or if it’s totally raw. That way, it doesn’t just soak up all of your paint. But, if it’s been painted or stained before, I often skip the primer step.
Primer is also a great idea if you’re going from a dark color to a lighter color. It will help you achieve good results in fewer coats.
I spray painted a project, and now it feels sticky. What did I do wrong?
Typically, this happens because your coats of spray paint were too thick and haven’t been allowed to cure properly. What’s happening here is that the top layer of spray paint has dried, but the layers beneath haven’t. Your piece should stop being tacky once it has fully cured, which could take days or even weeks. Try to set it in a place with good ventilation and do not use it at all until it has dried fully!
To prevent this in the future, you should always stick to multiple thin coats. You can wait up to 30-45 minutes between coats to give it extra cure time.
It’s killing my finger. Is there a tool to make pulling the trigger easier?
There is! Rust-Oleum makes a Comfort Grip tool that slides right over the top of your spray paint can and makes it a lot easier on your hand. It’s great for larger projects, and it can easily be moved between spray paint cans for different projects. Rust-Oleum’s Universal line also has a comfort-grip trigger that should help this issue!
Help! My nozzle is clogged!
It can be really frustrating when your spray paint can gets clogged and won’t spray anymore. Thankfully, it’s an easy fix. Simply pull the nozzle off the spray can and soak it for a few hours in some mineral spirits, paint thinner, or even nail polish remover. Once it’s soaked for a while, pull it out and wipe it down – it should be great after that!
Also, don’t forget that most of the nozzles are a universal fit. So, if yours is clogged and you don’t have time to wait for it to soak, simply pull the nozzle off of another can to replace it while the clogged one is soaking!
In order to prevent clogged nozzles in the future, you should always clear it of paint when you finish a project. Turn the can upside down and spray onto a piece of scrap cardboard or your drop cloth until it runs clear. Then, wipe the nozzle off so any remaining paint is removed.
Do I need to seal my project?
Sealing isn’t ever a requirement, but it is highly recommended if you’re working with something that will see heavy use. You want it to be fully protected from knicks and scratches! The sheen of the paint can affect this too! Sealant is less necessary with high gloss and semi-gloss paints – it’s more important with the matte ones. I really like Watco’s spray lacquer – it’s easy to use and gives a really good finish!
And that, my friends, is just about everything you need to know about spray paint. Whether you’re painting a piece of furniture, a small trinket, or anything in-between, you can do this!
Go forth and transform everything in your house! (Just kidding. But seriously. You can transform almost everything!)

Which paint would you recommend for an aluminum Mailbox?
I’d just any Rust-Oleum paint that says it’s good for metal!
Question, I could only get gloss for the colors I want, and I’m making a gradient with these. 1 should I spray a base color? It’s already primed. Or should I do the whole spray with multiple colors ever 5 mins? Can’t decide how to start this. 2 I want to clear coat it, do I let dry for 2 days then do a light sand and then spray the couple layers of clear?
If it’s primed, you shouldn’t need a base color. If I were doing this, I’d probably do the entire thing (with all of the colors) for each coat. For the clear coat dry time, just follow the directions on dry time from whatever paint brand you use!
Thanks for your notes. I’m spray painting a wood shelf. Is it better to lie it down on the ground or paint it while it’s standing up?
Thank you,
Spraypaint newbie
I like to lay things down whenever possible!
Our fire table was damaged from moisture over winter. Can I use an outdoor spraypaint to touch up the “tile” top or will the paint heat up and become combustible? Thank you.
I’d recommend using a high heat spray paint if you’re going to try something like that! Rust-Oleum makes spray paint meant for areas that will be exposed to high heat.