How I Painted Our ENTIRE HOUSE EXTERIOR
If you’ve ever considered painting your house exterior, you know it’s a big job! Learn how I painted my house in just a few days, and see my tips for how to paint a brick house.
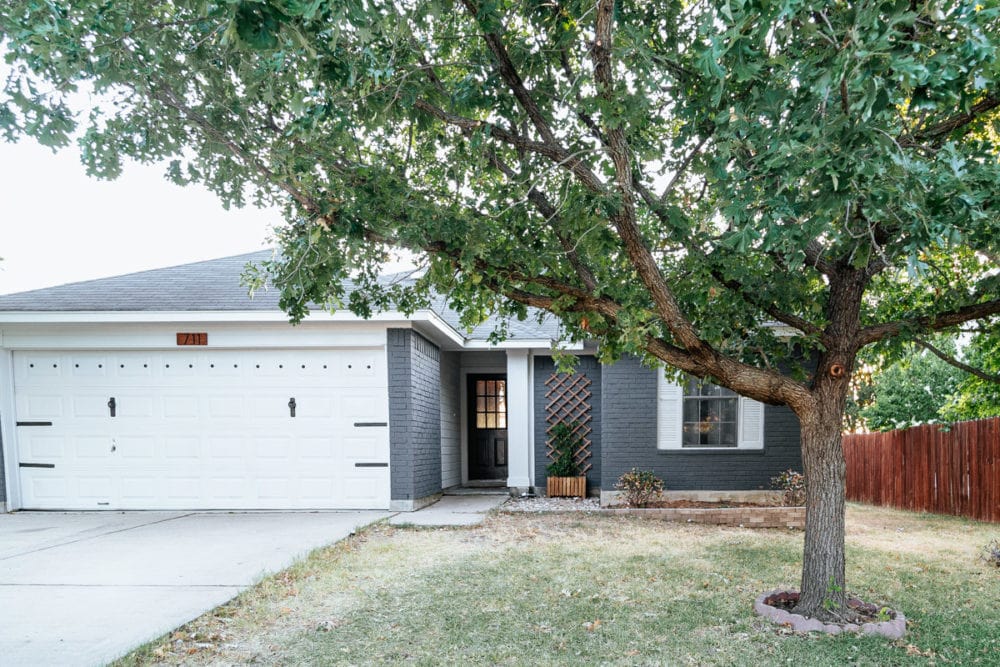
The big day is finally here, y’all. You’ve been waiting all summer long for me to finally paint the exterior of our house. After a few false starts, we finally got it completed and I can’t even begin to tell you how excited I am that it’s done.
As seems to be typical with these types of projects, I find myself asking why didn’t I do this sooner?!
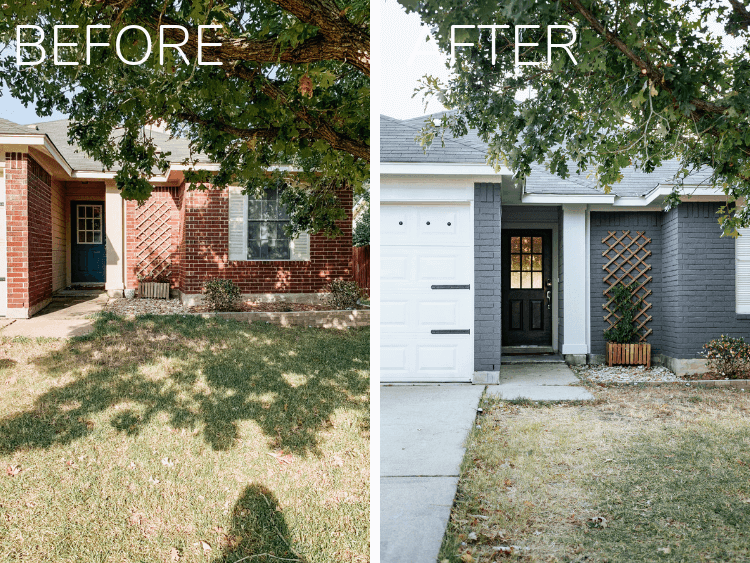
Because, my goodness, what a transformation!
Let’s go ahead and get that first oh-so-satisfying before and after out of the way, because I know you won’t be able to pay attention to a word I say until you see it. Here’s the before…
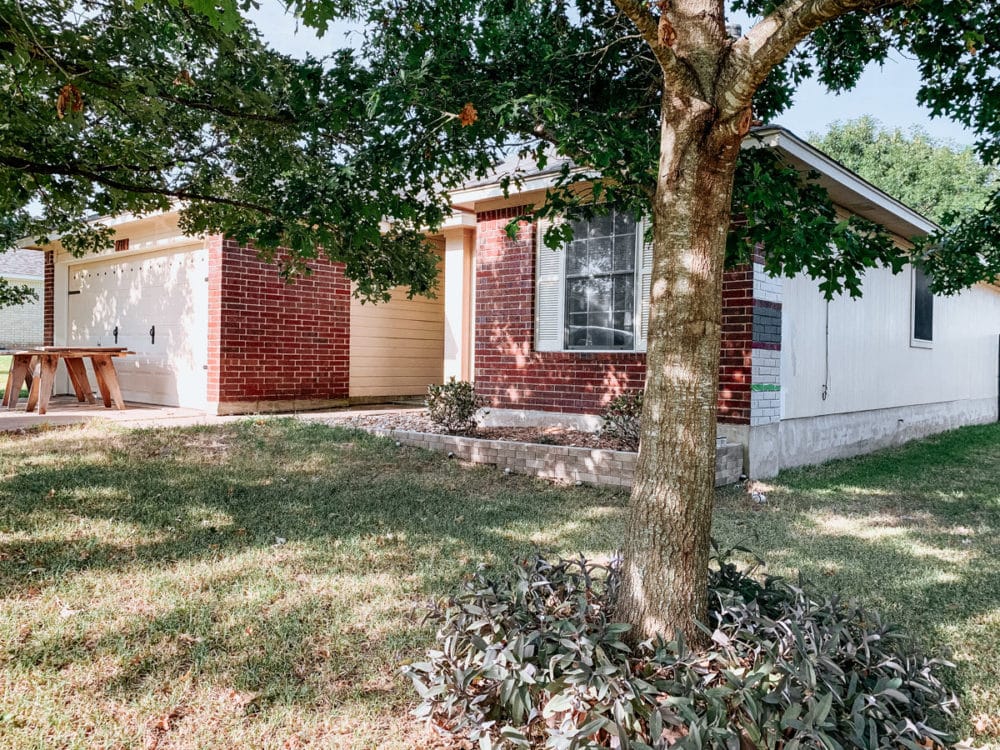
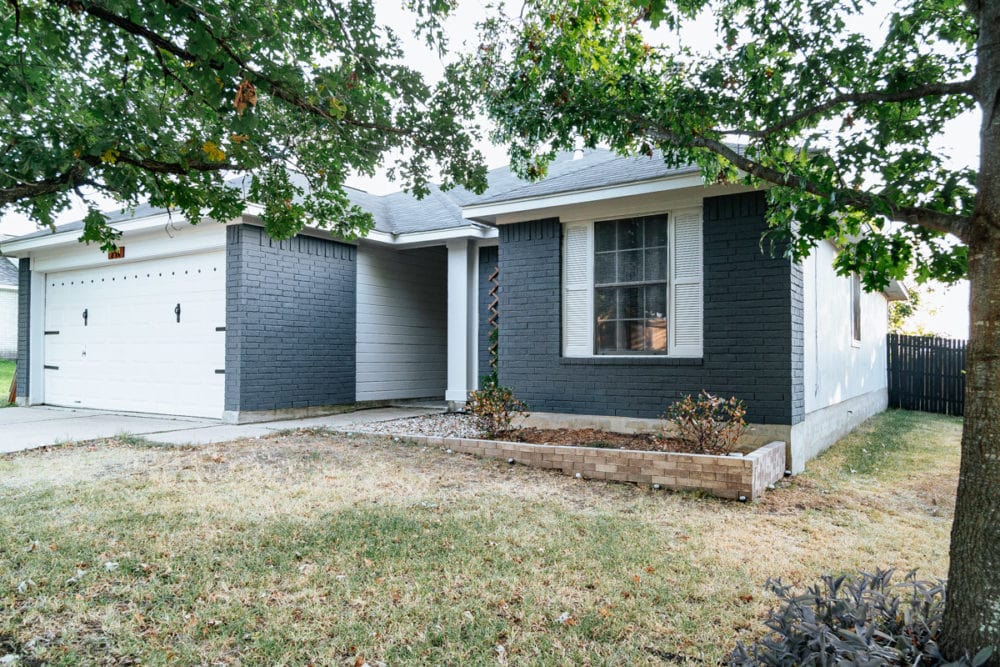
And here’s the after:
This post is sponsored by Wagner.
So! Good!
Today I wanted to break down all the details of what it’s like to paint the exterior of your house, how much it costs, and my recommendations for making it go as smoothly as possible. It’s a big job, and it’s intimidating to tackle something like this on your own. But I promise it’s 100% doable, even if you’re not a super experienced painter!
I mean, this was my first time painting the exterior of a house and it worked out just fine! Sometimes you’ve just gotta dive in, right?!
How to paint a house exterior (SIDING)
Recommended tools and materials
Let’s start with what I recommend you should use. Keep in mind, there are a ton of different ways you could approach this project, and I’m not a professional. But, this is what I used and it worked well.
For prep:
- Pressure washer. You can also just use a hose and some elbow grease if you don’t have access to one.
- Caulk
- Sanding blocks
For siding:
- Wagner ControlPro 130 Paint Sprayer. More on this in a second, but I never would have tackled this job without this sprayer!
- Behr Marquee Exterior paint. (I used Cotton Grey for the siding.)
- Scotch Blue Painter’s Tape with 2-foot Drop Cloth.
- Frog Tape Painter’s Tape. What? I know – keep reading and I’ll explain.
- Paint roller
- HANDy Paint Pail
- Angled Paint Brush
For brick:
- RomaBio Masonry Flat Paint. (I used Navy Steel.)
- Masonry paint brush.
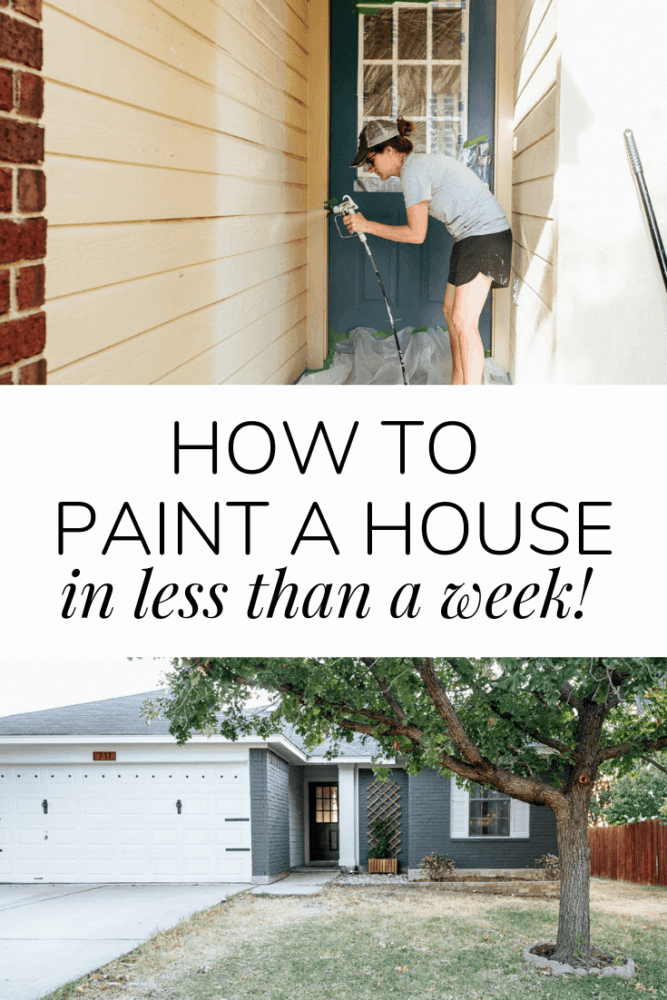
PREP WORK
Start by choosing a stretch of days where it won’t be too terribly hot, there isn’t any rain in the forecast, and you are able to totally dedicate yourself to working. It’s incredibly hot here in Texas right now, so I only worked half days – if you’re able to work the entire day, you’ll get it done even faster!
The day before you plan to paint, go ahead and do some prep work on the house. You should clean the entire house (I recommend power washing it) thoroughly, and give it at least 12-24 hours to dry before you paint. I also went around the house with a caulk gun and a sanding block to take care of any little cracks in the siding or peeling paint.
If your siding needs dramatic repairs, I suggest you call in a pro. I’m more than comfortable making a few small repairs here and there, but if siding needs to be replaced or patched, it’s generally best to let a professional handle it.
Painting the siding
Once your repairs have been made, and everything is fully dry, you’re ready to paint!
I used my Wagner ControlPro 130 to paint all of the siding on our house. It’s a high-efficiency airless sprayer, which is just a fancy way of saying it doesn’t have a big motor attached to it like my handheld sprayer does. It’s meant for big, exterior jobs and you first saw me use it when I painted our outdoor shed. It claims to reduce up to 55% less overspray than traditional airless sprayers, and I can really testify to this. I was shocked at how little overspray it left, and it really made cleaning up a lot less of a chore!
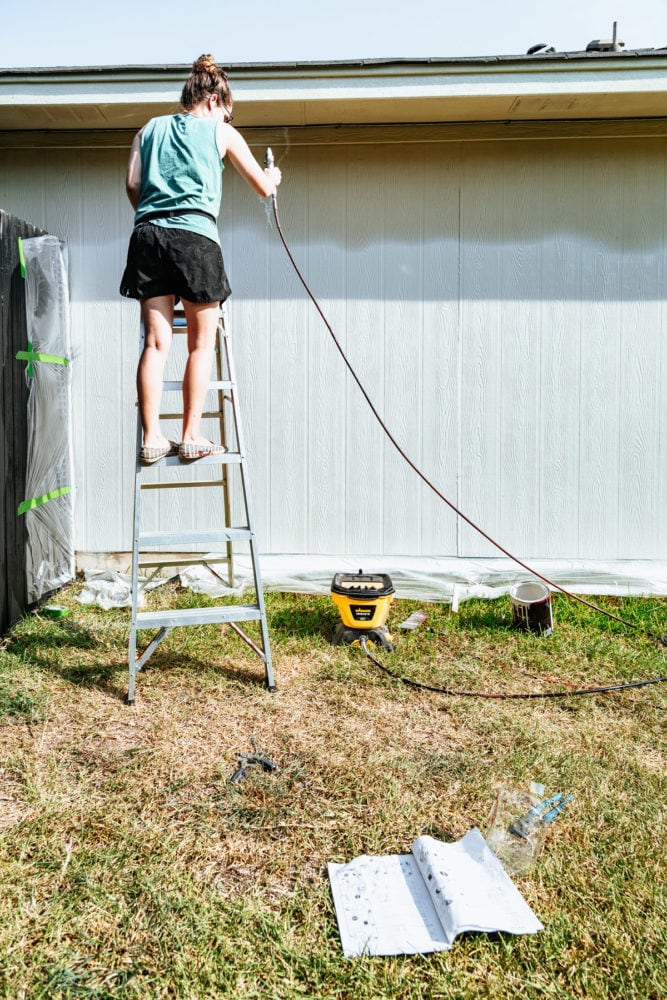
I gave a pretty detailed look at how to set it up (and how to clean it once you’re done) over on my Instagram stories, so be sure to watch the House Painting highlight if you’d like to see it in action!
Here’s what the steps to painting our siding looked like:
- I worked one side of the house at a time – so, instead of prepping the entire house at once (which felt overwhelming – and boring, if I’m being honest), I just chose a side to work on first and did that side from start to finish. Then, I moved on to the next. It also helped to break things up a bit if I needed to take a break for lunch or stop for the day. I could just finish that side and I had a natural stopping point.
- Start by taping off the foundation and any windows or other things that won’t be painted with the Scotch Blue tape that has a dropcloth attached. I found that I often needed to also grab my Frog Tape to help it fully adhere, especially to the concrete. The blue stuff just didn’t want to stick (which is why you also need to grab yourself some Frog Tape)! This is the most tedious and annoying part of the project, especially when you’re so antsy to just get on with the painting, but it’s worth it, I promise!
- Once your wall is fully prepped, grab your sprayer and get to work! Wagner’s instruction manuals are always incredibly thorough and well-written, so I won’t break down every step of the process. But once your sprayer has been assembled, you literally just pour your paint in the tank and pull the trigger to get started. You’ll be amazed at how quickly you’re able to knock out an entire wall, and how beautiful the coverage is!
- After you finish painting one side, be sure to remove all of the tape before the paint dries. Your tape can peel up your paint if it’s allowed to dry on there, so it should always be removed as soon as possible after you finish.
- For parts of the house that have a lot of obstructions or are hard-to-reach, I found it was easiest to just paint by hand. So, for example, our back porch I did almost entirely by hand. I just painted right up to where the porch started on either side, then I grabbed my roller to knock that part out. I could have easily taped everything, but I didn’t really feel like moving all of the furniture, taping the windows, and covering the plant wall – I think doing all of the prep work might have taken me just as long as it did to paint this little part by hand!
A few frequently-asked-questions
Did you need to prime?
I didn’t. I used Behr’s Marquee line of paint, which is a paint + primer in one, and I’ve never added primer underneath it. Keep in mind that some homes might need primer. If you’re painting over a really dark color, or if there are a lot of deep stains on the house, it might be worth it to go ahead and prime. But, for a relatively well-kept home that doesn’t have a dramatic color, you should be fine just using a high-quality paint and primer combo.
Do you need to do two coats?
It’ll all depend on what color you’re using and what color you’re painting over. My two colors were very similar, so I was able to get away with just one coat. Generally, a paint sprayer is going to give you much better coverage than a roller will, and find that I almost never need a second coat when I’m using my sprayer on a wall! However, if you’re painting a dark blue house white, you’ll probably need to do a second coat.
Should you be back-rolling the paint?
Back-rolling is where you grab a roller after you’ve used a sprayer and go over what you’ve just painted to be sure the paint adheres completely. This is really only necessary with surfaces like brick or stone that have a lot of crevices that the paint may not get in. For siding, which isn’t super textured, just spraying is generally perfectly fine!
Do you need to thin the paint?
No! With the Control Pro 130, there’s no need to thin paint or stain. Simply pour it into the container as it is, and go for it. Best feature ever, no?!
How much paint did you use? Does the sprayer use more paint?
It took me about 4.5 gallons of paint for the entire house. And, yes – as a rule, you’re going to use more paint when you’re working with a sprayer. In my experience, I’d guesstimate a sprayer uses approximately 25% more paint than painting by hand. To avoid wasting paint, be sure to stand close to the surface you are painting (so the paint only gets on the wall) and avoid painting on windy days, which may blow away some of your paint as you work.
How long did it actually take?
Here’s the breakdown of time spent on this project for me (keep in mind, our home is 1-story and 1,100 square feet – a larger home will take some more time):
- Prep work + cleaning: About 1.5 hours
- Day one of painting: 5 hours
- Day two of painting: 7 hours
- TOTAL: About 13.5 hours of work for the siding
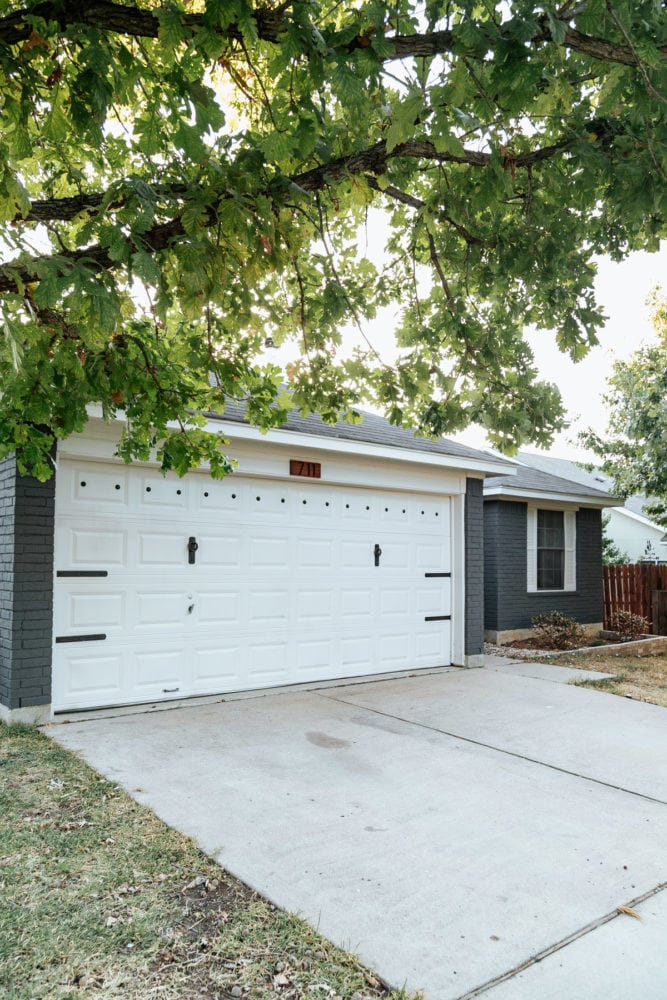
Now, let’s break down phase two of the exterior painting job – painting the brick!
HOw to paint a house exterior (brick)
Prep work
Just like with the siding, you’ll want to pressure wash the brick – but this time, you should do it immediately before painting! The brick should be damp when you apply the paint, and I found that (since it’s so hot here), I only needed to let it rest long enough to drop dripping after I pressure washed it – a slightly more damp brick seemed to accept the paint a lot better. For this reason, I worked in sections.
Tips for painting exterior brick
I chose to use a masonry brush to do all of my brick by hand. I had a lot of questions on Instagram about why I wasn’t using the sprayer, and there a few different reasons. First of all, by the time I started painting the brick we were having a pretty intense heat wave here in Austin (hello, August!) and the temperatures were a good 10 degrees hotter than when I painted the siding – subtle difference, but when the temps are over 90 degrees you really shouldn’t be painting at all, much less using a sprayer. I worried that the tiny droplets of paint may dry as they were coming out and we wouldn’t get an even coverage.
On top of that, I have such a small amount of brick on our house that I originally thought it would be more trouble than it was worth to tape it off. I was wrong – painting brick is very slow, and if I would have realized that ahead of time, I absolutely would have pulled out my sprayer! My recommendation is to wait until it’s not too terribly hot in your area, then use a sprayer to apply the paint to your brick – and be sure to back roll it!
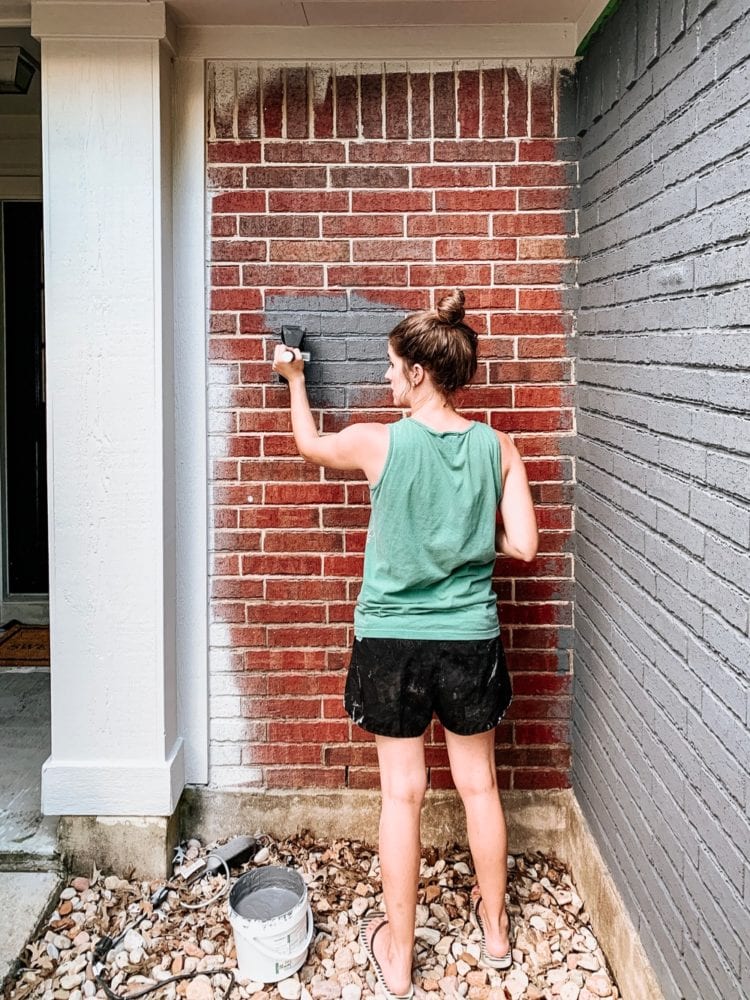
Romabio’s paint recommends two coats, and no primer is needed for unpainted brick. I found that, similarly to painting a wall, the first coat looked kind of uneven and had me a bit worried, but the second coat is where it aaaaall came together. The trickiest part of painting brick is getting paint into all of the little grooves and crevices of the brick, so I recommend loading up your brush with more paint than you’d think you need – it was much easier to fully coat the brick when I applied it a little thicker than I would normal paint!
I found that this full tutorial over on Romabio’s website (plus the videos on their YouTube channel) were really helpful in getting me feeling prepared, so I recommend checking it out if you’re considering this project!
I was honestly surprised at how straightforward painting the brick was – other than the crevices in the brick, it was exactly like painting any other wall. Only, it was waaaaaaaay more satisfying because holy cow what a transformation!
I painted all of the brick over two days, working mostly in the evenings. It took about four hours to get the first coat on, and about 3 for the second.
Once all was said and done, we had a stunning new house and it was worth every single second of work.
Budget Breakdown
In our last home, it cost us about $5,000 to have some siding repaired and the entire house painted (just the siding, not the brick). You can click here to read more about that process. Here’s the breakdown of about how much it cost to do it ourselves:
- Paint for siding: $250
- Masonry paint: $120
- Paint sprayer: $200
- Tape, brushes, etc.: $60
TOTAL: $630
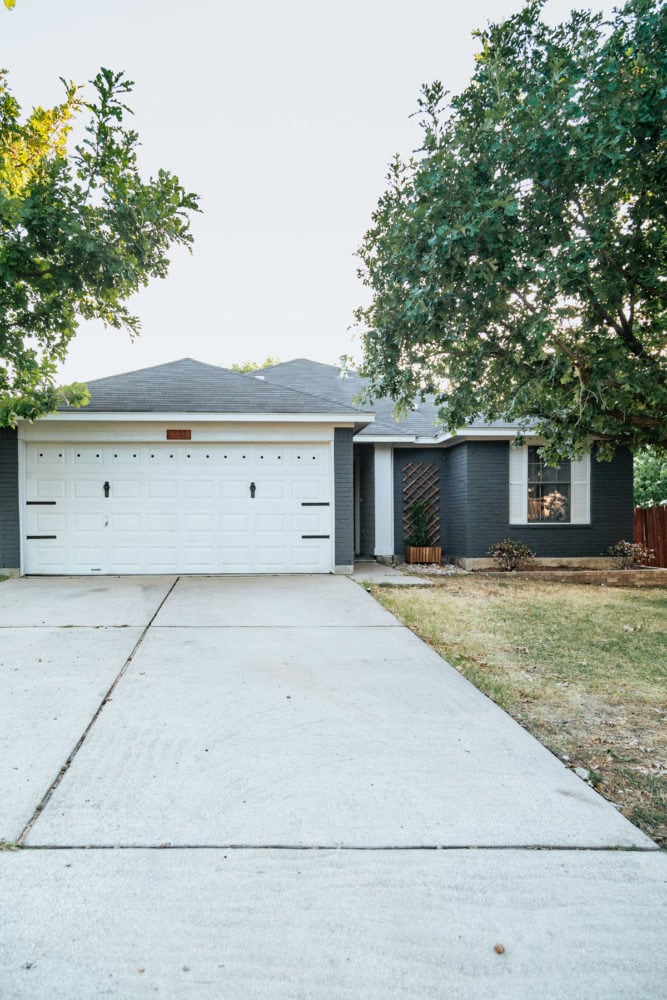
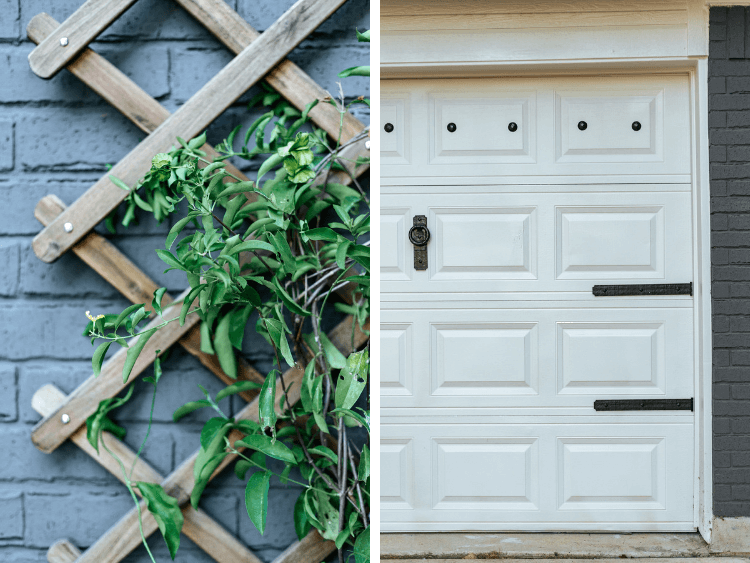
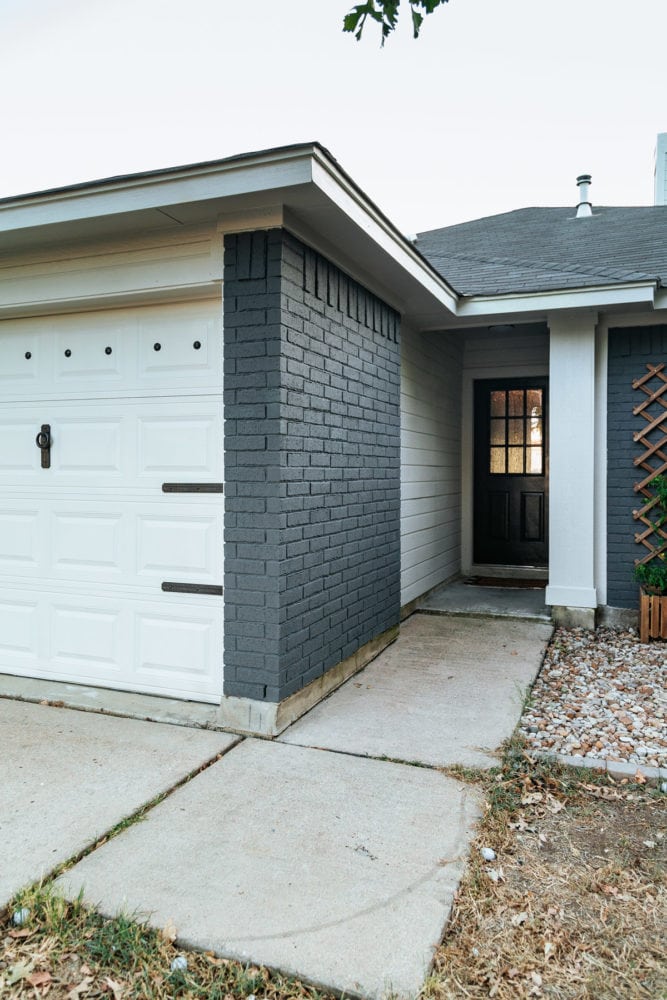
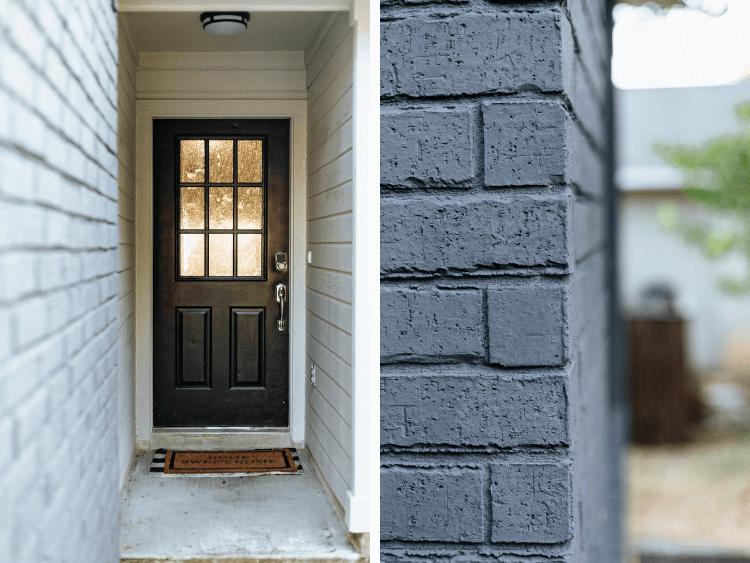
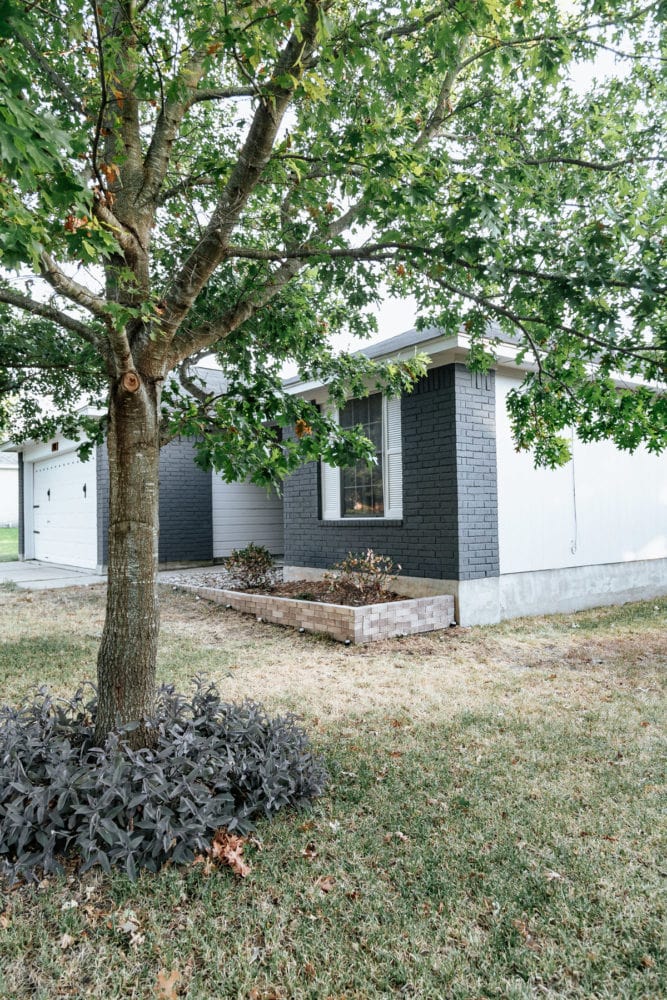
This was hands down one of the most satisfying projects we’ve ever done and I’m just so glad we decided to take it on! I think this fresh house color will make world of difference over the next few months as we work to sell our house, and I can officially say I pull into the driveway with a big grin every single day (rather than the slight cringe I used to have!).
Please let me know if you have any questions about how to paint your brick house (or how to paint siding), or if you have any questions about using an exterior paint sprayer. I’d love to help! And, if you’re considering this project, don’t forget to check out the Wagner ControlPro 130 – it’s a fantastic choice for any DIYer, and it’ll make your job much, much faster.


What was the name of the color paint you used?? Also the brand?
Hi! All the info for paint colors and brand info is in the post, listed under tools & materials.
Amazing. Thank you for being so detailed!
Hi,
Your house looks great!
Did you ever have any problems with your Wagner paint sprayers tip clogging? We just bought one and after a while it just clogged up. My husband took it all apart and flushed everything out but it happened again so I’m trying to figure out if we are doing something wrong.
Hi Deanna!
When you’re working outside in the summer, you’re a lot more likely to run into some clogging issues. The paint particles are so tiny that the heat can dry them up on the nozzle of the gun if you stop for even a couple of minutes. I find that it’s really helpful to keep a baby wipe on hand and thoroughly wipe the tip of the nozzle every time I pause (or, anytime issues pop up). The nozzle is often the culprit when I run into issues!
Hi Amanda,
After years of putting it off, reading your detailed account of how completely transformed the look of your home, I’m motivated!
Like you, I have both siding and brick. I have a 3000 PSI John Deere pressure washer with a “Tornado” tip from Lowes, that will dislodge sand from my patio while cleaning it each year. In other words, it cleans. Just don’t get close wood, it chews it up is seconds.
I have a question regarding the pressure washing process. I just completed one entire wall and found the brick to be fairly easy to clean. The soffit, on the other hand, seems to have so much dust accumulation over the years on the attic side of the soffit materail, that it simply rained back down on the clean brick. So my question is, did you have to remove your soffit for cleaning?
Also, you mentioned spraying on the paint before the brick dries completely. I had read an article on the subject of stain vs paint for brick as I was thinking stain to be the better option due to the lack of maintenance. Unfortunately, the color of brick I have is simply too dark for staining. But what I read in the article is that before painting, the brick needed to dry completely, otherwise it would tend to peel prematurely due to the trapped moisture.
The article was written in a pro and con, stain vs paint, by the stain manufacturer, so I assumed it to be somewhat biased; just curious if you had any thoughts. The stain manufacturer’s claimed was that the stain would last 20 years, while paint required maintenance every three years; again i’m a little suspect on the claim.
Thanks again for the great article and great job on the actual painting, very nice finish.
Hi, Barry! We didn’t remove our soffit – I simply worked from top to bottom so that any dripping dirt would be cleaned afterwards.
The wet vs. dry thing totally depends on the paint you’re using. The brand I used recommends painting on damp paint, but other brands might want dry paint! I recommend you read the directions on whatever brand you choose to go with and stick to that! Hope that helps!
Hi Amanda when you sprayed did It get on the roof/
Nope, not at all!
Looks great. Why not use large black house numbers on the garage? I think that would look better.
I did a similar paint job on my 2 story red brick, stucco and siding house.
We put on new siding but sprayed the stucco and I hand rolled and then painted the bricks individually so they were 3 shades of grey, light grey, medium and a charcoal!! Plus went back and hand painted the grout lines to look like the original beigey/grey grout–a bit ridiculous I know!!
Talk about a lot of work!! But I did this 5 yrs ago and have not had to touch up a single brick and I live in an extreme climate province in Canada so it was worth it all. Wish I could attach a picture of my before and after but it is not working to do that.
Anyway love how yours turned out and I imagine it will last a long time for you as well!
Wow!!! I Bet it looks incredible!
My siding is vinyl. Can I paint it? I have red brick with white vinyl trim and around the roof. I would love to line wash the brick and paint vinyl. Do you think that’s do able?
Hi! You’d probably need to do a bit of research – I believe vinyl siding can be painted but I don’t have any experience with it so I can’t give any tips.
There is a paint by Sherwin Williams that is for vinyl siding so I would look into that-just saw a post about that today actually.
Did you have to paint your soffits? We have BROWN soffits on our home and are wanting to paint our house next month. I believe our soffits are aluminum or vinyl – not sure. Was just curious how that process would work! Thank you!
Yes, I did! Just painted them like everything else with the sprayer.
Oh my gosh! So many would never attempt this, you are one brave woman and the job you did looks fantastic! Congratulations! Plus August in Austin?! I live near Fort Worth and I know that hot August weather. Thanks for sharing and I’m looking forward to reading more of your blog entries.
Haha! It was definitely exhausting!
Great job! What a difference. What color brick paint is that from Behr? I’m thinking of going the same color from the pink brick I have now : (
Hi! All of the info on the products I used is detailed in the post. I used RomaBio paint for the brick, and Behr Exterior Latex paint for the siding.
This blog post and your Instagram show (?) portraying the actual process really inspired me. I have been desperately wanting to do this for years. A few things have held me back: 1. It’s an overwhelmingly big project. What if I start it and realize I’m in over my head? 2. We live in Central FL and it’s horrifically hot out. Would I even survive the project? 3. What if I naïvely do a poor job and it looks awful and then we have to pay for it to be re-done right away (strict HOA)?
Your success gave me hope! But I do have a few questions: Prep… the sides and back of our house and currently painted (yellow-y) cinderblock. When I began pressure washing, some of the current paint peeled up to expose the block. Should I not pressure wash and do something else? Is this a glaring red light that a pro needs to tackle this? Our yard meets right up to the house- would I did it out/away a bit to paint? I own the Flexio 570… is that sufficient if I just do one side per day? I’m sorry I have so many questions… but I’d really *love* to think I could tackle this… but it’s definitely intimidating.
(also to add- wanting to go from yucky mellow yellowy to a cleaner white color)
Thanks!
It is definitely a huge project! I certainly wouldn’t attempt it until the weather cools off a bit (do as I say, not as I do, haha), but I honestly thing it’s doable as long as you don’t have a ginormous house.
As far as the prep work – I’m not a pro, but here are my thoughts: it’s not uncommon for paint to start flaking if you get too close to it or use too much pressure with the pressure washer. I would finish cleaning the house with a lower pressure, or simply standing further back from it. I wouldn’t necessarily say it’s a sign you need a pro, but if it continues to flake even after you reduce the pressure you might want to have someone at least look at it. Again, I’m not a professional but if I were in your shoes I would finish cleaning the house (making sure none of the paint flakes), and then sand down the parts where the paint did flake so that the edges are smooth. Then, I would go for it! Using the 570 is totally doable (I painted an outdoor building with a similar one before!), but it will take you a little longer since it doesn’t cover as quickly.
hope that helps!
It looks great! I love the color of the brick. Good luck with your buying/selling process.
Thank you so much!
Wow what a difference! It looks amazing!
Thank you so much!
That paint is AMAZING stuff! We have a brick ranch, two sides of the house are two-stories tall due to the slope of the yard, so I can’t imagine doing it myself (I would absolutely try it though). We have a green tin roof, so choosing a color will be tough! If we decide to tackle this project sometime over the next few years, I will be coming back to this tutorial.
It’s SO, so good!!!
Looks awesome! Please tell me the “white” paint color used on your trim? Thanks,
April
It’s Cotton Grey from Behr!
How hard was it to use the sprayer, I’m planning on doing my exterior this fall, but was going to do it by hand because the sprayer intimidates me!
Not difficult at all! It seems intimidating, but I promise it’s doable!
It looks really nice. For the sake of the people that buy your house, I hope it lasts. The people we bought our house from painted right before selling and it was a flaking mess within 4 years. When we had the pros come in to repaint, the amount of care they took in the prep was amazing. Three guys pressure washed and scraped for a day and a half (and this is only a 1400 sq ft house). For some jobs, I think the professionals are well worth it.
Prep work is absolutely vital!! Thankfully our paint job was in great shape (just not our style), so there was very little peeling paint.