
Our New Modular Outdoor Kitchen from RTA Outdoor Living
Last updated on February 10th, 2025 at 09:46 am
We partnered with RTA Outdoor Living for our brand new modular outdoor kitchen, with appliances and a grill from Coyote Grills! Today, I’m sharing all the details.
I have always wanted to have a nice outdoor grill and kitchen setup in this house. We have a small backyard but our patio is a generous size, and it feels like it was just made for something a little fancy and super functional. Plus, I’m a big entertainer in the summer months and love to have people over! So, when RTA Outdoor Living reached out to me and asked if I’d like to review one of their MOKS modular outdoor kitchens, I jumped at the chance. And I’m so glad I did because, y’all, this kitchen is awesome!
Today, I want to walk you through the entire process of designing and building this modular outdoor kitchen from start to finish. Because, when you think of an outdoor kitchen you might think of something really big and difficult that takes weeks on end to assemble. But, that’s not what this is. It can be assembled in under a day and requires almost no tools.
I promise, it’s gonna blow your mind. Let’s get into it!
Designing Our Modular Outdoor Kitchen
The first step to getting an outdoor kitchen is to choose the style you’re thinking. For this collaboration, RTA offered me an outdoor kitchen from their MOKS collection, which is their more affordable line that is even easier to assemble than their other modular outdoor kitchens! It’s made of marine-grade composite panels and has an outdoor-rated solid surface countertop. We were shocked at how simple it was to put together, but we’ll get to that in a second.
Once you have an idea of what you’re looking for, you are ready to head to their online design tool. It walks you step-by-step through planning your exact outdoor kitchen, and it makes the whole process really accessible. They also have design experts that can walk through the process with you, and I found that they were incredibly knowledgeable and so helpful. Once you have your design all planned out, they even have a VR tool in their app that you can use to see how the kitchen will look in place!


From start to finish I found the process to be incredibly simple, and really exciting. Once your design is nailed down you just sit back and wait for it to ship to you. And then an intimidatingly-large palette of appliances and outdoor kitchen materials will arrive on your driveway and you might have a small panic attack. Ask me how I know.
But, no worries because assembly is a breeze. Promise.
Assembling the Kitchen
I’ll admit I delayed the assembling of this kitchen for a few days because I was nervous. But, once I finally opened it up and got started, I very quickly realized it couldn’t possibly be simpler. The directions they provide are really detailed and thorough. It took Corey and I a grand total of less than three hours to assemble the entire outdoor kitchen.
I don’t know about you but I find that to be pretty mind-boggling.
You’ll definitely need two people to assemble your MOKS modular outdoor kitchen, mostly just because you need a second set of hands to help hold things steady. The base of the outdoor kitchen is assembled with T-shaped tenons. That means there’s no drilling, hammering, hardware, or swearing necessary. Once you’ve got the bases assembled, you do need a drill to install the appliances, but it’s incredibly easy.
The assembly kit comes with everything you need to make it super simple. And, as someone who has assembled a lot of ready-made furniture and other things, I was really and truly impressed with the setup of this outdoor kitchen! Here’s a quick rundown of the process.
Assembly Video
First up, let’s do a quick video of what the assembly process looked like. This isn’t meant to be a detailed tutorial by any means, just an overview to give you an idea of what to expect!
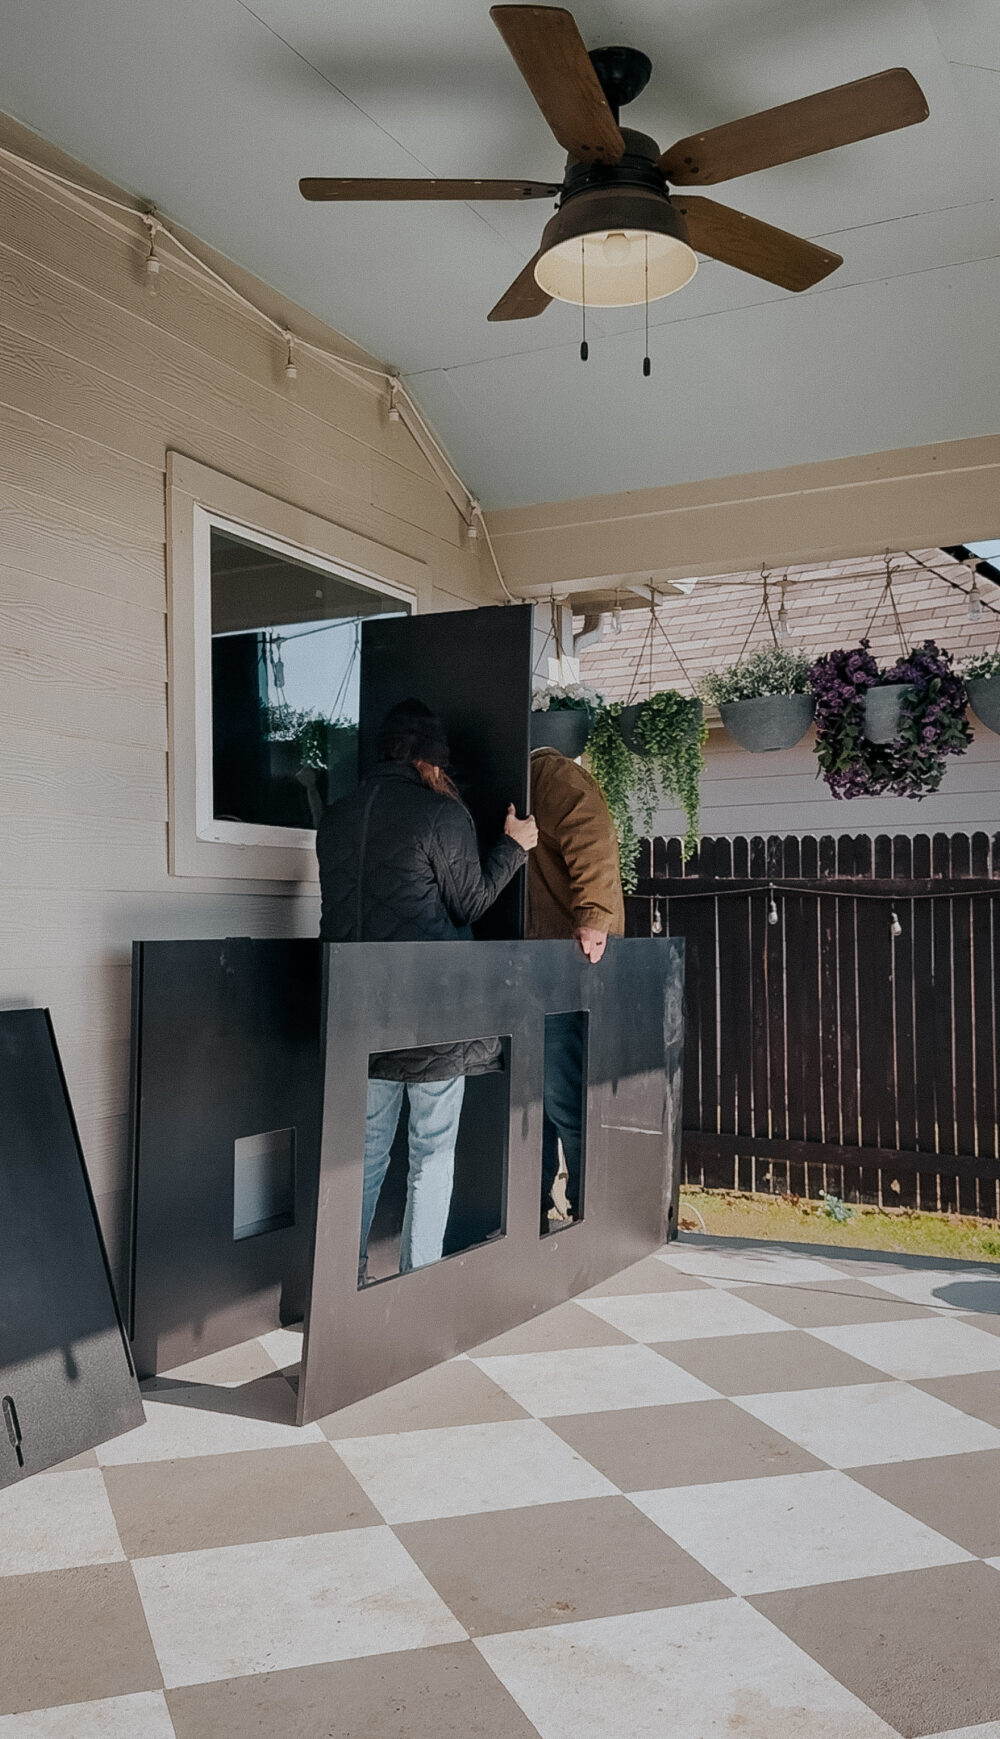
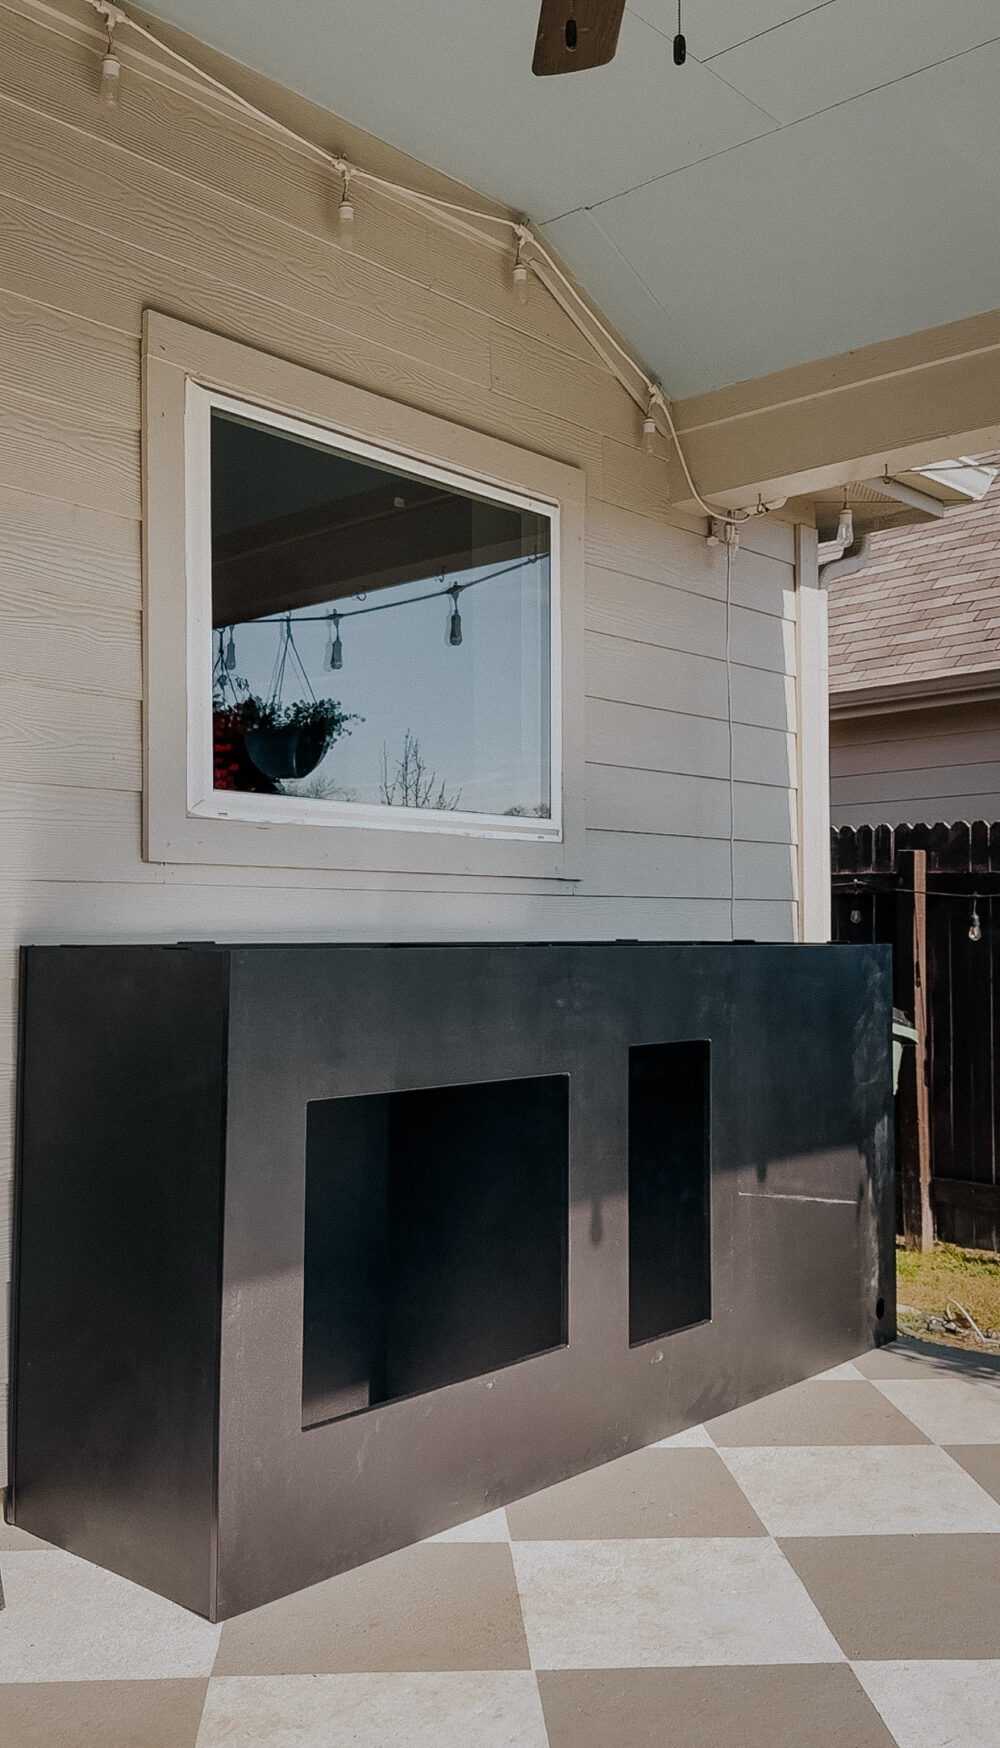
Assembling Frame Pieces
The frame simply locks into place, so you begin by grabbing the two longer pieces and holding them apart from one another. Then, you slide the middle supports into place. Add the sides and you’re done!
Install Appliances + Storage
With the base built, you simply need to get the add-on pieces that you chose installed. The directions are incredibly helpful here, but basically you’ll have support pieces that slide right into the base. Each of the add-on pieces has supports that you’ll use to drill them right into the base. Installing each appliance took mere minutes – honestly, with a few of them it was more difficult to get the sticky protective covering off than it was to install them!
Adding the Counter
The counter also has holes for tenons underneath it, and it simply slides into place. You might be wondering how sturdy it can possibly all feel if it’s this simple, but I’m telling you – it’s solid!
One of my favorite things about this setup is that it would be really easy to take it apart if (when!) we move. Plus, it’s super adjustable so we could use the pieces separately as single islands if we needed to. I absolutely love the versatility here!
All the Details of Our MOKS Modular Outdoor Kitchen
Alright, so you know that the design and assembly process are really easy and intuitive. Great. What about the actual product? I have a separate blog post breaking down all of the details of the Coyote appliances included in this kitchen, as well as a detailed tour of things. But, I wanted to at least share an overview of what we chose to add to the kitchen.
The Cabinets
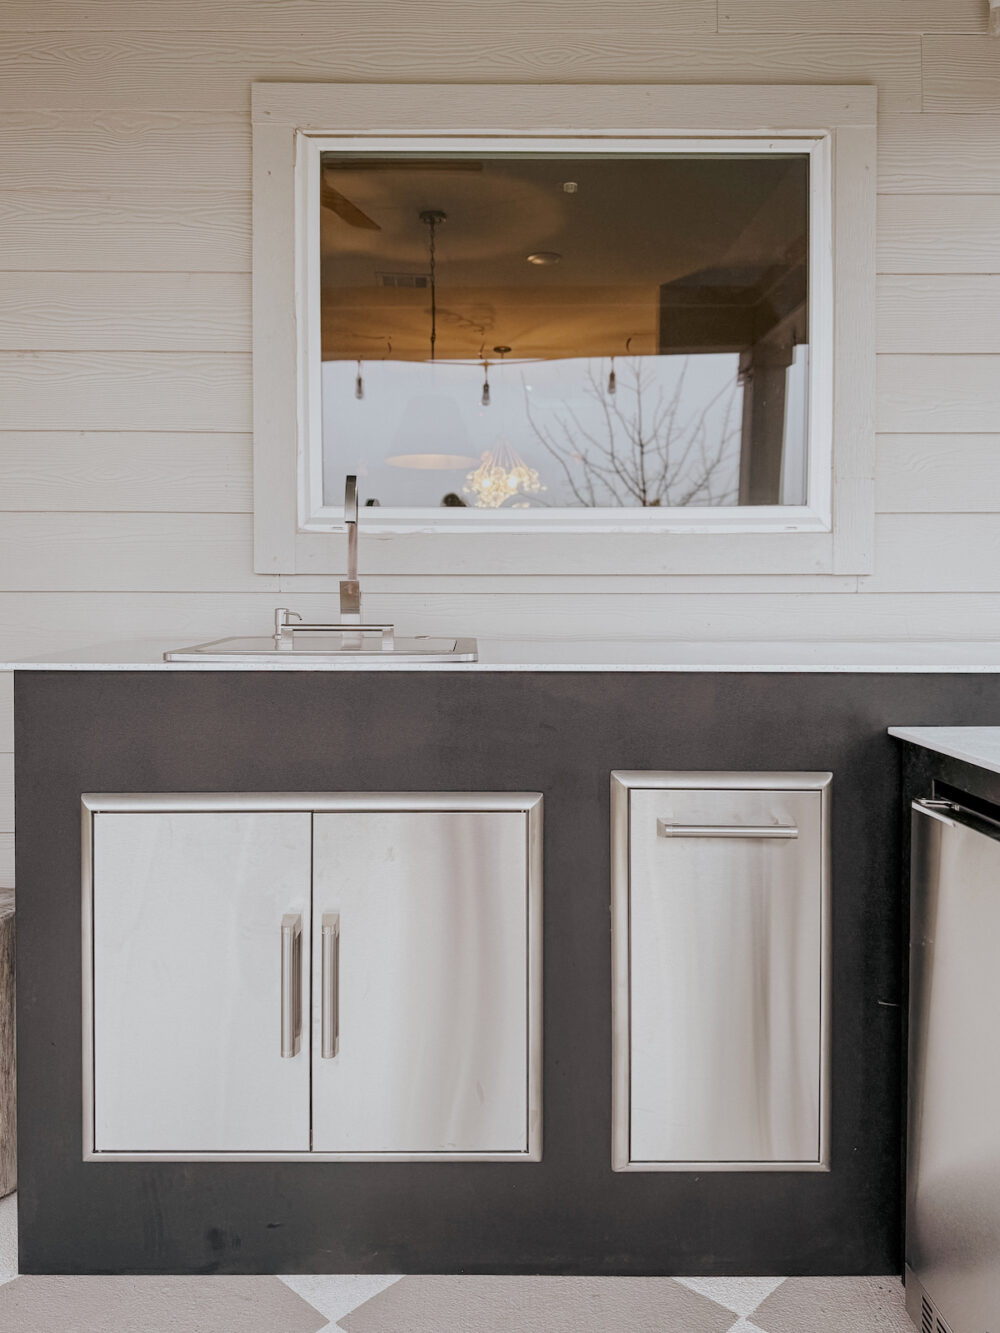
As I mentioned before, this kitchen is from the MOKS line that RTA offers. There are a lot of different available configurations, but we went with the L-Shaped Refrigeration Island and Sink Bar. As for the finish of the base, when it comes to the MOK there are four color options for the panels. We chose black! However, if you go with their more traditional outdoor kitchens there are a lot of design options and combinations, including brick and concrete options.
One thing I love is that you can purchase access doors and drawer add-ons for your cabinets! So, all of the interior space isn’t just going to waste. For example, the doors under the sink open up to that entire half of the island! So, we have plenty of room to store things under there. You can also add on access panels to the back of your island – the whole thing is incredibly customizable.
The Appliances & Add-Ons
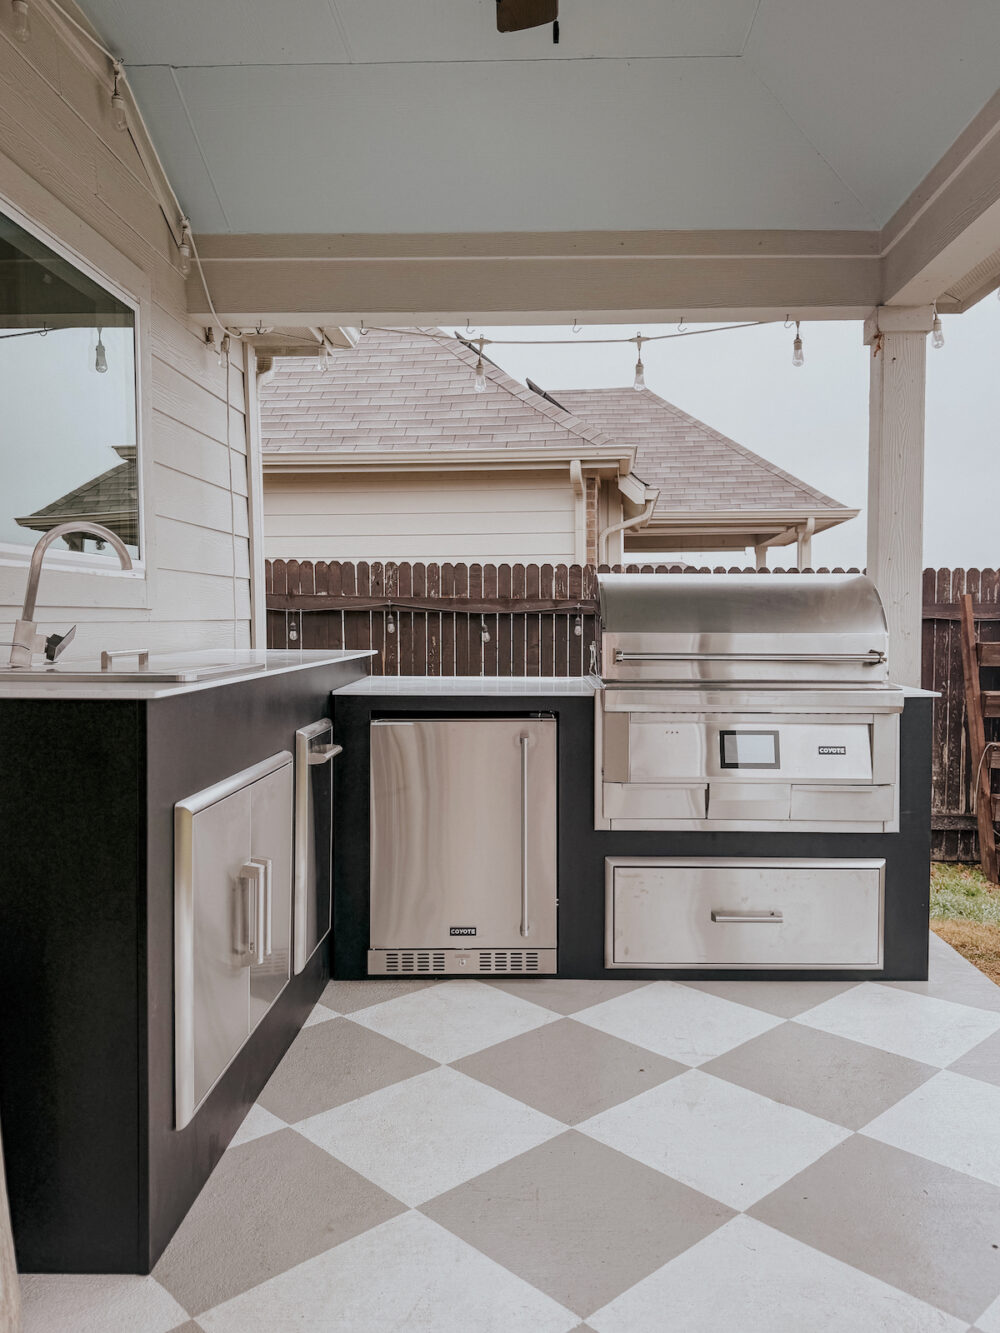
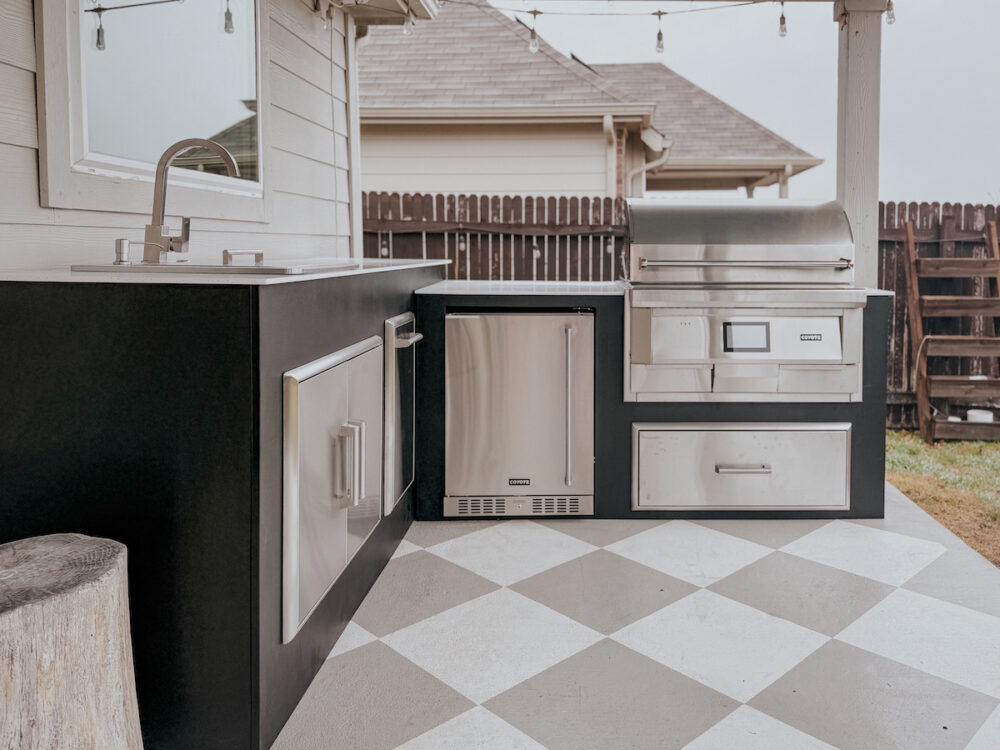
There are tons of appliance and add-on options available from RTA, but we were limited on space here so we had to stick to what we could fit. Our kitchen includes:
- A sink
- A mini refrigerator
- Pull-out trash can
- A 36″ pellet grill
- Large drawer for pellet storage
Most of these came with the basic setup for the island we chose, as you saw above. We added on the pull-out trash can and swapped the access doors under the grill for the drawer!
They also have charcoal and gas grills, single side burners, and more. All of the appliances are stainless steel and really high-quality. I’ll be doing a full breakdown of all of the components of the modular kitchen later, so stay tuned! You can see aaaaaall of the available options here.
Maintenance
I think it’s important to at least touch on how incredibly easy this thing is going to be to maintain. The material is weatherproof and can simply be hosed down if it starts to look dirty. I did not want to add another difficult-to-clean item to my life, so this is a huge perk for me.
The Cost
Okay, let’s get to the part I know you’re dying to hear about. I was gifted this incredible setup by the generous folks at RTA, but as I’m sure you know, outdoor kitchens aren’t cheap! With a setup like this, you’re definitely paying a bit of a premium for the sake of it being incredibly easy to assemble. If you were to DIY a base for your outdoor kitchen, you’d definitely save money. It would just take you a lot longer than three hours to put the thing together!
The grand total for the MOKS modular outdoor kitchen we chose (before the customizations of adding the trash can, changing the grill to a pellet grill, and swapping the doors for a drawer) was $13,845. Outdoor kitchens in general are absolutely a major investment, but can add so much function and value to your backyard if you use them a lot! RTA has really clear and transparent pricing on their website (which I always appreciate!), so if you’re considering a modular outdoor kitchen, I highly recommend spending some time clicking around.
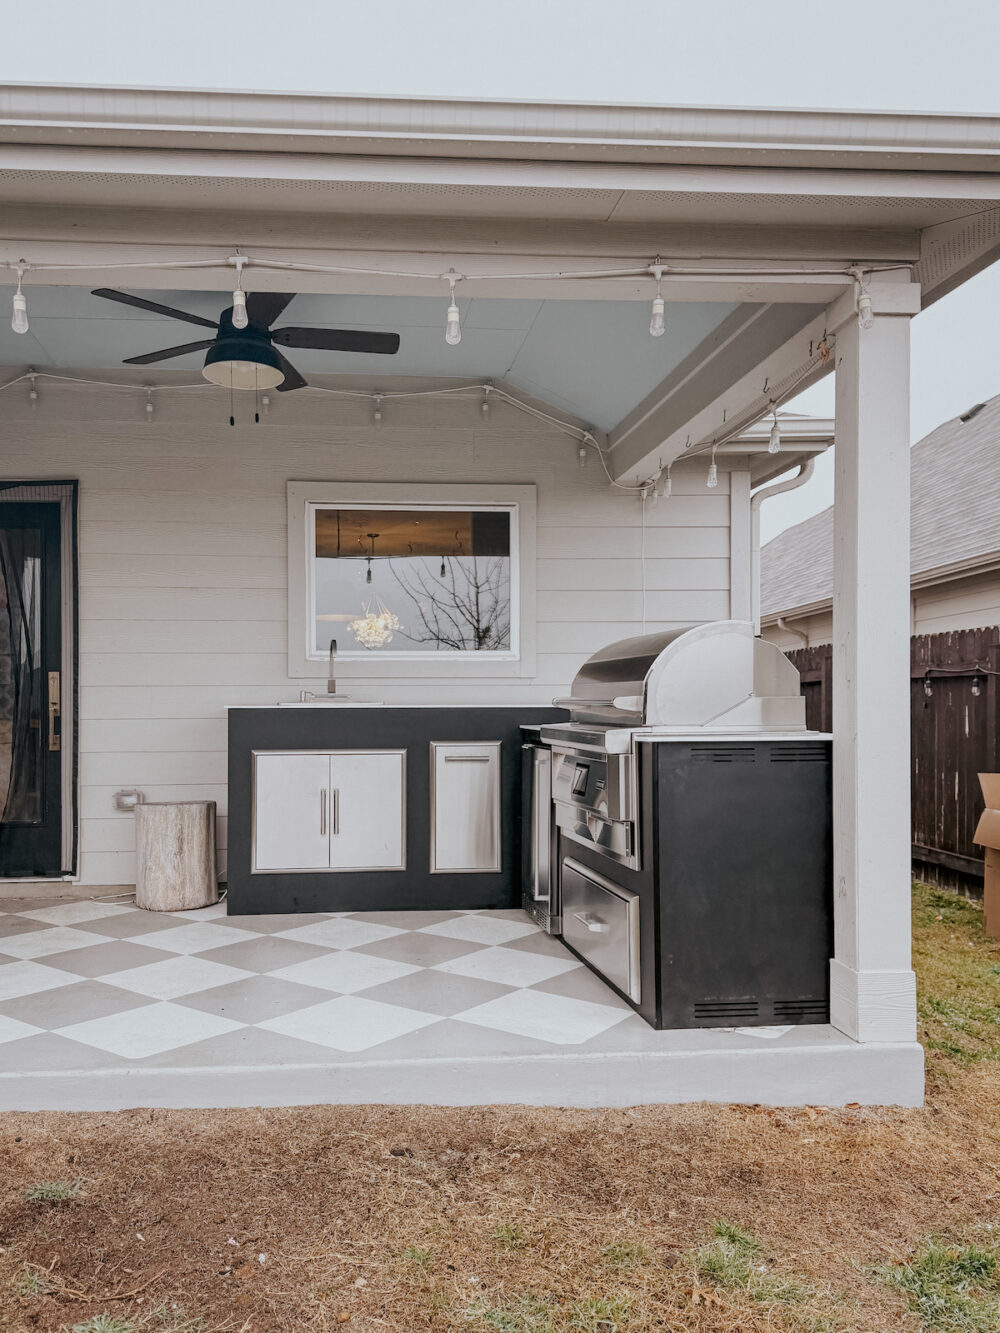
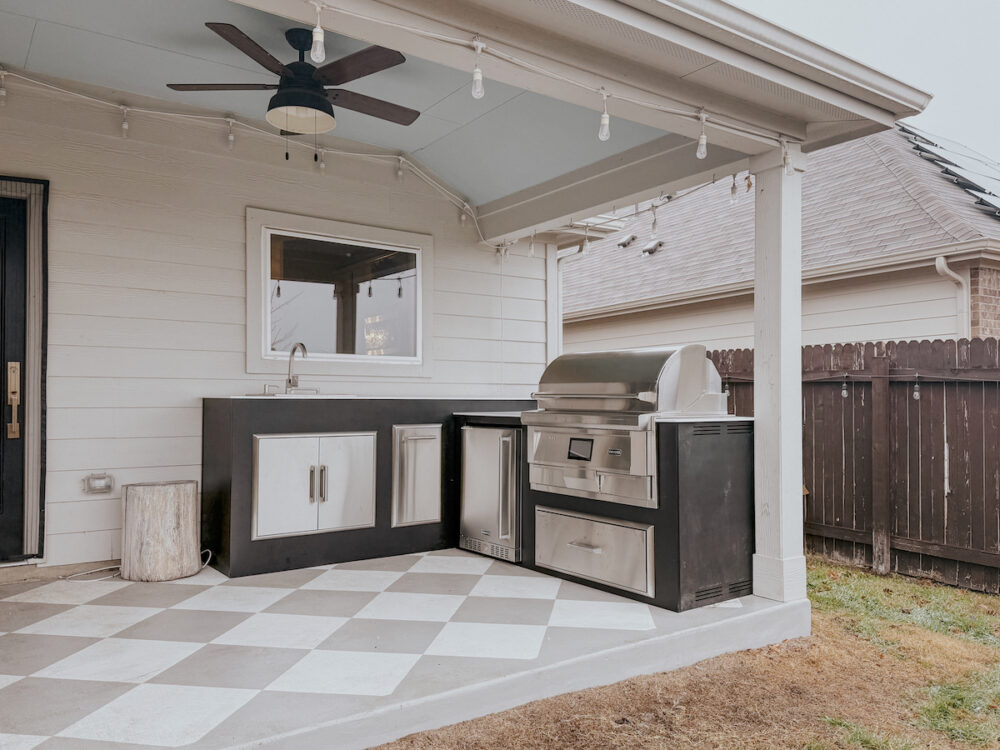
Overall Impressions
Y’all, I’m thrilled with this thing. I wasn’t sure what to expect with a ready-to-assemble outdoor kitchen setup, but I am so excited about it. It’s going to make outdoor cooking so much easier and more enjoyable for us, and our entire back patio has really been taken to the next level thanks to this gorgeous modular kitchen.
All of the sudden our back patio went from feeling bland and empty to looking really beautiful and intentional. I am really impressed with the flexibility offered in the custom designs that RTA has – there are so many different layouts you’re certain for find something that works for you and your available space.
I can’t wait for it to warm up a bit around here so I can get started using this guy! If you want to learn more, just click here! You can also join their email list to score 10% off your outdoor kitchen project!
This looks awesome! What do you have to do in terms of electrical/water/gas hookups?