
How to Turn an Image Into Silhouette Art
Learn how to make the easiest DIY silhouette art! I’ll show you the easiest way to turn an image into a silhouette in just minutes.
Years and years ago, when we lived in our first house, I made some DIY silhouette art to hang in our guest room. We didn’t have kids yet, so it was just photos of me, Corey, and the dogs. I look back at it and giggle a little, but dang I was so proud of that art! Thankfully, it is really easy to re-create it – much simpler than it was the first time around. In fact, it took me about 5 minutes to turn a photo of my kids into this adorable DIY silhouette art.
What is Silhouette Art?
First up, let’s quickly cover what a silhouette even is. Simply put, a silhouette is an outline of an object, typically colored in fully black on a white background. Traditionally, a silhouette image is one of a person (often a child!) and highlights features like their eyelashes and the curve of their nose. It’s really fun to see what really stands out in a silhouette image.
Video Tutorial
Let’s start off with a video walkthrough! If you’re the type that likes to watch things play out right in front of you, I’ve got you covered. This quick little video shows every single step in real time, so you can see exactly how simple it is.
How to Make Silhouette Art From an Image
This project was a lot easier than I expected it to be, and the final results are gorgeous. I’ve made silhouette art before with much more complicated methods, so I was beyond excited with how simple this was.
Ready to learn how to make them yourself? With this tutorial, you’ll create a digital art file that you can print with your favorite photo printing service. Or, you can simply print it on cardstock at home!
Step One: Take Your Photos
You’ll need to start off with profile portraits of each of your subjects. I just made them of the kids this time around, but before we had kids I made dog silhouettes too! You can do anyone, or honestly, anything you want!
A few tips…
- If you’re doing dog silhouettes, try having someone standing right off the camera holding a treat. While they look at them, you can snap a photo.
- Make sure your subject has their chin up straight, but not too high. You want it to look natural in the silhouette, but that might mean it looks slightly unnatural in reality. I recommend snapping a couple of photos with their head in slightly different positions so you can play with what you want.
- If your subject has long hair, I recommend doing a ponytail! If it’s down, it’ll kind of turn into a big blob.
- You absolutely do not need a fancy camera for this. Just grab your phone!
Step Two: How to Create the Silhouettes
Once you’ve got your photos, it’s time to edit them. There are a million different ways you can do this, but most of them are far more complicated than what I’m about to teach you. You can make the simplest DIY silhouette art with Canva. It’s a free program that’s super intuitive and easy to use. The feature you’ll need is part of the paid version of Canva, but you can easily sign up for a free trial to make your silhouettes!
I’ll walk you through every step of the way. Ready? Let’s do it.
upload your photo
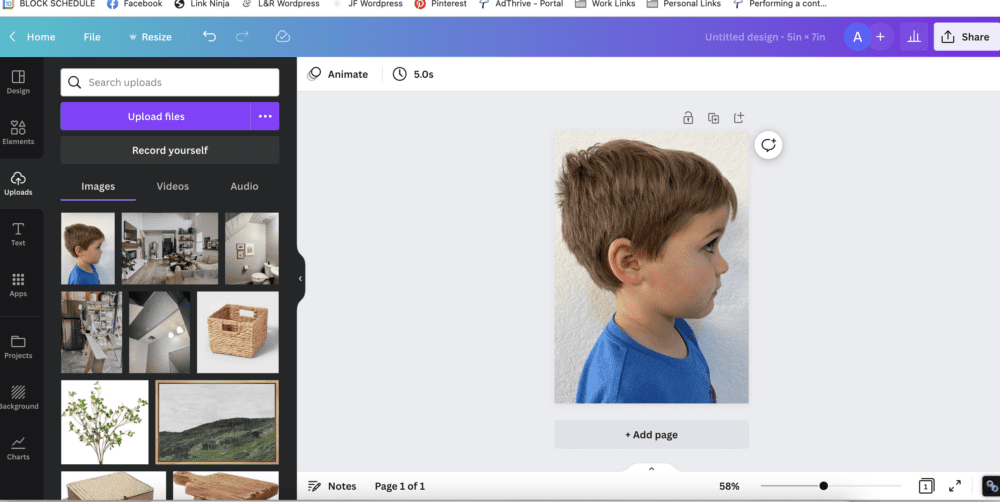
Start by uploading your photo to Canva. I worked on my computer, but you can do this on your phone, too! Here’s the step by step process I followed on my computer:
- Click “create a design”
- Choose “custom size” and type in the size you want to print. I chose 5″ x 7″.
- Click “uploads”, then “upload files” and add your image.
- Drag your image onto the page and resize it so it fills your entire template.
Remove the background
Now, you want to remove the background. I took my photos against a white background so there wasn’t much to remove, but you can still see the texture of the wall. Canva has a quick button that makes this SUPER simple. Just click on your image, then click “edit image”. From there, select “Background Remover”.
It’ll automatically remove your background. Just wait a second and it’s like magic! If it misses something or messes anything up, there will be buttons that say “erase” and “restore” afterwards. Use those to adjust until it’s right (but, it usually gets it right on the first try).

use the “Duotone” tool
Next, you’re going to stay in the “edit image” section and scroll down until you get to the section that says “You may also like…”. Look for the filter that says Duotone. That’s the one you want!
Click one it, and just choose the first color available. For me, it was Cherry. It doesn’t matter, because you’re going to change the colors!
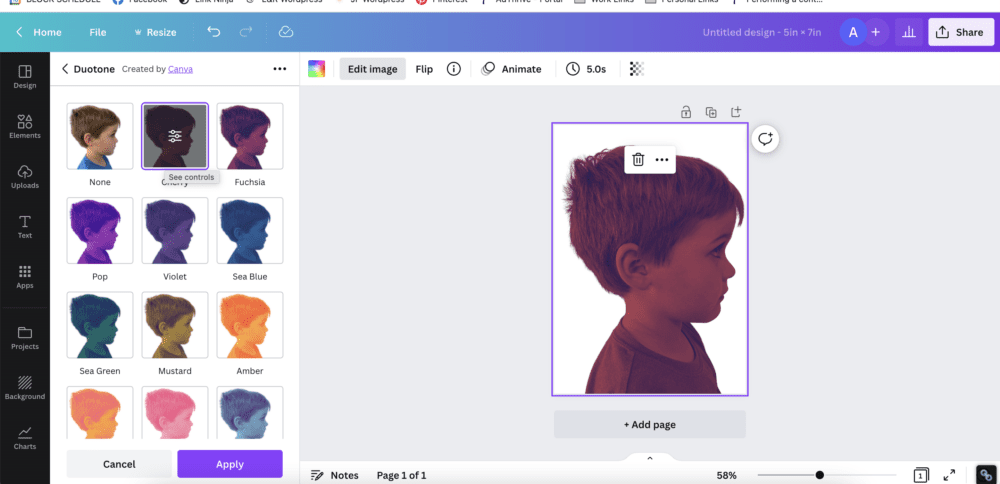
Above, you’ll see an example of what the image should look like. Things are looking a bit questionable right now, but just trust me. We’ll get there.
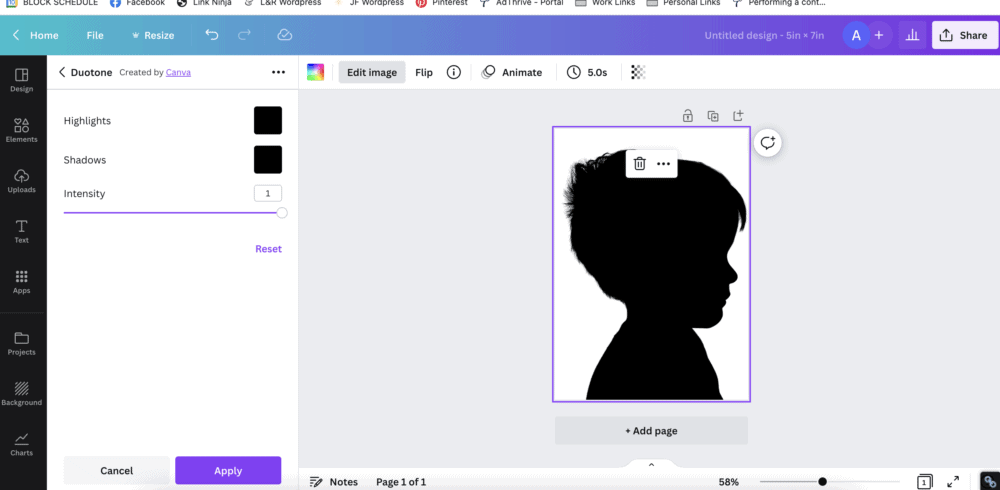
change the colors
Now, one the Duotone editor you should see a bunch of little sliders show up on top of the color you chose. Click on the sliders to get a page that allows you to select a different shade for the Duotone filter.
Change both the “Highlights” and the “Shadows” colors to black. Or white, if you plan to print on black paper!
And just like that…you have a beautiful silhouette picture!
All you have left to do is print it out. I like to save mine as a PNG photo with the highest quality settings. Then, I have it printed at a local photo printing service. I have had the best luck with Walmart! I always choose their matte option, and I’ve always had fantastic results.
I’ll note, I prefer a little more white space on the printed version, so I made the actual silhouettes a bit smaller before printing. I also adjusted the background color ever so slightly so it wasn’t a stark white. It’s a very subtle difference, but I like it a lot better!
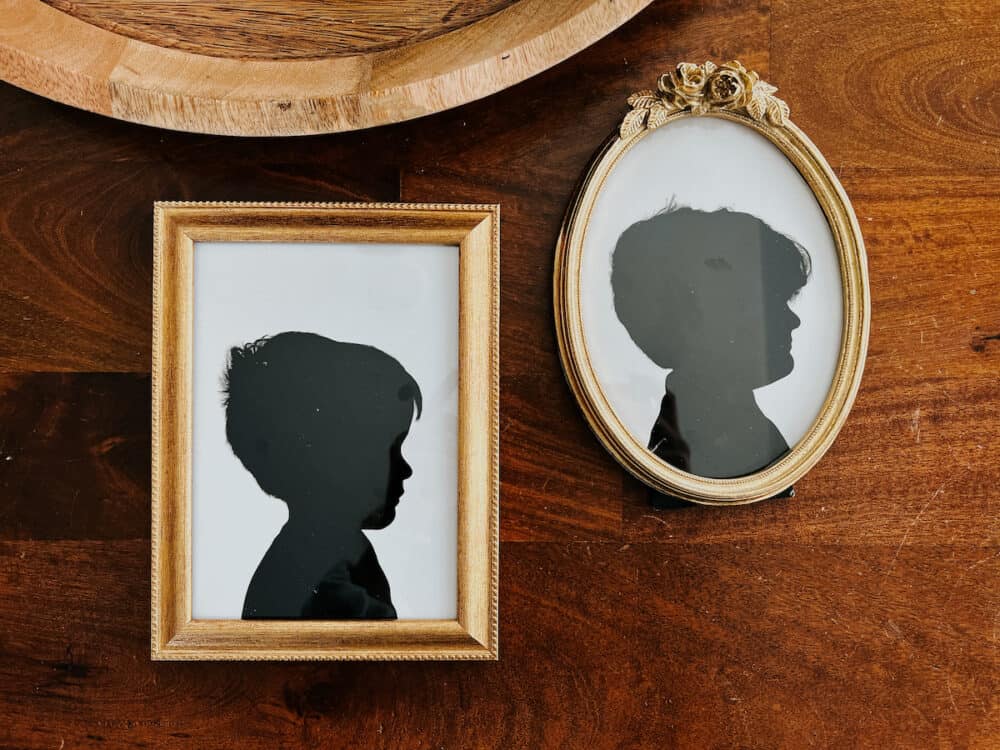
Framing Your Silhouette Art
After I got my art printed, I grabbed a few frames and suddenly I had two fabulous works of art ready to hang on our powder room wall! These shadow portraits look so great and I love that I was able to capture these two sweet boys at this phase in their lives.
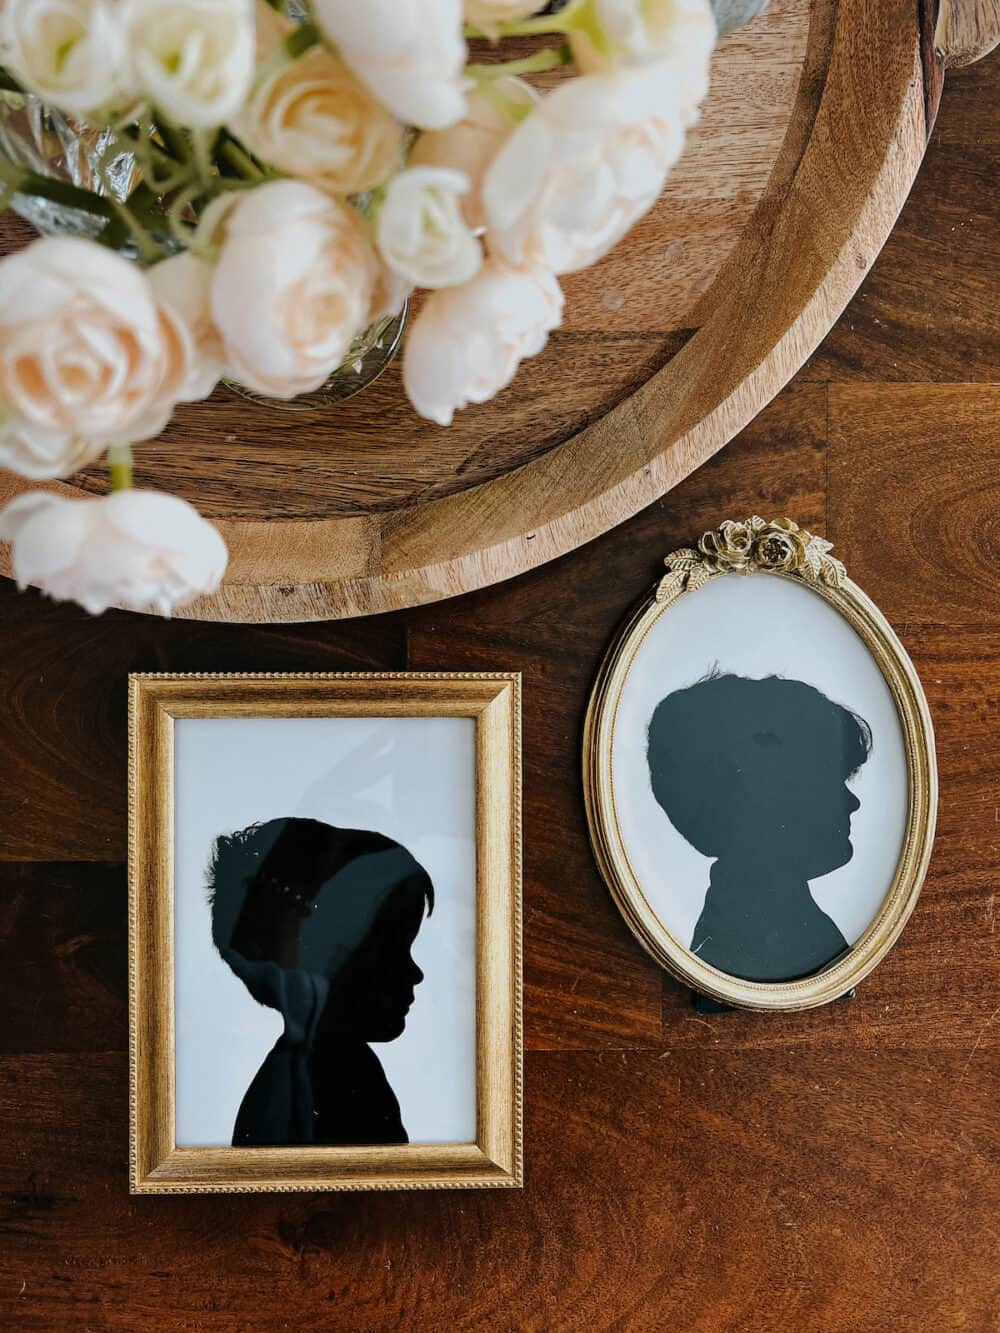
I used this frame and this frame for my silhouette art.
Making Silhouettes With Kids
Want to make this an arts and crafts activity with your kids? Here’s an idea:
- Print out a photograph of their profile, and have them cut out their head using scissors.
- Use a pencil to trace the outline onto black construction paper.
- Cut out the outline of their head, then glue it to white paper.
- Viola! They’ve created their own epic masterpiece that they’ll be so proud of!
Good luck! This is such a fun and simple project, and the final outcome is such a sweet keepsake.
Related Posts
Wall Art Ideas
- Here’s a vinyl art idea that I love
- How to create art using your favorite book
- How to use a projector to paint a mural
- Learn how to make a gorgeous DIY wood art piece
- Here’s another wood art piece – this one is great for outside!
- How to create DIY wood signs
Okay I have to say your instructions were so easy to follow, thank you!! I have been wanting to get silhouettes of my children for YEARS and this made it so easy!!! Thank you thank you!!!
Background remover is not free in Canva
Ahh, I believe it was at one point, bummer! You could always sign up for a trial to use it, then just not renew!
Thank you, very much, Ms. I appreciate the assistance with creating a silhouette.
Thank you for the clear explanation and the easy and quick result!
My Canva says that remove background is only for paid PRO version 🙁
I think they may have recently changed it! 🙁 You can do a free 7-day trial to create them, though!
How do you put the three layers together to make it printable?!
I think these turned out awesome! And you make it look like it’s so easy to do.
What a cute idea..I’ll have to give this a try sometime. They turned out great!
This is awesome, I love the turorial. Me, my brother and sister had silhouettes done on our first trip to Disney. I’ve loved the look ever since.
So Awesome! I’ve been meaning to do this with a tutorial I have on hand but yours is much easier- so I’m ditching mine for yours- thanks for posting!
Really nice. I wonder how they would look printed onto some graphic scrapbook paper?
Love this! So easy!
This is such an easy, cheap DIY, I love it! I have made a few DIY art projects. One was using different colored paint chips I cut out hearts and glued them to a white piece of paper in rows then framed it. It was hanging on our wall for a while. Now I am working on a DIY framed chalkboard to hang in my kitchen. I’m really excited about it!
The finished product looks so good!! In photoshop, there’s a tool that is magnetic to the image you’re selecting, so you don’t have to click so much. It’s super helpful for tasks like these!