
Adding a Sun Tunnel to the Boys’ Bathroom
This post is sponsored by VELUX, but all opinions and excitement are mine alone!
You might remember that last year, we had a skylight added to our primary bathroom. It was a complete cave before we had it put in, and it’s been one of our favorite additions to the house. Well, basically the moment it was done, I knew I wanted to do one in the boys’ bathroom upstairs, too. Their bathroom is just as dark and cavernous as ours was, and there’s only one little light above the vanity. I spent a lot of time last year making it cute, but the lack of natural light was still a huge bother. After lots of planning and dreaming, we recently had a VELUX Sun Tunnel added to their bathroom! And, y’all, the difference is staggering.
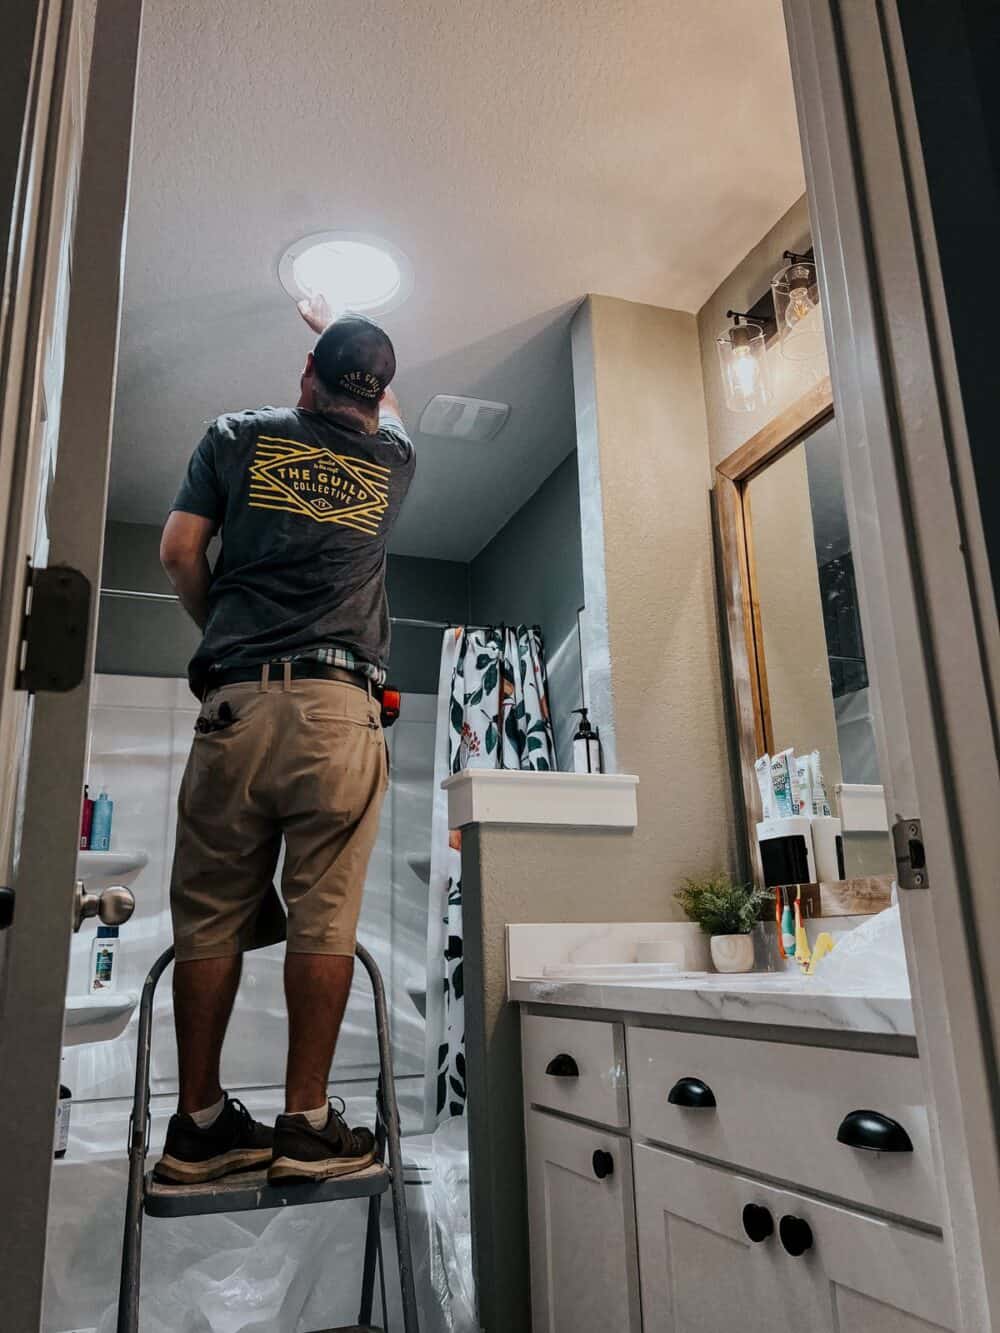
Here’s a look at how the bathroom looked with the light off before adding the Sun Tunnel:
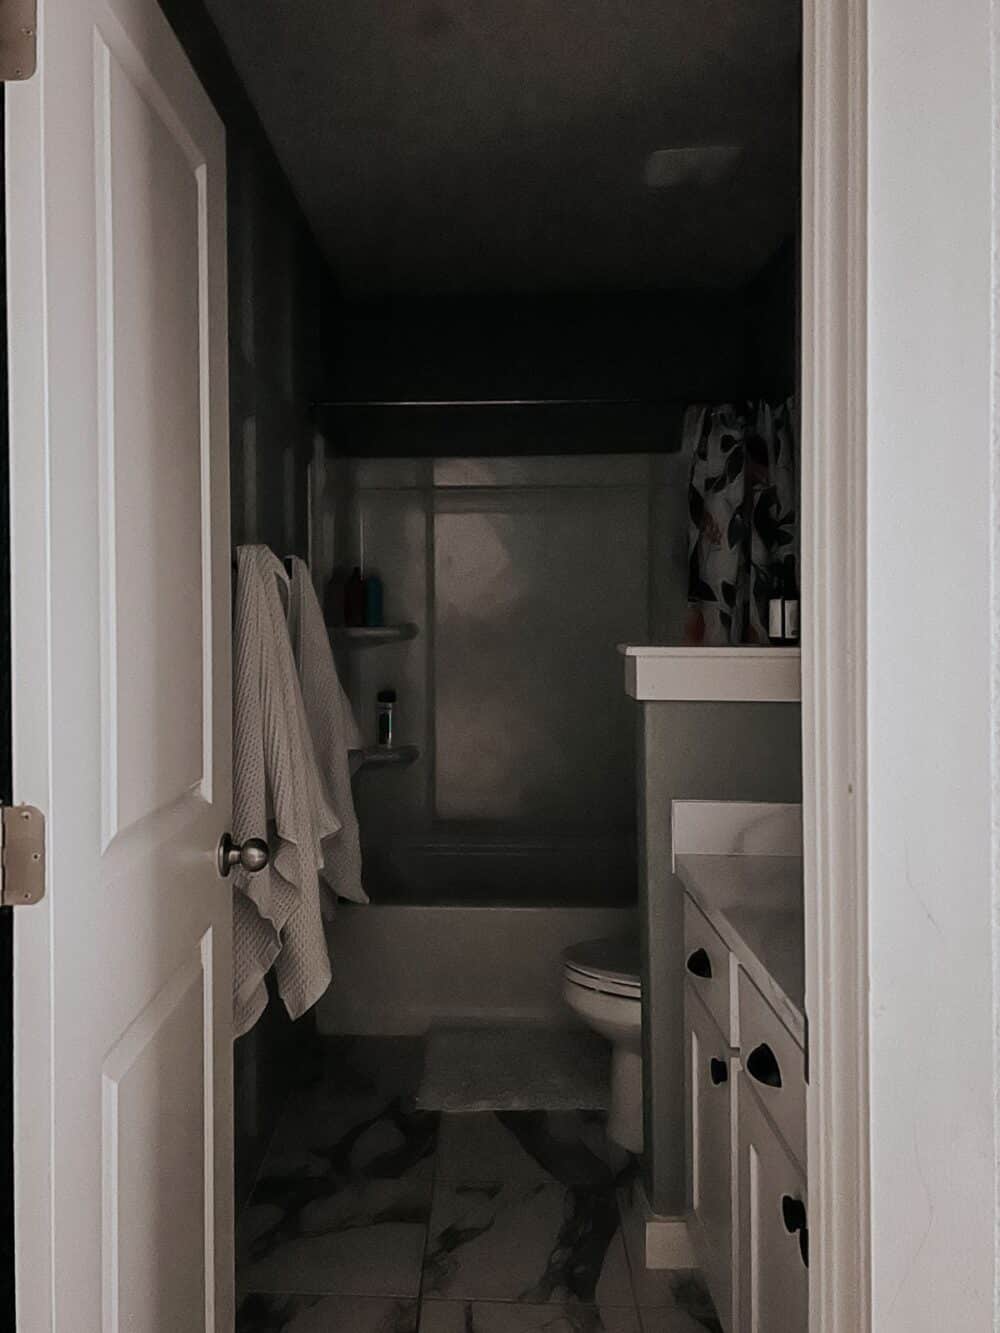
Like I said, a cave. I crave natural light in every room in the house, and I found it so frustrating that this space had none. But, after the Sun Tunnel? It’s a whole different story.
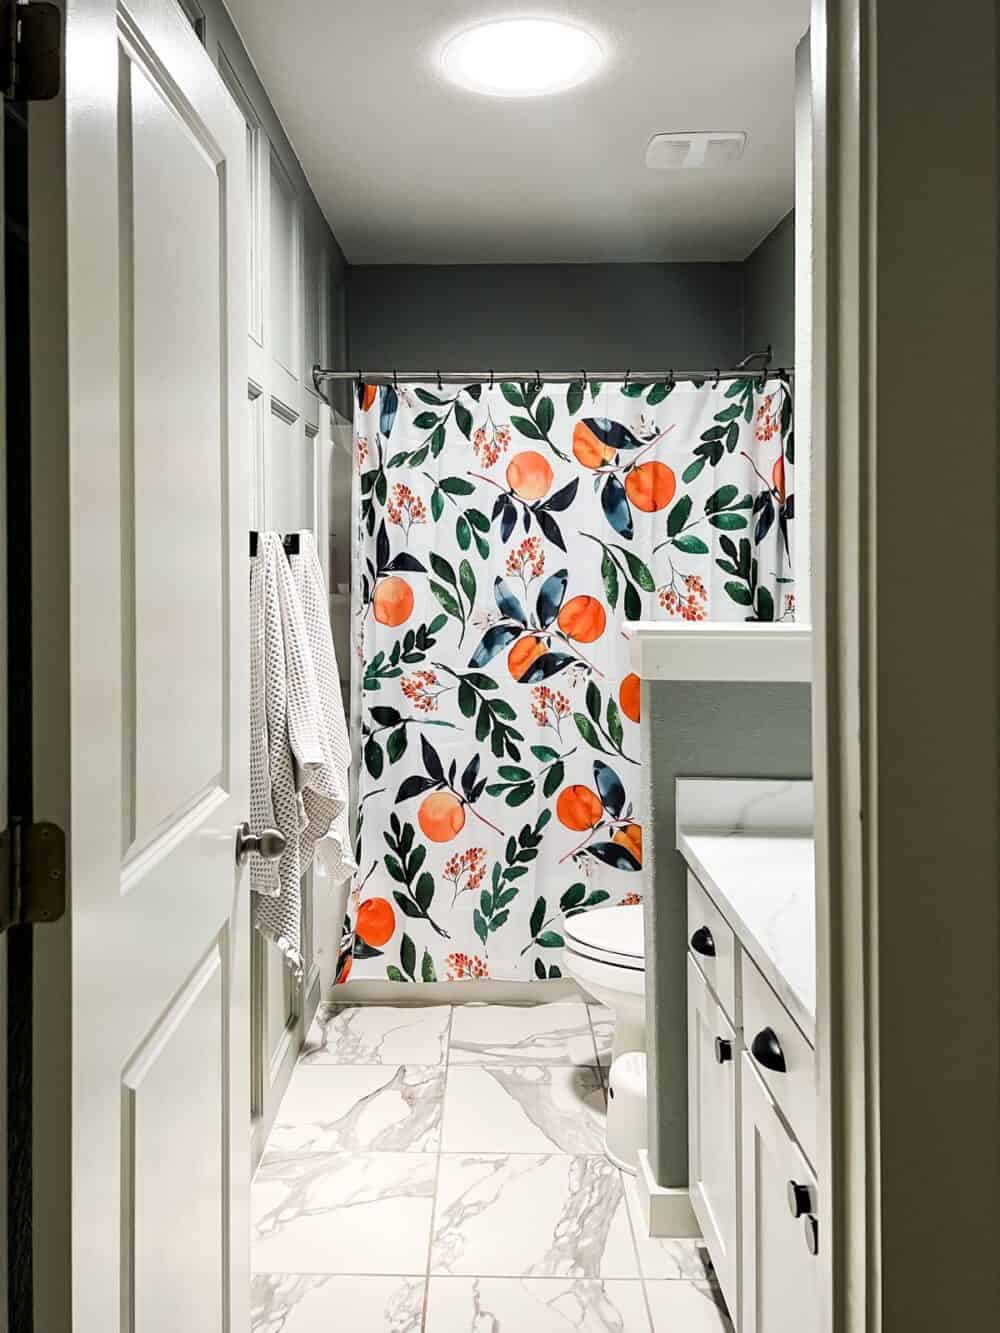
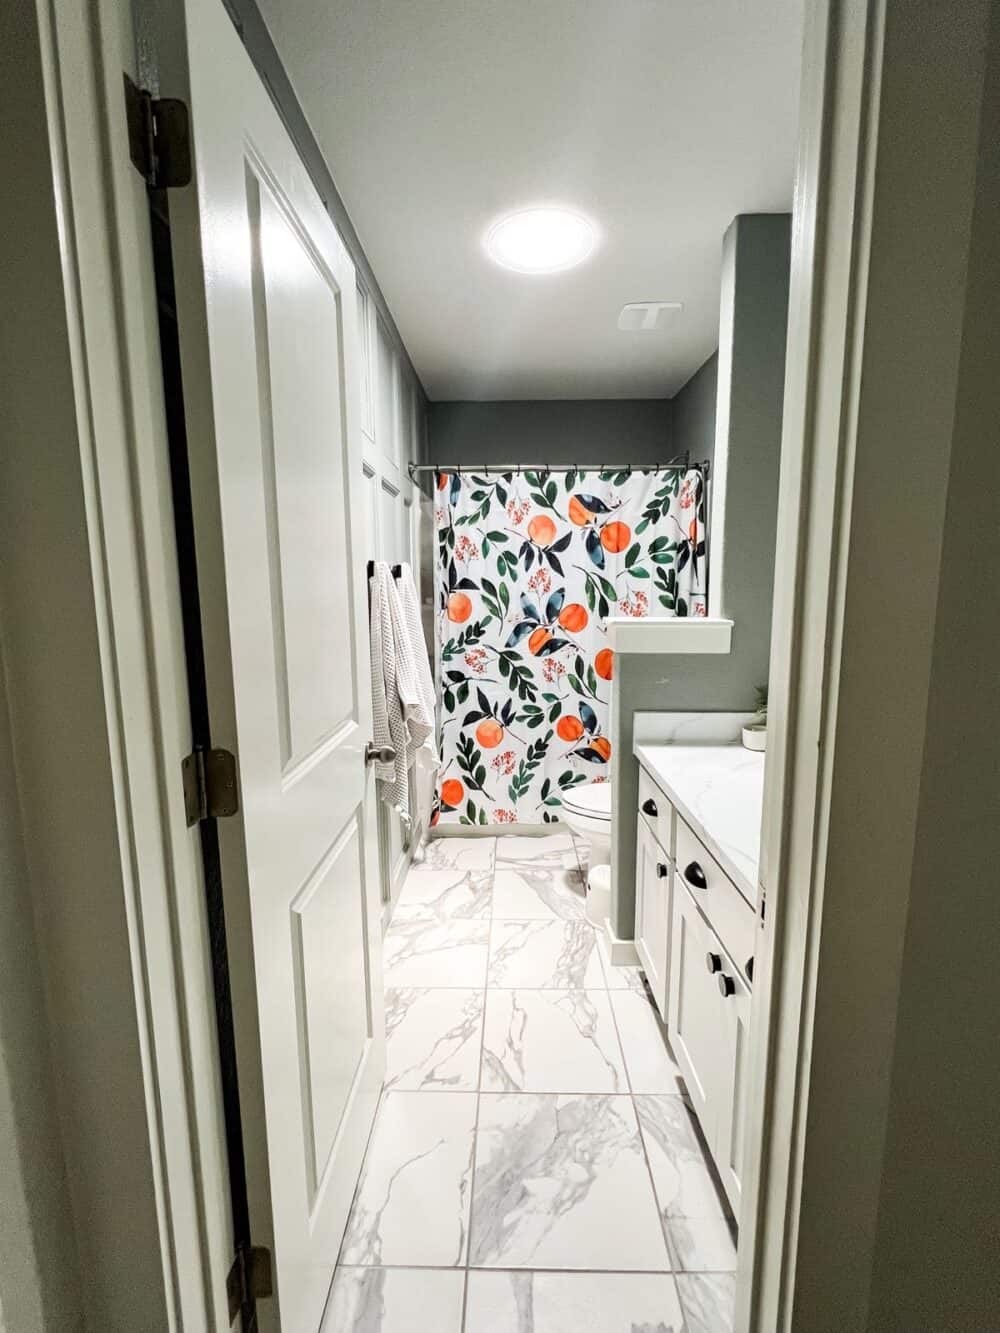
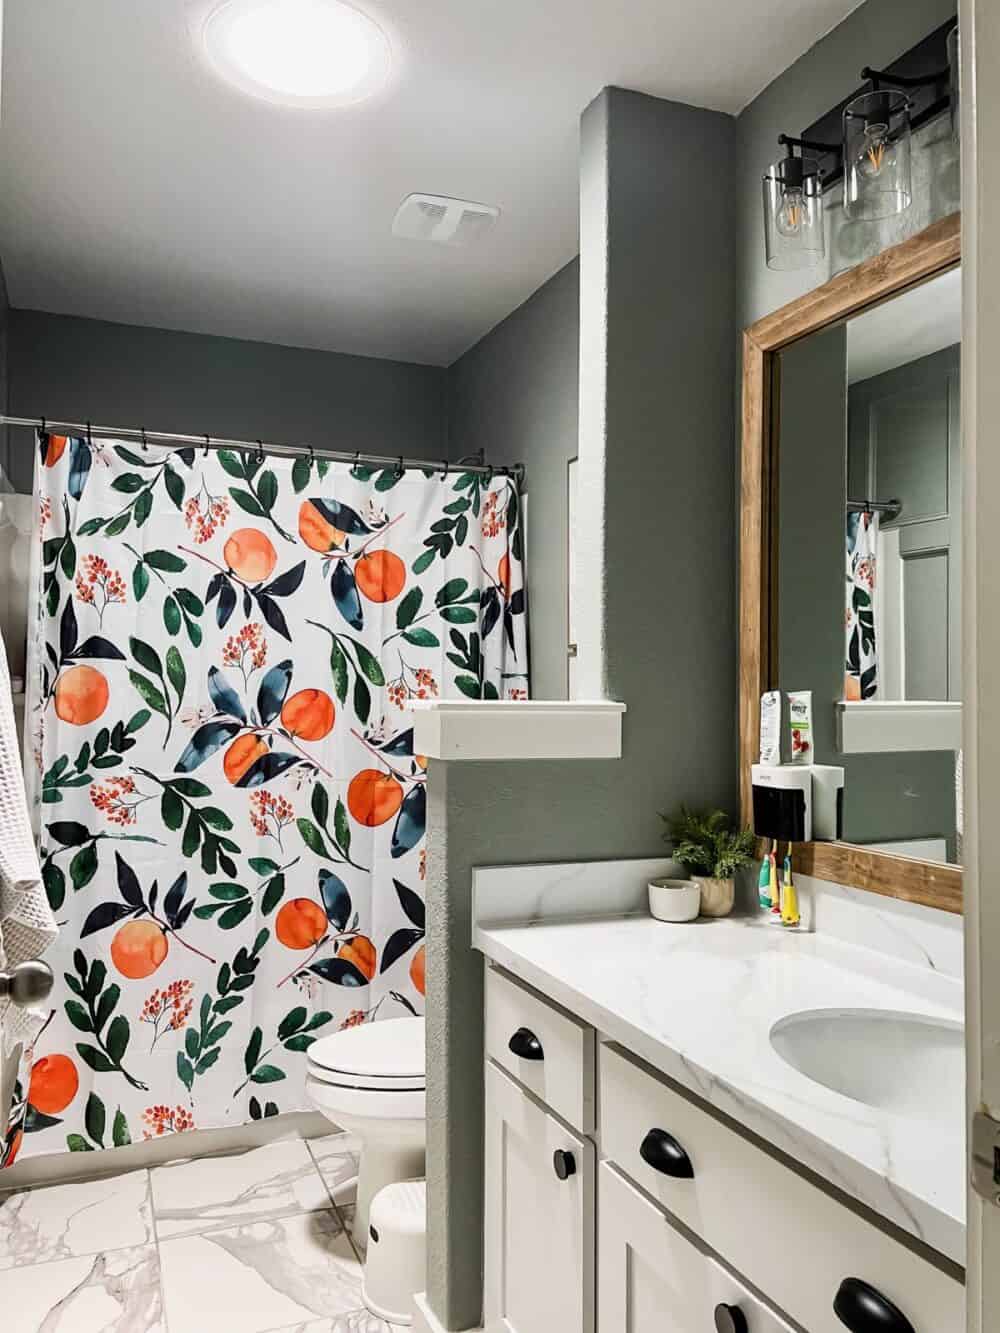
That’s the same space, taken from the same angle, with the lights off in both photos. The only difference is the brand new VELUX Sun Tunnel! No fancy editing tricks!
skylights vs. sun tunnels
Let’s talk details, shall we? When I first started researching and planning, I figured I’d just add a skylight like we did for our bathroom. But, because of the small size of the room, a Sun Tunnel made way more sense. It has a much smaller footprint on the ceiling but provides more than enough daylight.
While a skylight is essentially a roof window that gets installed in the ceiling, a Sun Tunnel is exactly what it sounds like. It’s like a little tunnel that funnels the light from your ceiling to your space. It looks a little something like this:
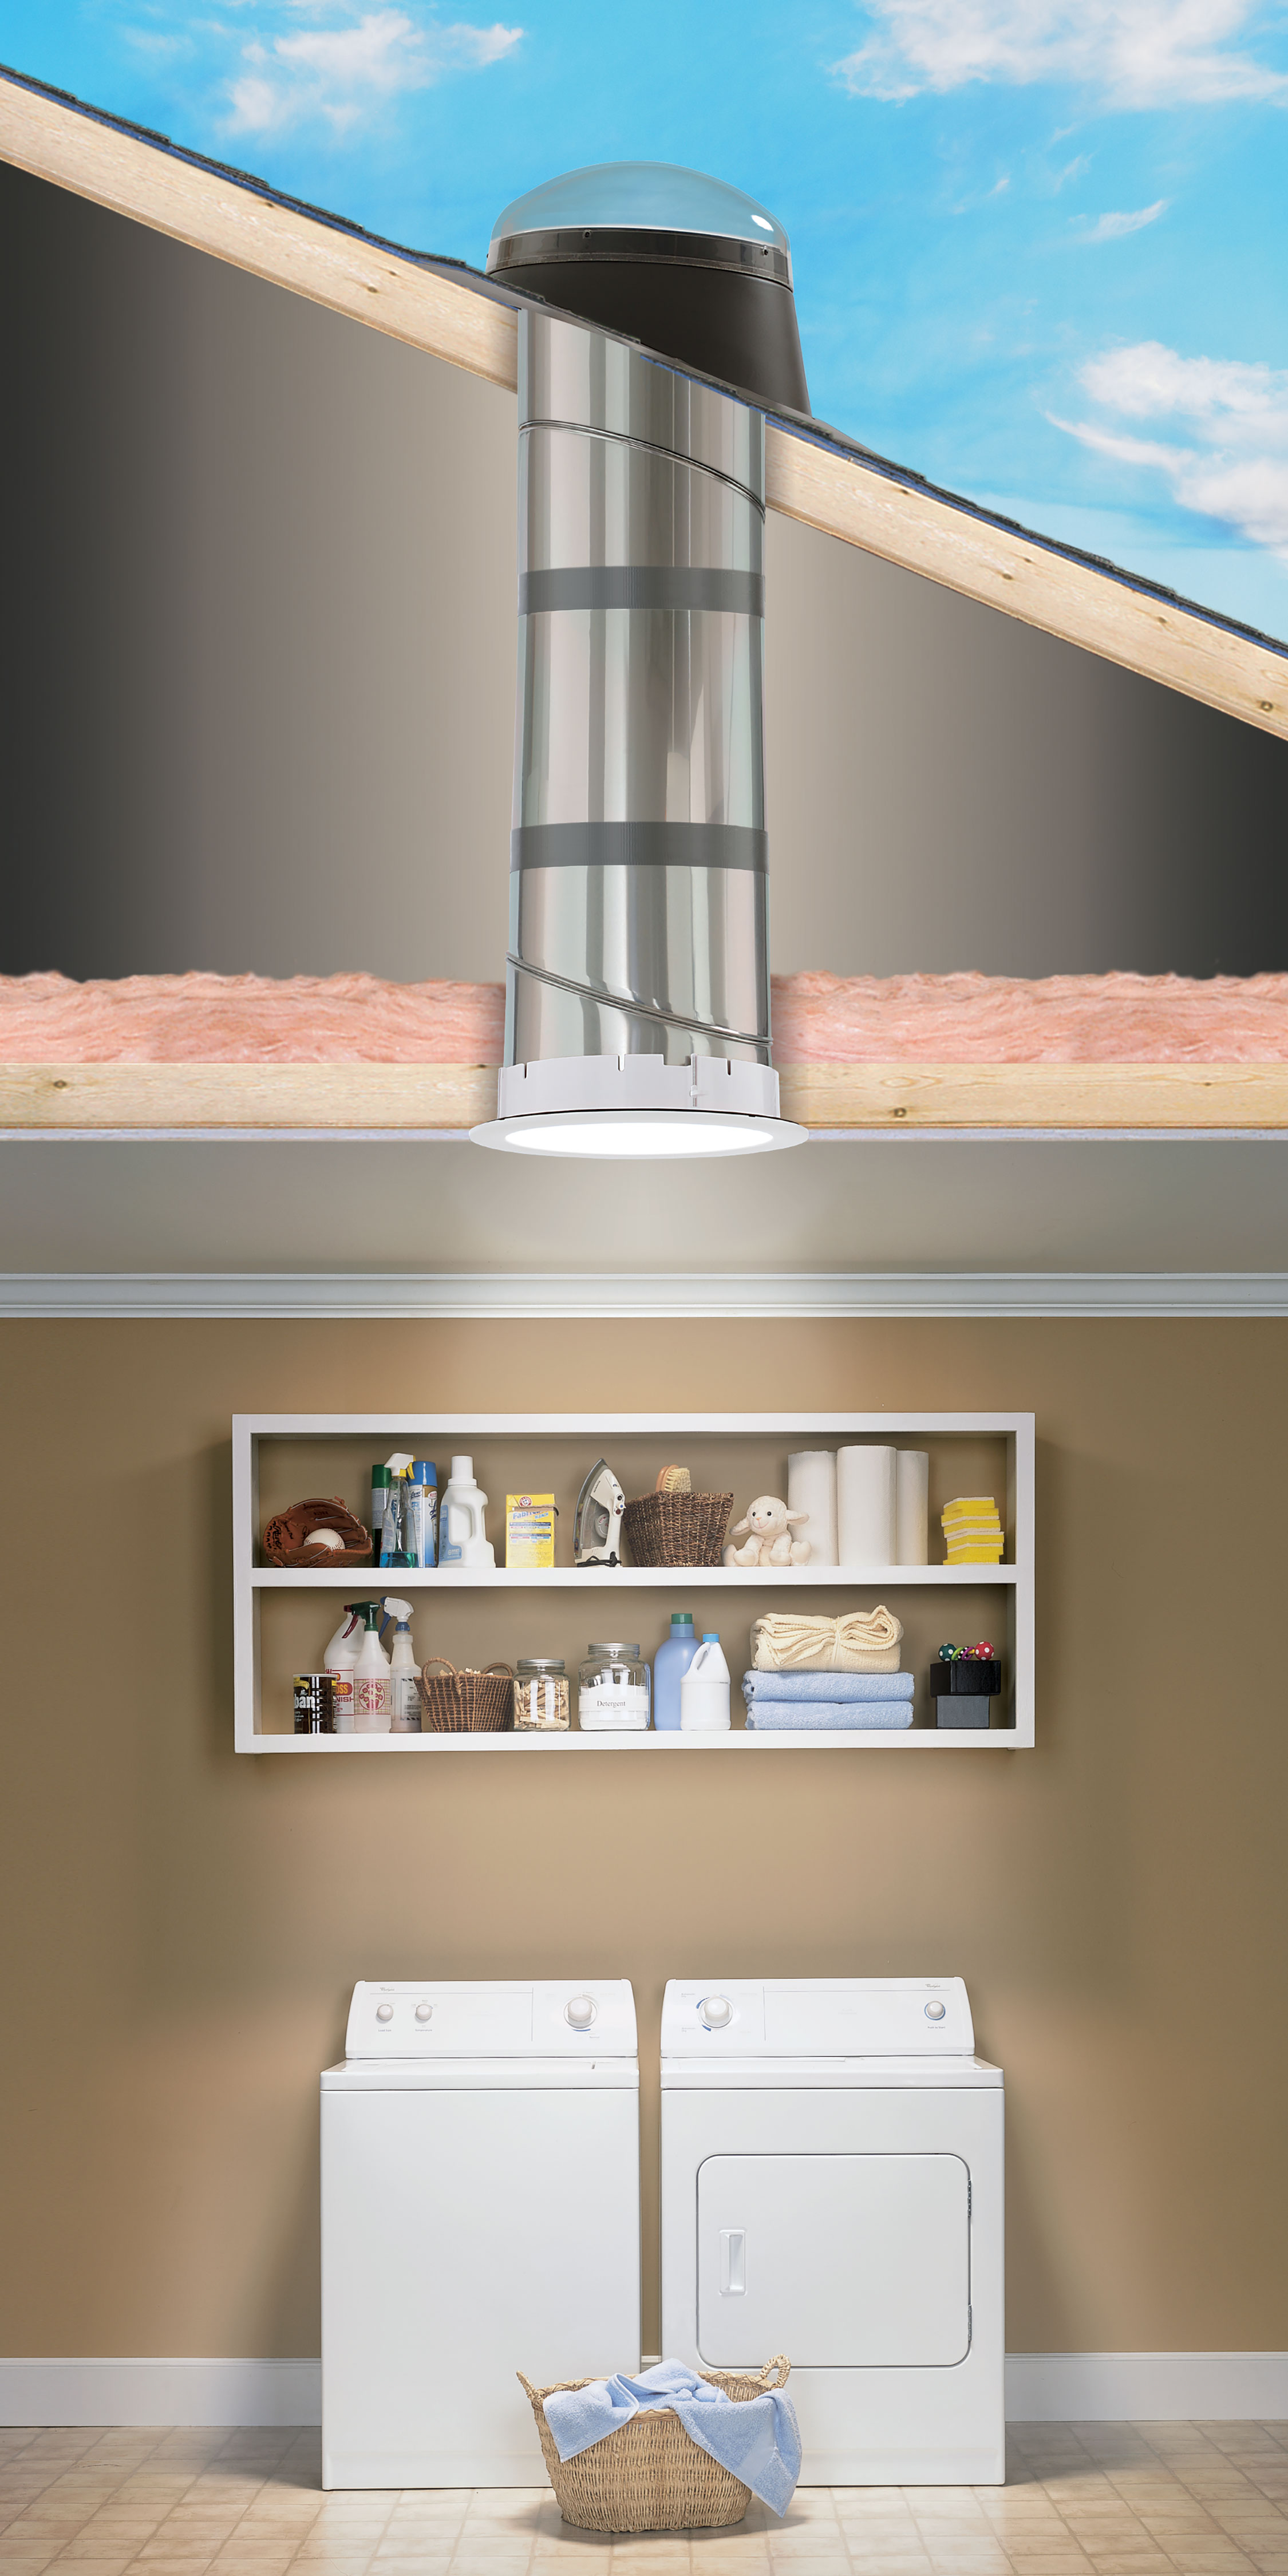
Image via VELUX
The installation is incredibly fast on the Sun Tunnels, too! While skylights are usually a multi-day installation (largely because of the drywall work involved), the installers were in and out of our house in less than an hour and a half to install the Sun Tunnel!
I’m so glad we have the experience with both Sun Tunnels and skylights, now! Our skylight is a complete show stopper and I would choose it a million times over for our bathroom. But, for this small little space, the Sun Tunnel (and the speedy tunnel assembly) was the perfect choice!
If you have more questions about Sun Tunnels, click here to learn more from VELUX!
How much does it cost to have a sun tunnel installed?
Installation and labor costs will definitely vary by region. Because we partnered with VELUX for this project, we did not pay anything for the Sun Tunnel or installation. But, here’s a breakdown of what the cost for our Sun Tunnel would have been:
- Product cost: $304
- Installation and labor: $400
So, the total cost for everything was $704. Which, if you ask me, is an incredible cost for getting ALL THIS LIGHT in the bathroom!
Oh, and a quick note – you might be eligible for a 26% federal tax credit on your entire VELUX Rigid Sun Tunnel skylight product and installation if you get it installed with a solar night light kit.
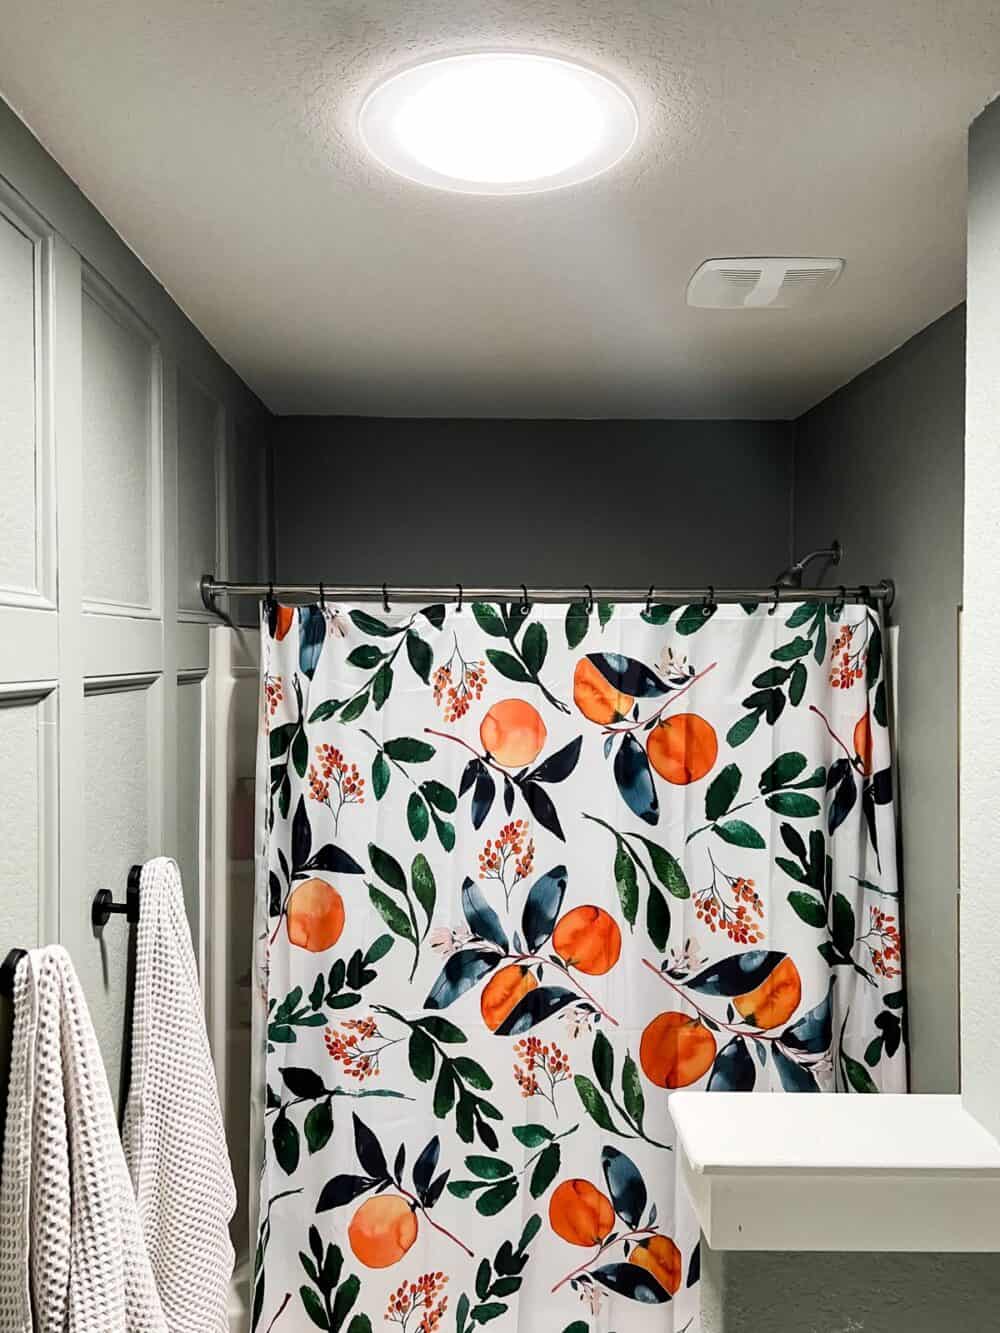
The solar night light is one of my favorite features. It’s installed on the inside of the tunnel and has a photovoltaic solar panel that charges its batteries during the day. When the sun sets, it automatically switches on and makes it bright enough at night to see just fine for late night bathroom visits without flipping the light switch, which is such a nice change of pace in this bathroom.
The federal tax credit applies to any solar powered product from VELUX. (Our primary bathroom skylights qualified, too!) So, be sure to look into that if you decide to move forward with one – the tax credit it will last through December 31, 2022.
sun tunnel details
A Sun Tunnel can be installed in a lot of different spaces, and there’s a lot of flexibility depending on what your attic space looks like! To make installation even faster, VELUX created the Flexi Loc system that cuts tunnel installation time in half! I was shocked at how quickly the installers worked and how fast and easy the whole process was.
Sun Tunnels are great for bathrooms, laundry rooms, hallways, closets, and more. If our upstairs hallway didn’t already have so much happening on the ceiling between the attic access, vents, and lights, I would definitely look into having some Sun Tunnels added there too! They even have an installer locator where you can enter your ZIP code to find a VELUX-certified installer near you.
If you have questions about the VELUX warranty, there’s a ton of detail right here. I know that can be a big concern for people, but skylight and Sun Tunnel technology has come so far since they were first used. They’re safe, effective, and they last.
How does installation work?
I was fascinated to watch the installation process of our VELUX Sun Tunnel Skylight. Here’s a quick breakdown of how it goes.
- First, the installer will head up to your attic to take measurements, check for attic obstructions, and mark where the ceiling and roof holes will go.
- Then, they’ll go up to the roof to install the top collar, the upper portion of the tunnel, lens, and flashing.
- Finally, they’ll head back inside to cut the hole in the ceiling. They’ll install the lower part of the reflective tunnel and connect the two pieces. At this point, the light coming in will be intense and bright. But, once they seal the tunnel seams, they’ll install the diffuser. They have a ton of different diffuser styles, and that helps tone the light down and spread it out in the room. Then, they add the trim and you’ve got yourself a brand new Sun Tunnel!
And just like that, you’ll have a ton of beautiful sunlight filtering into your space! They even have an installer locator where you can enter your ZIP code to find a VELUX-certified installer near you.
I’m beyond obsessed with having this Sun Tunnel in our bathroom. And, I’m just so thrilled with the difference it makes in here. There’s something about having more natural light that makes the room feel cleaner on a day-to-day basis. And, you know a boys’ bathroom needs all the help it can get. It also makes me so much happier every time I walk by or have to use that bathroom! It’s no longer a cave – it’s a beautiful, functional bathroom for our kids.
If you’d like to learn more about having a Sun Tunnel or skylight installed in your home, CLICK HERE for more information! VELUX is also running the Daylight to Night Light Sweepstakes from now through July 31st. One winner will receive two VELUX Sun Tunnel Skylights with solar powered night lights + installation! Just CLICK HERE to enter!
You always do such a great job explaining things. I never would have thought to do this but we have a bathroom just like yours in our kids bathroom. I’ve tried putting up a battery installed motion light but it never works for long. This would be the perfect solution! I’m surprised how affordable it is and excited about the rebate too, thanks for sharing about this.
Hello! Thanks for the explanation on this! Did you get the 14″ or the 10″? Thank you!
Ours is the 10″!