DIY Thankful Tree {A Gratitude Activity for Thanksgiving}
Last updated on October 28th, 2025 at 01:53 pm
If you’re looking for a way to help encourage gratitude in your family this holiday season, I’ve got you covered! This simple gratitude tree project is quick and easy, and your family will love it.
Every November, our family has a tradition of taking a few minutes each day to write down something we’re grateful for. It’s one of my very favorite traditions we have all year, and it really makes a difference in our attitudes. It’s such a sweet and intentional way to spend some time reflecting on all the things we have to be grateful for (it’s a lot!), and I think it sets such a great example for the kids!
You’ve probably seen some variation of a thankful tree (I’ve also seen them called Thanksgiving trees or gratitude trees) in the last few years. The idea is, you have a cute little decorative tree that you set out in the month of November, and every day you attach a little piece of paper with something you’re thankful for.
It’s a really simple little concept but man, what a powerful way to really slow down and appreciate everything you have!
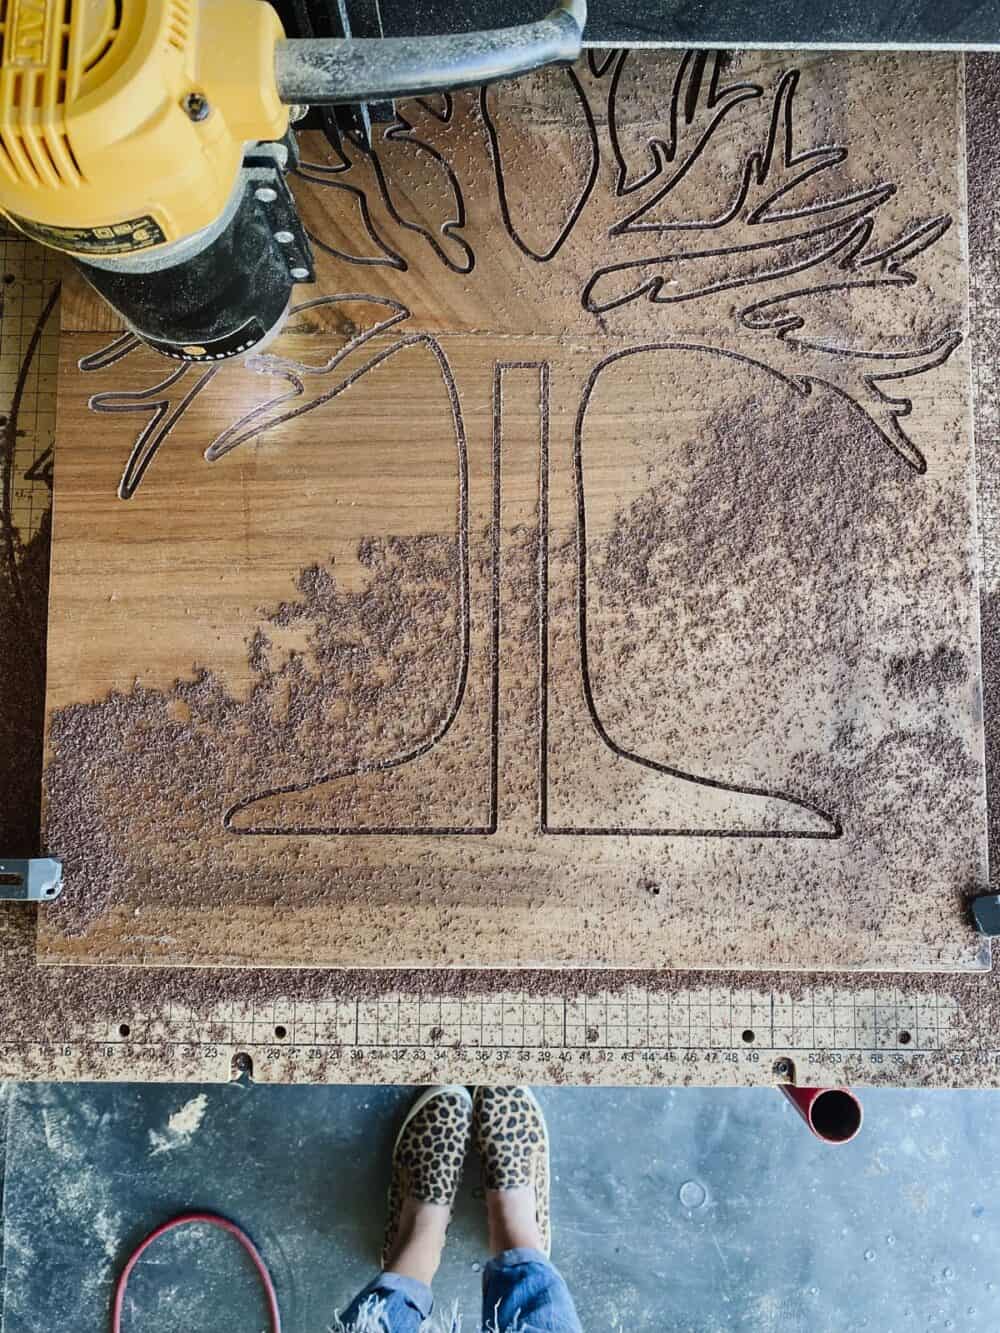
I wanted to create something really special that could be with our family for years and that the kids would really look forward to participating in. So, I used my X-Carve (a fancy CNC machine) to make this beautiful wood thankful tree. But, if you don’t have a big fancy tool for it, that doesn’t mean you can’t have one! Today, I’m showing you a bunch of options for really beautiful gratitude trees that you can make or buy for your own home.
Because, if I’m being honest, I think every single home would benefit from having one of these this time of year!

First up, a quick tutorial. If you are someone who happens to have an X-Carve or other CNC router and you’d like to make a tree of your own just like mine, read on. If not, skip the next section and just head on down to the part with all of the other options!
DIY Thankful Tree Using the X-Carve
Materials & tools
- Inventables X-Carve 3D Carver
- 1/8″ Straight End X-Carve Bit
- Thankful Tree SVG file for Easel
- Wood – You can really make it any size or thickness you want. I used 1″ thick cherry wood that I had left over from another project)
- Sandpaper (I used 120, 220, and 400 grits)
- Mineral oil
- Paper leaves or slips of paper
Cutting the Trees
You can click the link above for the SVG that I used for my project.
Be sure that your settings on the X-Carve are correct for the type and thickness of wood you’re using. When you are working with interlocking pieces like this, it’s vital that your measurements are exact. I recommend using calipers to measure the wood as you’re inputting all of the information.
You’ll also want to be sure to select the type of wood you have on the settings before carving . With an intricate design like this, it really matters how fast the machine is moving. If you have it moving too quickly, you can break off a branch of a tree. Or, the bit itself can break.
Allow both pieces to be cut by the machine, one at a time. It can take a few hours for each one, depending on how thick your material is and how large of a tree you’re making. So, be prepared to just keep an eye on things and wait it out for a while.
Finishing the Tree
After your two tree pieces have been cut out, gently sand any rough edges (along with the face of the trees). Be careful here, because those branches are pretty delicate!
I used my orbital sander on the face of the trees, mostly just on the trunk and the thicker branches. Then, I hand-sanded the edges of each of the branches to remove any little splinters or rough pieces. It’s tedious work, but it’s worth it!
Finally, you’ll want to oil or stain your tree. I just used Mineral Oil, but you could also paint, stain, or finish it however you’d like!
No X-Carve? No Problem.
If you don’t have an X-Carve, that doesn’t mean you can’t have a gratitude tree. I’ve got a couple of really great ready-made options for you.
If you want something really similar to my tree, you can find a really affordable version right here on Etsy. If you’d rather have a really quick and easy printable, I made one for you! Just click here for the printable gratitude tree.
Or, want an even easier option? Grab a big glass vase and some tree branches from your backyard. Trace some leaves on a piece of paper (or use a stencil), cut ’em out, and you’ve got yourself a thankful tree!
Leaves for Thankful Tree
Some of these options come with leaves, and some don’t. In the past, I’ve just cut out my own leaves with my Cricut (or by hand), but this year I grabbed some of the leaves below so it’s even easier.
- These pre-cut leaves come with twine to make your job even easier!
- This set comes with 12 colors!
- These look so realistic!
- Or, you can just buy some small slips of paper!
Filling Up the Thankful Tree

We use our thankful tree as a centerpiece on the dining room table all month long. Each night, when we sit down for dinner, we’ll grab a leaf and jot down something we’re thankful for. Sometimes we just have one person do it, sometimes we all do one. It just depends on how we’re feeling that day!
It would also look really cute in an entryway, or even on a fireplace mantel. Just make sure to put it somewhere where the entire family will see it regularly and be reminded to add to it!
It, of course, also doubles as Thanksgiving decor – be sure to have your guests fill out a leaf too! It’ll make a really fun Thanksgiving tradition you’ll want to re-create every holiday season.