
$100 Room Challenge Reveal
Last updated on March 1st, 2023 at 06:15 pm
Well, y’all we did it. Barely. As in, I finished caulking, touch up paint, and taking photos in this room just moments before I hit “publish” on this post, and the sink doesn’t actually work yet because Corey still needs to finish hooking it up.
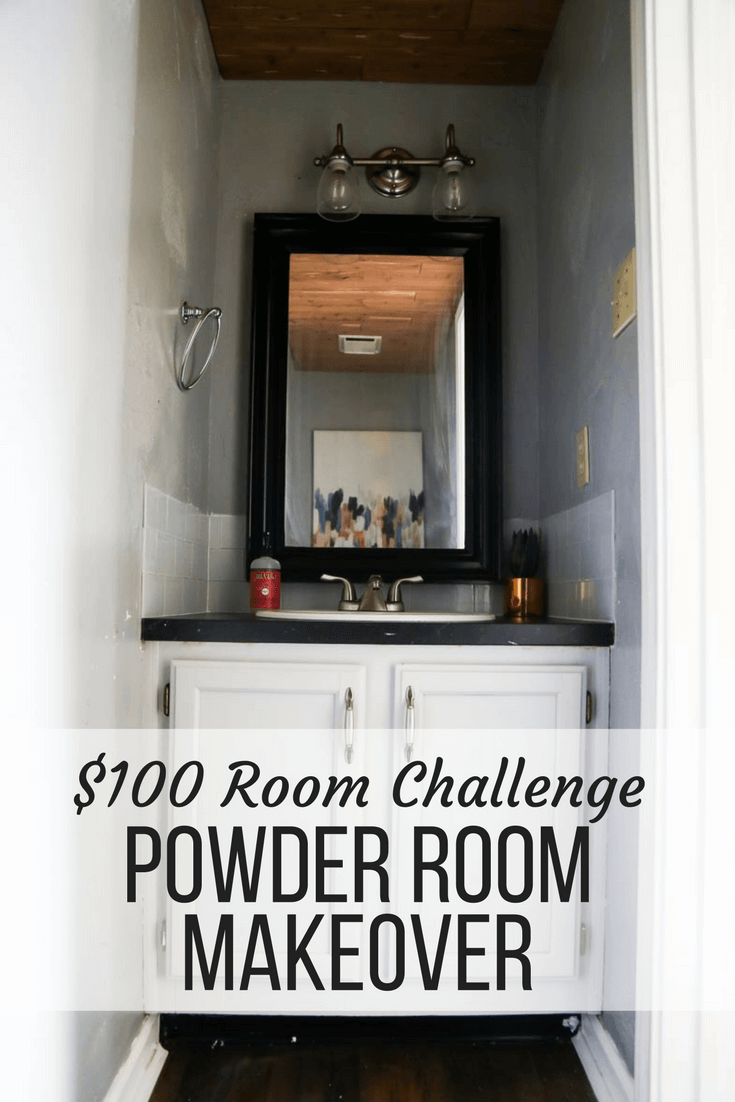
But the powder room is done!
And it’s a good thing we finished on time because we kind of blew through the $100 budget. Whoops!
Before I continue, let me explain. If you haven’t been keeping up, I took on the $100 Room Challenge with a bunch of blogging friends this month, which is a challenge where we all attempt to give a room a mini-makeover in just 4 weeks and with just $100. At the beginning of this challenge, I was feeling pretty confident I could pull it off because we had lots of supplies left over from previous projects, but we kept hitting problem after problem and in the end, we probably spent closer to $175 on the whole thing.
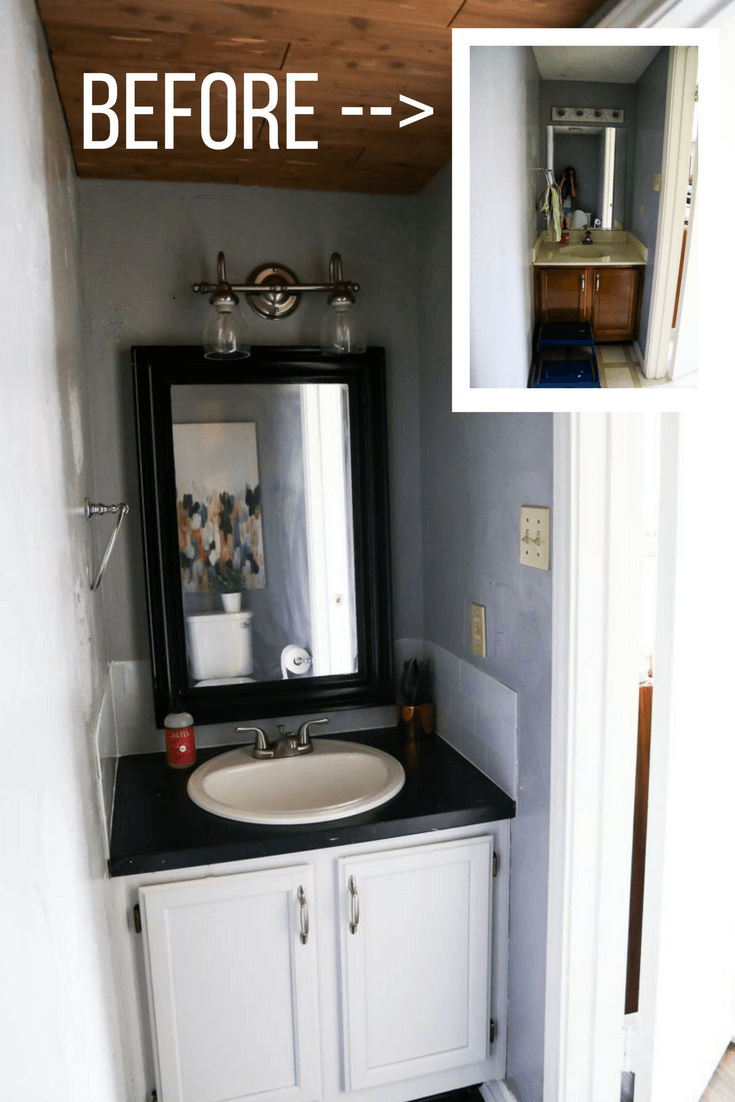
If you want to catch up on the challenge so far, you can see my intro post here (with all the befores and the original plans for this space), and you can see my post on how to paint cabinets here to see some of my initial progress.
And now? Well, it’s all done.
This post contains affiliate links. Click here to read my full disclosure policy.
Let’s talk about the changes since the last time I showed you this bathroom:
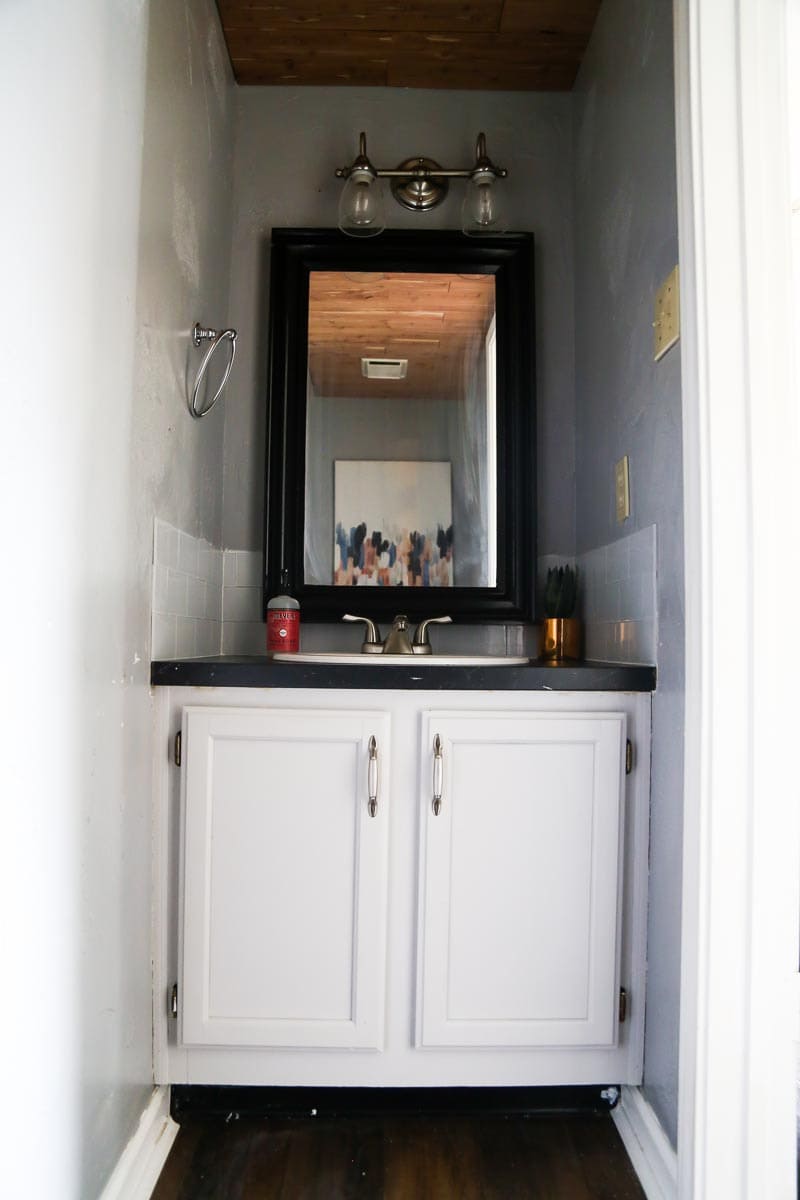
- We added the countertop. See this post for my (super simple) tutorial on how to change out a bathroom counter. We had planned on using a scrap from Jackson’s bathroom for this makeover, but realized at the last second it was too small. So, we headed back to IKEA and picked up the cheapest countertop they had (it was $69), which I actually really love the look of. We had a fun issue in this bathroom that we didn’t have in the other one, which is that the walls are slightly bowed. Thankfully, that’s nothing a little caulk can’t fix and the final product looks pretty great if you ask me!
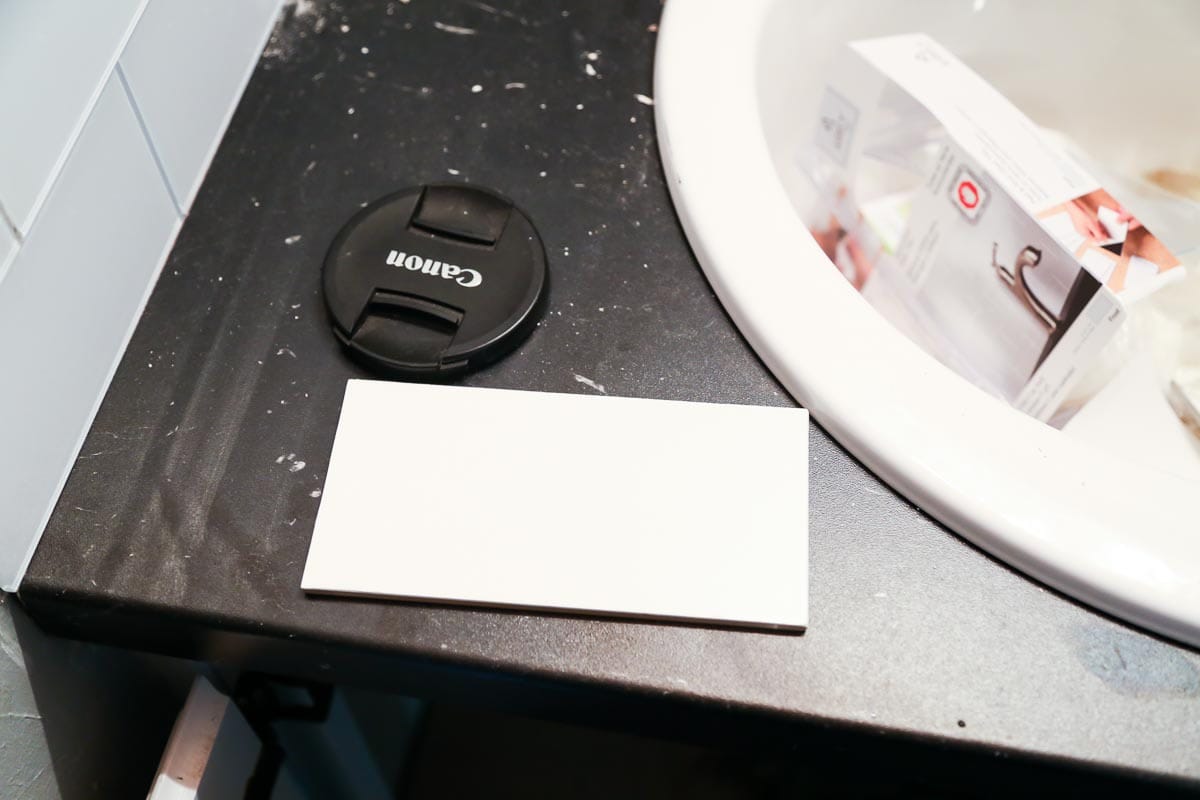
- I tiled around the sink. This is a project I got a ton of questions on when I did it in Jackson’s bathroom, so I’ll try to answer them here. These tiles are peel and stick. As in, they’re basically giant tile stickers. The ones we used are by Aspect (you can get them here) and we got them for free after attending Haven last year. I’ve had lots of questions about a tutorial for using them, but there really isn’t much to say. When you get the tile out of the box it looks like this on the back:
 All you to do install is peel the backing off…
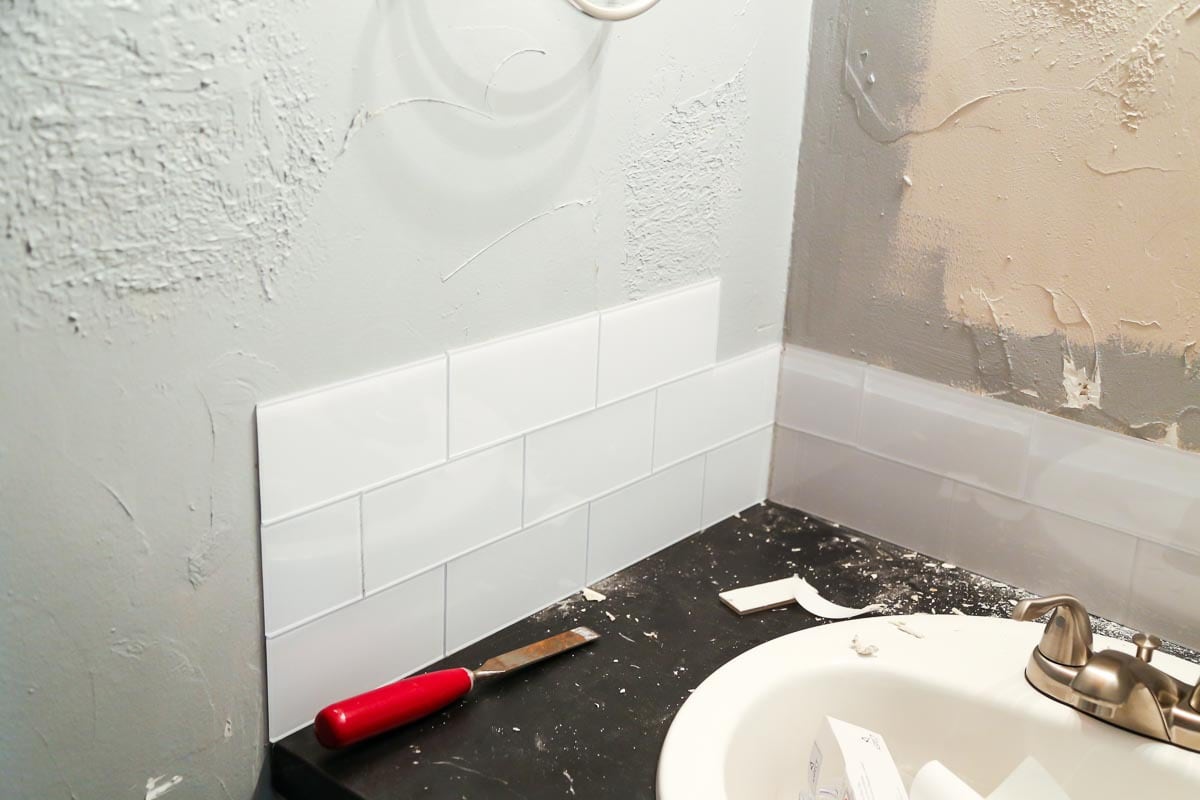
And stick it on!You can use a tile saw to cut this tile down just like you would with any other tile, though I did find that since they’re glass tiles, it takes a little extra care to prevent any breakage. I’m a total novice with the tile saw, though (before I used this tile in Jackson’s bathroom I had literally never even touched it) and I did this by myself, so it’s not that difficult! I originally wanted to tile all the way up to the ceiling, but since I was doing this at the 11th hour (seriously, I was doing it last night right before I went to bed) I decided to just let it go and do the same 3 rows of tile that I did upstairs.
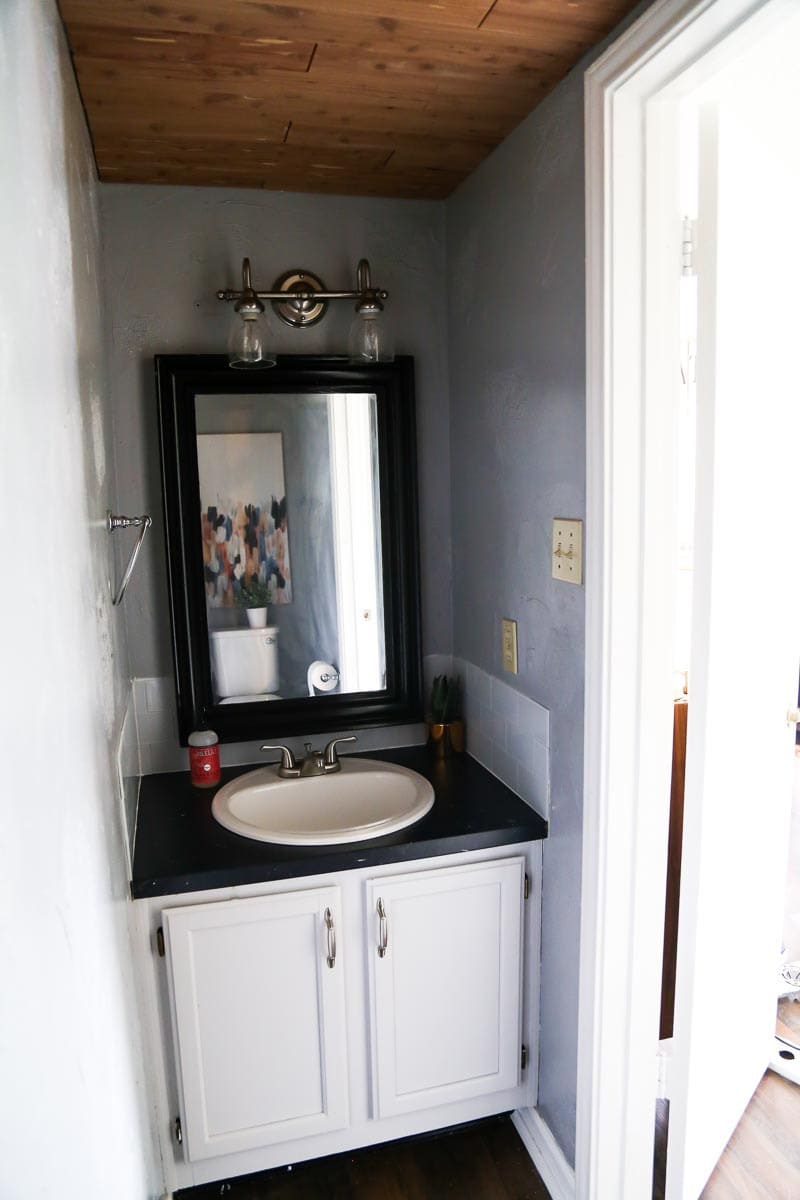
- We swapped out the sink, faucet, and the light fixture. All three of these together ended up totaling almost exactly $100. We went with basically the cheapest options our local hardware store had to offer, and I think they actually look pretty great! The sink is still not fully hooked up yet, but we’ll get that done soon.
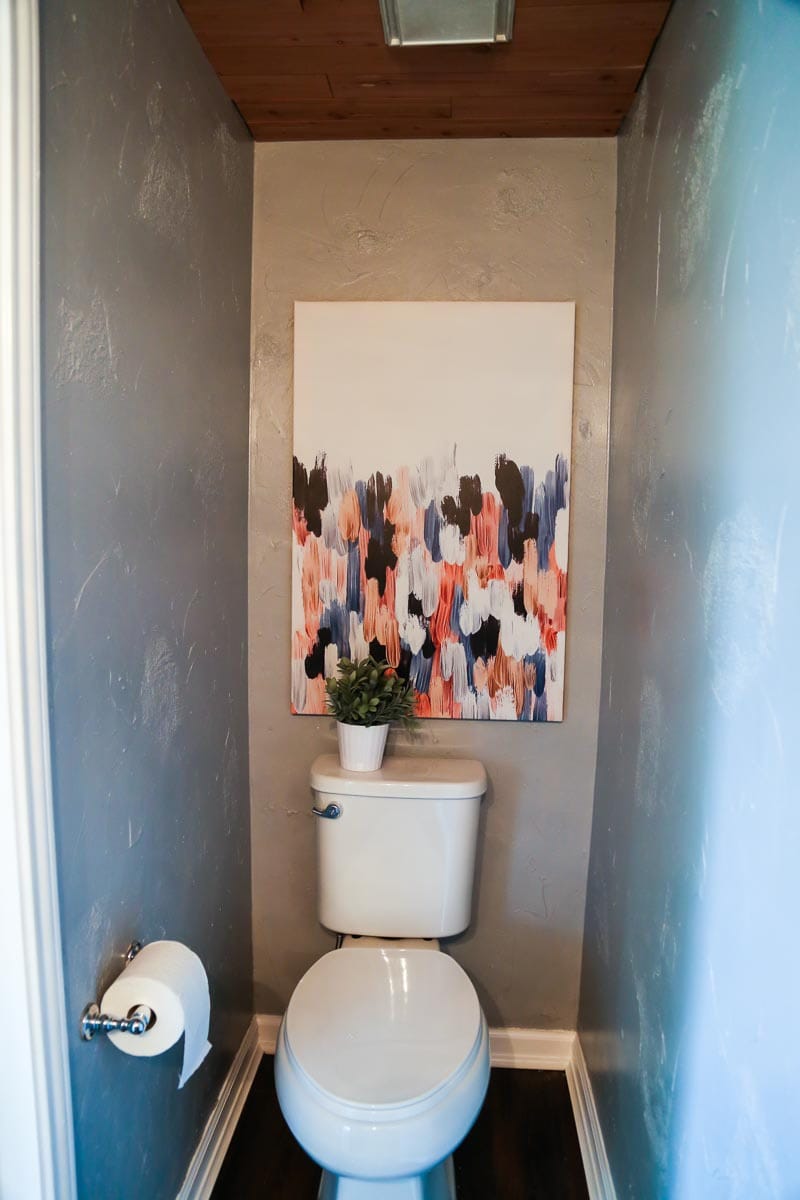
- I added a few accessories! Since I was obviously out of money to decorate at this point, I shopped our house to add a few fun decor pieces. I will probably end up taking the art right back down because we’re getting ready to list our house within the next few days, which means I’m depersonalizing and taking most of the decor down around the house anyway. But, if we weren’t selling, I think this might be the new home for this art (which, if you’re curious, was designed by my friend Lisa – you can check out her shop here!).
 All you to do install is peel the backing off…
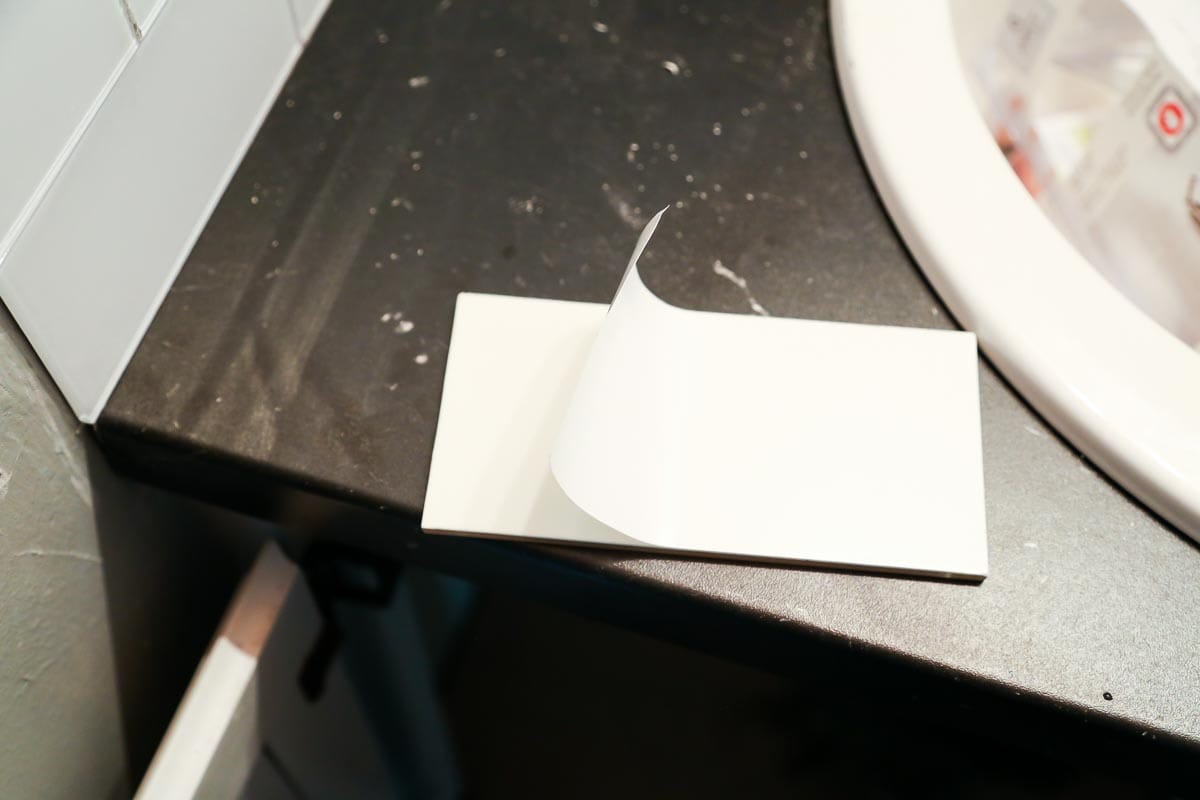
And that’s it!
In all honesty, I do feel like it’s a little deceptive to say that we made this room over for just $100. Because we’re getting ready to sell our house, we had a few other projects we were already doing anyway and didn’t count into the budget (like new flooring and baseboards and a new toilet). We also already had a lot of materials lying around (like paint, the wood for the ceiling, and the tiles) which would have made the project total add up quickly. We were out of pocket right around $175 for this, but if we had purchased everything new the total would be quite a bit higher.
If you want to try this at home, the most expensive part of this project is the tile (here’s where you can buy it on Amazon), which probably would have cost an additional $150 or so if we purchased it ourselves. You could easily do actual tile for much cheaper than that – plain ol’ subway tile is just a few cents per tile, so if you have the extra time and want to save money, that would be an easy thing to swap out to make things cheaper.
I had a blast doing this challenge and I can’t wait to take it on again in the future – although, next time it will be at a new house (which is equal parts exciting and terrifying)!
Be sure to check out all of the other fun room reveals today! It’s always amazing to see what can be done on such a small budget, and I love seeing the creativity of the other participants.
–>
Fantastic! I love the colours you’ve gone for. It has a sort of industrial feel that’s very cool.
What a difference! Love it girl! x
I love that peel and stick tile. Looks so easy to do (which is what I’m always looking for 🙂 ). Good luck with the sale of your home… and I hope you get to join the challenge again in a new space! So exciting!
It is SO easy!
Beautiful! It looks amazing!
Thank you!
It’s amazing the difference you can make in such a small room! I love the countertop and those glass tiles. The whole thing turned out beautifully!
Thank you!
It looks great! I’m so glad to know about the peel and stick tile – I might just have to give it a go sometime. What a great way to update your powder room right before listing your house!
It’s really great!
It turned out great! And even though you went over budget, $175 for all this is till pretty great. I think my favorite part is that ceiling – so awesome!
Thank you, Carrie!
It looks great!
Thank you!
Peel and stick tile is such a thrifty easy option. I love all those little “cheats” that can make such a big difference. Good work!
I LOVE it!
I love the changes! That new countertop is so pretty! I love the art, too!
great job getting it done on a budget and on a tight schedule. I know that y’all are doing so much to get ready to sell and I think that this looks great!
I can’t believe the difference it makes! Love the light above the mirror!