5 Ways to Use DAP’s 3-in-1 Repair Sticks Around the House
Raise your hand if you have about a dozen little places around your house where you have furniture, decor, or anything else with a chipped finish. You know what I’m talking about. Those cabinets that the kids are always bumping. That one chair that doesn’t need a full paint job but looks pretty worn. The frame on your wall with a giant scratch. We’ve all got them all over the house and I don’t know about you, but it takes me foreeeeeever to get around to dealing with them!
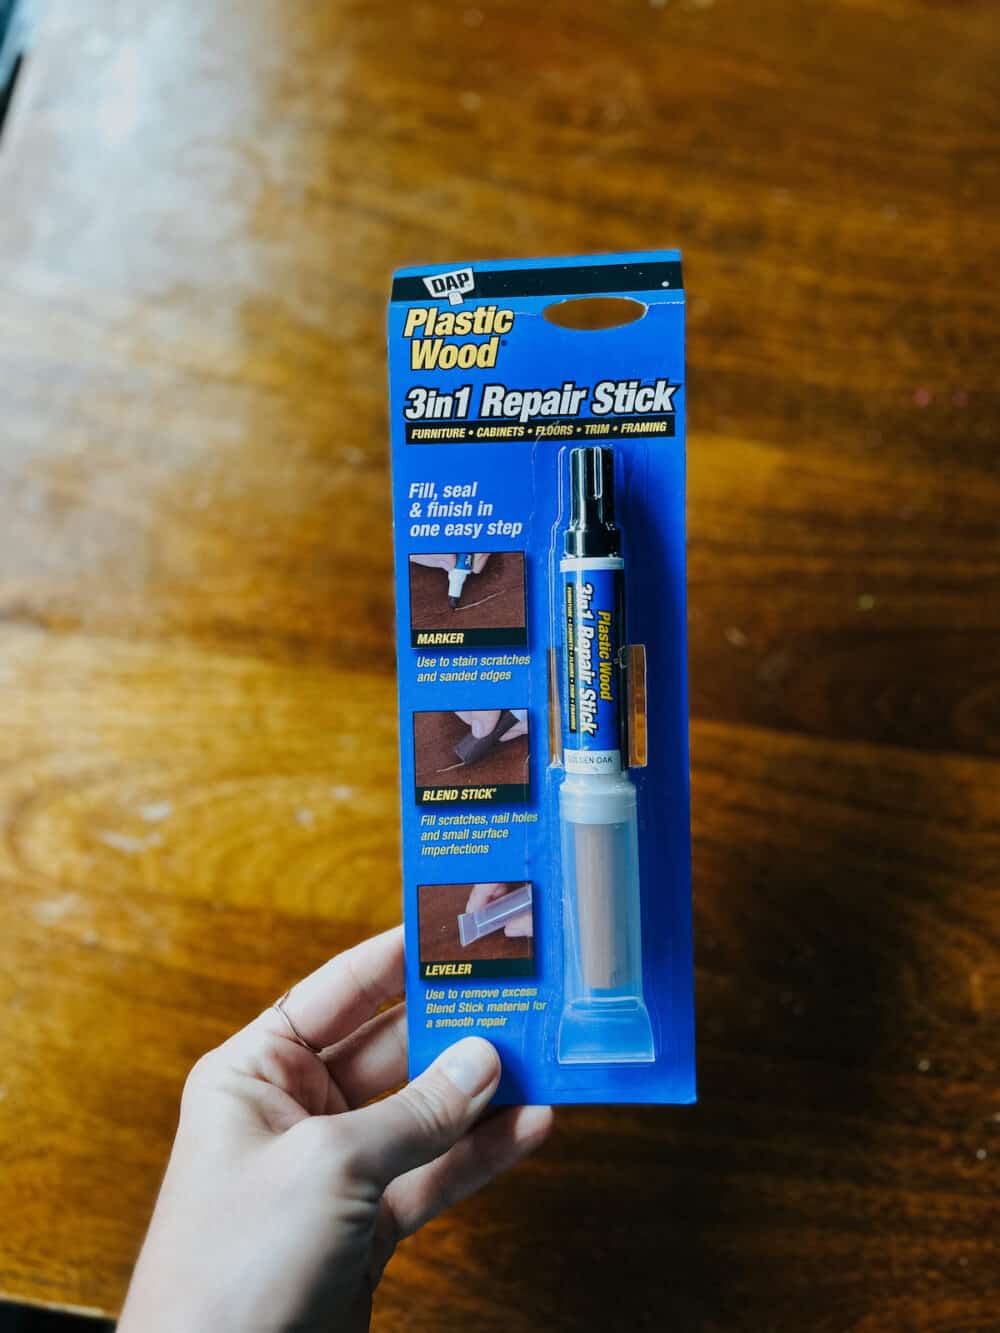
Enter DAP’s Plastic Wood 3in1 Repair Sticks. These little things make every single touch-up job so much easier. And the best part the marker is formulated with stain AND finish so it’s a one-step process to repair AND protect your finish. Today, I’m going to show you five little ways I used them around my house to deal with those pesky little issues. And maybe (hopefully!) I can inspire you to knock a few out around your house, too!
What is a 3-in-1 Repair Stick?
Let’s start by breaking down what the Repair Sticks are. Basically, it’s a super simple way to repair scratches, nicks, and dents in anything around your home. It works for cabinets, furniture, trim on walls, baseboards, doors, and even floors!
It has two sides. The Marker side is basically a stain pen that allows you to repair chips in stain or areas where there isn’t necessarily a scratch but the finish has been removed. The Blend Stick side is great if there’s a small scratch or dent – it can fill it in slightly and make things level, while also matching the color.
They come in lots of colors that will basically cover anything you’ve got around the house. They have created them in most really popular shades so it should be easy to find something that works for you.
Now, let’s get into how I use them around the house!
How I Use DAP 3-in-1 Repair Sticks
1. On Our Dining Room Table
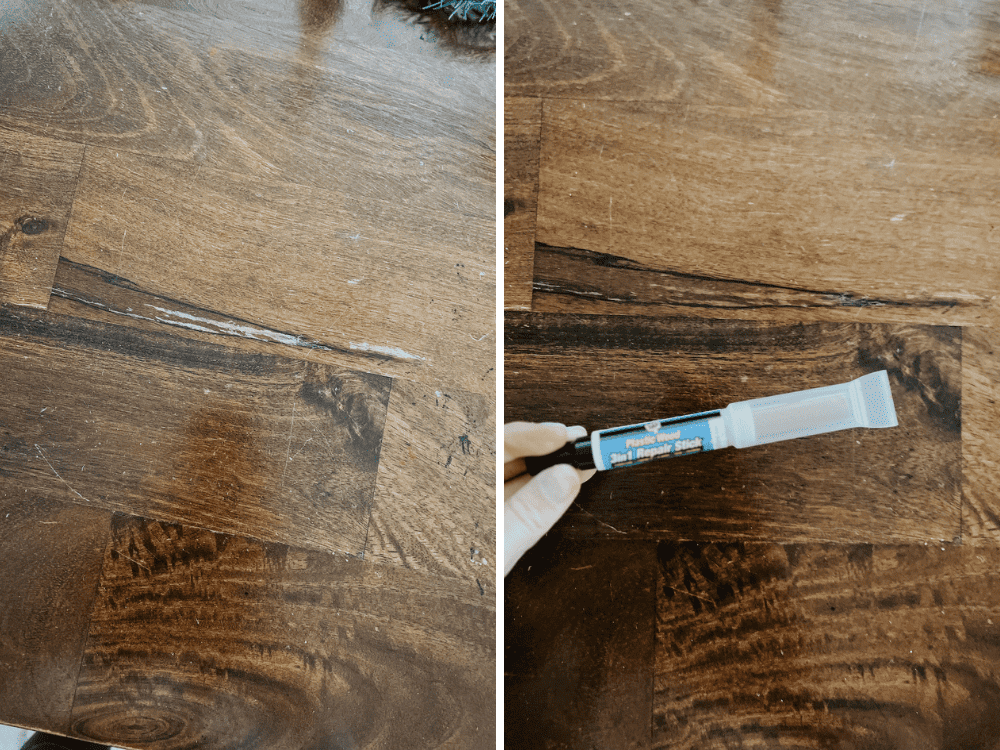
Our dining room table sees a lot (and I mean a lot) of use. We eat there almost every night, it’s where the kids do homework, arts and crafts, and play games, and occasionally the dog decides to climb on it to try to steal some food when we aren’t looking.
Needless to say, it gets beat up. I used a Golden Oak 3in1 Repair Stick on it, though, and some of the more noticeable scratches have basically disappeared!
Here’s how it works:
- Start by cleaning off the surface.
- Choose if you want to use the Blend Stick side or the Marker Side. For this, I was using mostly the blend stick, since we have some actual scratches on the table.
- Rub the blend stick into the scratch until the area is completely filled.
- Remove any excess filler with the leveler cap. Then, buff the area with a lint-free cloth until it’s blended right in!
Here’s a before and after to show how it works:
2. On My Wood Shelves
I’m not sure when this shelf got a big ol’ chip in it, but it’s been staring at me for months now and I kept ignoring it. I’m sure we bumped into it at some point re-arranging things in the house, and now it was a noticeably different color from the rest of the shelf.
For this repair, I used the marker side of the stick. Here’s how it works:
- Clean your surface
- Shake the Repair Stick well, then open the marker side.
- Relieve the pressure by depressing the tip a few times on a paper towel or spare piece of paper.
- Once the stain starts flowing, apply it to your wood on areas where it needs to be repaired. Allow to sit for a minute, then wipe off the excess using a lint-free cloth.
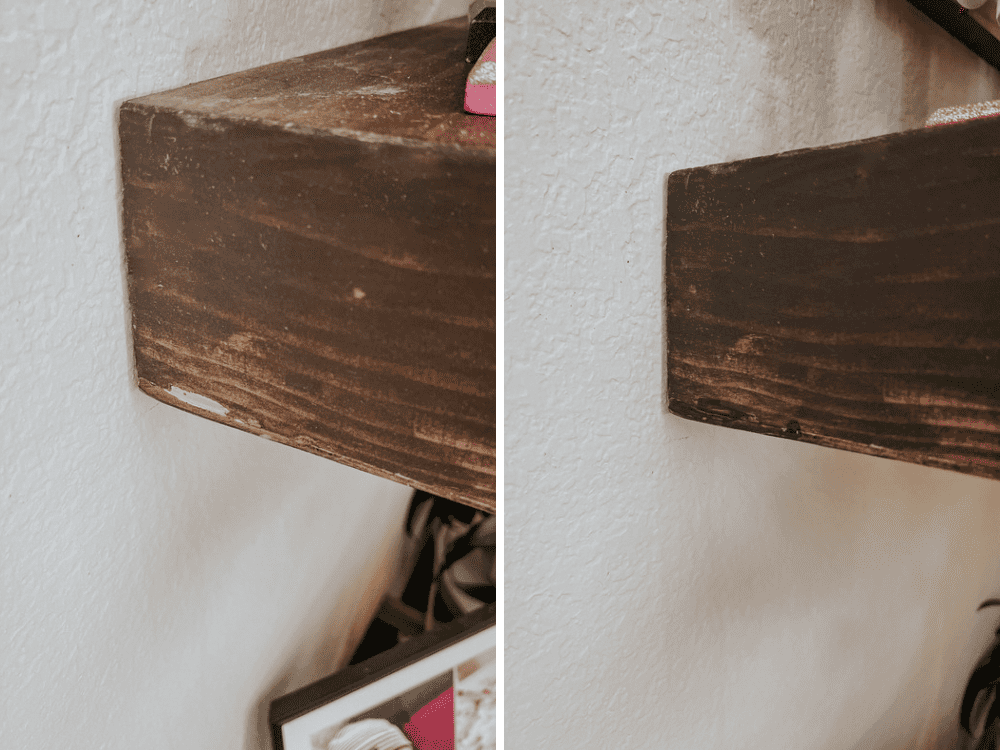
Pretty impressive, right?!
Now that you’ve seen how both sides of the Repair Stick work, here are the other ways I used it around the house.
3. On Our Bar Stools
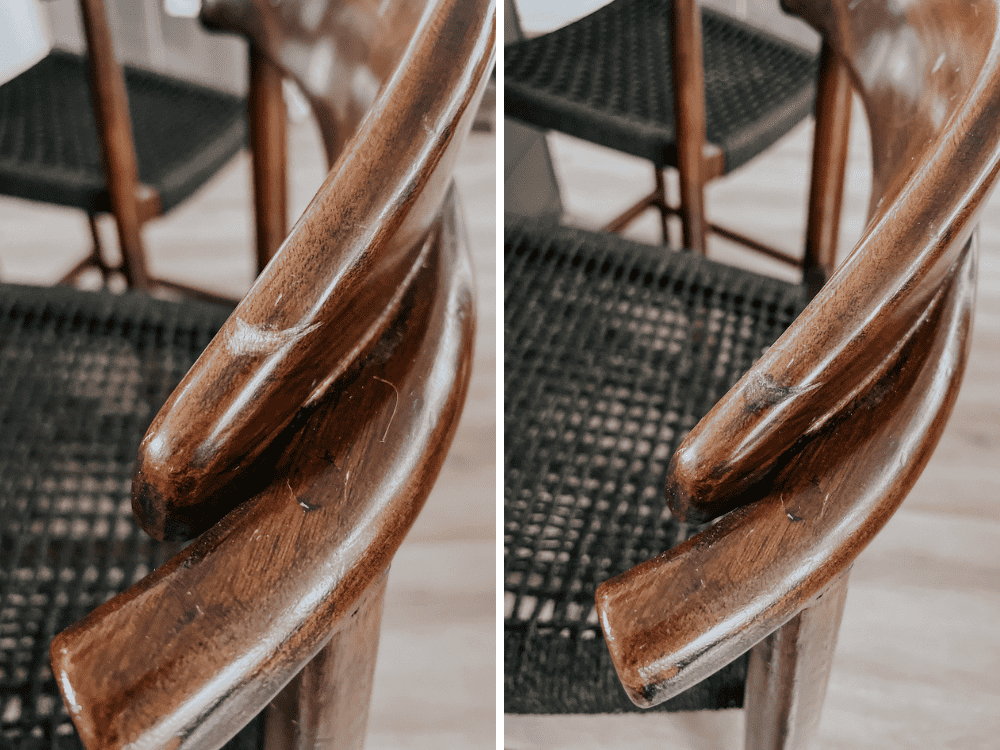
A few months ago, Grant knocked one of our kitchen barstools over and it got a pretty large chip on the back, along with a big crack. Eventually I’ll need to replace them, but for now I just wanted the damage to be a little less obvious. Thankfully, the repair stick worked like a charm! I used both sides on the chair to blend the chip right in, and it’s not perfect but it’s notably better, and that’s enough for me!
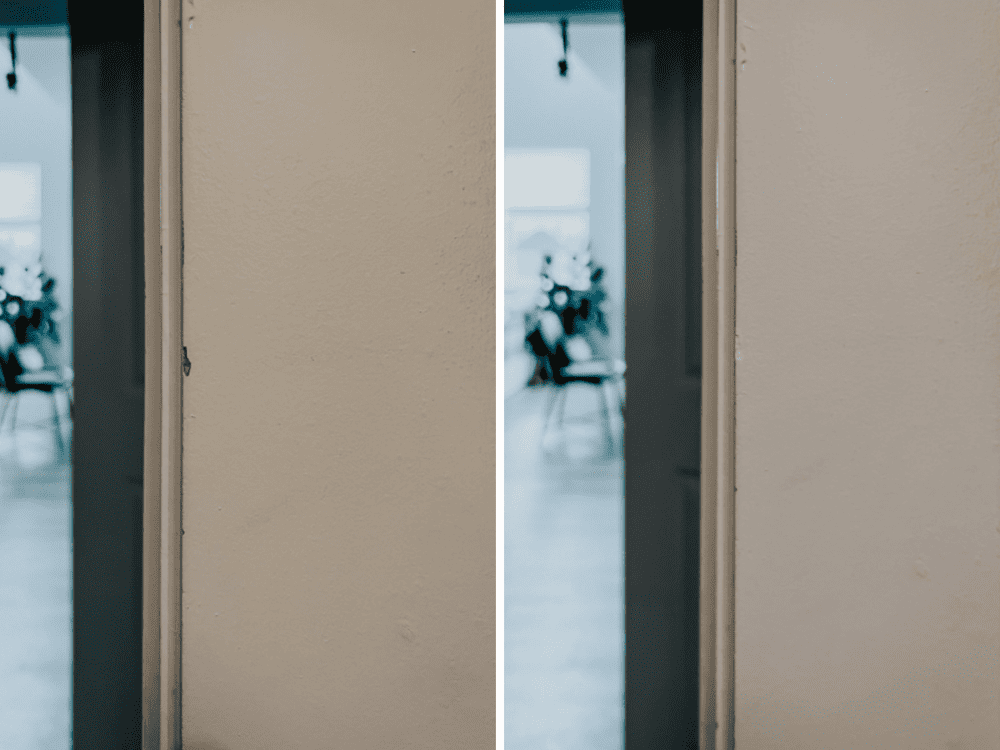
4. On Our Trim
If you live with kids I probably don’t even need to explain this, but several of the doors around our house and the trim around them have some chips and imperfections on them.
I’m constantly reminding my kids that doors are not toys but they’ve yet to actually get the message.
So, I used my white Repair Stick to touch up a few places where things were looking rough, and it cleaned it right up! This is one of those things that reminds me the impact of finally taking care of those annoying 5-minute projects around your house. It can be hard to just get started on them, but once you finally knock them out, you’ll be so glad you did,
5. On My Cabinets
White cabinets can be a pain to keep clean, but it’s even worse if they get chips. The wood underneath is so obvious when the rest of it is painted white. We had a spot on a cabinet near our back door that had a chip that has been bothering me for weeks.
I took the time to patch it up with the 3in1 Repair Stick and now I don’t even notice it! It’s not perfect (I probably could have used the fill stick a tad more), but it’s a major improvement.
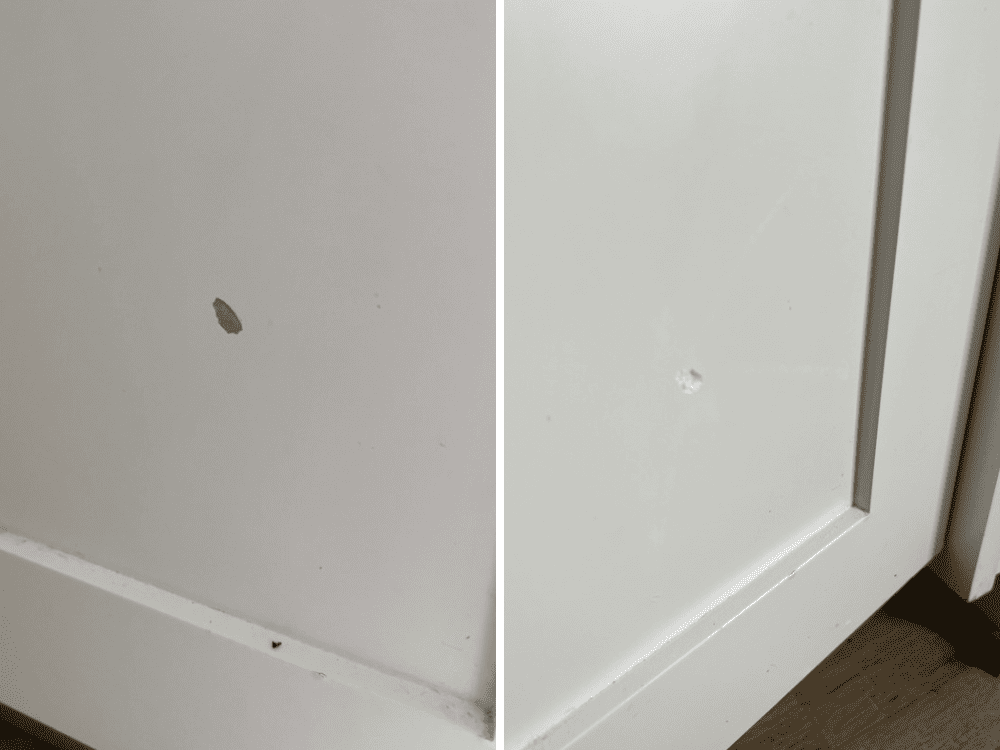
It looks so (so!) much better, and it took me no more than 5 minutes from start to finish. It doesn’t get any easier than that.
And there you have it – five super simple but incredibly impactful ways to use DAP’s 3-in-1 Repair Sticks around your house. I’m sure you can think of a zillion more for your specific home. Kitchen cabinets, chipped floors, furniture, picture frames…the options are endless!
I can’t wait to hear how you use it in your house. here’s to one more annoying project crossed off the ol’ to-do list.
Click here to grab yourself some 3-in-1 Repair Sticks for yourself!

I really appreciate the info on 5-1 sticks