Upstairs Hallway Board & Batten
I find hallways difficult. Just me? It’s an awkward stretch of space with lots of doors and things (vents, attic access etc). Some hallways are great and lend themselves to beautiful makeovers…but others? Like mine? They’re just plain hard.
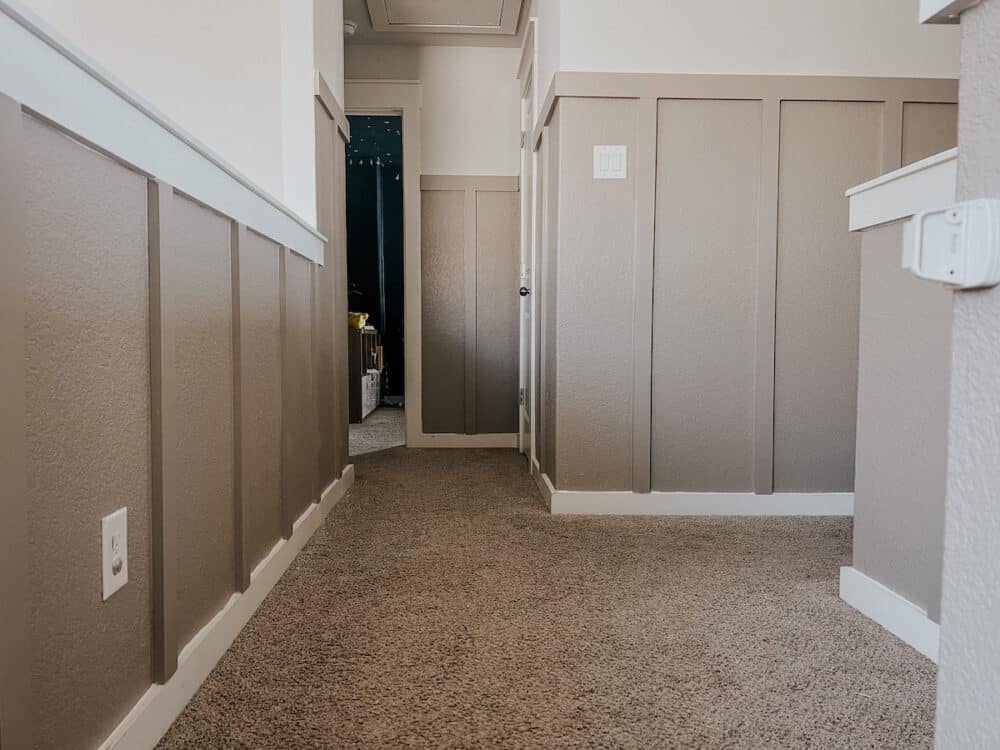
Ever since we moved into this house, I’ve been dreaming about how I want to spruce this space up. I even wrote a blog post last year mulling over a few ideas! And, after alllllll the thinking/planning/fretting, I finally made a plan. And after two days of work, our upstairs hallway has the most beautiful board & batten wall treatment that makes me SO HAPPY!
This post is sponsored by DAP.
Hallway Board & Batten Wall Treatment
I’ve installed board & batten multiple times throughout the years. Some people call it dated, but board & batten has been used forever and ever and it is one of the theeeee most classic trim treatments around. I will die on this hill. It works well with modern home styles and more traditional home styles. It’s gorgeous, it’s timeless, and it’s always a good choice.
When I was debating wall treatments for this space, I wanted something that would be easy to start and stop without it looking clunky. I wasn’t sure where I wanted it to end, but there isn’t a super natural stopping point anywhere, so it was important that it was a treatment that would look ok if it isn’t everywhere. I also wanted something that wouldn’t be visually overwhelming and would help make this kinda cramped hallway feel a little more expansive.
Board and batten is perfect for that – all the vertical lines help draw your eye up and make the space feel bigger! And, it’s really flexible with start and stop points, and works great as an accent wall or a whole room treatment. It’s super flexible, and did I mention it’s timeless? Because it is.
Board & Batten Installation
I’ve written a few tutorials on board and batten installation over the years, so I’m not going to go into too much depth. I’ll link aaaaaall of those posts for you if you want more details. What I will do, though, is give some detailed tips and tricks to help you get started. If you need more, please click on the links in the box below for answers to all of your questions!
- Plan Your Spacing FIRST! Spacing for your vertical pieces should always be planned wall-by-wall, and before you do any actually installation. If you’re working in a full, regularly-shaped room, your spacing should be equal on every wall. But, on something like this with tons of little wall areas to work with, spacing may change! For example, on the small slivers of walls between doors, I wanted the vertical pieces to be centered. So, technically that spacing is smaller than on the longer stretches, where I spaced the vertical pieces 16″ apart. I looked at every wall individually and planned the spacing for it based on what would look best overall. There aren’t any hard and fast rules here, just trust your gut!
- Use the Rules of Thirds! Trying to figure out where to put your horizontal board? Split the room into thirds – if you want shorter board and batten, do it 1/3 up the wall. If you want taller, do it 2/3! Again – this isn’t a science. My horizontal board is slightly less than 2/3 up the wall, but it’s close. You can use this rule to start, and adjust based on what your preferences are!
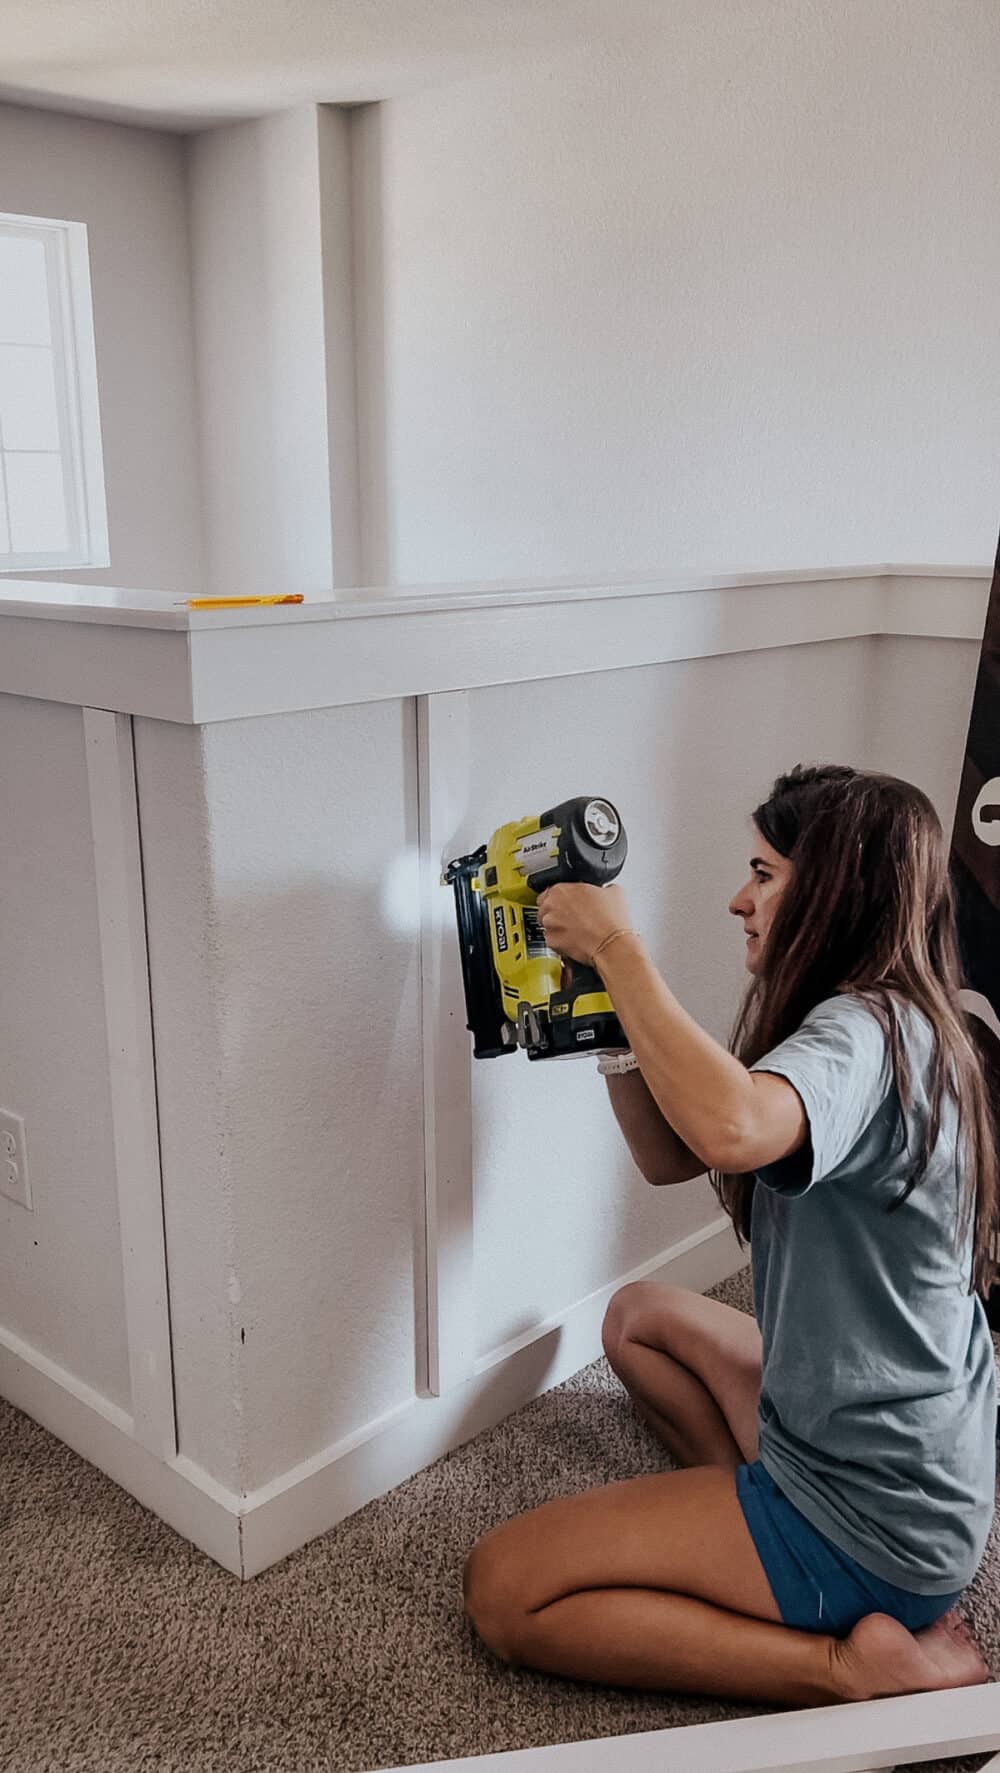
- Nail in the Middle First! When you’re installing your vertical boards, start by measuring the spacing and putting one nail in the middle of the board. Then, grab your level and shift the board until it’s sitting straight up and down before you nail it the rest of the way in. This is way easier than trying to get the board plumb first – just get that first nail in to hold it in place!
- Here’s my sizing formula: For my top horizontal board, I use a 1×4. For my vertical boards, I use a 1×3. If I’m adding a small “shelf” board on top of the horizontal board, I use a 1×2 for that! You don’t have to follow this formula – you can do the boards all the same size, or even do a more drastic sizing difference. But, this is what works well for me!
- You Don’t Have to Glue! A lot of people worry that if they’re installing trim, they have to use construction adhesive on the back. But, really, you don’t! I’ve installed tons of trim treatments and most of the time I just rely on nails and caulk to hold things in place. And guess what? It works great! I try to angle my nails as I put them in the wall so that they help hold things closer in place (extra points if you angle nails close to each other at opposite angles – one up and one down). It works like a charm and I’ve never had an issue.
Related posts
Board & Batten Installation
Finishing Work
Once you’ve installed the board and batten, the next step is the fun part. Finishing and painting always feels so tedious, but the payoff is SO worth it!
First up, you want to use caulk on all of the spots where two planes meet. For example, you’ll caulk all of the spots where a board is meeting the wall. This helps create a great seal between the board and the wall, helps hold things in place, and makes it look so much more finished.
Caulk is one of my very favorite steps in any project because it’s really when things go from looking a little wild to looking so good.
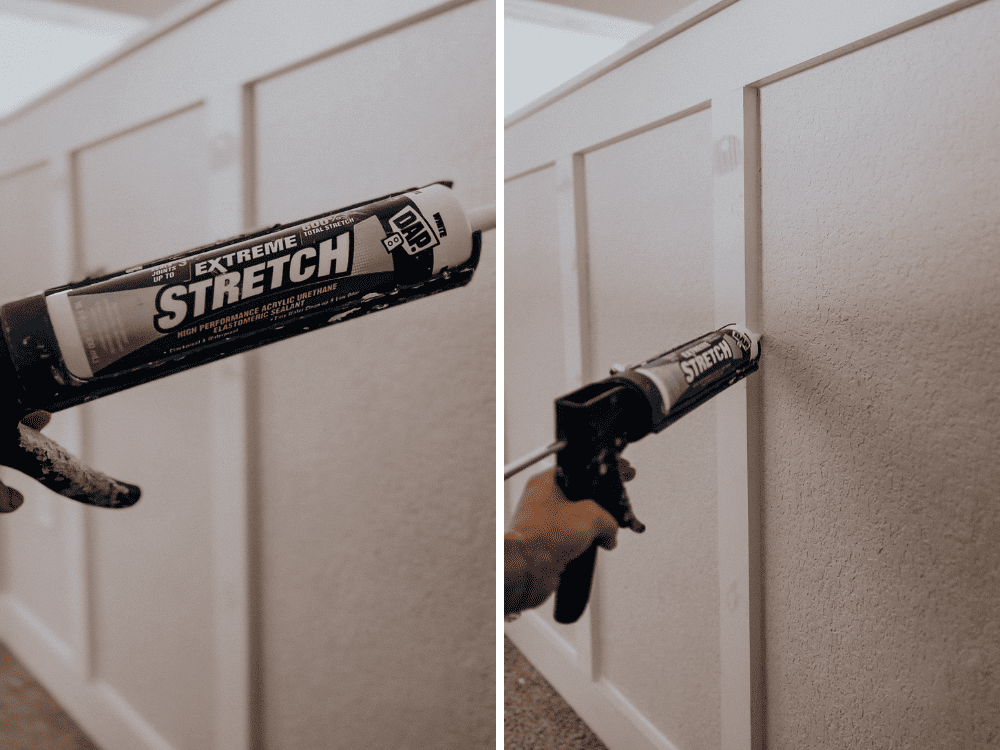
For this project, I used DAP’s Extreme Stretch caulk. It’s a really versatile option and I’ve been using it a ton lately. It’s formulated to stretch up to 600%, so it is practically guaranteed not to crack or lose adhesion! It is a great choice for any sealing project, it’s waterproof, and it’s paintable in just two hours. Doesn’t get much better than that!
After caulk, you’ll use wood filler on all of the vertical planes. This is where two boards meet each other or where you need to fill nail holes. For this part, I used my go-to – DAP’s Professional Wood Filler. I find it to be so reliable and easy to use!
The Finished Product
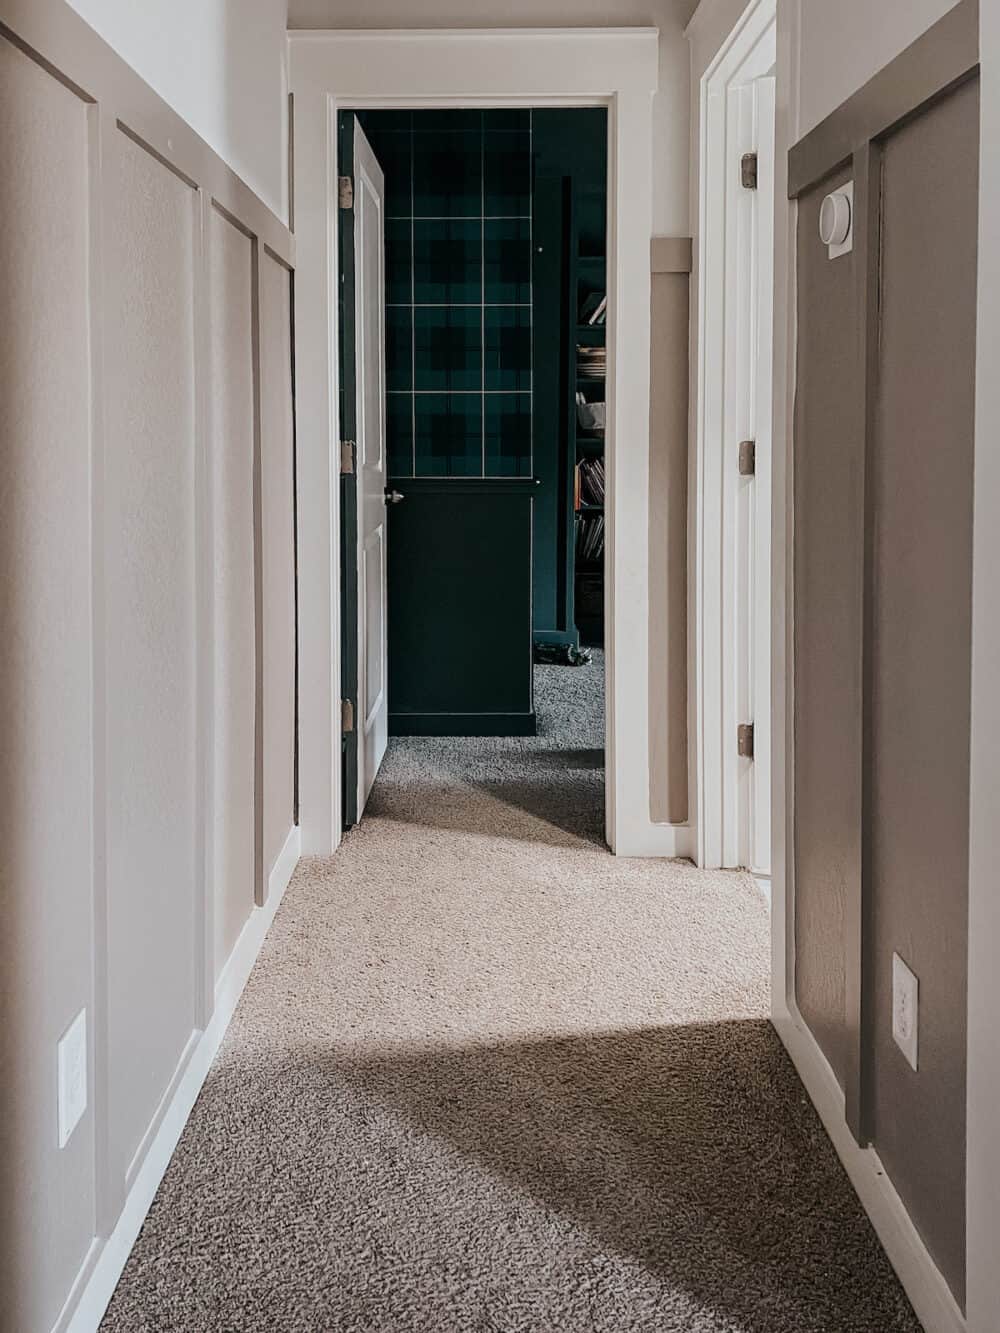
Once all of the finishing work was done, I painted! I used Perfect Greige by Sherwin Williams, and I loooove the look. It’s so warm and welcoming, and it really transformed how the entire upstairs hallway feels.
I was a little worried that this type of project would make the upstairs hallway feel visually overwhelming or crowded. But, it really did the opposite! It went from feeling like a dark and weird space to one that really welcomes you in.
I’m still brainstorming all sorts of ideas for what else I can do up here, but this feels like a really great start!
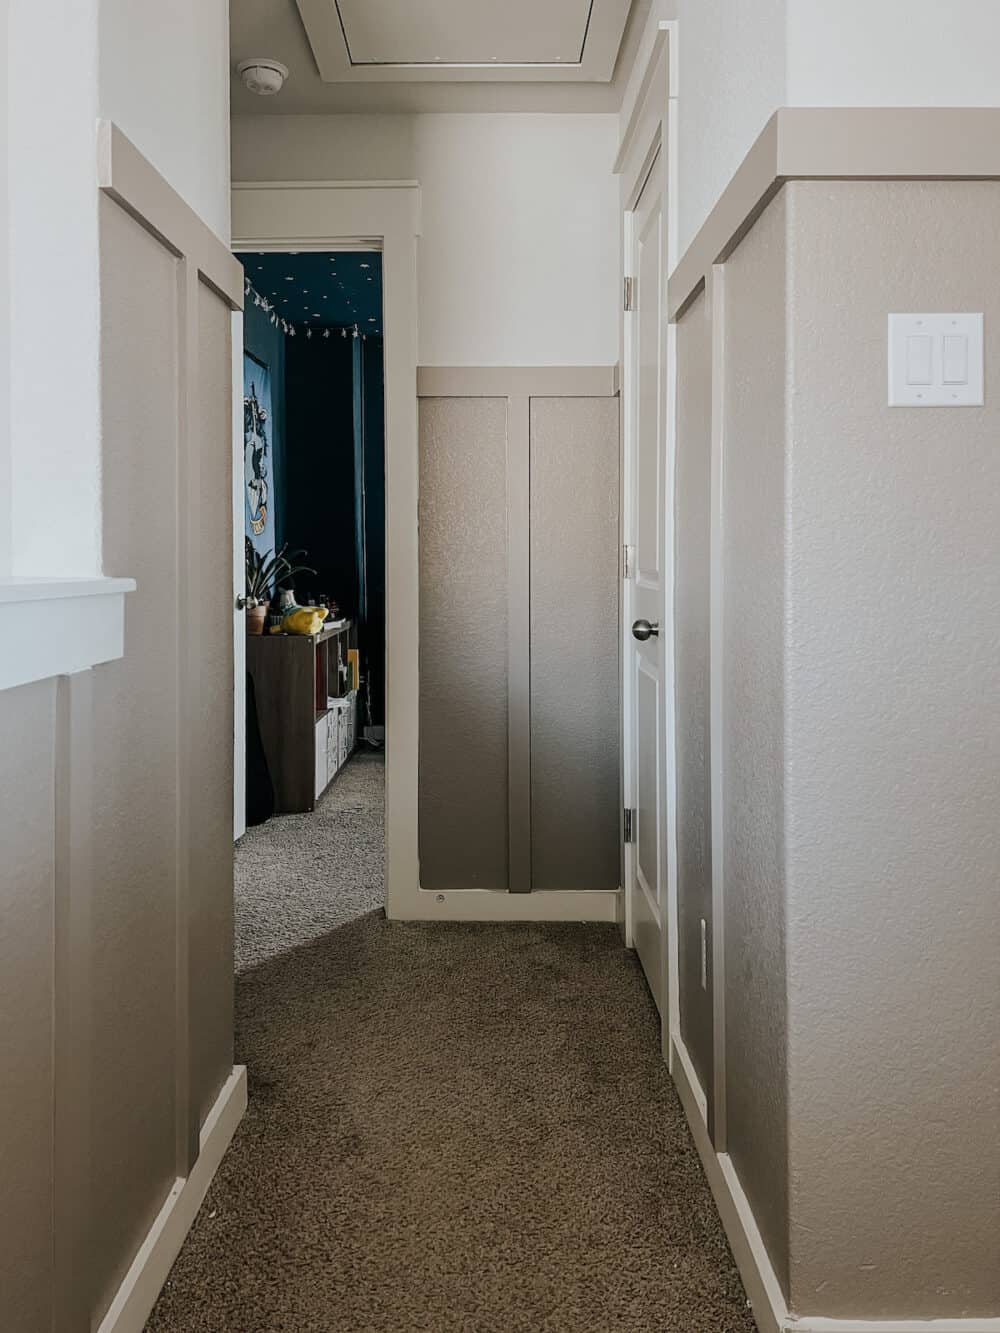
Consider this your friendly reminder that weird hallways and awkward spaces in your home don’t have to stay weird and awkward. Just because it’s “only” a pass-through area doesn’t mean it has to be boring! This is step one in making this space feel really intentional, and now that I’ve gotten started my brain is definitely swimming with all sorts of other ideas. I guess we’ll all just have to stay tuned to see what’s in store next!
Don’t forget to check out DAP’s Extreme Stretch Caulk next time you have a trim project to work on. I’m consistently impressed with how easy it is to use and how well it holds up over time. DAP is always my go-to when it comes to finishing work on my projects!

Awesome Post
Thanks