
The Easiest DIY Bird Feeder {With Scrap Wood!}
It’s week two of the No Spend Summer and I’m really excited to share my scrap wood project with you! I took forever coming up with a plan for this project, but I finally landed on a DIY bird feeder…and y’all – it’s so cute!
Don’t know what No Spend Summer is? Let me catch you up – in an effort to stretch my creativity, push my limits (and save a little money), I decided that for the entire month of June, I’ll be doing one project a week without spending a dime. We kicked it off last week by styling something around the house using only decor you already have. I tackled my kitchen counters, and I can’t get over how big of a difference it made! Sometimes just rearranging a few things feels like a huge change!
This week’s challenge was to make something – anything! – using scrap wood. I thought long and hard about this because I didn’t have much scrap wood on hand. But finally, I decided on something I’ve been wanting to do for a while – a DIY bird feeder! It took me less than an hour to build it with my 8-year-old son helping, and I love how it turned out.
I mean…can you believe I spent one hour and zero dollars on this?!
Let me show you how.
DIY Bird Feeder tutorial
Materials I Used
- (1) Piece of 3/4″ plywood, cut to 7″ X 10″
- (1) Piece of 3/4″ plywood, cut to 7″ X 4″
- (1) Piece of scrap 1×4 wood (you can use anything you have on hand, even extra plywood!)
- Wood glue
- Pin nailer (click here to learn how to use one!)
- Wood filler
- Spray paint
A reminder: I used what I did because I was trying to use only scrap wood! If I was purchasing wood for this project, I’d probably have bought a 1×8 board (to replace the plywood) and a 1×3 board (instead of the 1×4). But anything you have is FINE!
step one: cut the roof shape
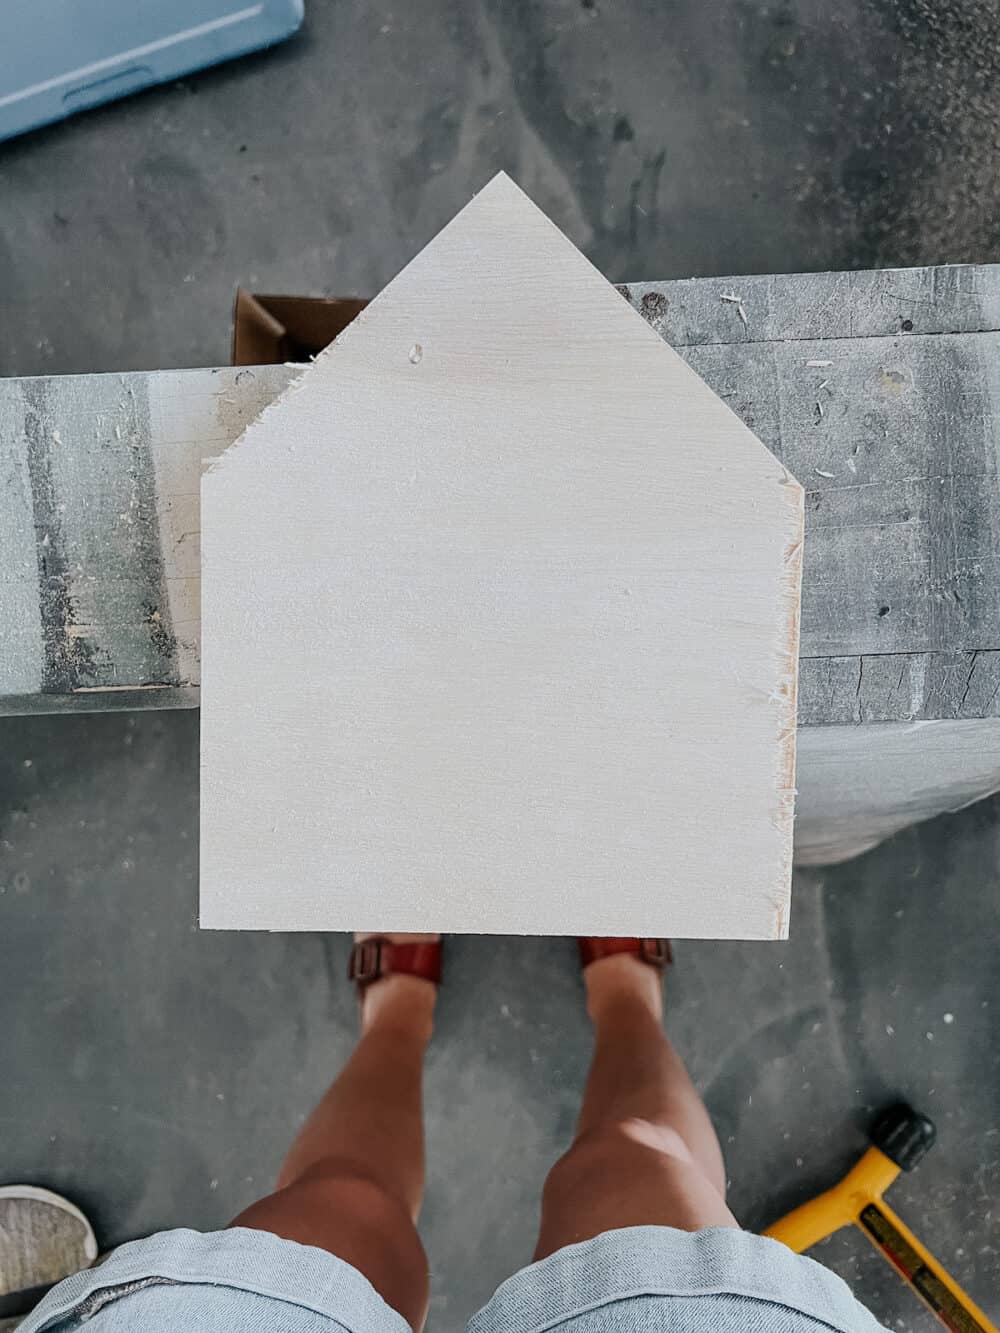
You’ll start by cutting the shape of your roof onto your plywood (or larger piece of wood). I used my miter saw (click here to learn how!), and I just cut two 45-degree angles that met in the middle of the board! Don’t overthink this, it doesn’t need to be perfect.
step two: attach base to the back
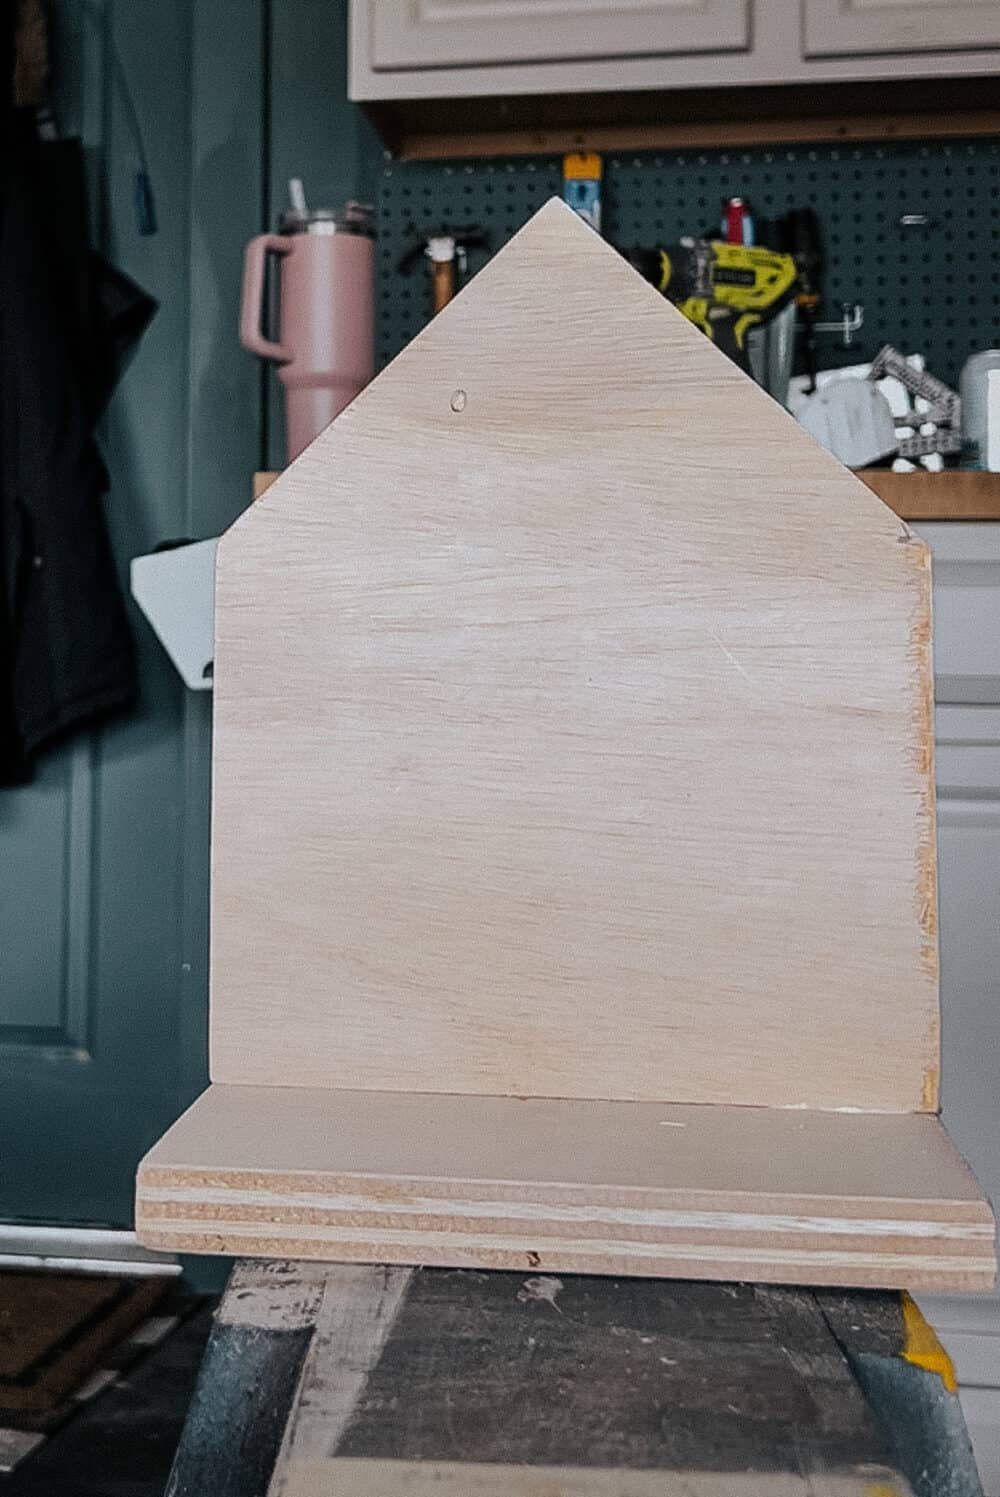
Now, use wood glue and pin nails to attach the 7″x4″ piece of plywood to the house-shaped plywood. The smaller piece will be where the birdseed sits! Don’t worry about it all falling off – we’ll add something to hold it in place in a minute.
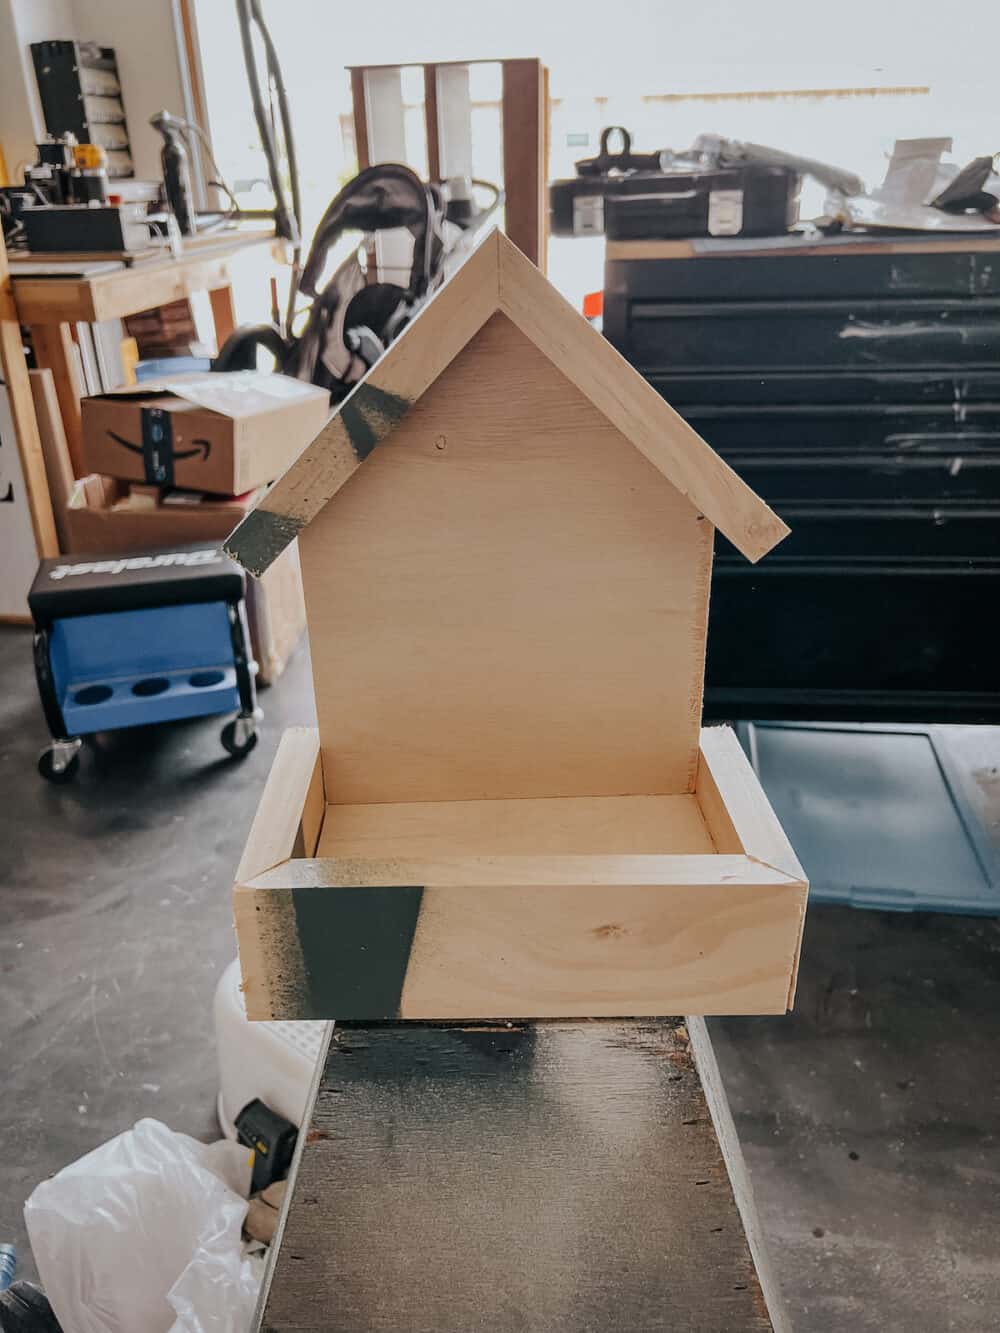
Step Three: Add Trim
Now, it’s time to trim it out and make it extra cute!
I added 1×4 pieces of wood all the way around the base of the bird feeder. This creates a little well to hold all of your birdseed and gives the little birdies a place to perch.
I chose to miter the corners, and also to have the trim hang off the bottom a bit (so the base is slightly inset). The only reason I did that is because the wood was so wide – if it was a 1×3, I would have made it flush!
After adding that, I also added two pieces of wood to the top of the bird feeder, to trim out the “roof”. There’s no functional reason for this addition, I just thought it was cute.
When all was said and done, here’s how it looked:
Step Four: wood fill and paint
Now, you’re ready to make it really cute! I had one large-ish gap where the mitered corner didn’t align quite right, so I went ahead and added some wood filler to the corners. If your corners all align okay, you could skip this part. It is just a bird feeder, after all.
I added the wood filler and let everything dry, then I sanded it down before painting.
My oldest son helped me a lot with building this, so I also let him pick out the paint color and help me paint it! We used some leftover spray paint (because, remember, I can’t spend any money!), and when we were done…it was so cute.
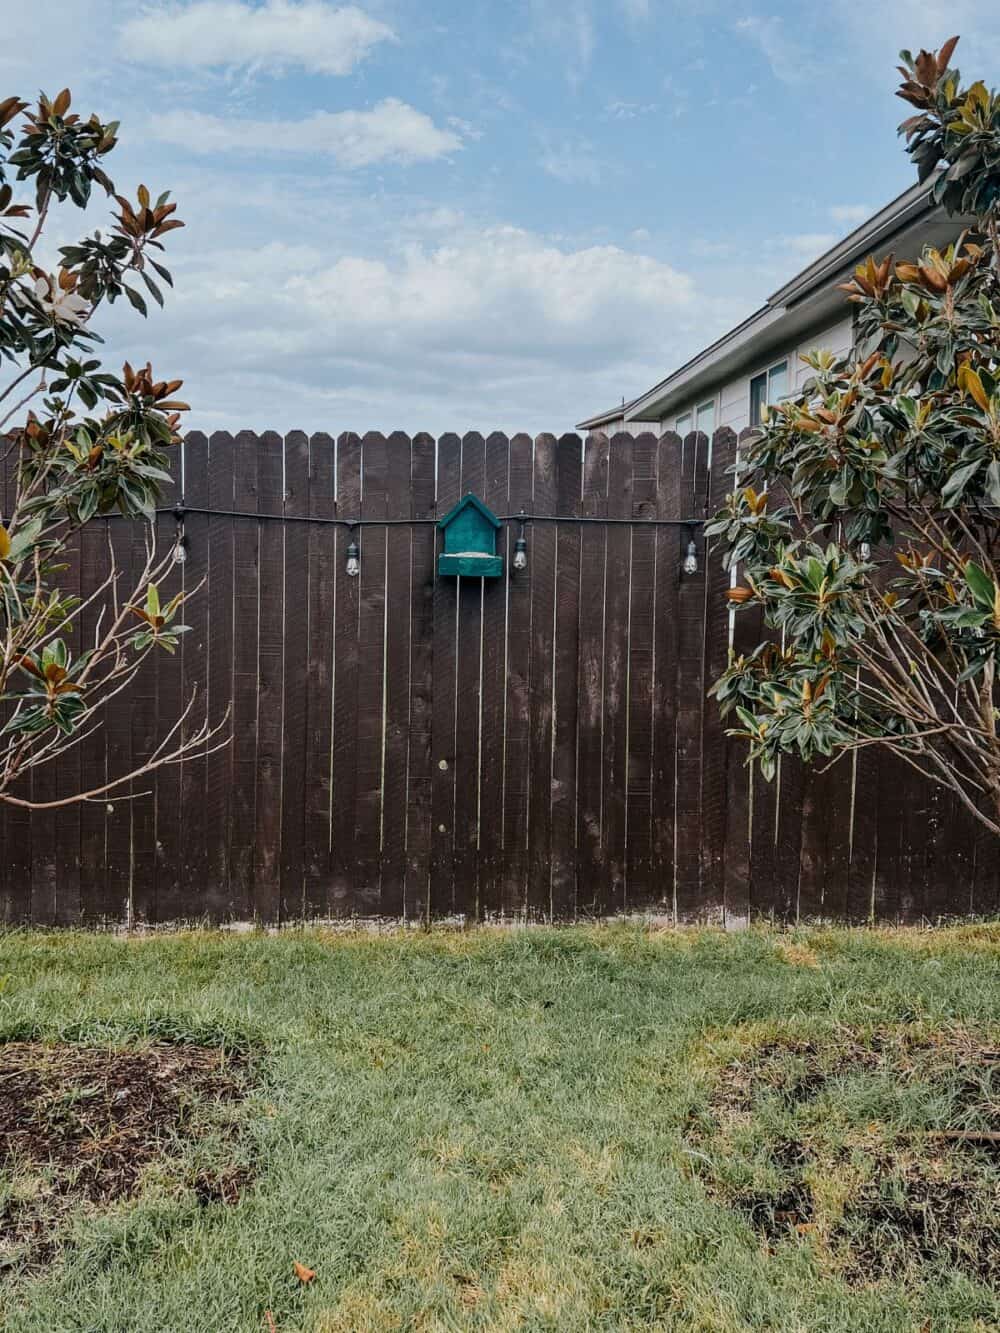
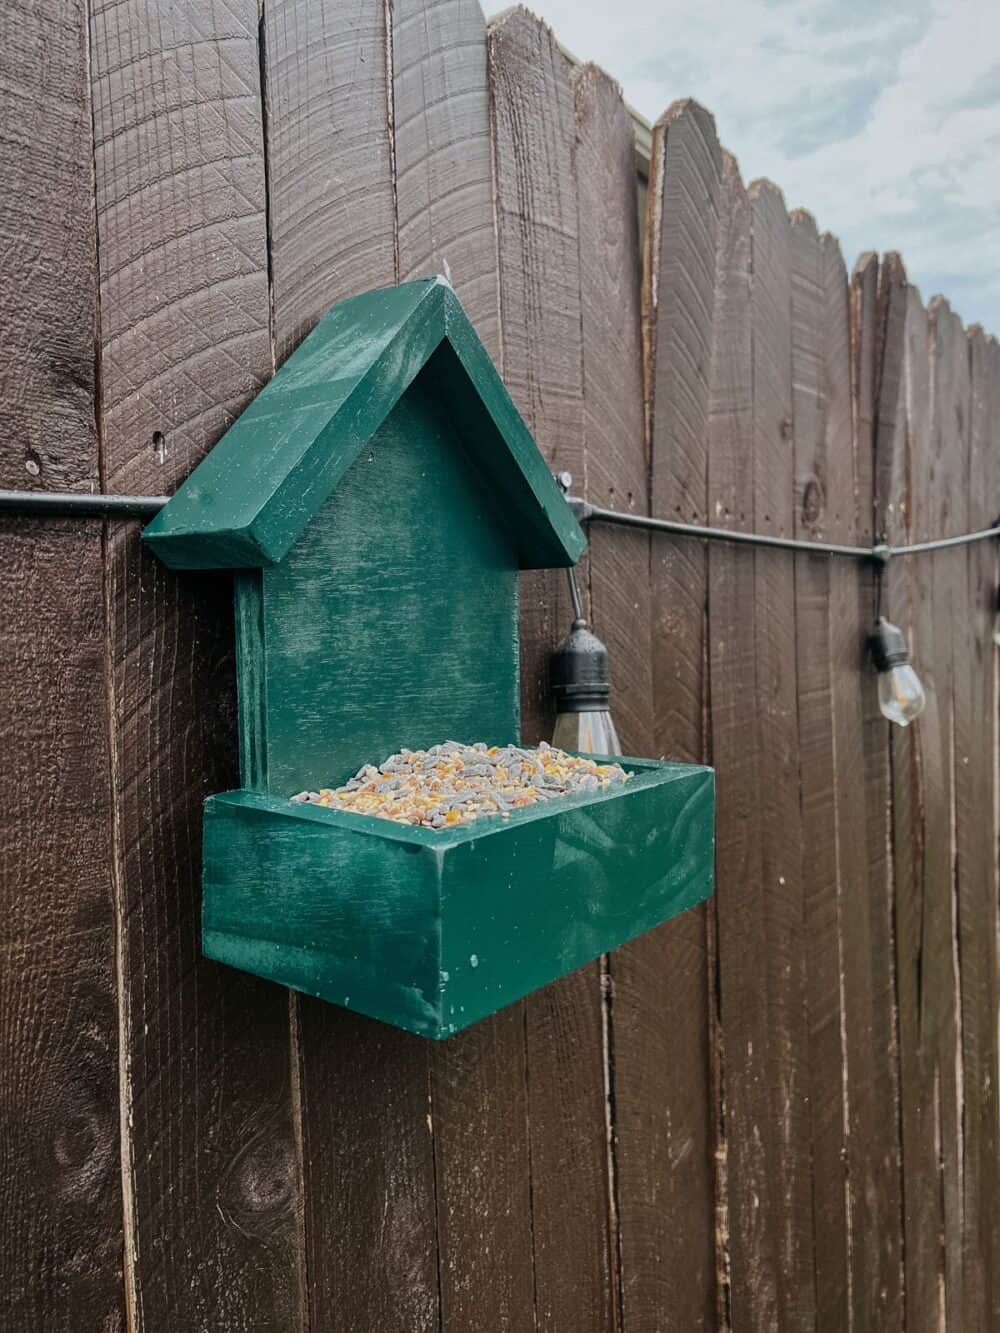
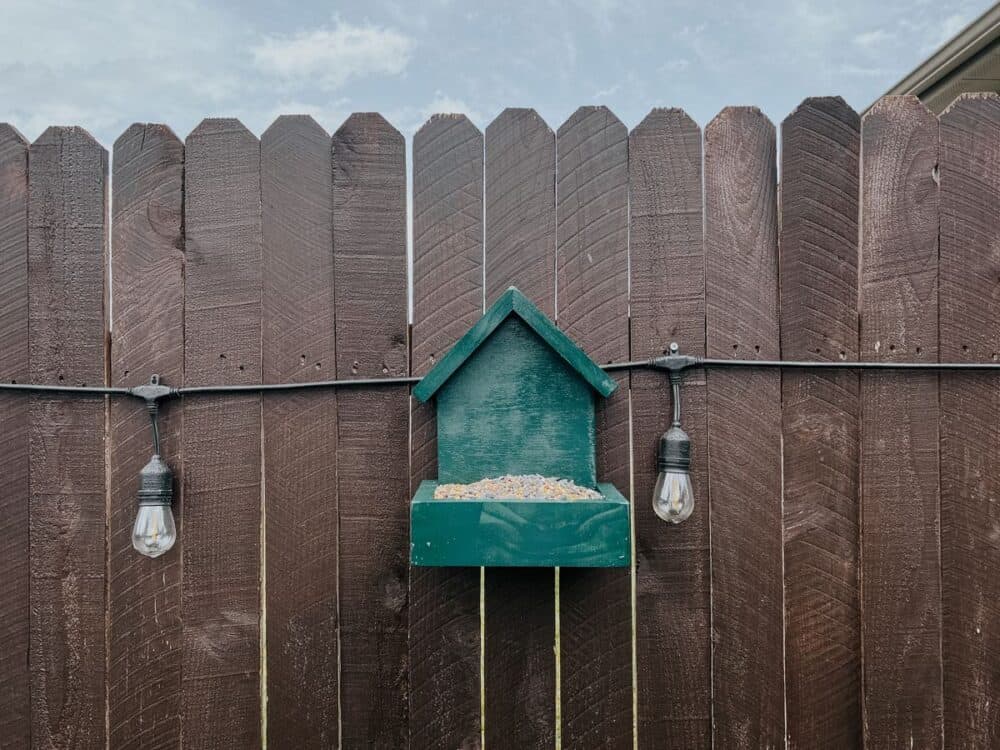
The color is Rust-Oleum’s Hunt Club Green and it looks so great against our dark wood fence.
To hang it up, I added a little picture hanger to the back on the roofline, them just hung it off of a screw on the fence! Then, we added some birdseed and have been eagerly watching every day to see what kind of birds decide to visit us.
If you’re still looking for ideas for what you could tackle this week, click here to see a roundup of 50 amazing scrap wood projects!