
DIY Camper Playhouse {The REVEAL!}

It’s done! It’s done! It’s done!
After weeks of effort and I don’t even know how many hours of work, our playhouse camper is officially finished. The boys have spent almost every waking moment in it since I declared it done, and I definitely think we can call it a major win!
Wanna catch up on the project?
- Here, I shared the base of the camper and how I painted the flooring.
- And here, I shared the process of framing it out
- There are also two Instagram highlights with lots of behind the scenes details – see them here!
Since then, we’ve added siding, painted the entire camper both inside and out, and added all sorts of fun details. Let’s break it down, shall we?
The Camper Playhouse: Finishing Touches
This post is sponsored by Wagner.
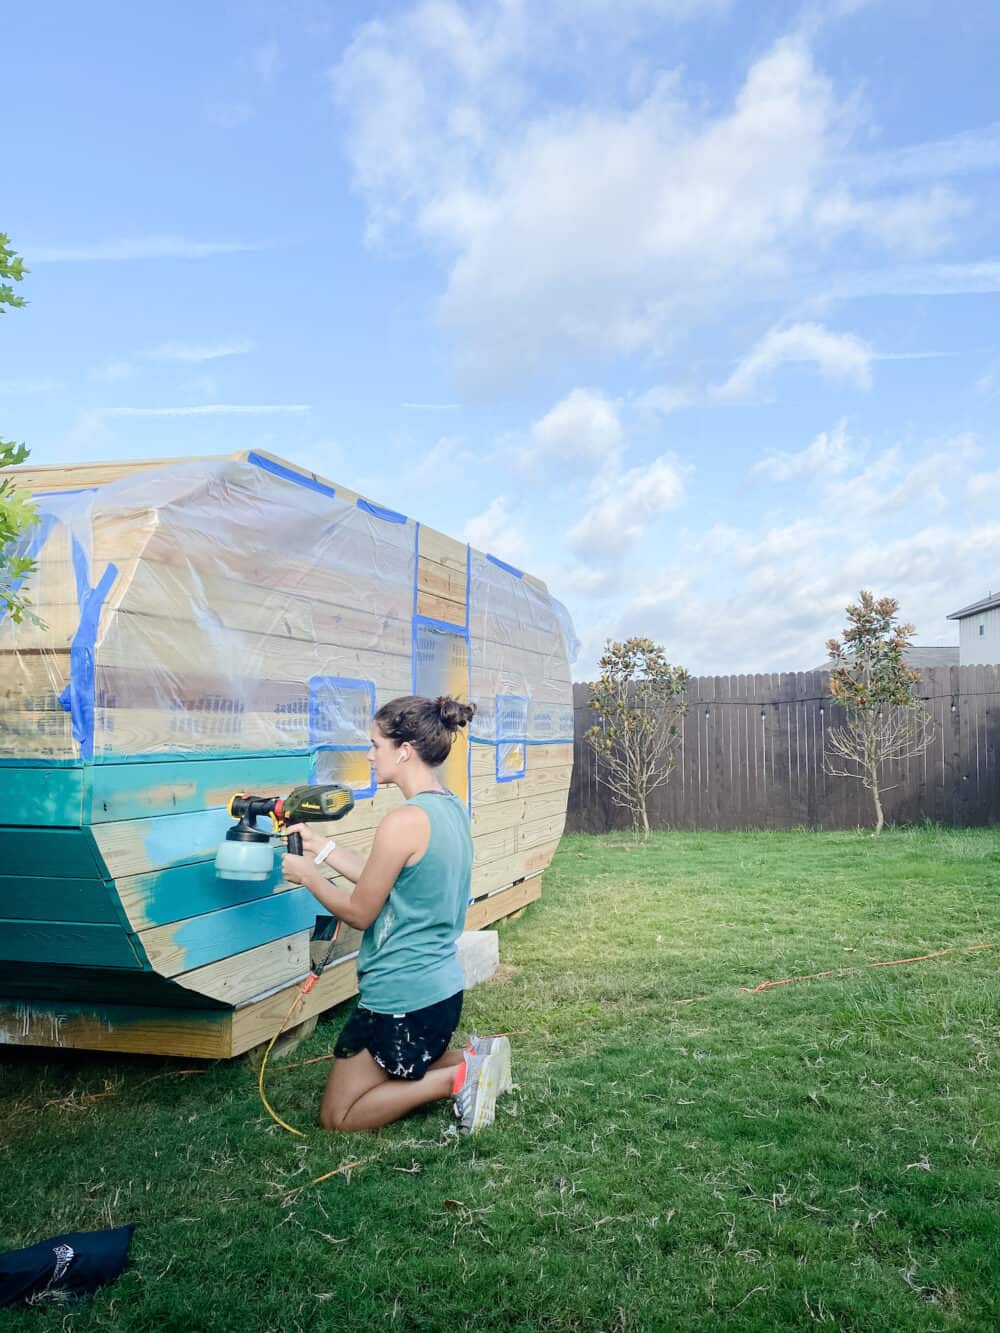
The last time you saw the camper here on the blog, it had some framing but no siding, no paint, and no cute accessories or details. Putting the siding on obviously made things look really different, but what made the biggest difference in the world was painting the entire camper!
I painted both the inside and the outside of the play camper using Wagner’s new FLEXiO 2500 – I’ve always loved their FLEXiO line of paint sprayers, and this one is the best I’ve used yet. It’s 20% lighter than previous models and I noticed! When you’re holding a paint sprayer for a long time – especially when you’re holding it above your head for some parts of the process – weight matters, and I found this guy noticeably easier to work with because of the lighter weight.
I love the simple design and how easy it was to use – from pulling it out of the box for the first time to actually spraying with it took just a couple of minutes. Wagner’s sprayers are always reliably easy to use, and they come with a fantastic instruction manual that’s really helpful if you ever get stuck!
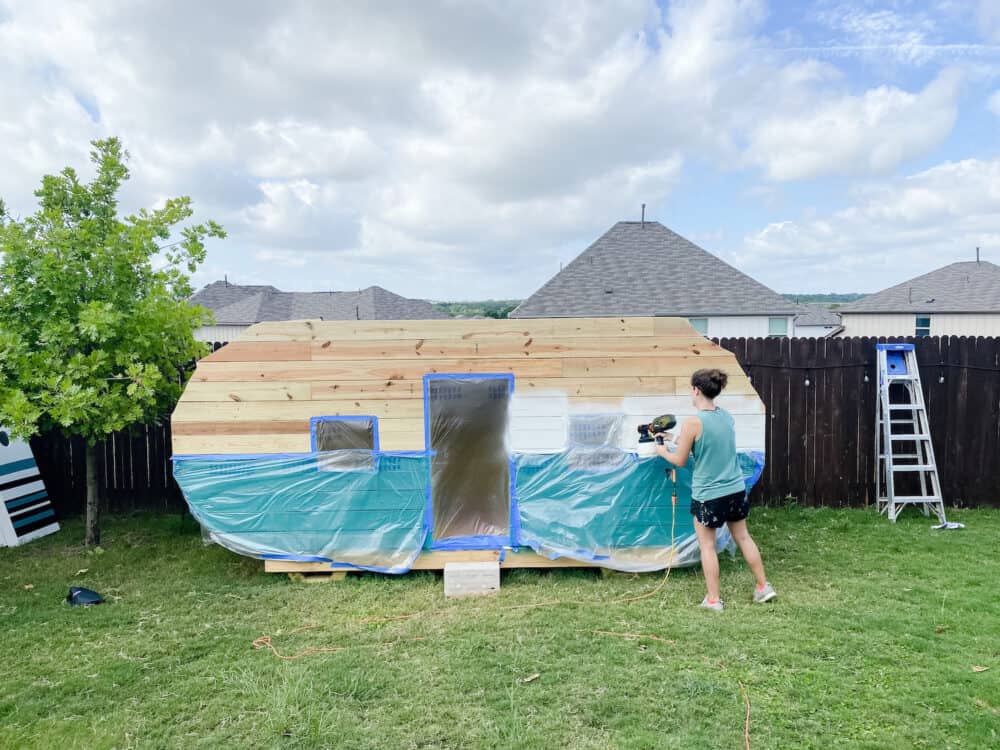
The process of painting this camper would have taken me hours upon hours if I had done it by hand, but with the FLEXiO 2500 I was able to get coats on the interior an exterior in only about 30 minutes per coat. It saved an incredible amount of time and gave me such a beautiful finish!
If you’ve been here for any length of time you’ll know that I’ve used and loved Wagner’s sprayers for years, so this should come as no surprise to you. If you haven’t managed to get yourself one yet, this would be a great one to start with! I also have a tutorial I wrote a few years back on how to use a paint sprayer if you’re still on the fence – it’ll show you how simple it is to use!
Once the paint was done, the really fun part started and I got to make things cute. Are you ready for the full tour?!?!
diy Playhouse camper tour
If you want to see a full tour in video form, just click play on the video below for a deep dive into all of the details of the camper!
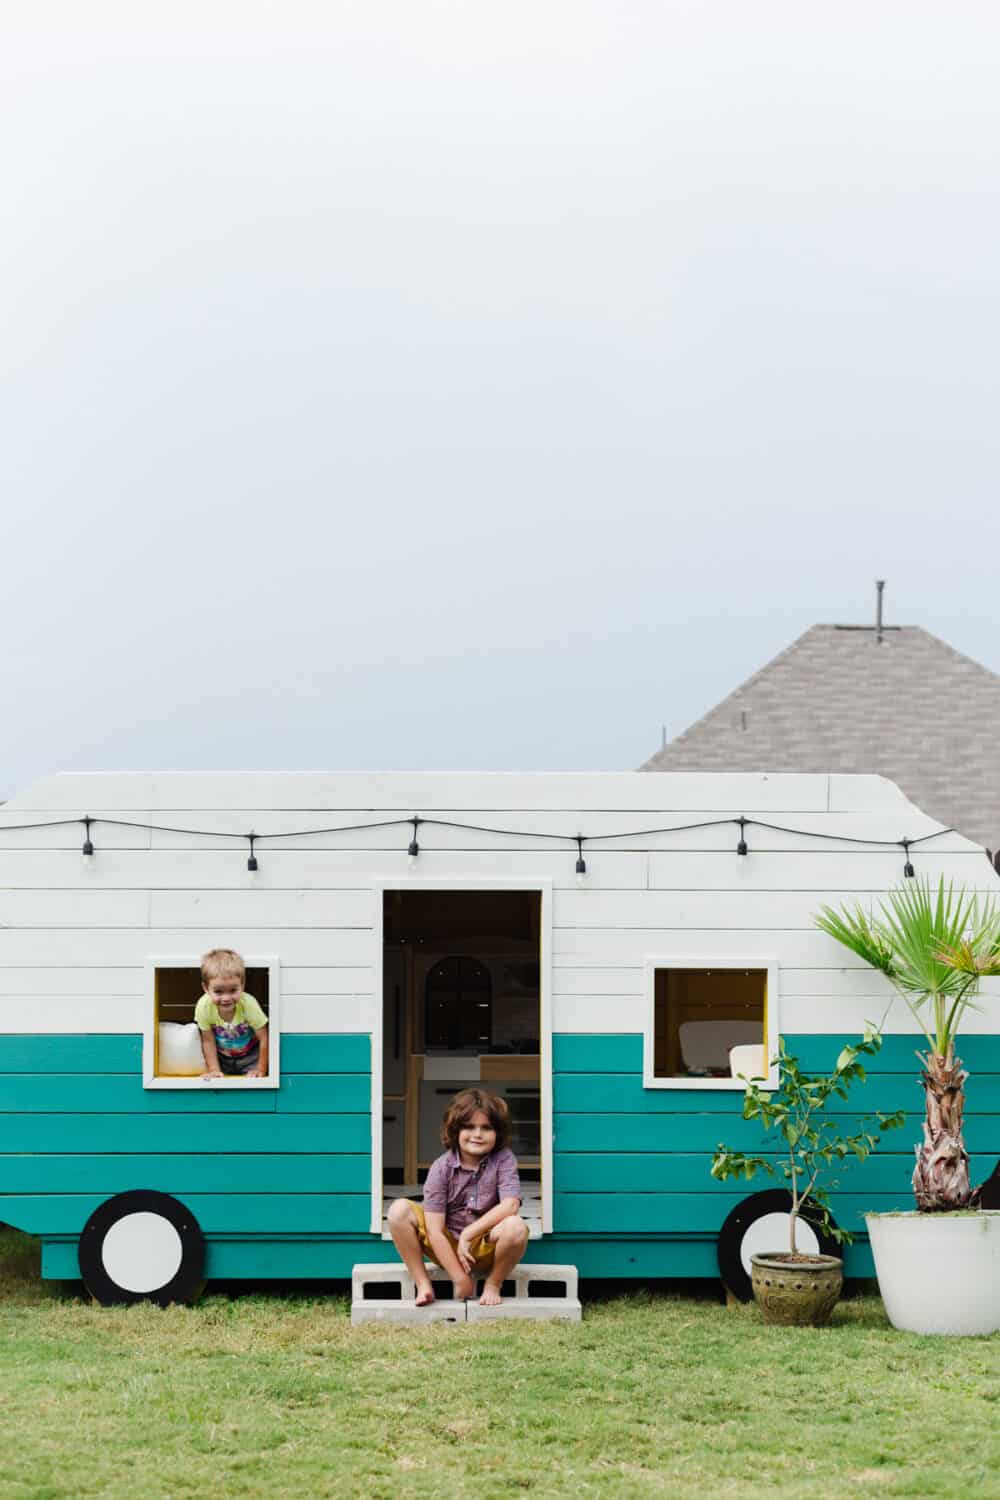
camper exterior
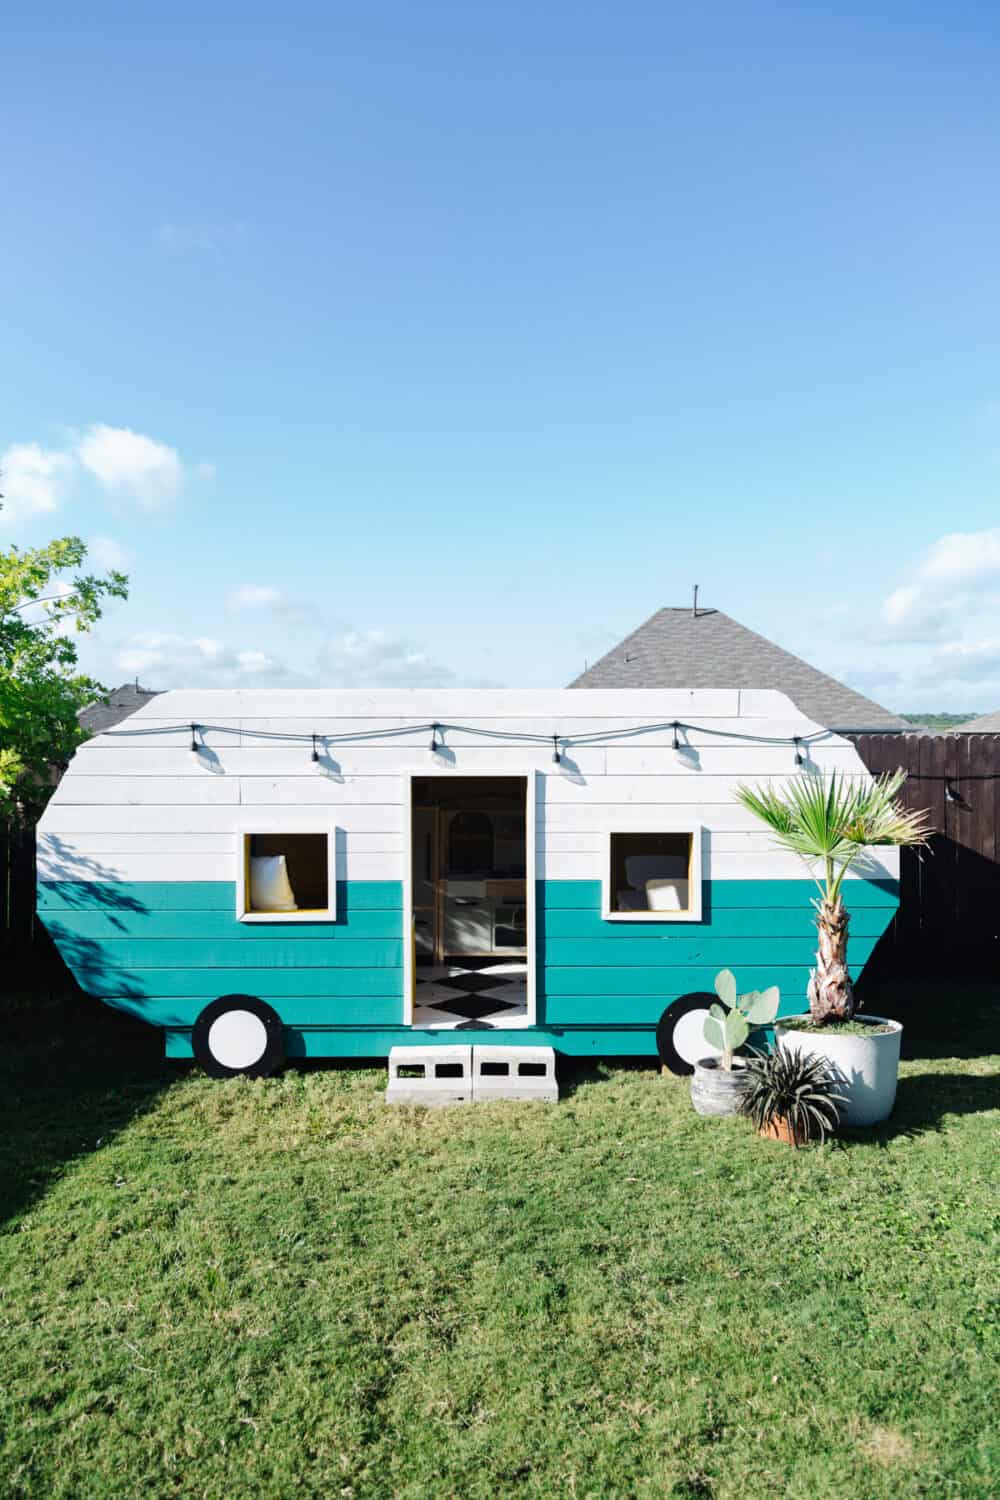
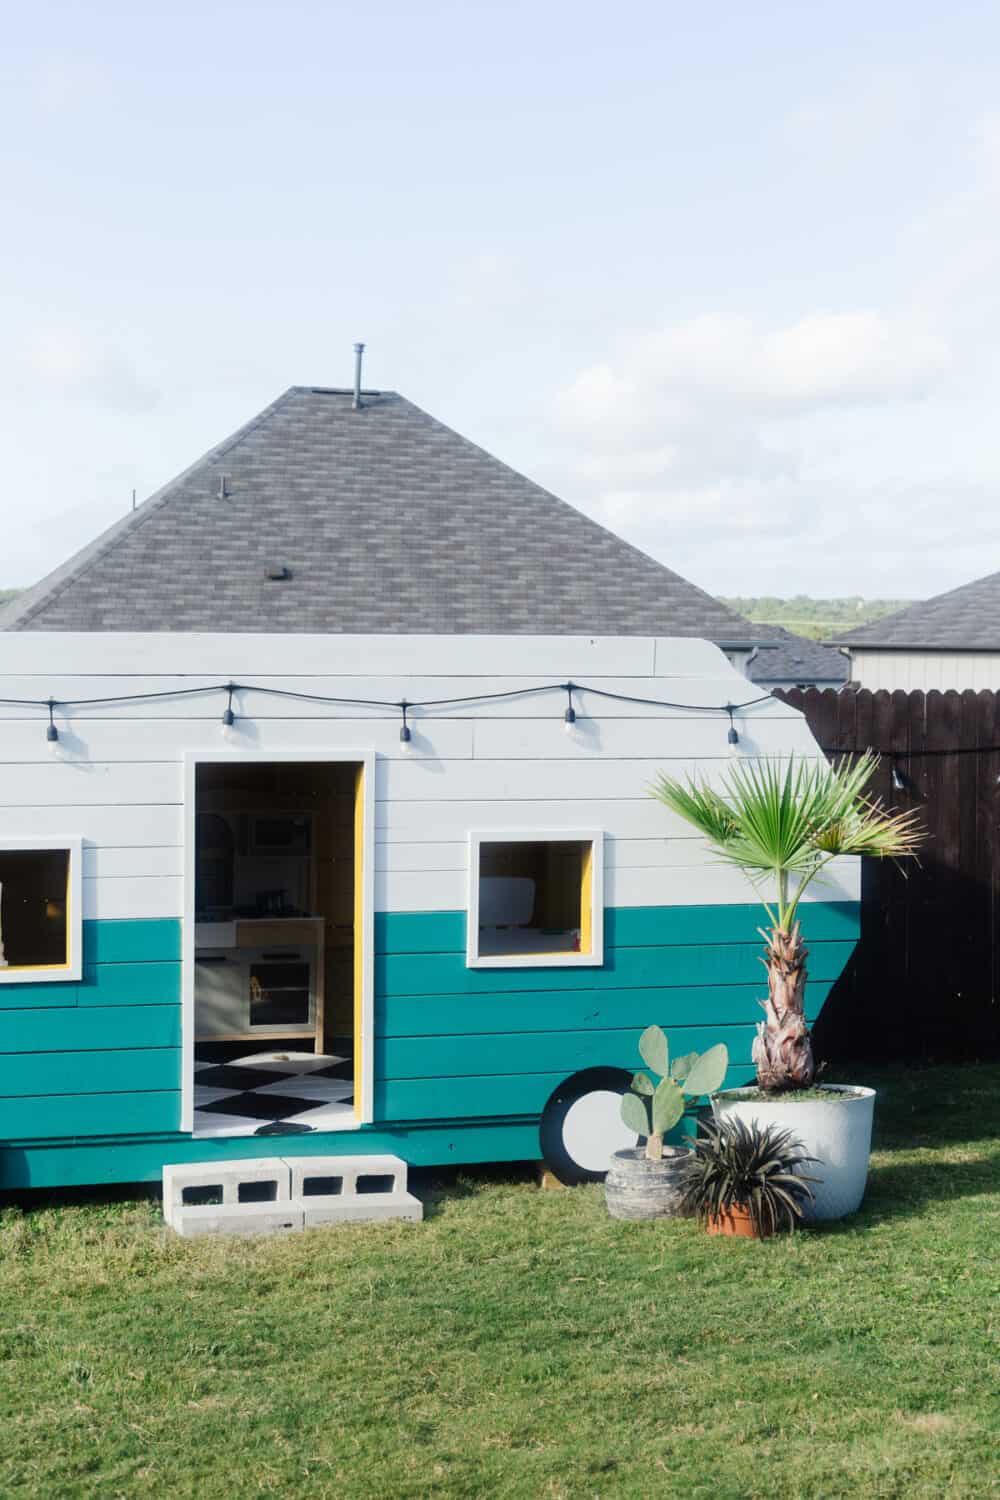
I decided to go with a classic vintage camper look and did two-tone paint with turquoise on the bottom and white up top! I had more than one person send me photos of their actual campers with the exact same paint treatment, so I definitely feel good about the decision!
I brought a few plants over by the camper to make things look a little more homey. The big guy is a Mexican Palm Tree, and there’s a little Meyer lemon tree next to it (in some of the photos you may notice cacti next to it, but I realized they can’t live there because of our sprinklers).
The stairs are just plain ol’ cinderblocks – we used two full-sized ones for the back stair and two half-size ones for the front. They’ve stayed in place really nicely and the boys feel so fancy having their own little set of stairs!
Oh, and we obviously can’t have a camper without wheels! To create them, I just grabbed a couple of 18″ round pieces of plywood (linked on the source list below) and painted them black with a white circle in the middle. Then, I just screwed them directly into the siding so that they’d cover up the supports underneath the camper.
Our final touch (for now) was adding some string lights around the camper. We already had lights all along the fence line, so it was really easy to grab one more set and string them all along the top of the camper. It feels like the perfect finishing detail and it makes me smile so big every evening when the lights turn on!
EXTERIOR SOURCES
- Top paint color: Weathered White by Behr
- Bottom paint color: Bubble Turquoise by Behr
- Plywood for tires
- String lights
- Large planter
Camper Interior
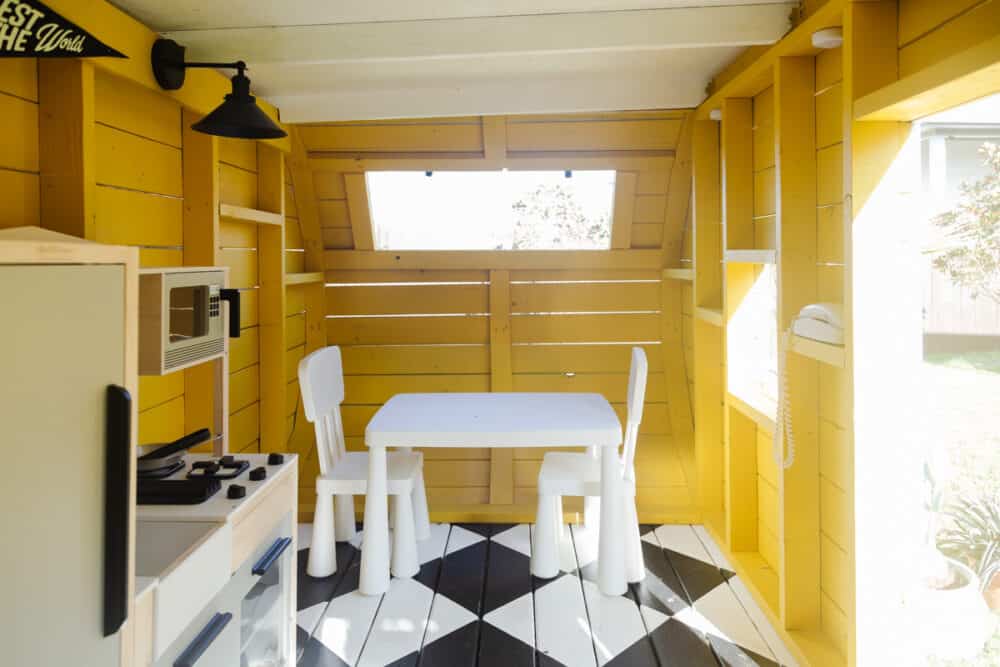
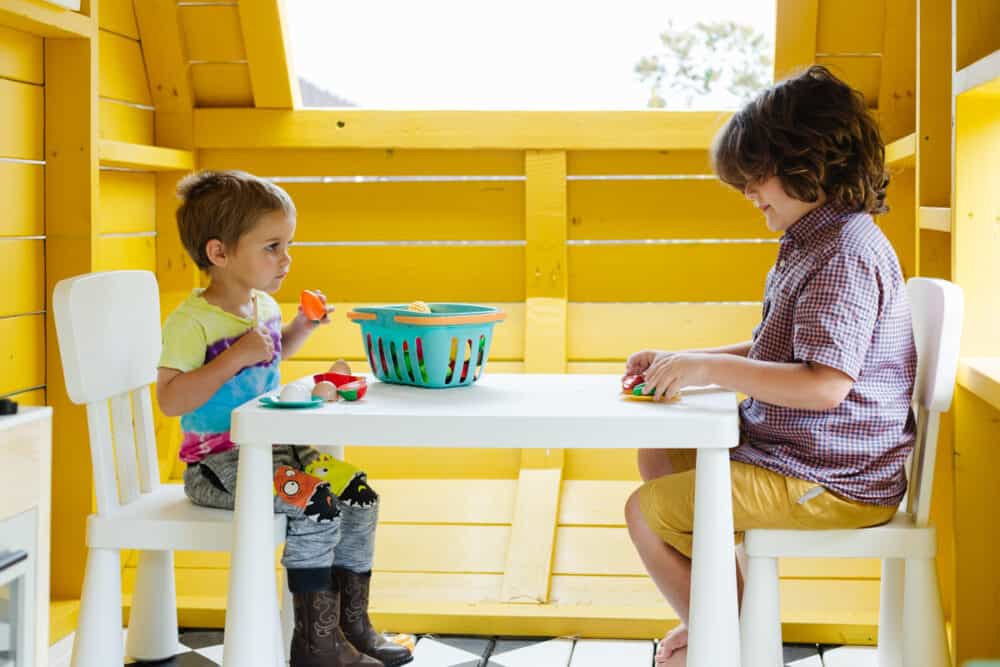
On one side of the camper, you have a little seating area. The boys have eaten nearly every meal and snack out here since I put this table in place!
The table and chairs are from IKEA. I love that they’re the perfect size for both boys to use comfortably, and they’re plastic so they’re very easy to clean. We have some play food that is almost always spread all over the table (when it isn’t covered with plates from actual meals), and it’s even proven to be a great spot for Jackson to draw or read a book!
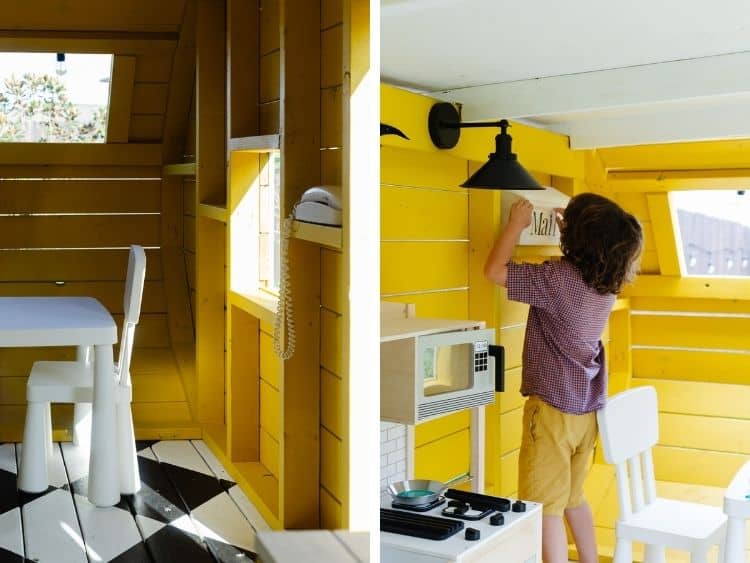
We’ve been using the studs as little shelves throughout the camper – so I tucked a little mailbox into one of them. I had originally planned on hanging it on the exterior, but the hanging mechanism wasn’t very user-friendly and I decided to skip the effort and just set it inside.
Project burnout is real, y’all.
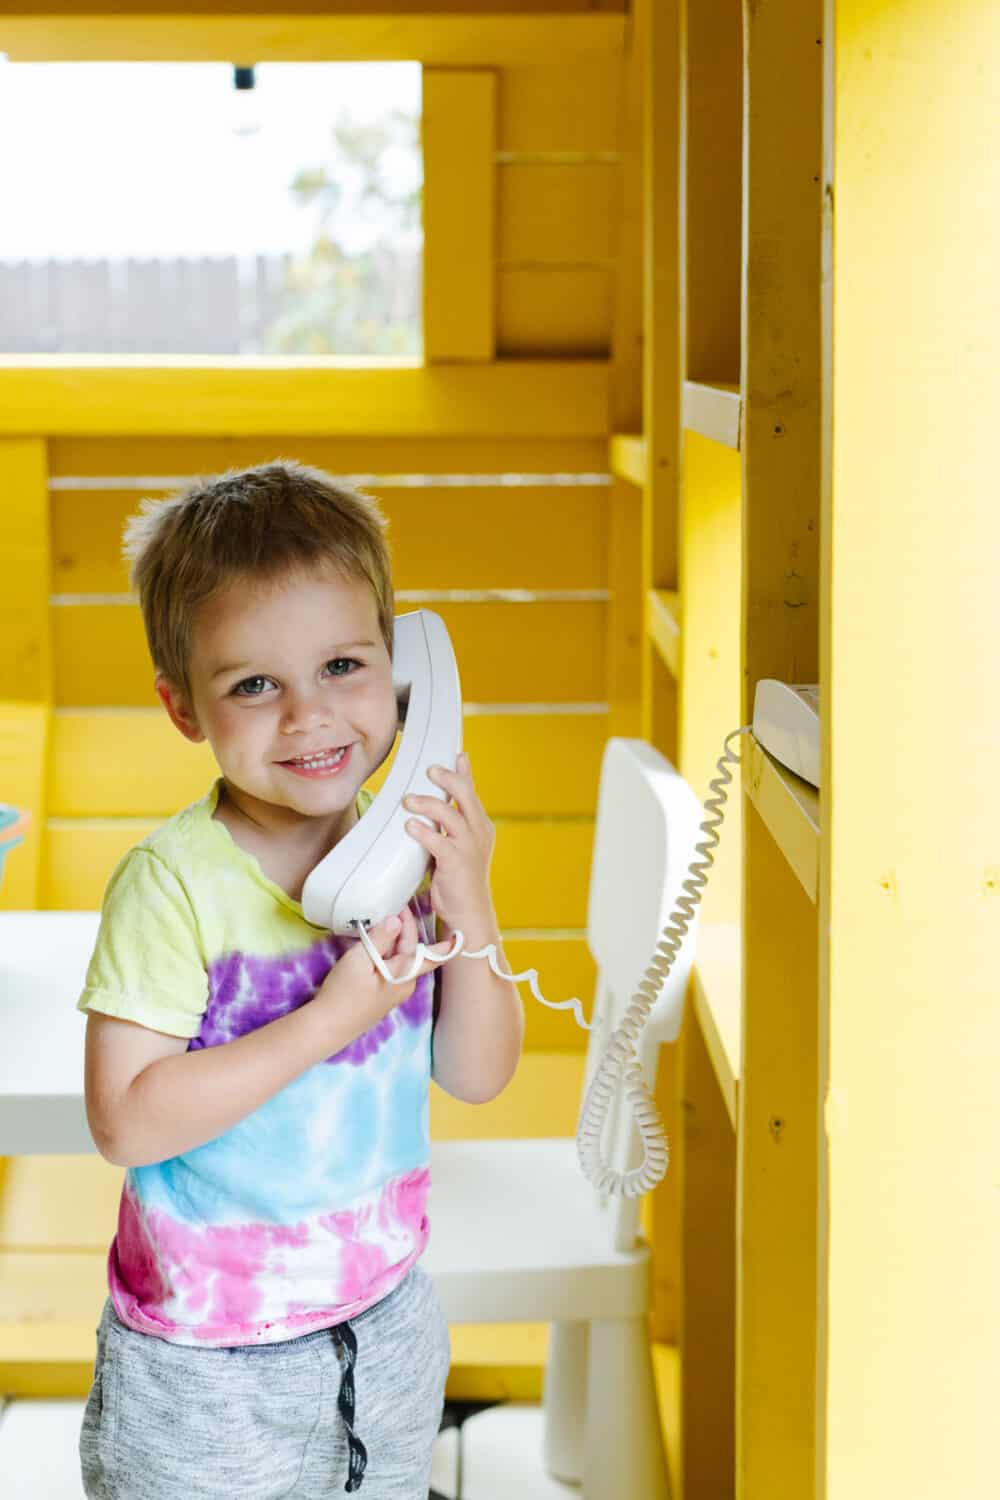
On another “shelf” in this area, we’ve got their new favorite toy ever – the telephone. This is actually a real telephone, and the boys fight over who gets to play with it constantly. I had originally planned on wall-mounting it, but the phone wouldn’t stay in place when it was vertical.
Apparently that’s what you get when you spend $14 on a telephone. It works great for a play phone other than that, though, and the boys actually really love that they can move it around the camper to wherever they are playing, so I’m not complaining.
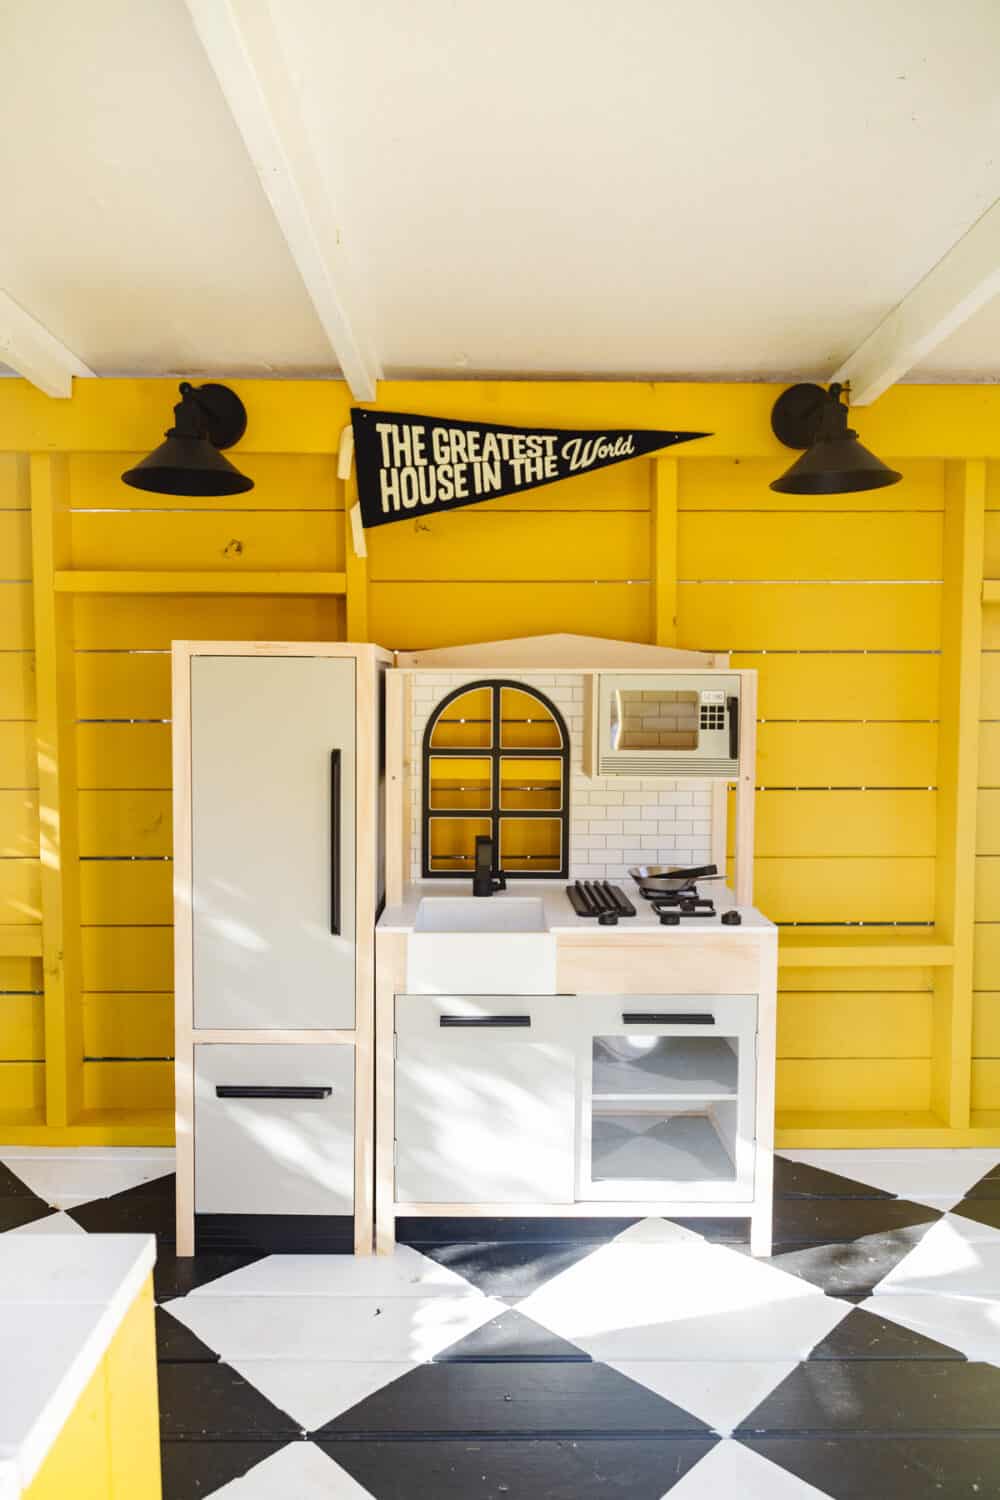
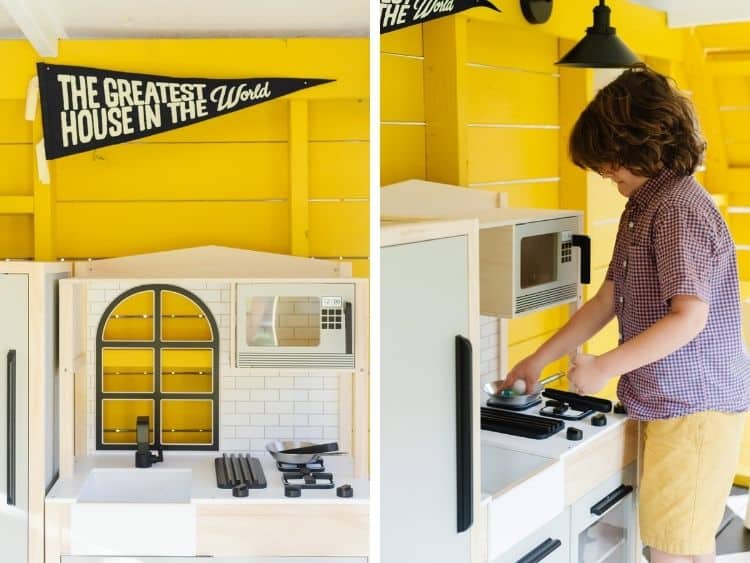
In the center, we’ve got the kitchen. This is the Hearth and Hand play kitchen from Target (linked below!) and we love it so much. I didn’t have to do anything to make it look cute, it has plenty of storage, and I am obsessed with the fact that there’s a fridge too!
Once Grant is a little bigger and I can count on things consistently staying where they’re placed out here, I’d love to add in some cute details like dish towels, maybe an apron, and some more dishes for them to play with. But, just about everything I place out here still gets dragged all over our house and the backyard, so I’m not going to pour too much energy into it yet!
I wanted the boys to be able to comfortably play out here in the evenings without bumping into things, so I got creative with some lighting. I grabbed some super cheap sconces and mounted them above the kitchen, then I added some remote-controlled puck lights to them. They add so much charm and makes things feel really home-y.
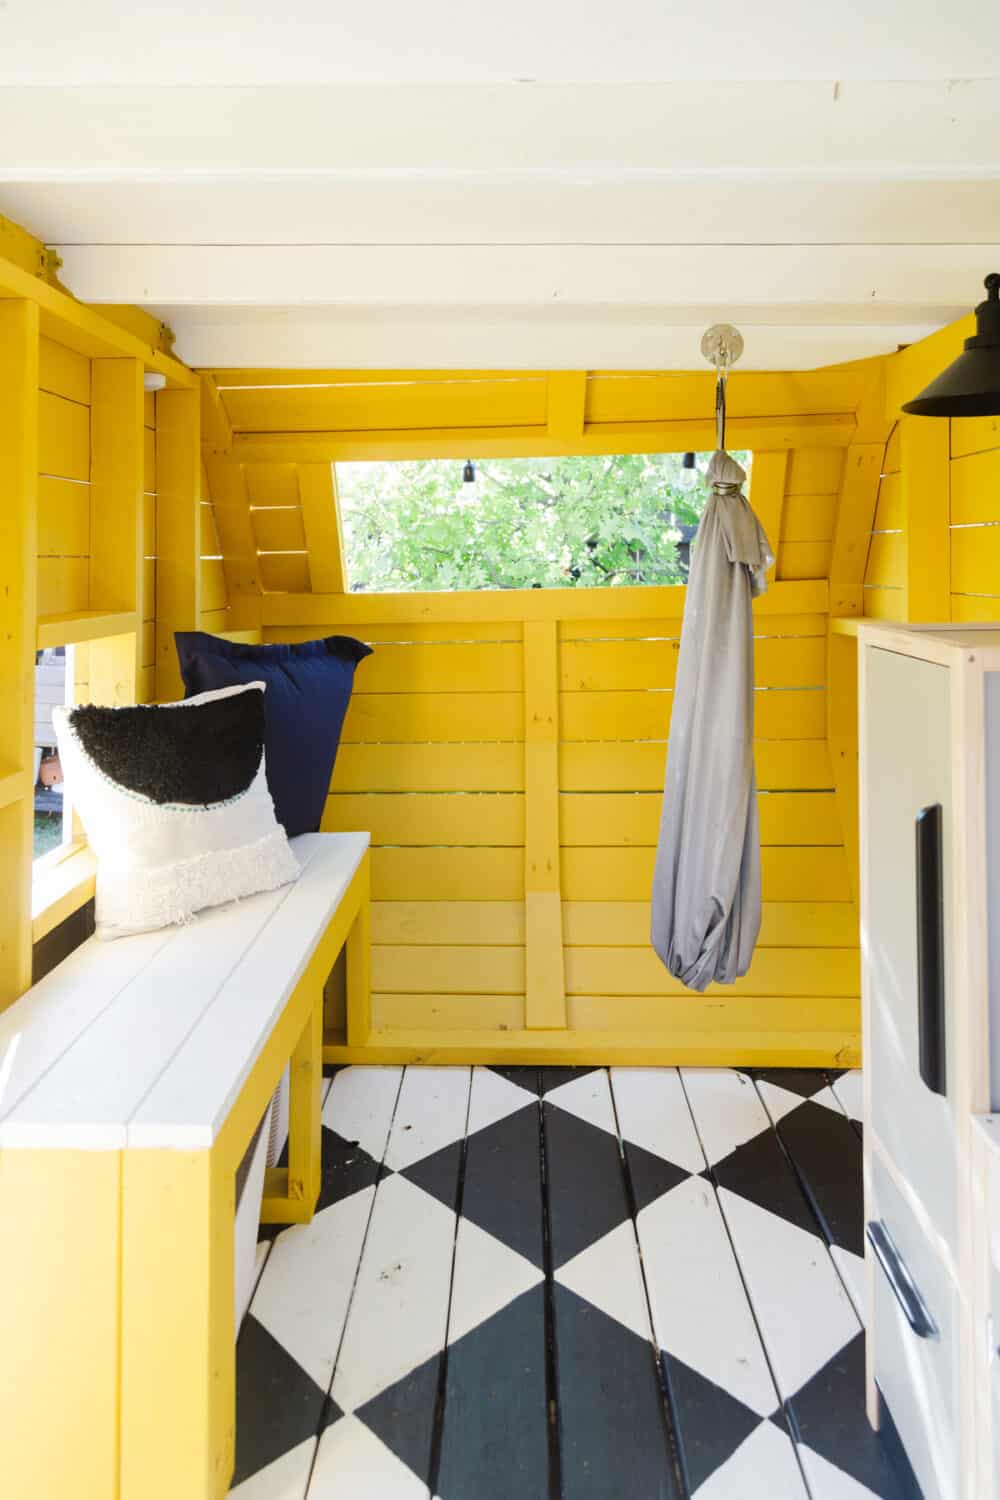
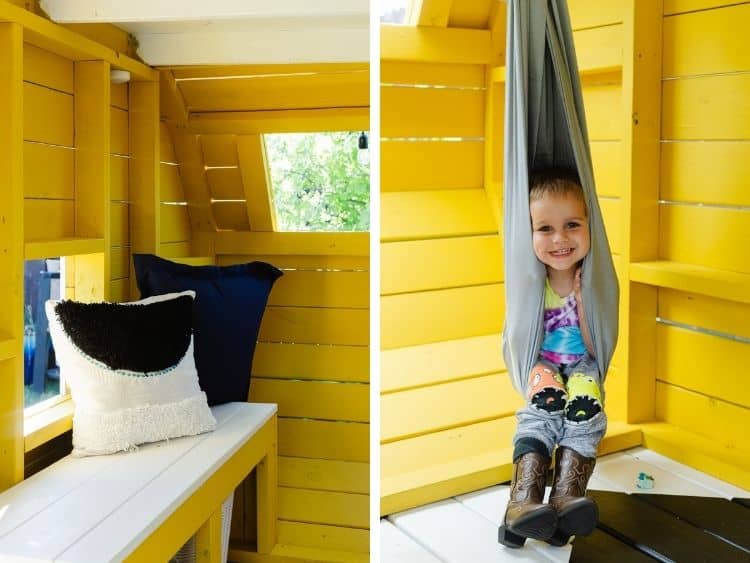
And finally, on the other side we’ve got the cozy seating area. I created a built-in bench on this side that has storage underneath for toys. The boys are constantly bringing random things out here to play with, so these little plastic baskets make it easy for them to clean up when they’re done.
I also added in a sensory swing at the very last second. I had originally thought about putting a pouf or a small chair in this little corner, but then it dawned on me that it was the perfect spot for a swing! The boys are obsessed with it and Jackson has already requested we also add one to his bedroom.
There’s obviously not a ton of space in this corner for them to go wild with the swing, but they’re both easily able to spin in it and rock gently, so I’m thrilled. These swings are really great for kiddos who have sensory needs or suffer from anxiety, and I think both of the boys will really benefit from having access to it!
INTERIOR SOURCES
- Paint color: Midsummer Gold by Behr
- Floor paint (We used the base white color, and the black is color-matched to Behr’s Limousine Leather)
- Table and chairs
- Play kitchen
- Play refrigerator
- Play food
- Telephone
- Mailbox
- White baskets
- Sensory swing
- Sconces
- Puck lights
I’m so incredibly proud of how this project turned out, and I really hope it ends up being a space our boys use for years and years to come. If the last few days are any indication, we’ll absolutely be getting our money’s worth with this thing because I can barely get Grant to come inside anymore!
camper playhouse plans
The biggest question we’ve been getting is if we’re going to have plans available.
The answer is YES, of course we are! Creating plans for a project this massive is quite an undertaking, though. We’re actively working on putting something together, and I’m hoping to have them available for you in the next few weeks.
So, stay tuned to learn how to build your own!
In the meantime, we’ll just be over here playing in our camper aaaaaall day every day.
Hi Amanda! I love this camper- such a great idea! I’m wondering what it cost you to build this. I’m trying to decide if it would be cost efficient to build one myself or just buy it.
Thanks!! ❤️❤️
Hey Stephanie! I didn’t do a great job of keeping track of funds, and it will vary wildly depending on wood prices. But, I’d guesstimate it was somewhere in the neighborhood of $750!
This is so awesome! Great job 🙂
I am amazed at your vision and creativity! I wish I had something like this when I was small. My kids are grown, but maybe I’ll have grandkids some day. I’m sure any kid would love it!