
How to Make Simple DIY Christmas Arches
I’ve been wanting to make these lighted Christmas arches for our sidewalk for years now, and we finally did it! Here are all the details on how to make them.
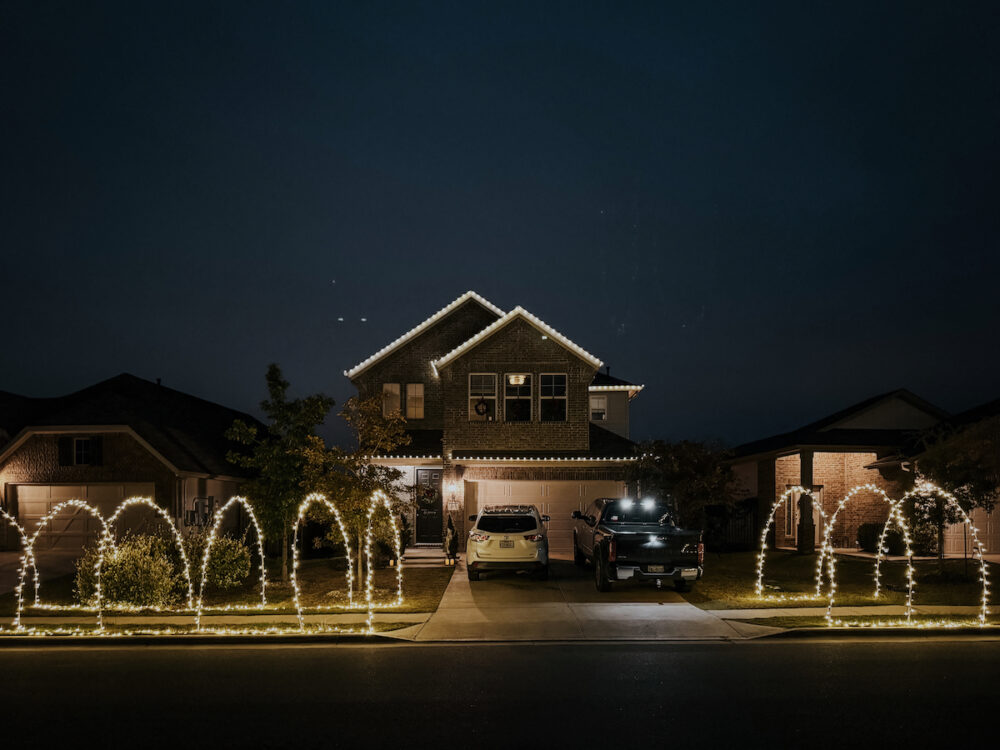
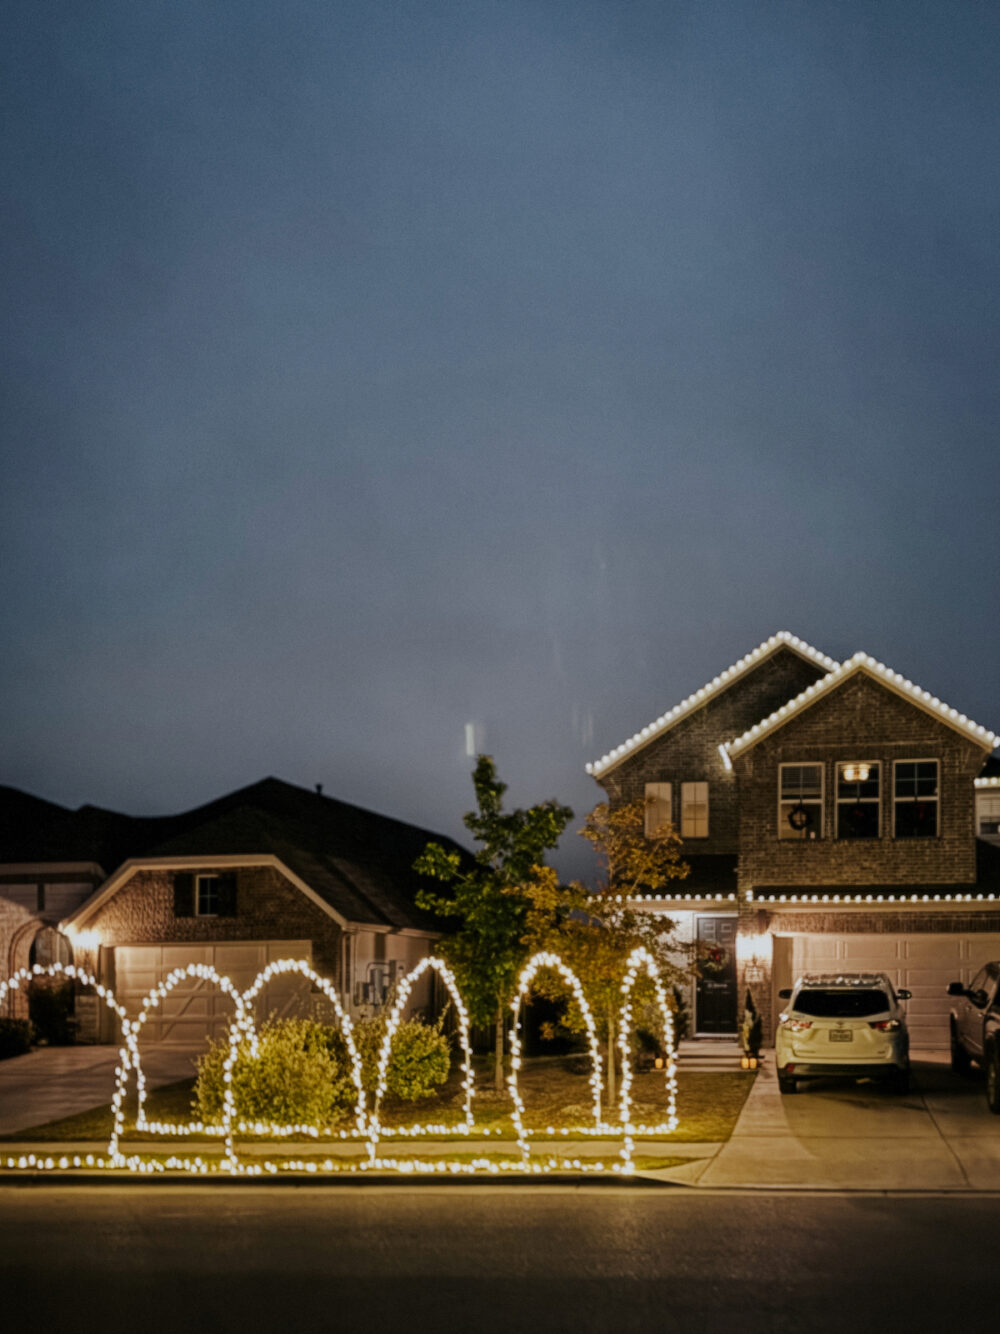
A few years ago, a neighbor across the street put up some lighted arches across the sidewalk in front of her house. My kids loved it, and we intentionally crossed the street as often as we could just so they could walk through them. Over the last couple of years, more neighbors have added them to the sidewalk in front of their houses. And this year? Well, we’re joining in on the Christmas arch fun!
This was such a simple project that creates some serious magic in front of our house. Let me show you how to do it.
How to Make Easy Lighted Christmas Arches for Your Sidewalk
Materials Needed
For this project, you’ll want to have on hand:
- A rubber mallet
- Some gloves (rebar is dirty!)
- An extension cord
- Pliers (optional)
- Painter’s tape or packing tape
And then, for each arch that you want to make, you’ll need:
- Two 1/2″ PVC Pipes (10′ length)
- One 1/2″ PVC Coupling
- Two 3/8″ lengths of rebar (2′ length)
- Christmas lights (We used about 100 lights per arch)
Step One: Prep Your Supports
Your first step is to insert some rebar into the ground where you want your arches. This will be what holds them in place. We didn’t worry too much about measuring – we placed one rebar length near the curb on one side of the sidewalk, and did the other approximately the same distance from the sidewalk on the other side.
This is definitely one of those projects where you could spend a lot of time measuring and overthinking and chasing perfection. However, it’s also one of those projects where you can mostly wing it and things will still turn out awesome. Promise.
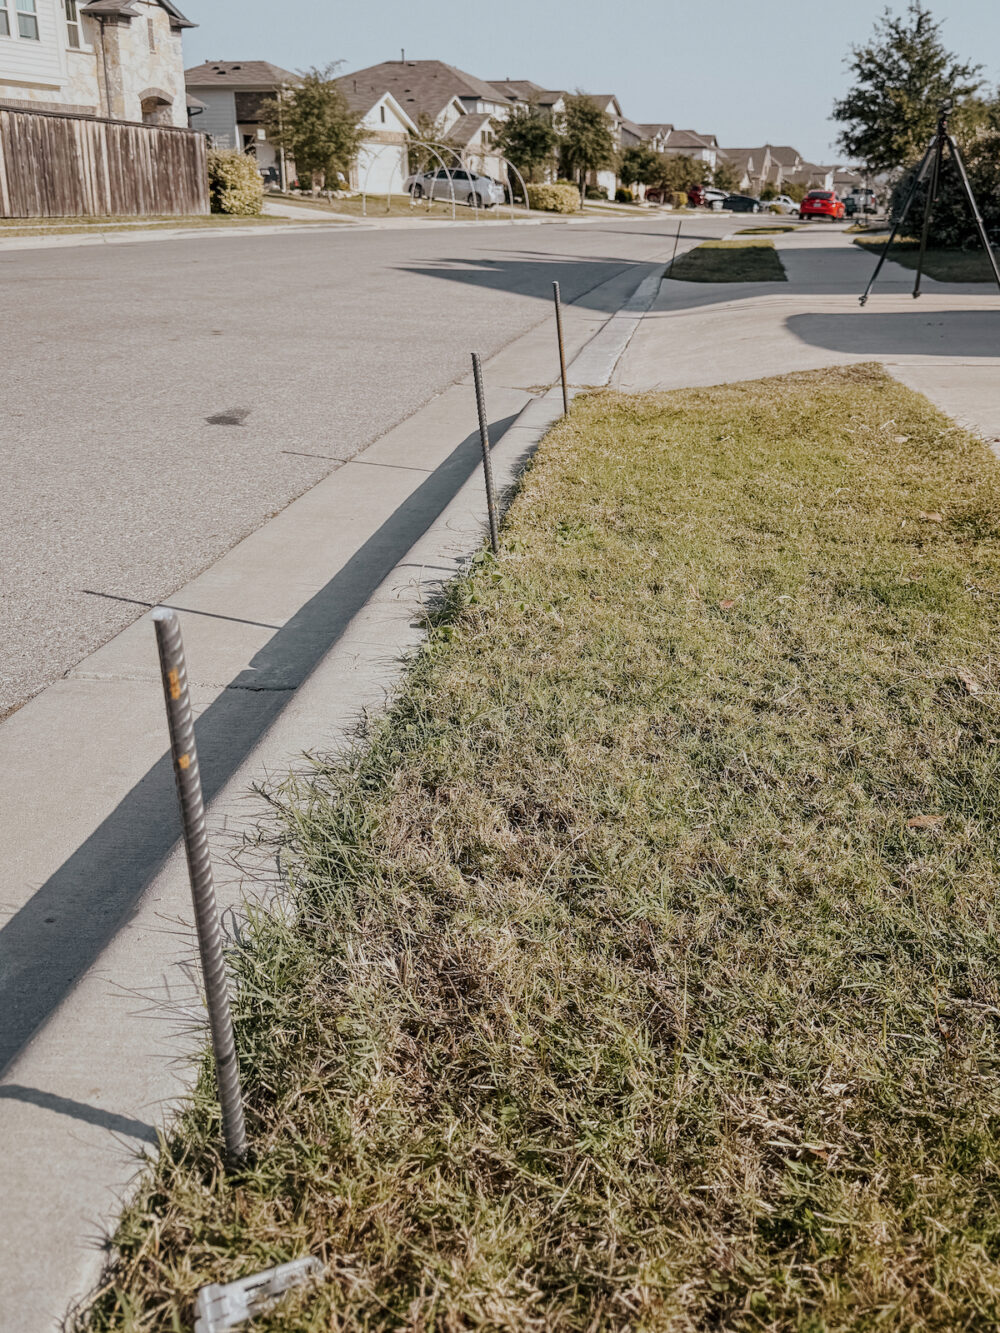
As for how we spaced the arches from each other, we just lined each one up with a seam in the sidewalk. Seriously – we didn’t bust out a measuring tape once for this. But, of course, you can!
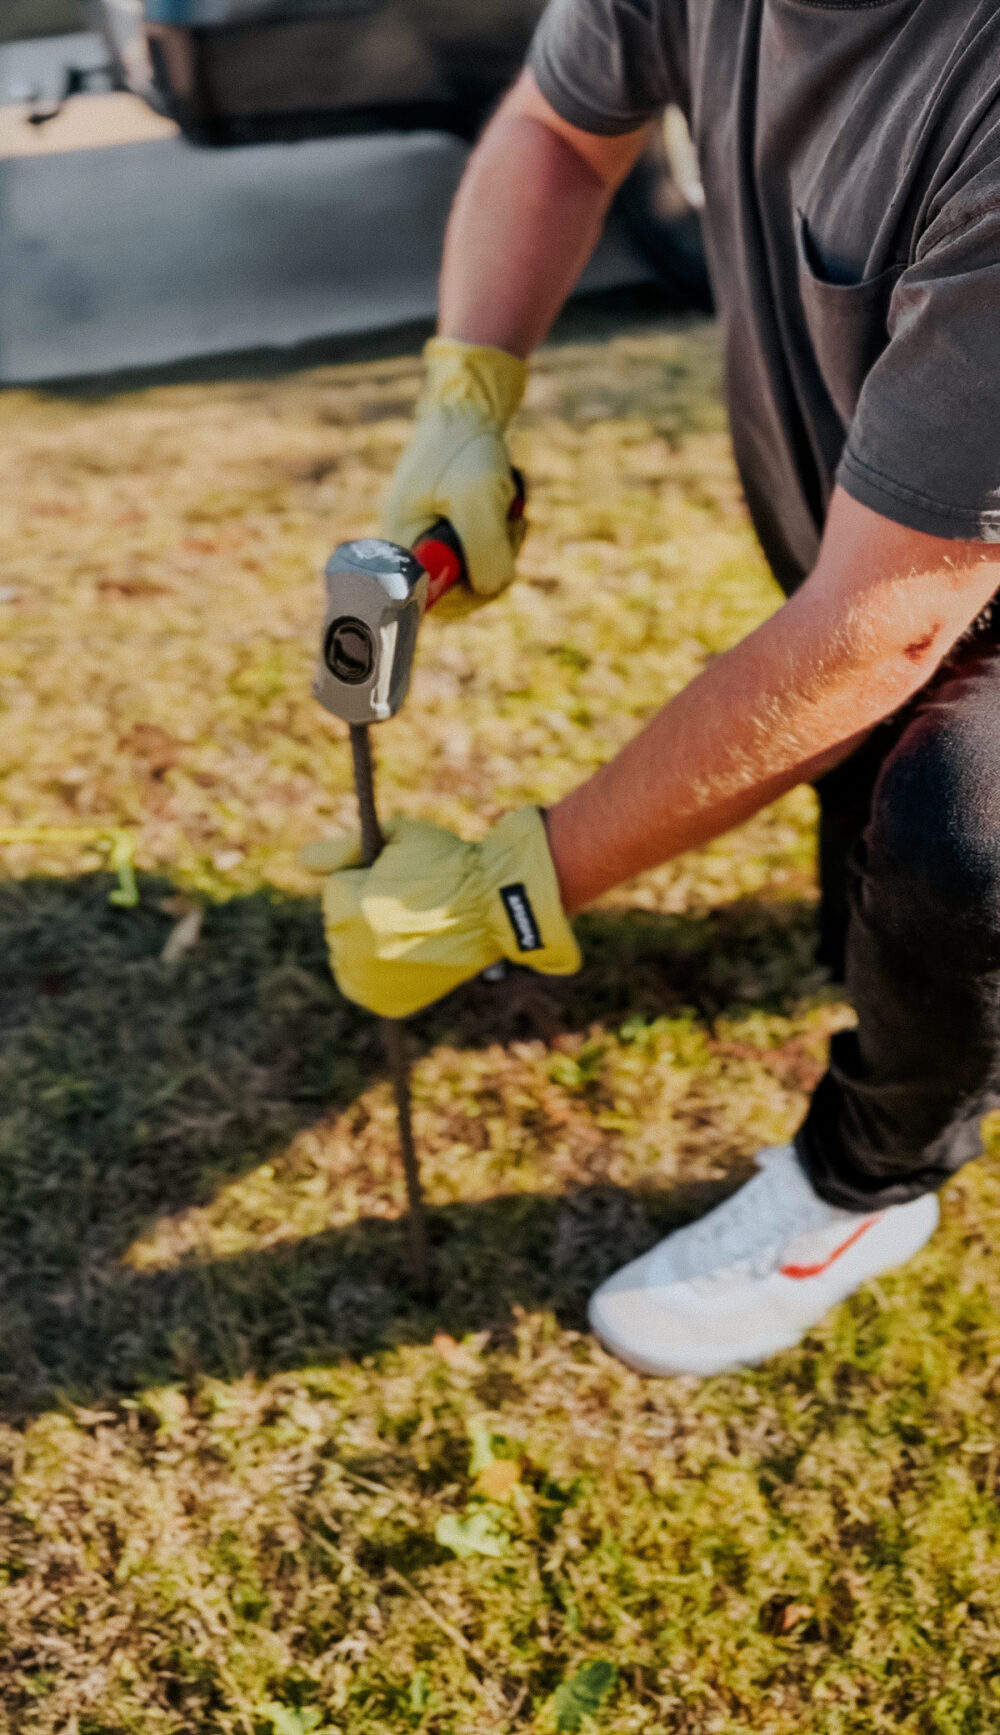
I recommend wearing gloves when you’re hammering your rebar into the ground. It’s dirty and rusty and gross. Just grab your rubber mallet and take out all of your aggressions on making sure that rebar gets firmly into the ground anywhere you want an arch. You’ll need one length of rebar on each side of the sidewalk per arch.
Step Two: Attach PVC Pipes to Each Other
Next, grab your two pieces of PVC pipe and attach them to one another using the coupling. You can use sheer force and determination if you want, but we found pliers helped. We grabbed the PVC with two pairs on either side of the coupling and twisted to get it nice and firm. Don’t use any sort of glue or adhesive here – you want this to be easy to take apart at the end of the season!
Step Three: Wrap Lights
Now, you should have a 20′ length of PVC pipe. And you’re ready to wrap it! We did approximately 100 lights per arch. You can, of course, do more if you want a bigger impact, but lights can get pricey!
We bought a few big rolls of 300 lights and used those – one roll covered 3 arches. Others on our street have just done the 100-light strands and done one per arch. Totally up to you! I’m sharing some notes on connecting them like we did below, though, if you want to read my thoughts on the matter.
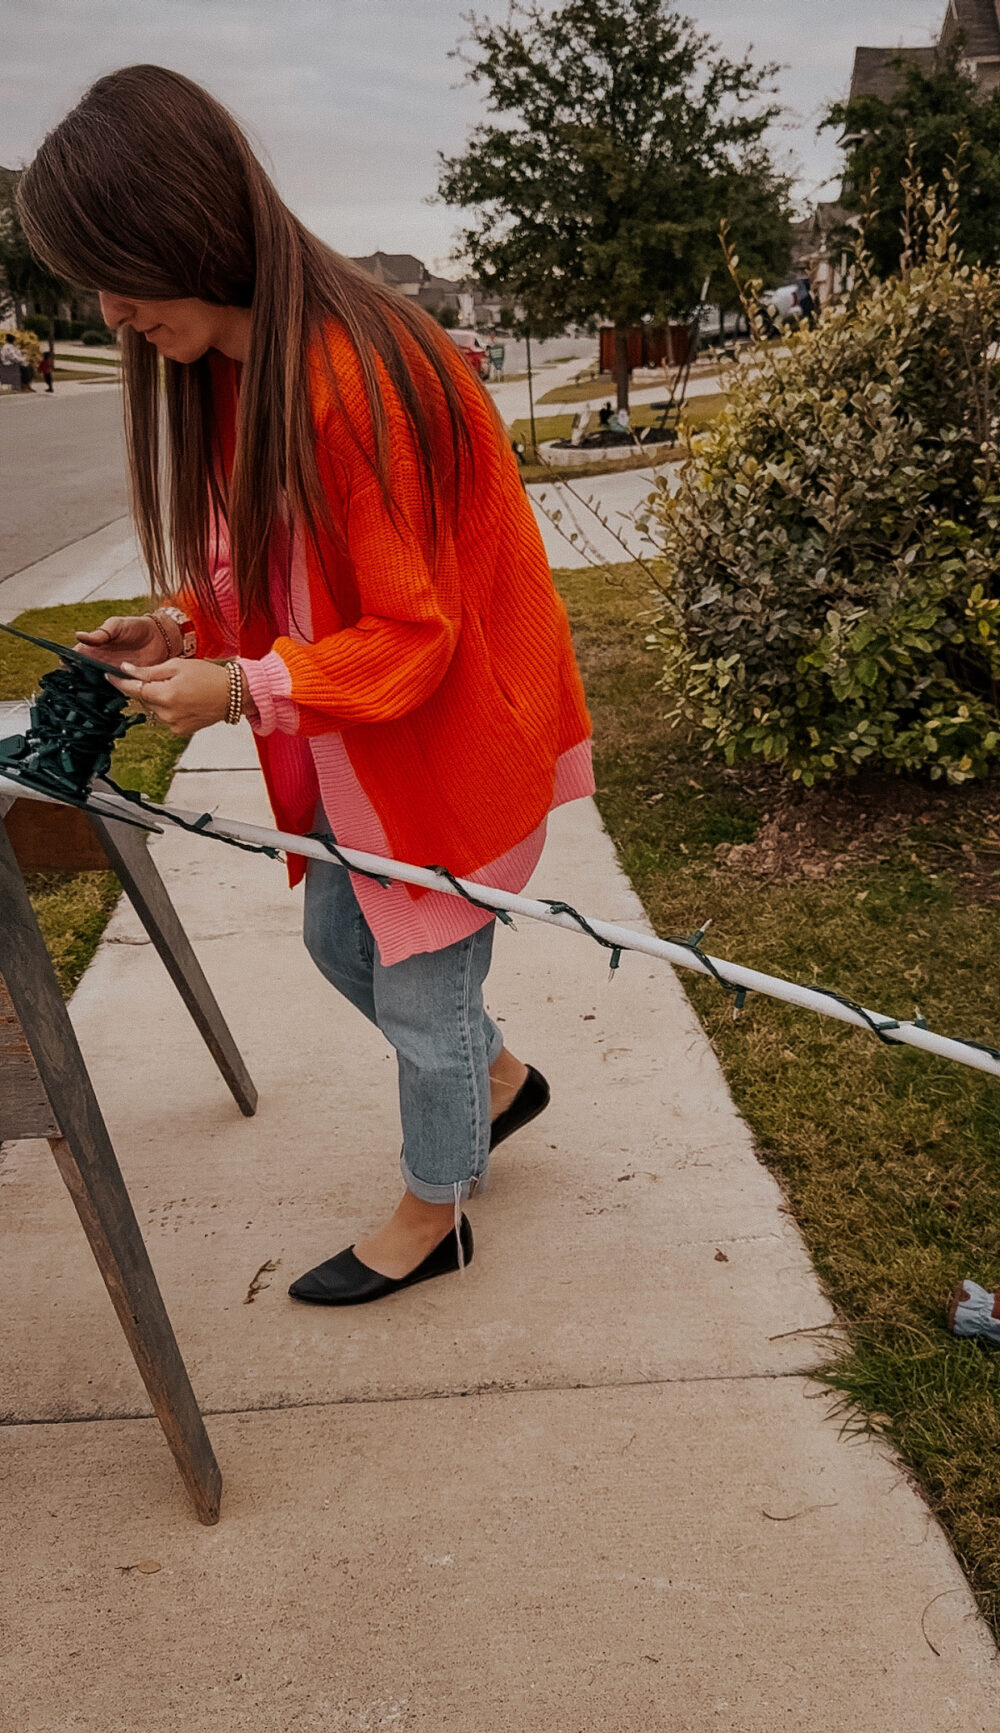
I recommend using some packing tape or painter’s tape to attach the lights to the PVC pipe on one end. Then, just tightly wrap them around until you reach the other end. Again, don’t overthink this! Just wrap the lights around the PVC and try to keep them approximately evenly spaced.
Put a second piece of tape on the other end of the PVC pipe when you reach it!
Step Four: Put the Arch Up!
Once your PVC pipe is wrapped in lights, you’re basically done! The final step is to slip the holes on each end of the PVC pipe over the rebar. It’s helpful if you have a second set of hands for this step! Just be careful not to bend the joint too much as you work, and it should all stay in place nicely. If your PVC pops apart while you’re working (ours did once or twice), just reattach it. Once you’ve got it fully fitted over the rebar, the tension will hold it all together.
If you’re anything like me, you might worry that this is overly simple. Will it actually hold? Yes! We’ve had absolutely zero issues with our arches, and it’s been a pretty windy season. Just make sure your rebar is really firmly in the ground, and you’ll be good to go.
Notes On Connecting Arches

As with most projects, there are a lot of different ways you can approach this. As I mentioned before, we chose to connect our arches with lights and used longer strands. Between each arch, we ran the lights on the ground. I doubled back anywhere that wasn’t naturally going to have lights fall on it, so that each side of the “tunnels” have lights all along the ground. I was a little worried that the lights on the ground would look weird, but the finished effect makes it feel even more magical and like a tunnel. I highly recommend taking this approach instead of wrapping each arch with individual strands!
Another note – if you are worried about stability or just want it to feel even more magical, you can connect the PVC along the top too. This was our original plan, but we pivoted at the last moment to keep it simple. But, if you want, you can use this type of coupling instead and grab some extra PVC pipe. Cut it down to fit the distance between your arches, and add an extra piece along the top between each arch. You can wrap that in lights, too, and I think the effect would be beautiful.
How Much Did It Cost?
That’s always the most important question with any project like this, right?!
By far, the most expensive part of this project is going to be the lights. The rebar and PVC pipe are incredibly affordable. We spent an average of about $50 per Christmas arch. However, we later discovered that Lowe’s had cheaper lights than where we got ours from – we would have saved about $10 per arch if we had gone that route. If you can get them on sale, you’ll save even more!
How Do You Store Your Christmas Arches?
Of course, the final (and equally important question) is what the heck do you do with these Christmas arches when the season is over? One of the things I love about this project is it’s honestly so simple to undo. We taped our lights in place as we worked, which means they should stay wrapped year-round. When it’s time to take them down, we’ll pull the PVC off the rebar and bundle all the arches together (since they’re connected by lights). Then, we’ll just have some 10′ long PVC pipes to store, which shouldn’t be too difficult. I will note that for storage purposes, I predict that doing one light strand per arch will be simpler, versus connecting them along the ground like we did. I’ll have to update this post next year once I know how much of a pain that choice ends up being!
We haven’t hatched an exact plan yet, but our neighbors across the street just hung some large hooks in their garage (like a bicycle hook) and they have their Christmas arches stored along one wall. They take up almost no room, and are really easy to pull down and put back up!
And that’s it. These Christmas arches were so fun to to put together and so worth it. It took us a few hours one Saturday afternoon to knock this out – but I imagine that in future years it’ll go way faster.