
DIY Kid Picnic Table
Last updated on July 11th, 2024 at 05:47 pm
This DIY kids picnic table project is sponsored by Wagner.
Friends, over the last few months I’ve slowly been learning more about power tools and building. I’ve been sharing what I’m learning as I go. I’ve even completed a few small projects on my own (see my DIY geometric wood art here, and my vertical plant stand here).
But I felt like I was ready for something more. Something bigger.
Furniture.
It’s big and scary! But, I knew if I was ever going to get any better at building, I was going to have to dive in and do it. I decided to start with something simple for someone who isn’t too terribly picky.
I mean, he’s picky about what he eats. And what he wears. And which seat he sits in for dinner. Okay, and which cup he uses.
Alright fine. He’s really picky. But he doesn’t know much about furniture. So, he won’t fault me for a slightly wonky piece of furniture.
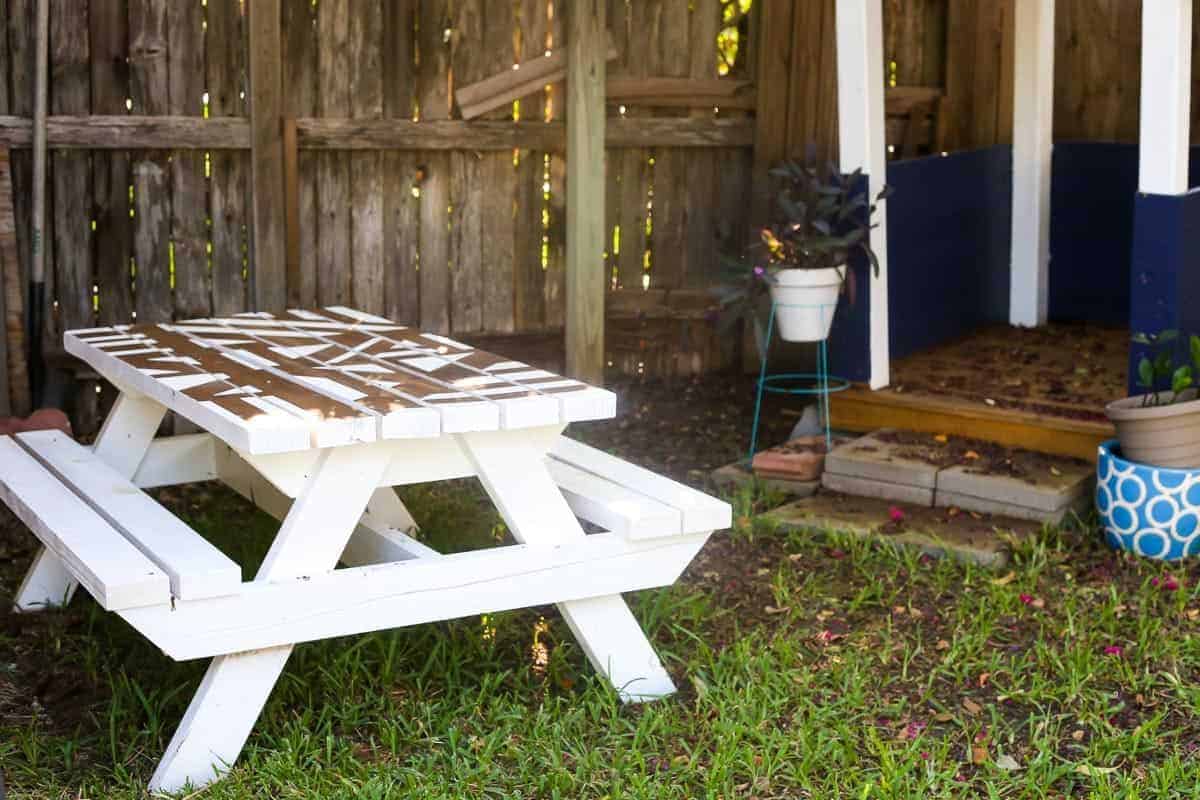
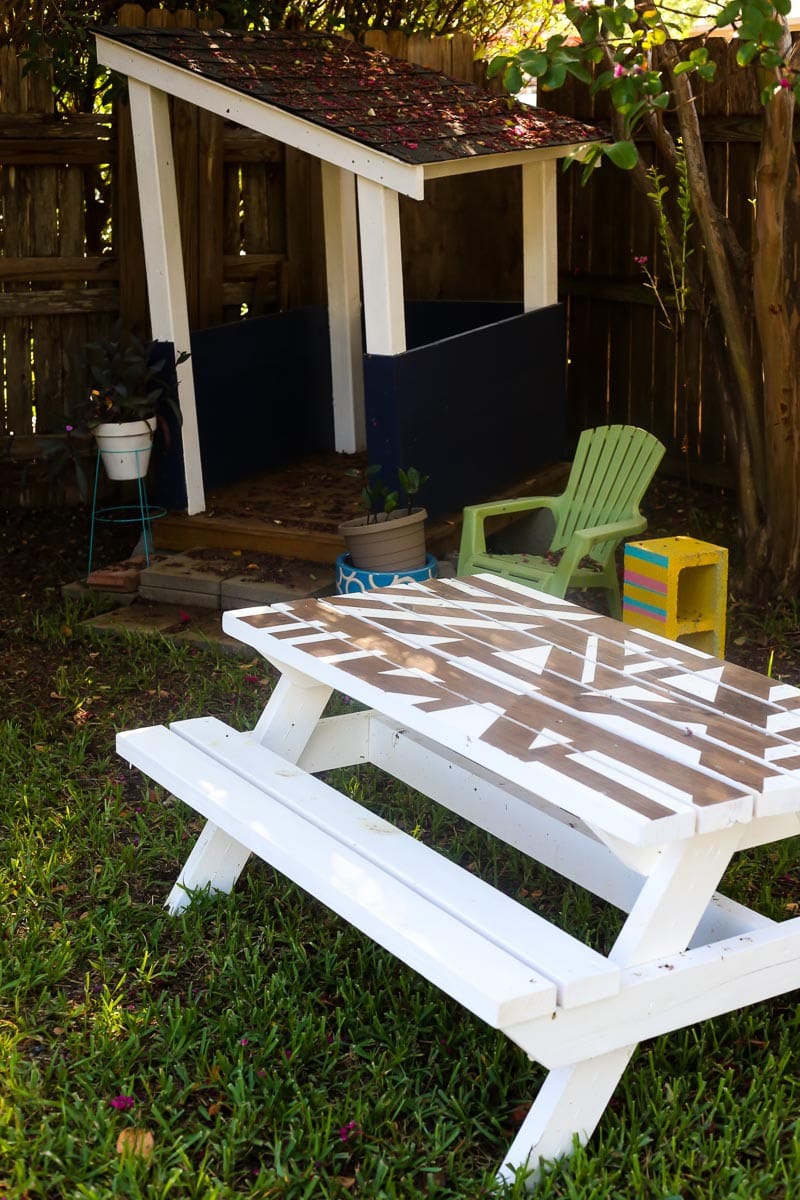
That’s right, I built a DIY kids picnic table for Jackson.

Y’all, I built this table with my own two hands. Corey wasn’t even home. I did it completely, 100% by myself! I couldn’t be more proud. It makes me feel really motivated to do some more building. Maybe a dining room table for the new house? Or some nightstands? How about a whole new house?!
Hold on, I’m getting ahead of myself. Let’s chat about the table first.
How to Build a DIY Kids Picnic Table
I followed the plans for the DIY kids picnic table from Ana White. It was very straightforward and easy to understand. And, this is coming from someone who has never read a furniture plan ever before this. I say this all the time, but if I can do it, you can do it.
I won’t get into all of the details of how to build it – the plan covers it pretty thoroughly. But, I did take photos while I was working so I’ll give you the overview.
I started by attaching the top pieces to support boards underneath. The plan calls for 2×6 boards, but I didn’t have those so I went with 2x4s instead.
Then, I cut the legs down and attached them, along with the supports.
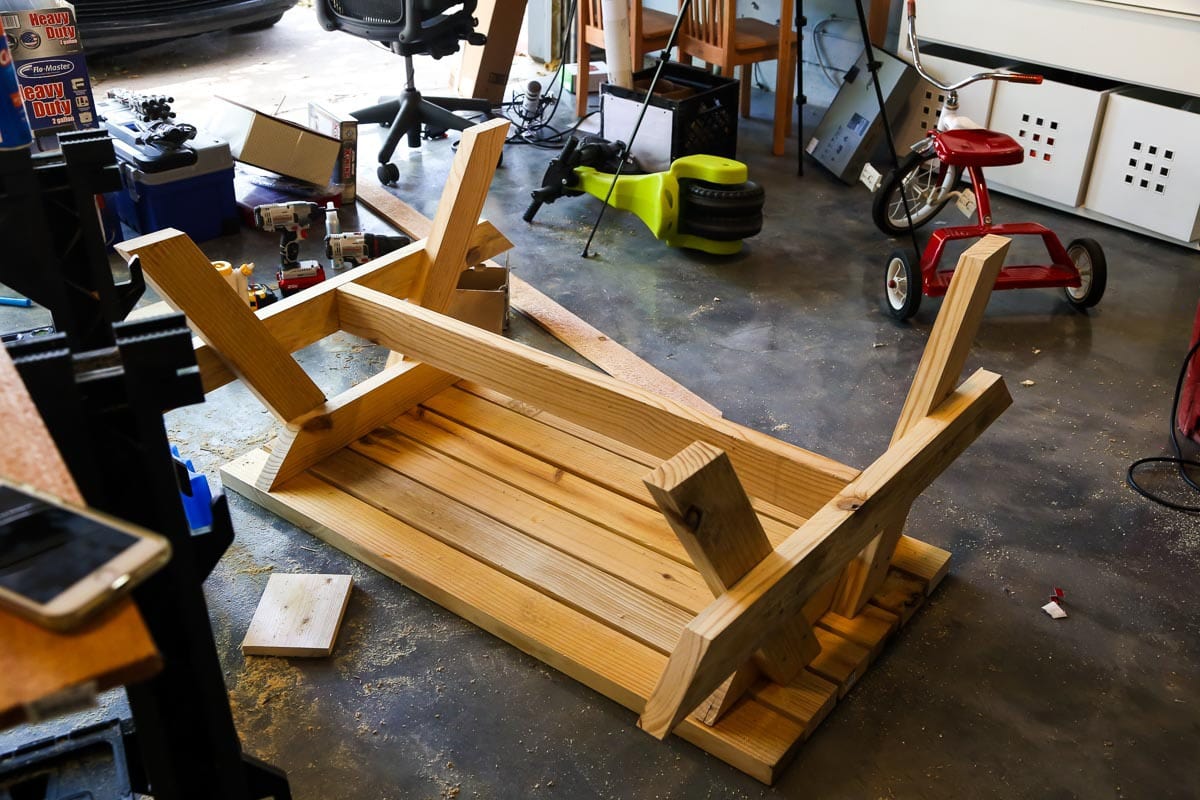
After that, I flipped the table over and added the boards for the seats!
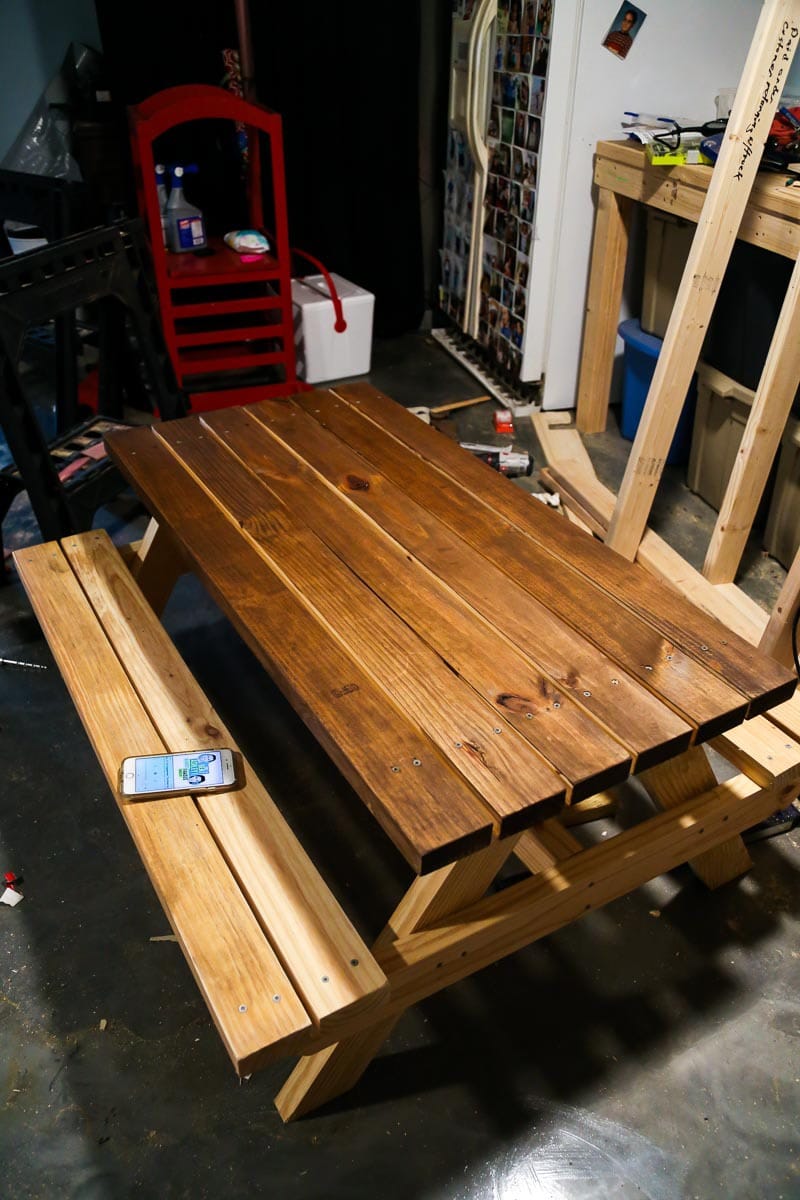
And seriously, that’s all there is to build this. It took me just a few hours, and it’s not perfect, but Jackson doesn’t know the difference. And, he loves it!
Of course, I loved the table as it was and I was so proud of myself for building it. But, I also wasn’t about to just leave it alone. I mean, a picnic table is fun and all but isn’t it way more fun with a cool paint treatment?
Painting the Table Top
I partnered with my friends at Wagner for this part of the project and, y’all, I’m so glad I did. They sent me their new Studio Plus sprayer and I am officially obsessed with it. I’ve chatted about a few of their different sprayers before (you can see how we used their sprayers on our DIY bar cart and when I painted the workshop), but this one is hands down my favorite.
So, how did I create this super cool look? It’s way simpler than it looks. I even made a video to show it off, so you can get a visual for how it works. I’ll share some details below if you can’t watch, but it’s definitely the best way to see how the sprayer works!
Video Tutorial
If you prefer, you can watch the video on YouTube right here!
Okay, so for the details. First, I stained the entire table top:
Then, I grabbed my trusty painter’s tape and marked off a design. I just played around with a graphic, geometric-y pattern until I landed on something I liked. It helps to step back and take photos of it as you go. For some reason, it’s much easier to notice when something look “off” in a photo than it is in real life.
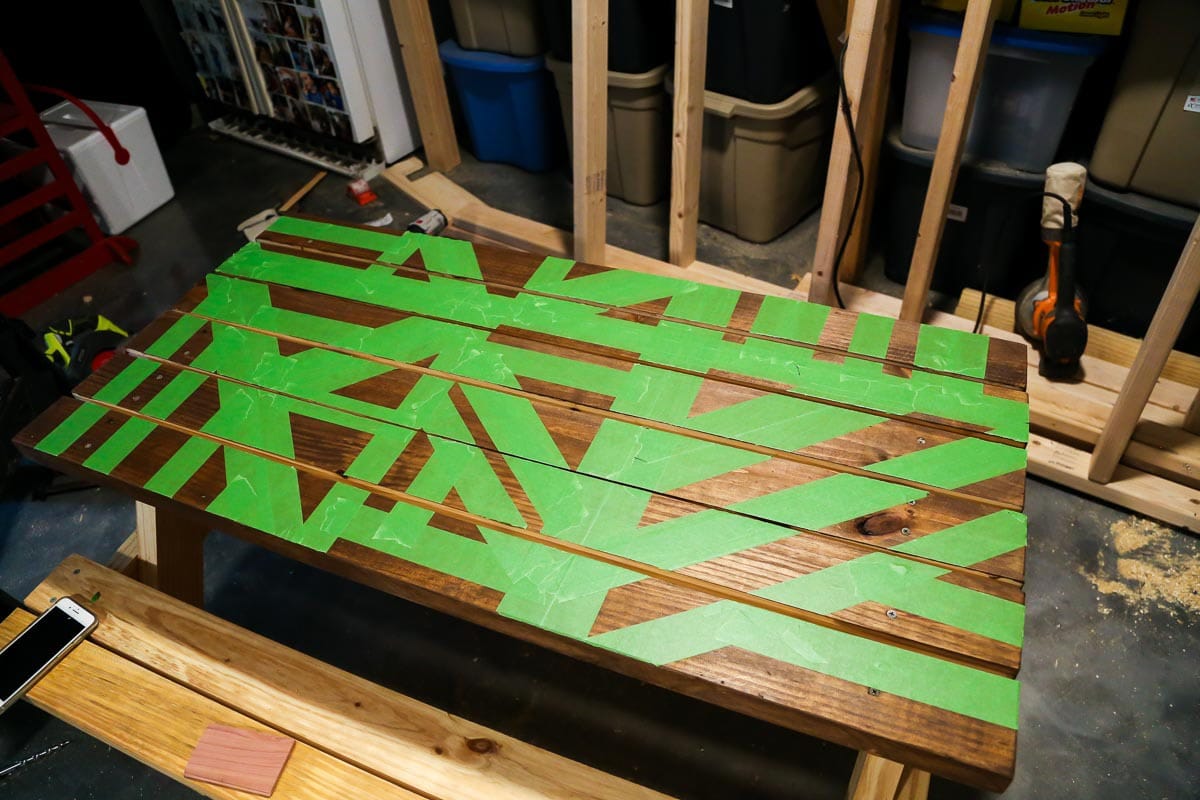
Once I had a pattern I liked, I just grabbed my sprayer and got to work. It was really easy to get into all of the gaps and grooves with the sprayer – it would have taken me forever with a brush. Then, once you’re done painting, wait no more than 5-10 minutes before pulling off the tape. Why? If you wait too long and the paint dries, you could pull up some of the paint when you pull off the tape. If you remove the tape while the paint is still wet, you’re a lot more likely to get perfect lines.
Don’t forget to seal it! I brought this dude outside before I sealed it (because I needed some space in the garage for a different project). Then we got hit with Hurricane Harvey. I forgot to bring it in over the 2 full days of rain we got. Once I remembered to check on it, there were a few spots where the paint had yellowed due to the rain and the Crepe Myrtle blooms dropping on it. I just used a brush to touch those spots up and then sprayed a finish on to protect it from the elements in the future.
Jackson is a huge fan of this table. He loves hanging out at it, and now that the weather is finally cooling off a bit here in Texas we can actually spend time outside.
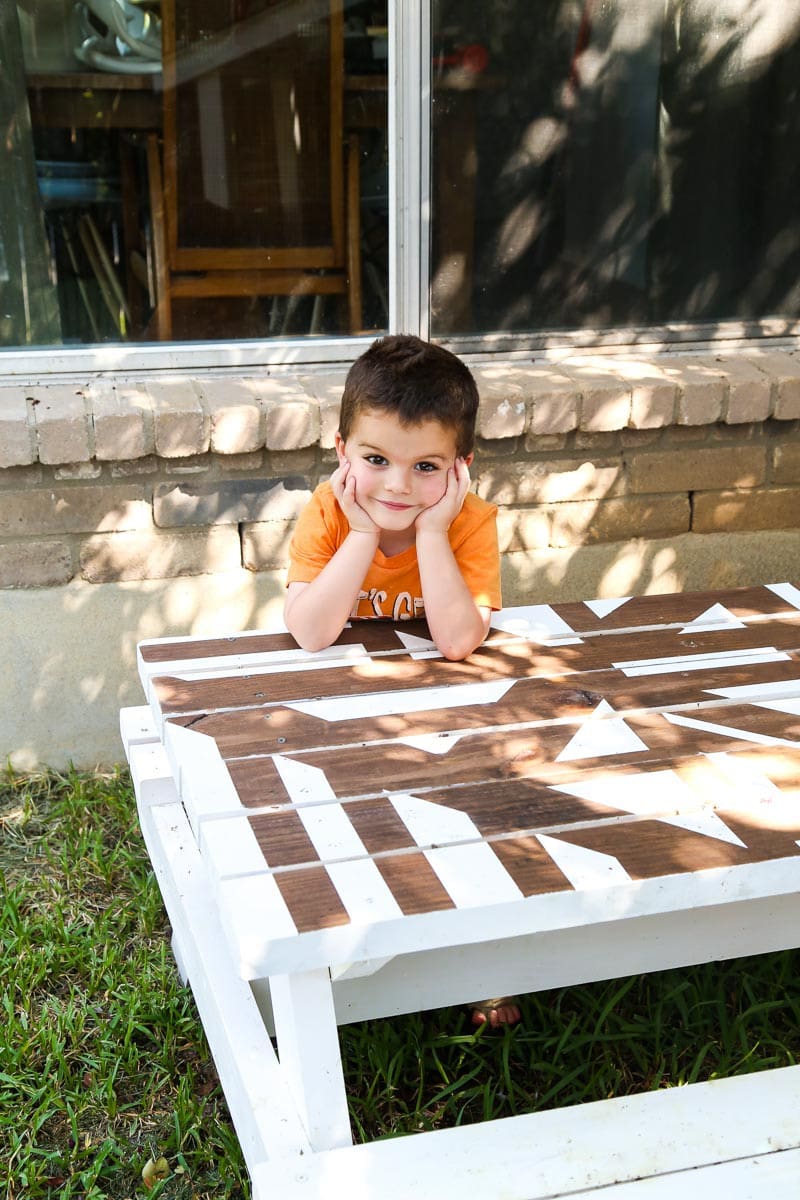
I can’t even tell you how proud it makes me to know that I built this DIY kids picnic table completely on my own. It’s so satistfying to know I’m capable of doing it on my own, and it makes me really excited to get started building something else for our house.
Have you ever built any furniture? What do you think I should build next?
Please tell me what finish you used that didn’t turn the paint yellow!
This project turned out great. Love the design. Jackson is adorable!
Thanks so much, Crystal!
Cool! I love the design! Love the geometric art! Do you have the blueplans?
Thank you! I don’t have any sort of template for the pattern on the top because I kind of just made it up as I went! You could probably re-create it if you pull up the photo as you work, though!