
Geometric DIY Wood Wall Art
Last updated on January 31st, 2024 at 01:33 pm
Today I’m going to show you my first ever power tool project – some beautiful geometric DIY wood wall art! It was such a fun home decor project, and so, so easy!
We all have those spaces in our home that are just totally impossible to decorate, right? I know I’m not alone on this because some of my most popular posts are all about how to decorate those hard-to-fill spaces (like that weird corner you don’t know what to do about, and the space above your bed). Well, I have one of those spaces in my bedroom – it’s the area above my dresser. I’ve wanted to do something fun to this space like some large scale art, some DIY wood wall art, or hang a gallery wall for a while now but I just couldn’t decide what to do.
So, for 6 years, I just ignored it.
But! I’ve been itchy to make our room a more enjoyable place lately, so I’ve been doing a lot of brainstorming and browsing Pinterest and Instagram. I was really inspired by the geometric wall art in this gorgeous space, and I knew I could make something similar. It felt like exactly the right choice for this space!

Are you drooling yet? Because I am.
It’s okay. Don’t be embarrassed. Wipe it off and grab a cup of coffee (or a glass of wine, depending on when you’re reading this), and let’s chat about how I created this wood wall decor. Because you know you want to make one too and it’s one of the easiest DIY projects around.
How to Make Geometric DIY Wood Art
Tools + Material Needed
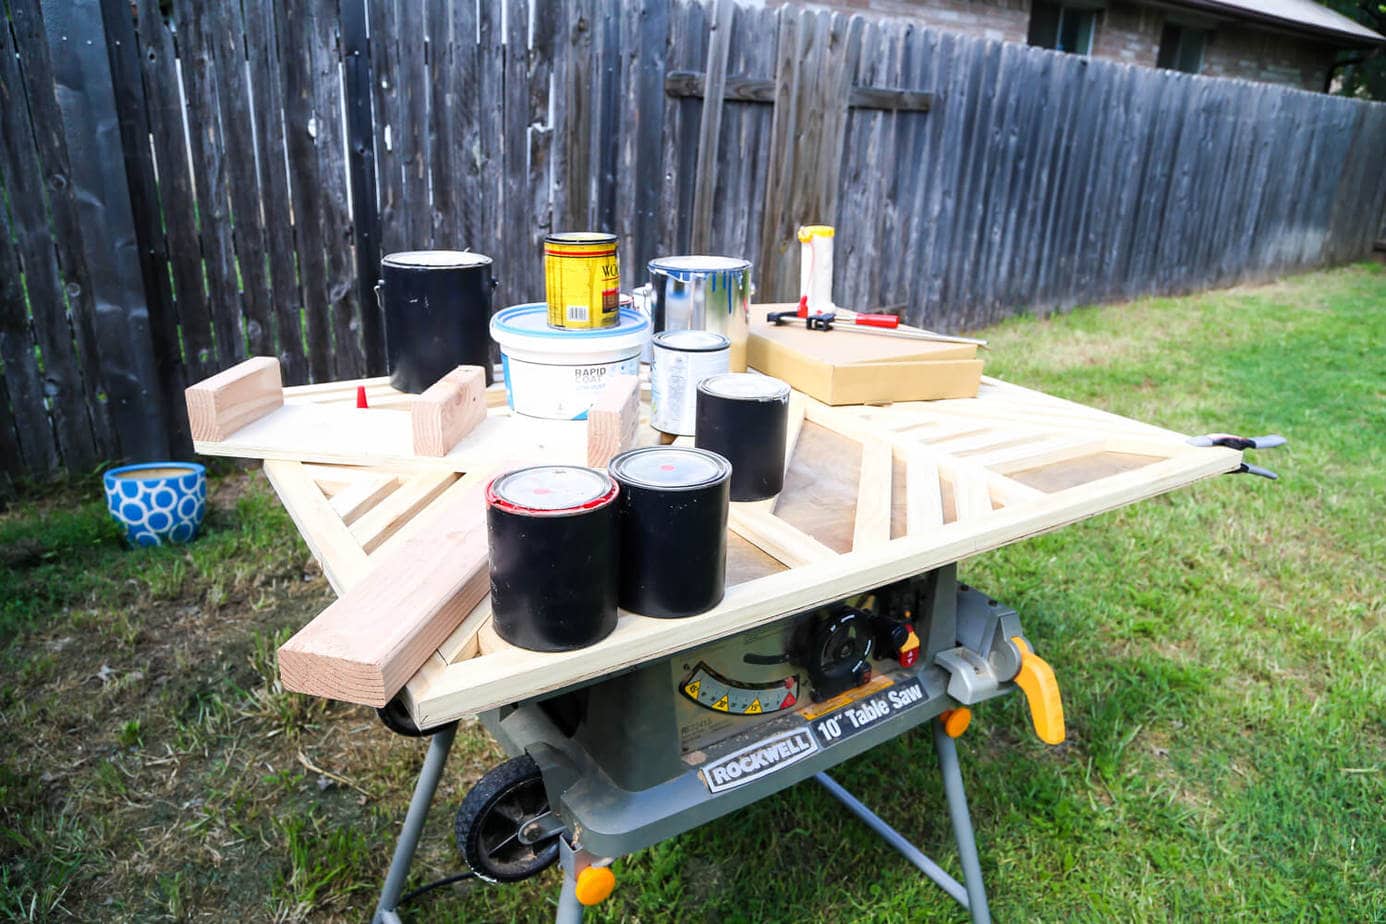
Step One: Prep Plywood
First, you’ll want to cut your plywood down to the size you want for your art. Mine is a full quarter sheet of plywood, so it’s 2′ x 4′. You can do whatever size you need for your space, though! If you don’t have a table saw or circular saw at home to cut it, they’ll help you out at your local hardware store.
Once you’ve got the plywood at the size you want, it’s time to stain it. I highly recommend this before you start adding in the wood pieces, because it’ll be much easier to do now.
Step Two: Add Frame
Next up, I created the frame on the art. To measure the pieces, I just held them up to the board and marked where they needed to be cut, then I cut them on a 45-degree angle and laid them out on the board to make sure they fit. Easy peasy.
To attach the wood, all I did was use a bit of wood glue and a few clamps. Seriously – no nails, no screws, nothing complicated. Just some plain old glue.
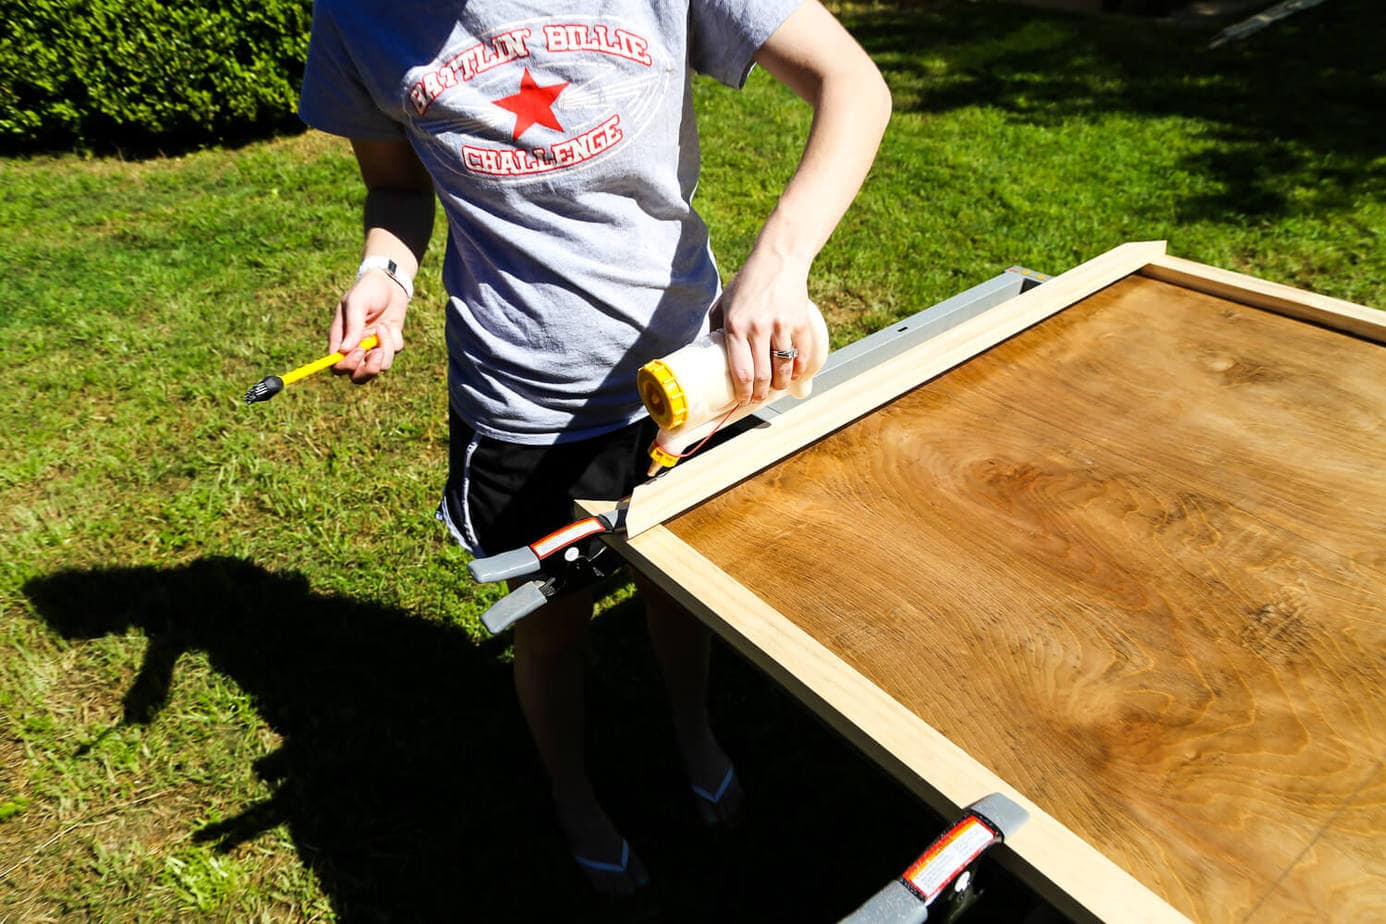
I used a little brush to spread the glue nice and evenly, but it’s totally not a requirement. I would recommend using some clamps, at least on the outside, to make sure nothing moves around while it’s drying.
You can use a nail gun or pin nailer to hold things in place while it dries. However, I used wood glue only and it has held up beautifully!
Step Three: Create Design
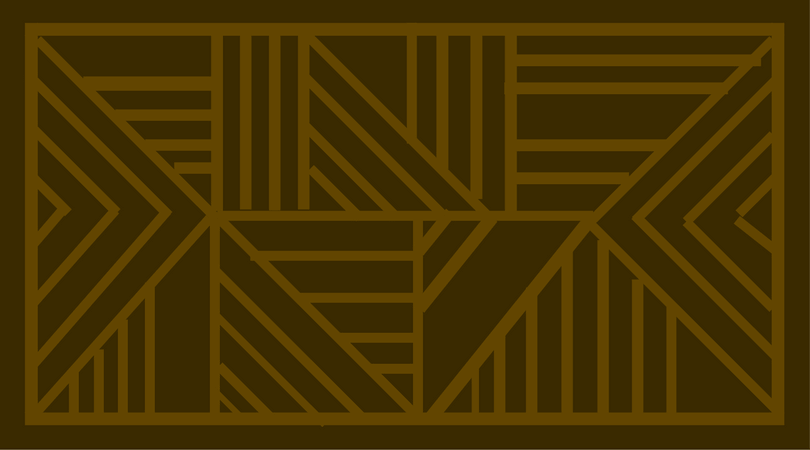
Then, it was time to start the design for my wood art. I created something on Canva to loosely follow. I just played around with it a little until I landed on something I liked. There wasn’t any measuring or follow any specific guidelines – I just messed around with the angles and designs until I thought it looked complete.
Also, I didn’t worry too much about how perfect it was, because I knew I wouldn’t follow it exactly. It’s just a jumping-off point! And, spoiler-alert, I did end up straying pretty far from the original design as I was working, but it was really good to have this to reference, at least as I was getting started.
Step Four: Lay Out Design + Glue
Once the glue on my frame pieces was dry, I started to fill it in with the 1×2 pine boards. I do recommend grabbing some sandpaper and sanding the boards before you get started but, if we’re being honest, I didn’t. Do as I say, not as I do!
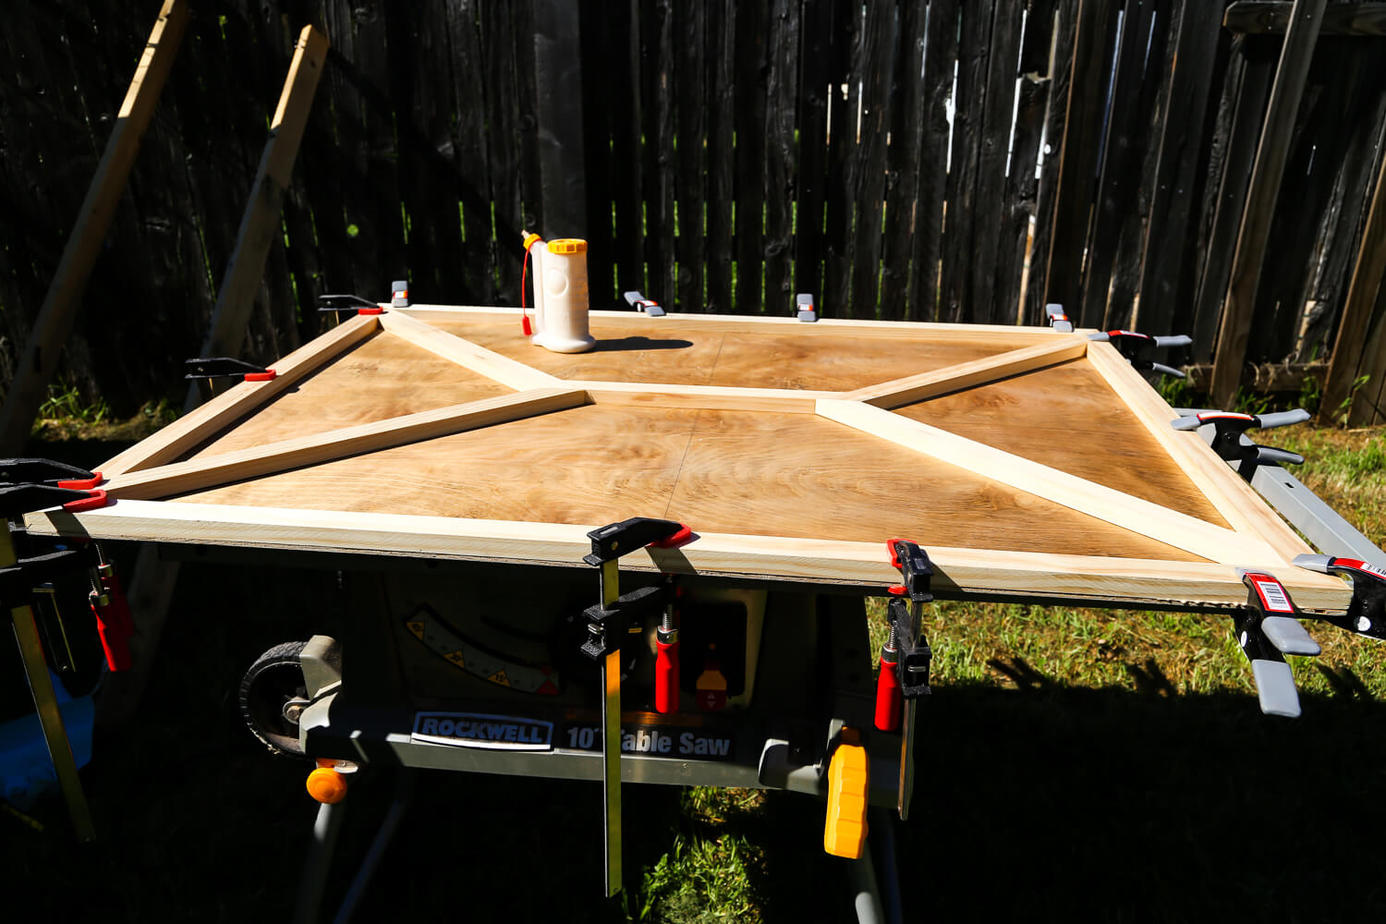
When it came to laying out the wood wall art pieces, I began with the large triangles on the side and the middle piece. That kind of anchors everything inside the plywood base.
An important note – I didn’t glue anything at this point other than the frame. I just laid all of the pieces in there until it was full, then I went back in to glue it down. I didn’t want to end up stuck with something that wasn’t going to work, and it was really easy to glue it all on once all was said and done.
As I was working, I used a scrap piece of wood as a spacer. I stood it up on its side in-between each piece. Again, I didn’t stress too terribly much about keeping everything perfect, but it was a great way to keep things looking mostly uniform.
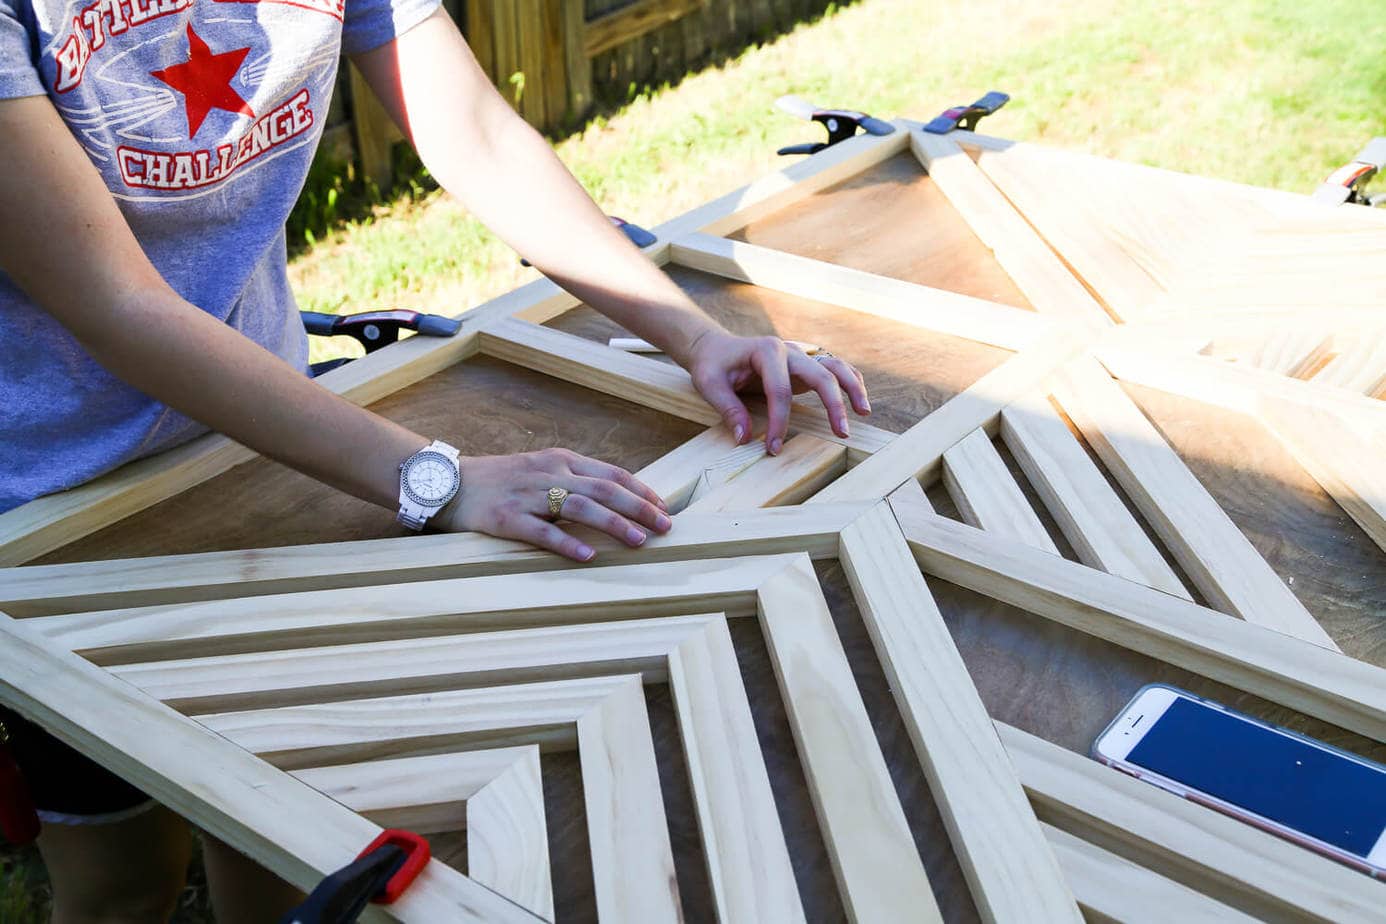
As far as measuring the pieces, all I did was bring each piece over to my art and lay it roughly where I wanted it. Then, I used a pencil to mark where I needed to cut, and the angle I needed to cut at. Then, I cut my wood and laid the piece where it belonged. Super simple. I swear.
Once I had all of the wood in place, I used the wood glue to attach it. Then, I grabbed a bunch of heavy items to help hold it down. I left it like this for about 12 hours, to make sure it was all completely dry…
Step Five: Finish
We’re nothing if not fancy and totally professional around here.
Once the glue was set, I used a foam brush to apply two coats of stain. I also recommend adding a coat of poly if you want to be sure it lasts for the long haul!
Step Six: Hang It Up!
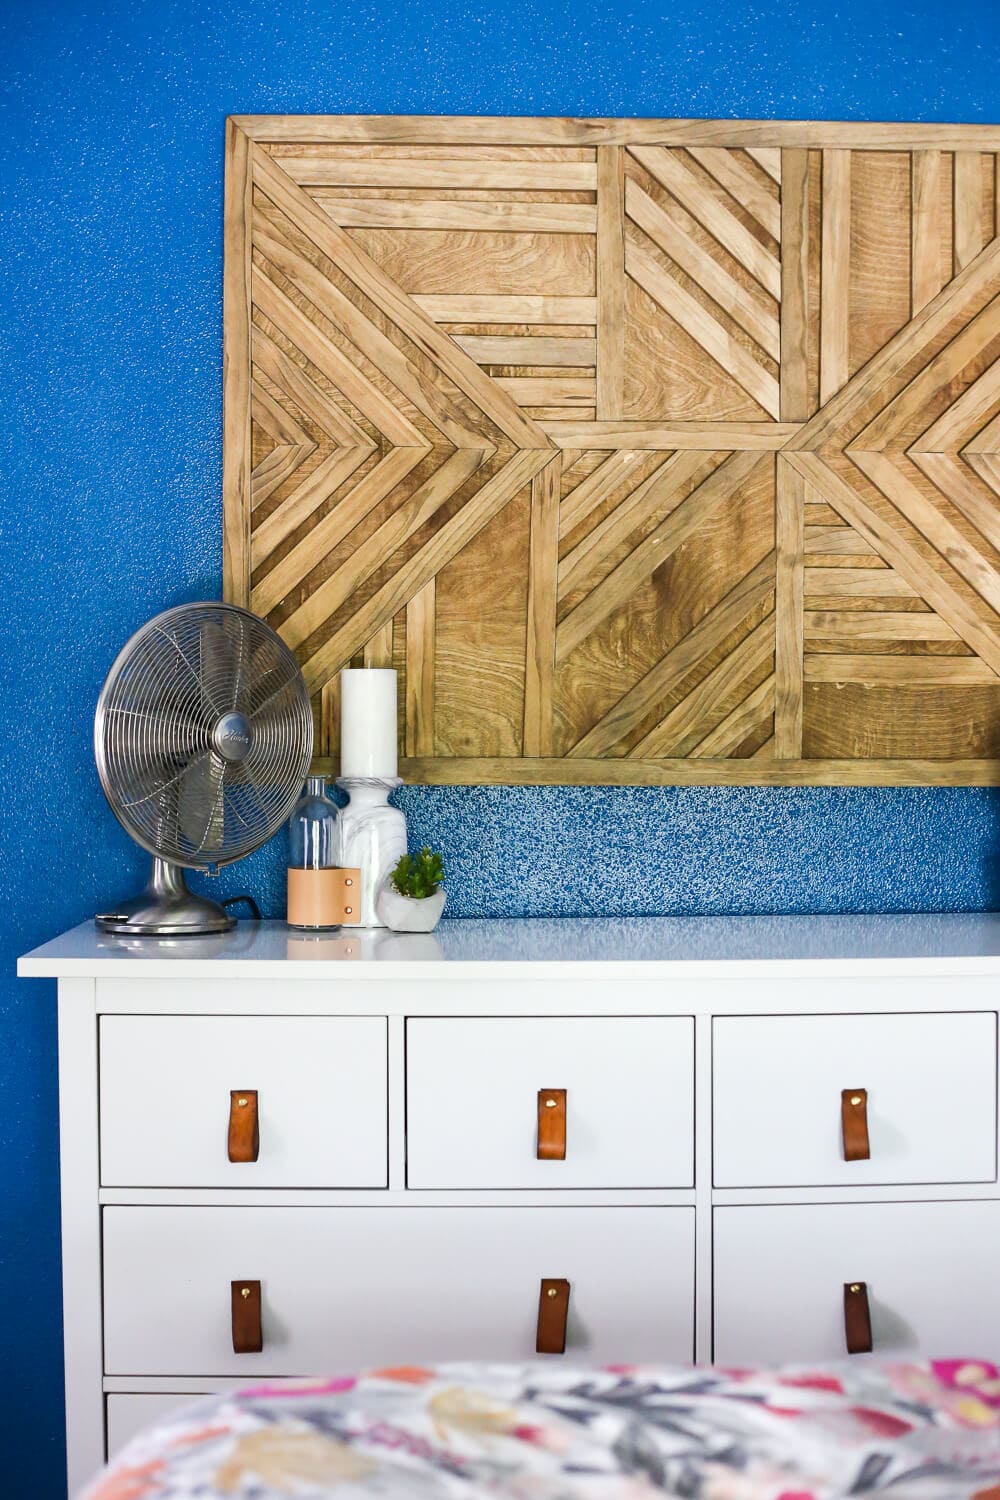
Once everything was finished and dry, I added the french cleat to the back. I find this to be the easiest way to hang DIY art, but you can use whatever hanging mechanism you’d like.
It also feels good to finally have the top of this dresser styled. For so long, we’ve just plopped things down on top of it without any actual thought, and I forgot how much of a difference it makes to actually put some effort into this little space.
This is such an easy project, and I promise you don’t need to have a ton of DIY skills to make this happen. There are endless variations on how you can do this. It would make a great gift, too!
I love creating pieces of art with things like scrap lumber – it’s an affordable project and totally customizable. Hopefully this leaves you feeling inspired to create your own DIY wood wall art!
Great work on this project Amanda! It’s great to see how positive you remain even with some of the negative feedback you received.
Great work on this project Amanda! It’s great to see how positive you remain even with some of the negative feedback you received.
I agree with Vera and the boldness is key!
Great wood wall art! it looks very pretty. I will try this art at my home. Thank you for sharing such great tutorial.
Hi Amanda,
Nice wood wall art project! Your other projects (Edison chandelier) are pretty cool too. It’s great to see more folks getting into the DIY movement, and helping others learn too. That last part is a lot of work.
I’m a long-time woodworker in Austin, and would love to meet you guys sometime. I live south in Estates of Shady Hollow, and recently retired so I have lots of time for woodworking now. Drop me a line if you’re interested in meeting. I’d be happy to help you with some of your projects, though you certainly appear to know what you’re doing!
Looks like shit. A 14 year old shop student could produce something that looked more intentional.
Hi Fuk! Thanks so much for spending time on my site and sharing your opinion. This was actually my first ever woodworking project so it’s absolutely fair to say a student in shop class would have more experience than I did. 🤷🏼♀️ That being said, I still love the project and have it hanging in my home to this day! Hope you have a lovely day!
What a rude comment by someone who couldn’t even leave their real name. This is awesome and a great tutorial, thank you for sharing!!
❤️ thank you so much!
I’m actually an experienced woodworker, it’s not my day job but I’ve built plenty of furniture and sold pieces. I love this idea, I think it turned out great, and I’m going to build the same thing for our tall foyer wall in our bi-level. Excellent creative work! I hope you’re proud of it! I’m gonna browse your site more for your great ideas. Thanks for sharing!
Thank you so much for sharing! I think it looks very pretty. I see the flowers nearby and wonder if you can somehow add them to the piece itself. Is there any way to stick a few silk flowers or plants, around or in-between the slats? I think it would make it look even prettier!
That’s a fun idea, too!
This is very interesting work of art, when I first saw I wondered how did you come up with this beautiful geometrical pattern, then scrolled down a bit and canva answered my question. I have worked on Canva before and come across lots of these patterns there, you fiddled with them very nicely. Wood always looks good and this beautiful pattern of lines and angles took it to an another level.
Amazing project! A simple graphic statement piece, and a wooden one – could it get any better?
I will be the one boo-ing change of color, though. I colored my entryway in a pretty similar shade, mounted a stained glass chandelier brought from Istanbul, and now it’s one of my favorite areas. Hope your new color will be as bold as this one!
I promise, it’ll still be bold! 🙂