
DIY Wood Sign
Last updated on March 4th, 2023 at 11:41 am
I get tons of questions about how to make DIY wood signs every time I share mine. It’s such an easy project, so I wanted to share a full tutorial for you!
If I’m looking for art for a spot in my home, one of my very favorite go-to projects is to take on a DIY wood sign. I’ve created several of them in the past, and they always make me so happy when they’re done. They’re cheap and easy to make, they are totally customizable, and they look great.
What’s not to love?!
In our old house, we had this DIY wood “Gather” sign in our kitchen and I still miss it every day. I’ve considered adding one to the kitchen here but I just don’t think it fits as well with the style of this house.
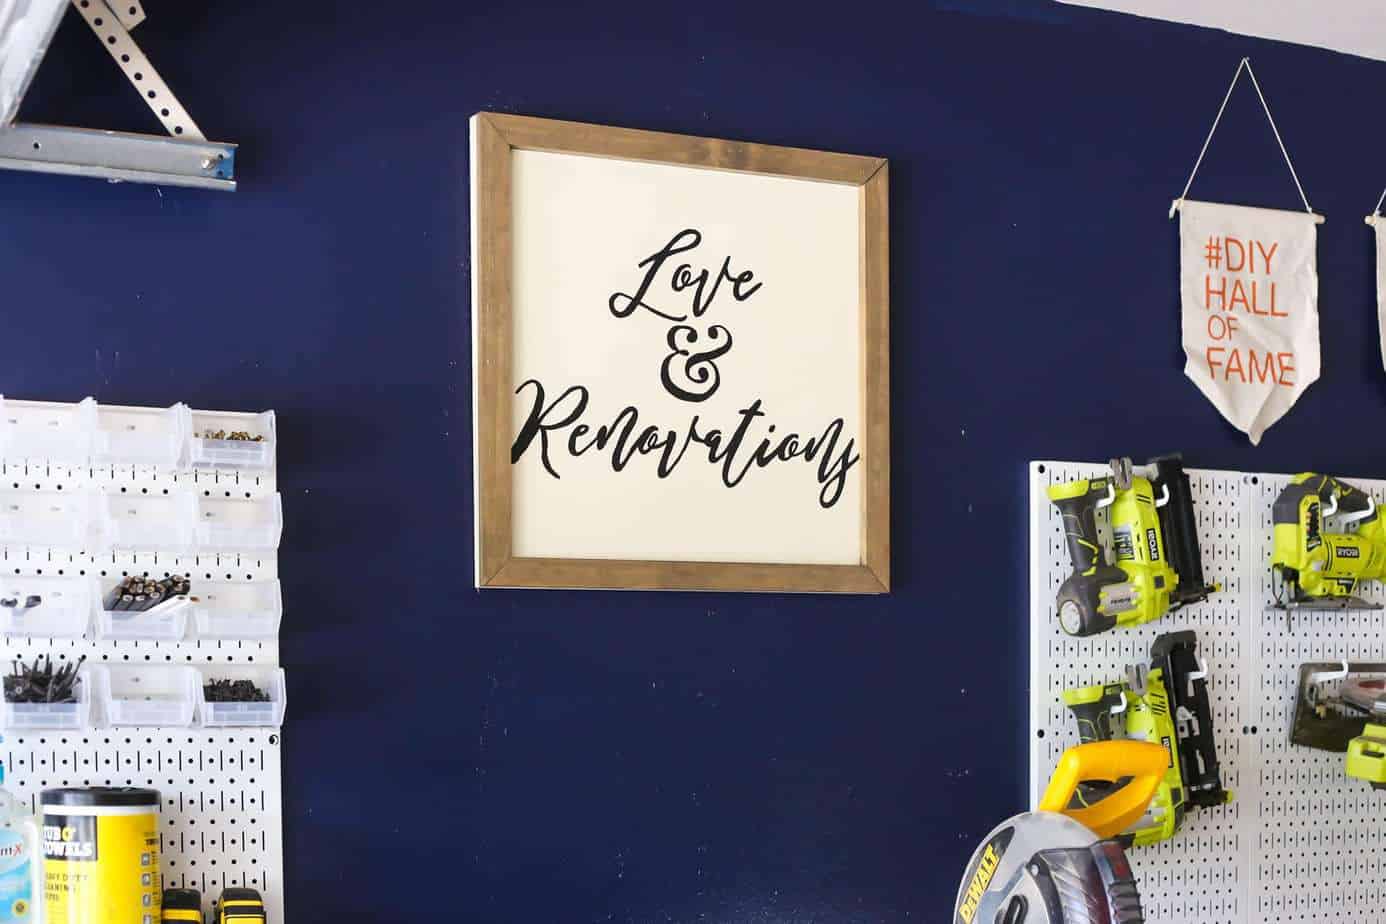
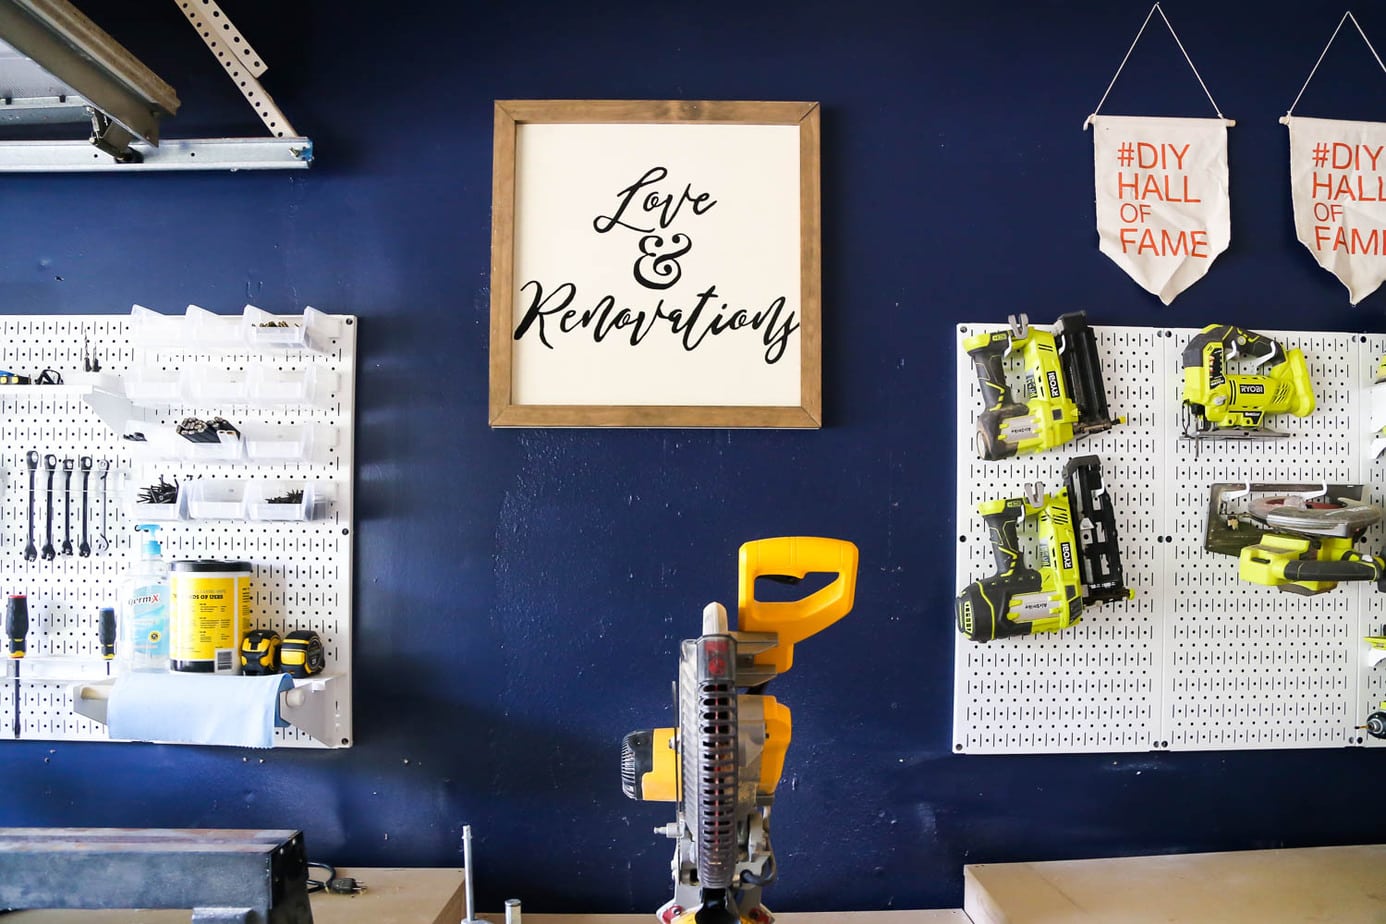
But, I digress. Today, we’re talking about the DIY wood sign I made for the workshop! We had a big open space between our two new metal pegboards and I wanted to fill it with something that didn’t need to be accessed (like tool storage) but was still nice to look at. Of course, a wood sign was the only logical answer!
Of course, most of you won’t be making a DIY wood sign with your brand name on it. But, how cute would this be in a workshop with “Dad’s Shop” written across it? (Or, of course, “Mom’s Shop”) You could also make signs for the bathroom, kid’s rooms, the living room – really, it’ll work just about anywhere.
Ready to learn how to make your own?
Psst – Here’s another really fun DIY sign idea!
Easy DIY Wood Sign
This post contains affiliate links. Click here to read my full disclosure policy.
Materials Needed:
- 3/4″ Plywood (You’ll want to use a paint-grade plywood, so not the super cheap stuff. You can buy them in multiple sizes, we went with a smaller size since our sign wasn’t going to be large)
- Circular saw (Optional – used to cut plywood down to size)
- White paint
- 1X2 wood for trim (You’ll need enough to frame out the sign. I purchased two 6′ boards)
- Wood stain
- Paint pen
- Printer + printer paper
- Pencil (Optional – you can also use graphite transfer paper)
Step 1: Prepare Your Plywood
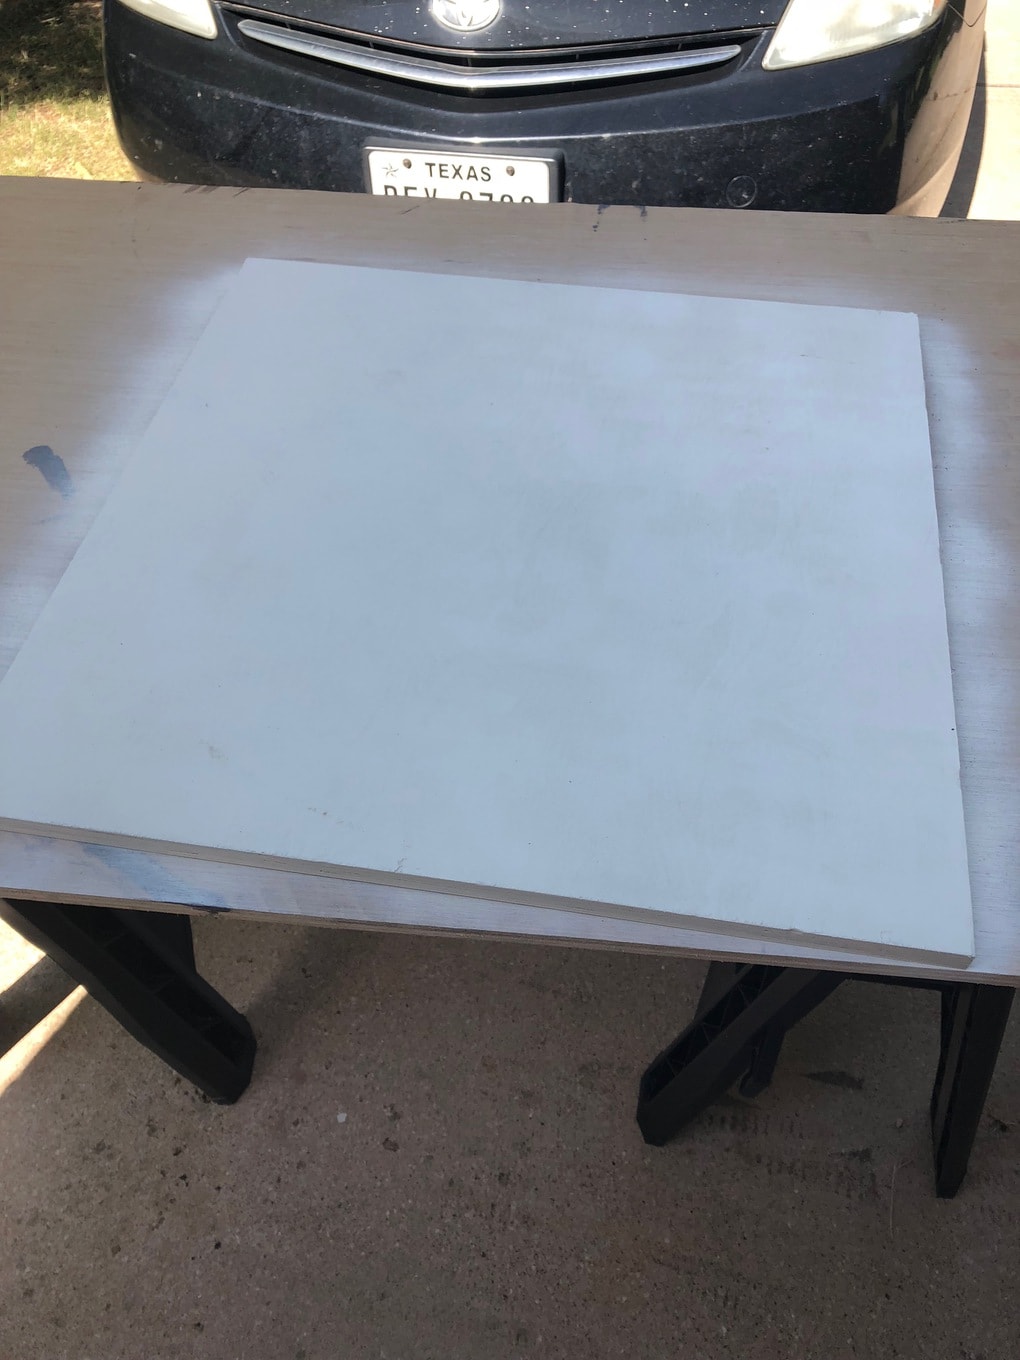
You’ll start off by cutting your plywood down to the appropriate size for your space. I wanted my sign to be about 2 feet square, so I simply measured and marked the board, then used my circular saw to cut it to the appropriate size.
Once your board is cut down, you’ll want to go ahead and paint it. I typically use latex wall paint for my signs, but I was in a rush (and didn’t want to get a paintbrush dirty), so I used some leftover spray paint (this one, if you’re curious). Either way is fine, as long as it gets painted!
Step 2: Create Your Design
Let your board dry, then you’re ready to add your letters! In the past, I’ve designed my signs in Word (I measure how large I want the letters to be, then use the ruler in Word to size them appropriately) but this time around I decided to try a new technique and used Photoshop. If you want to see the old technique, you can read all about it on this post. Here’s a rundown of how I did it this time around:
Note: If you don’t have photoshop, there are free options that function the same! I like Gimp – it has a bit of a learning curve if you’ve never used Photoshop, but it’s very simple and with a little help from Google, you’ll be rocking it in no time.
- Create a canvas the same size as your sign – that means I created my canvas to be 24″ by 24″
- Choose a font you like and write out your words, filling the sign however you’d like (I centered mine both vertically and horizontally and left a fair amount of white space).
- Export the image as a PDF, then open in Adobe Reader.
- Print the image using the Poster setting in the print dialogue box. This will automatically tile your image onto several sheets of paper for you.
Step 3: Trace Your Design
Once your image is printed out (no matter which method you use!), grab your papers and head over to your sign.
This is where I wish that I would have been able to find my graphite transfer paper. This makes everything way easier, so if you have any laying around (or if you aren’t in a hurry and can purchase some first), I highly recommend using it. If you don’t have any, though, all you need is a pencil!
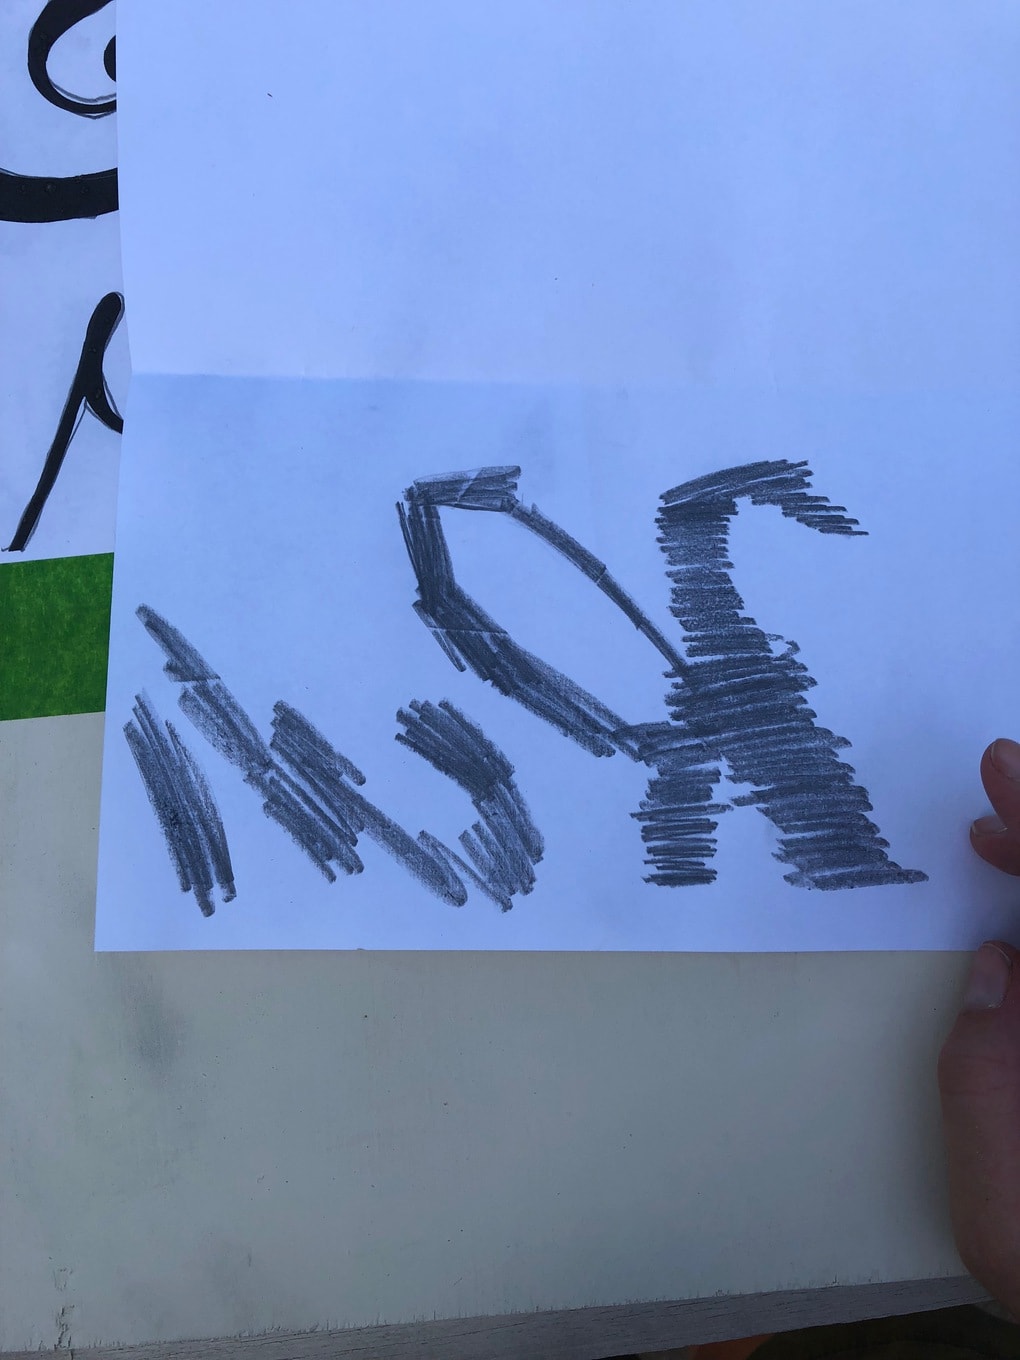
Simply use your pencil to shade in around the letter on the back of the paper (just be sure that you cover anywhere that the letter is on the other side), then flip the paper around, put it into place, and trace. It’ll clearly and easily transfer the lead to your sign so you have a perfect outline of your letter!
I recommend preparing each paper with the pencil ahead of time, then tape them all in place on the sign to trace. Alternatively, if you’re smart/prepared, you can just lay down a layer of graphite transfer paper and then tape the printed letters on top.
This is one of those do what I say, not what I do situations.
Although, if you’re cheap and lazy like me, the pencil thing works just fine.
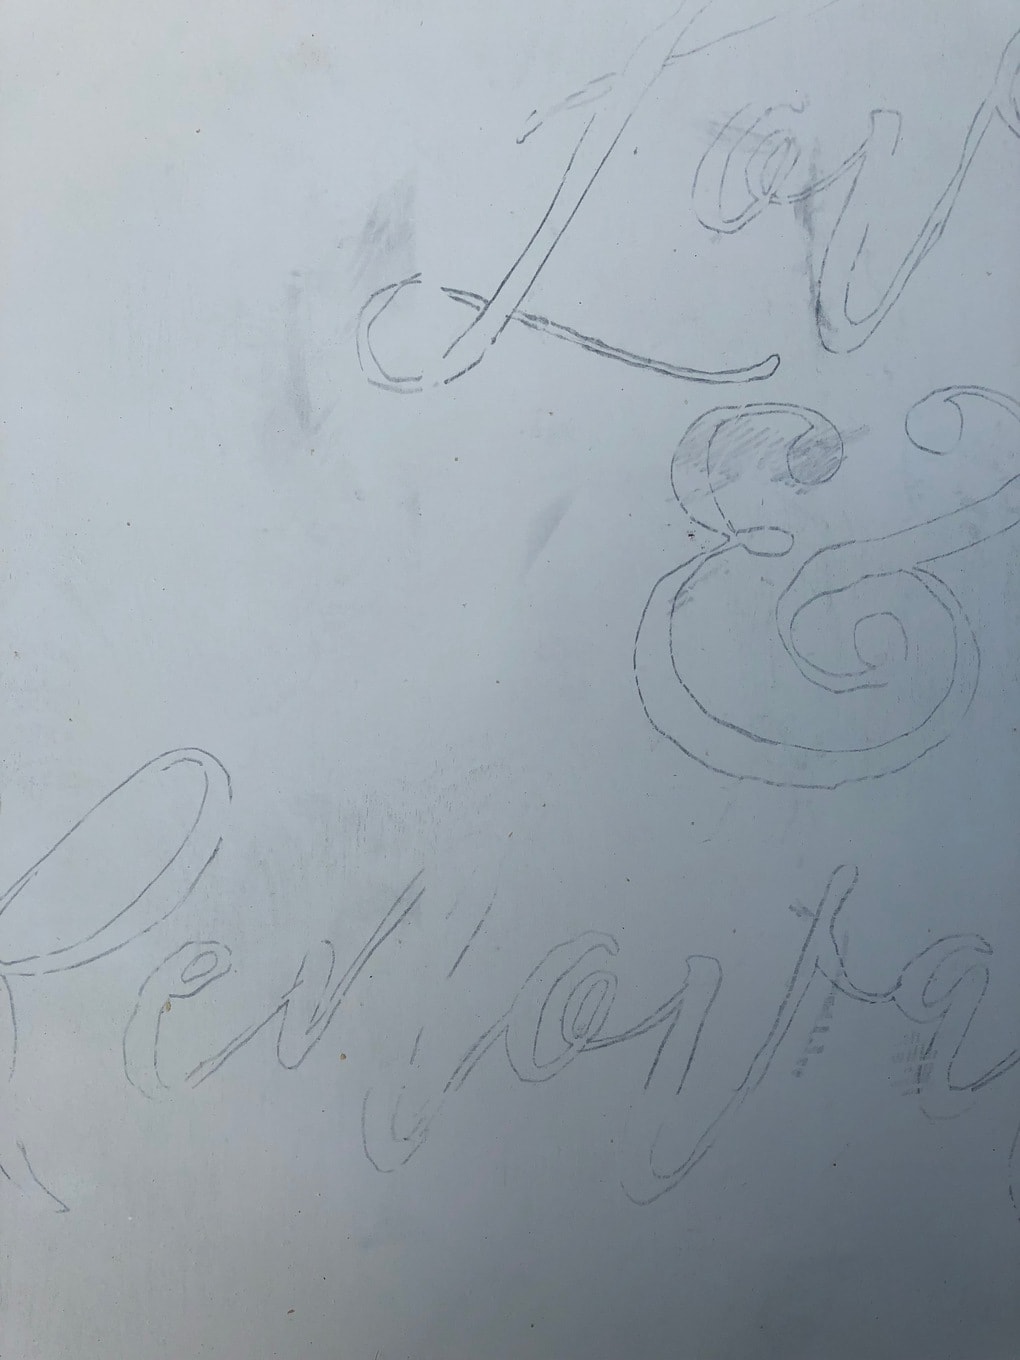
Anyways, once you’ve got your entire design traced onto the sign, you’re ready to go!
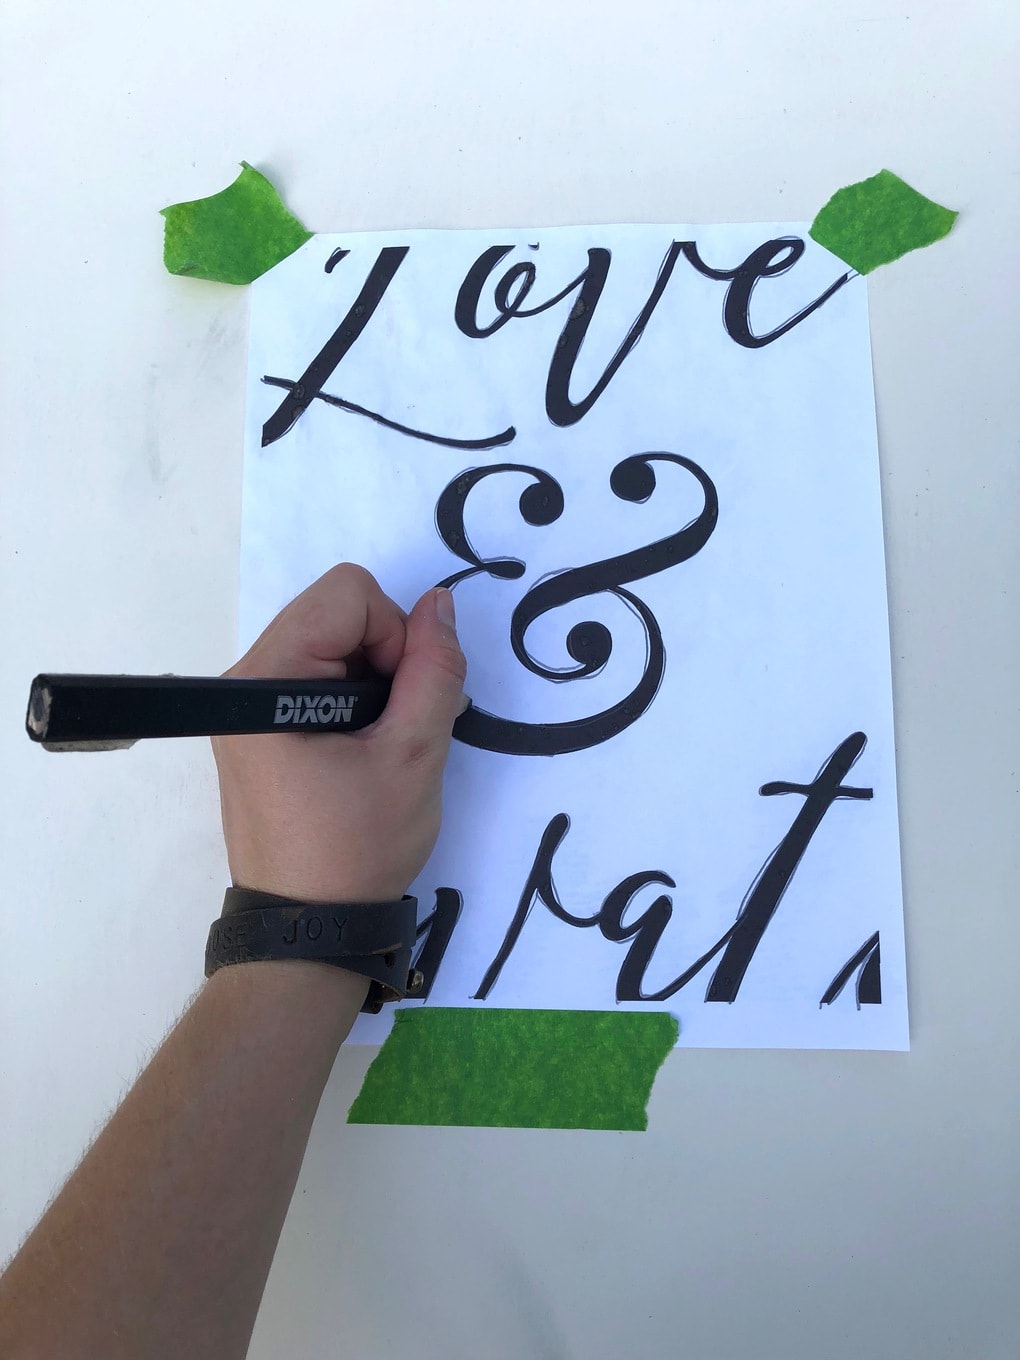
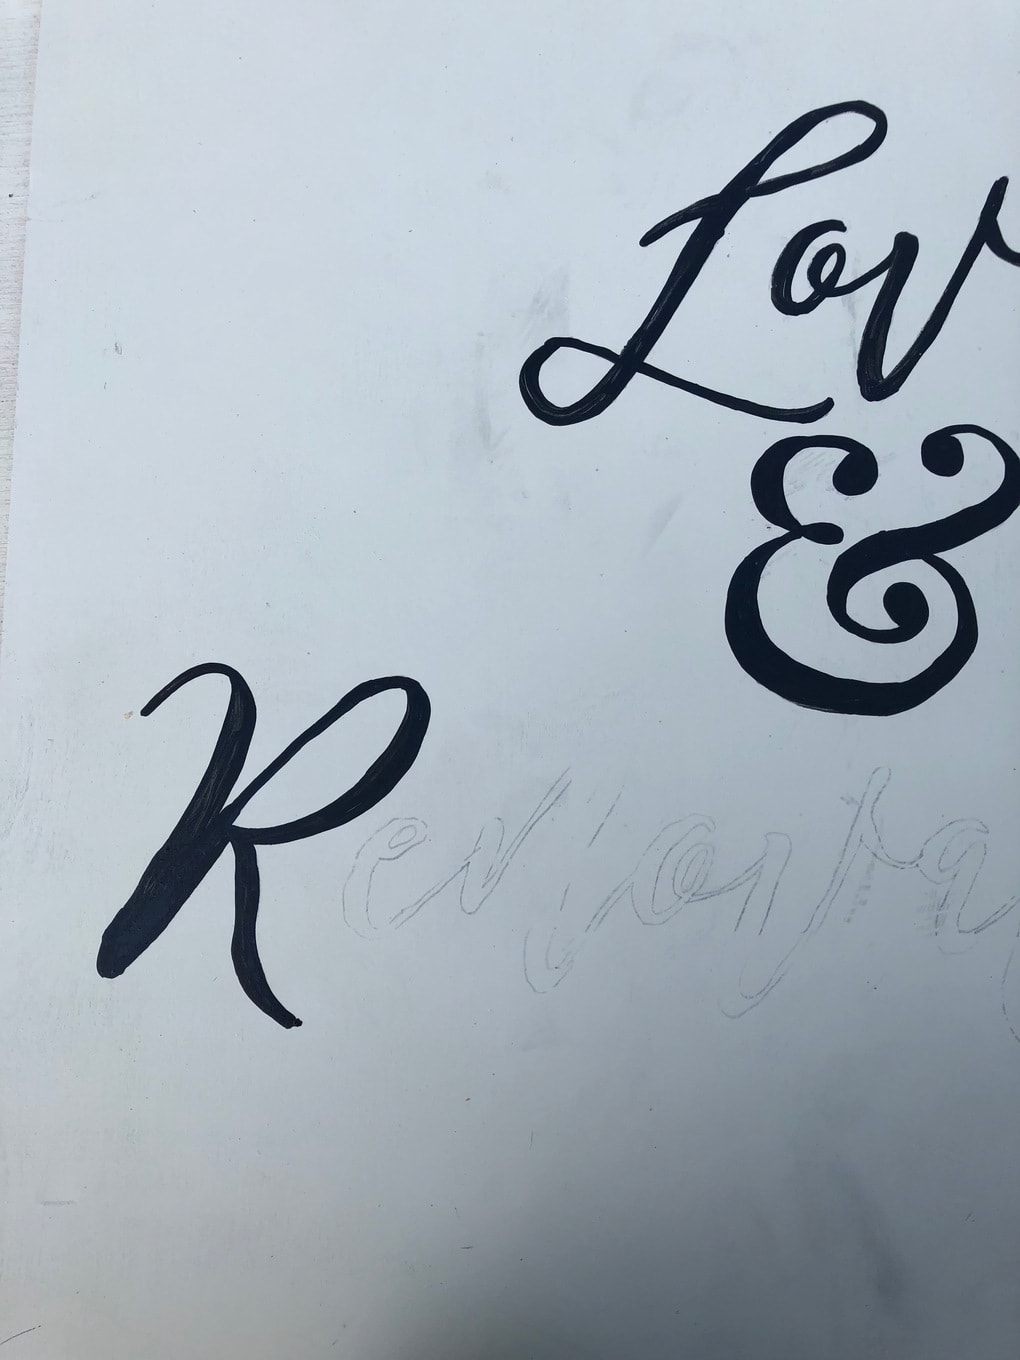
Step 4: Paint Your Design
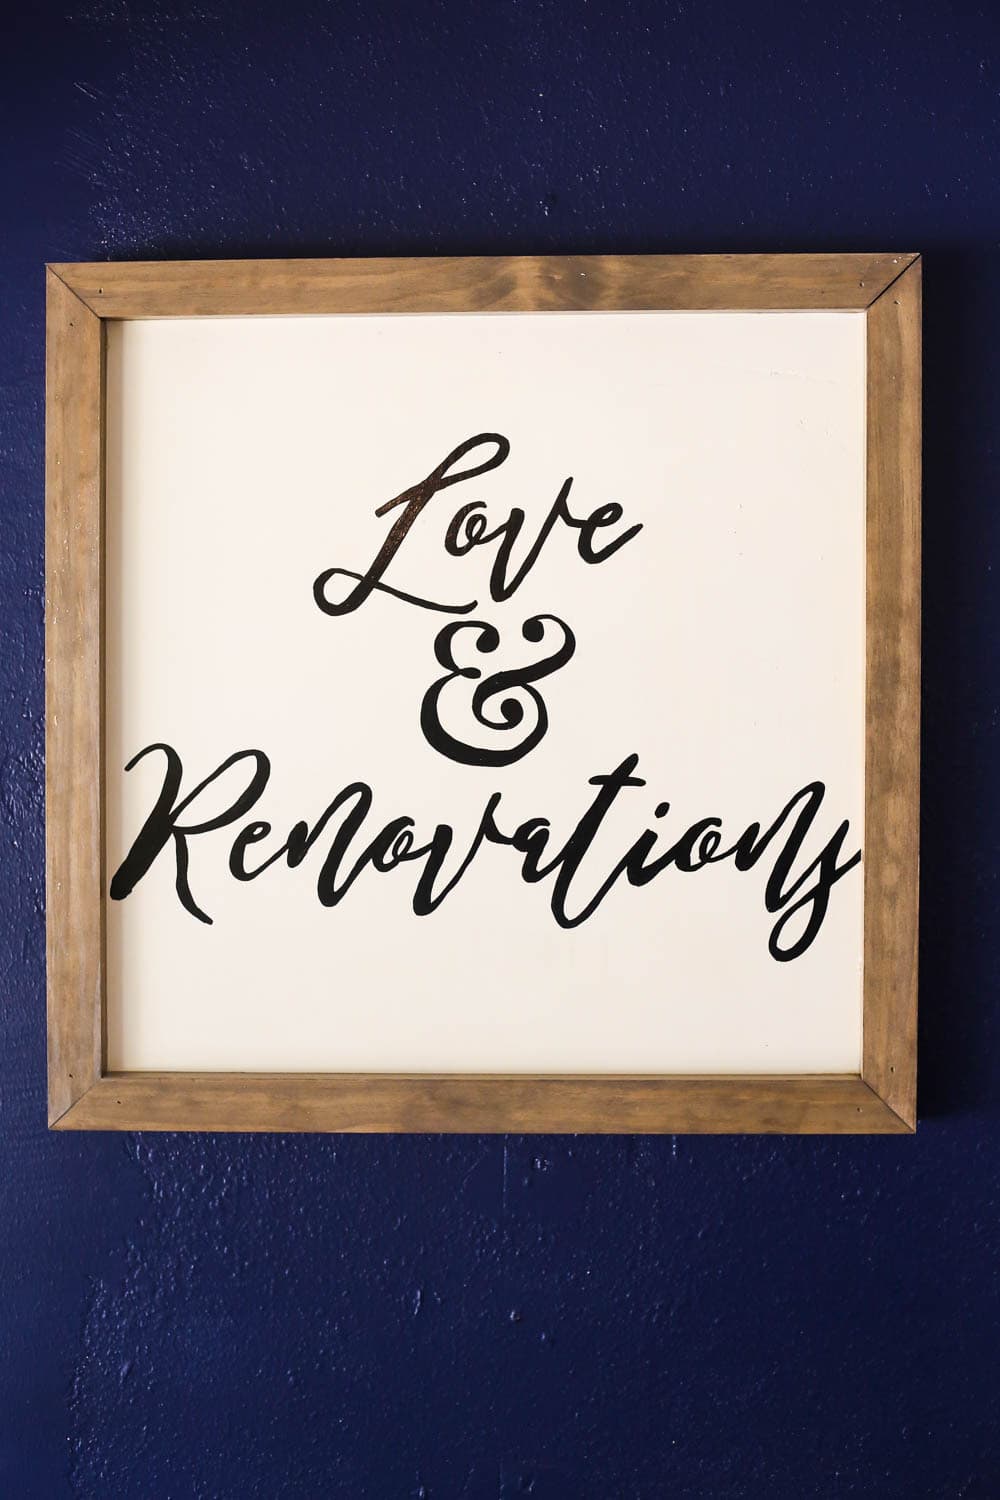
Many people will tell you to just use a small paintbrush and some paint to finish off your design. I say those people are wrong. I am in a long-term relationship with my favorite paint pen and we will never part ways. It’s so much easier than using a paintbrush, and it’s faster and less messy as well. I’ll never use anything else to make a wood sign!
Simply use your pen to fill in the outlines (I usually go over it one time, let it dry, and then do another coat to fill it in and smooth out the edges) and then let it dry for a few minutes. Trust me – it’s way more efficient than the paintbrush method!
Note: You can see lots of smudges here – that’s common with my projects thanks to being a lefty! I simply used one of these workshop cleaning wipes to clean it all up and it came right off.
Step 5: Frame Your Sign
Finally, you’re ready to create your frame! I didn’t take any photos of this step (whoops!), but it’s very easy. Simply measure each side, then cut a piece of your trim to the appropriate size, mitering each side.
Don’t know how? Read this post on how to use a miter saw to give you a better idea of what I’m talking about!
I simply placed the frame on top of the plywood (instead of on the outside) to make things easier, but you could go either way. I used wood glue and finishing nails to attach it, and I stained the boards prior to attaching them.
Easy peasy!
Step 6: Hang the Sign!
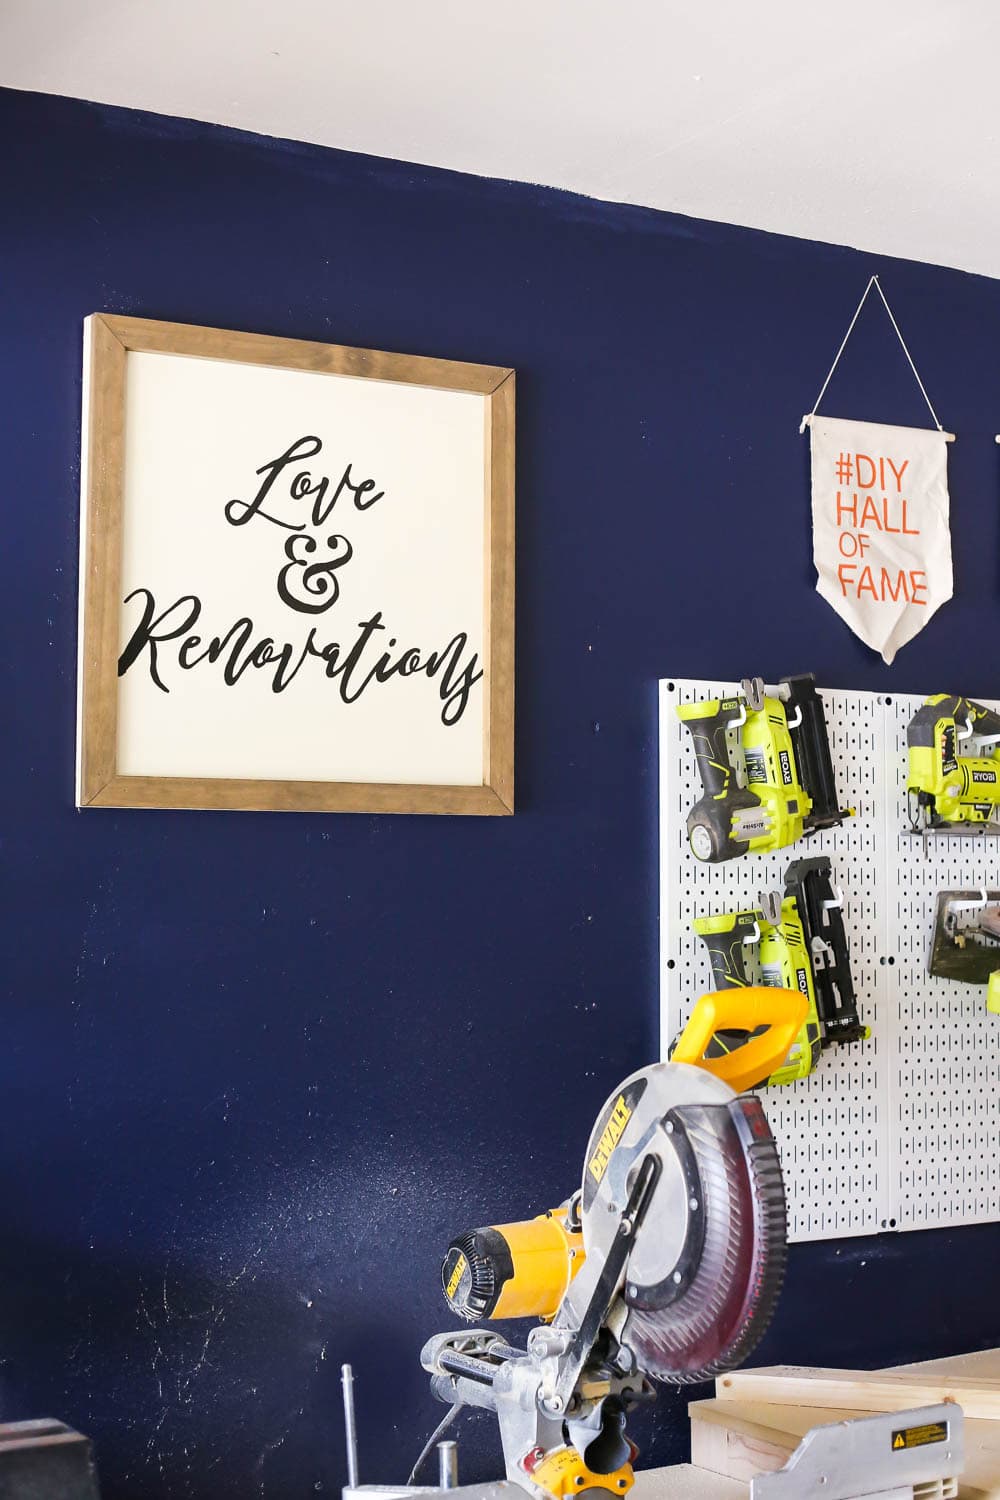
Finally, we grabbed a french cleat (our favorite quick & easy way to hang DIY art) and used it to hang the art up on the wall. We hung it a little higher than we normally would for a couple of reasons. First, since this area will be a backdrop for many photos, we wanted it to be visible above our heads. Secondly, Corey will be adding to our dust collection system with a setup for the miter saw, and it will cover up quite a bit of wall space – we wanted to be sure and leave room for it!
This is such a simple project that really can make a huge impact in your home. If you’ve ever seen a cute wooden sign at a favorite store and wanted to buy it but decided it was too pricey (those things can get expensive!), this is such a great way to re-create the same idea at home at a fraction of the price. Plus, you can say you made it yourself!
Stay tuned later this week because I have another DIY art project coming your way. And this next one is one you will not want to miss!
Thanks for sharing….What font did you use?
Hey Liz! I used Remember Script. 🙂
These are great decor ideas for my new house. Thanks for Sharing.