
How to Make a Wood Gather Sign
Last updated on January 26th, 2023 at 04:57 pm
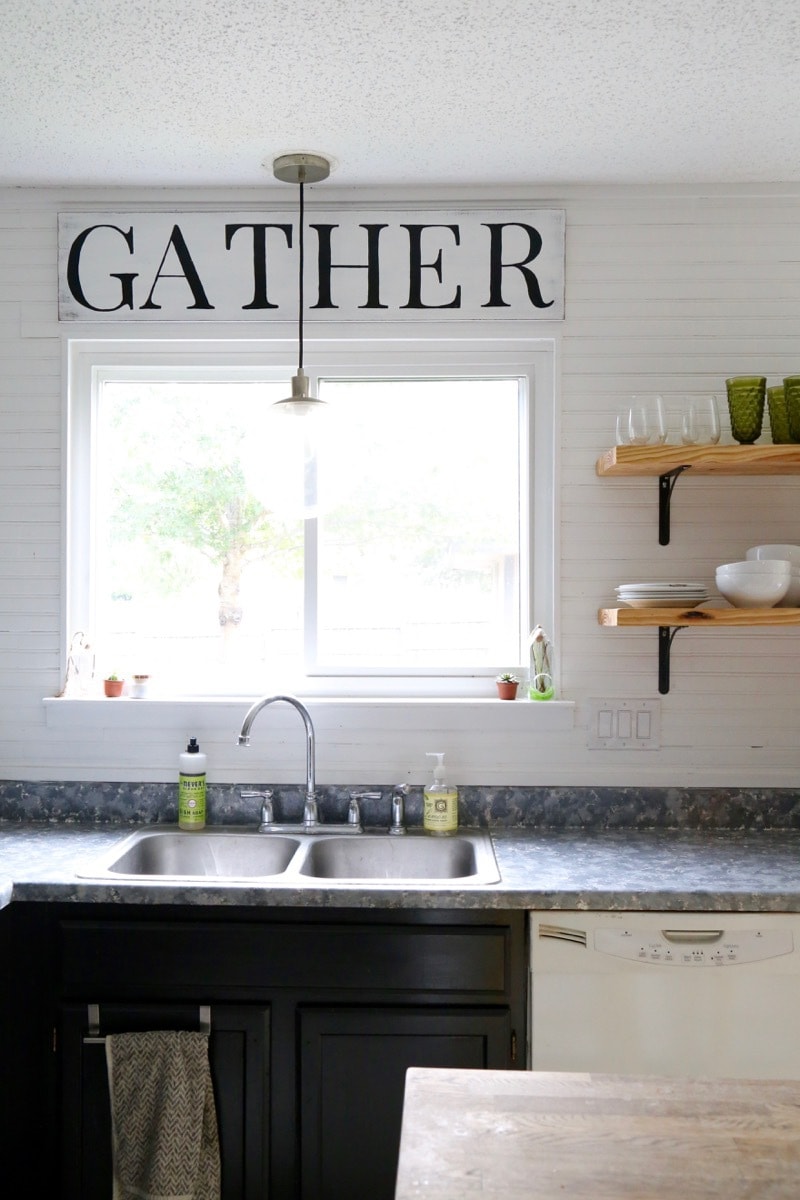
This DIY gather sign is perfect for your kitchen or dining room! Here’s a quick rundown of how to make wooden signs for your home. This “Gather” wood sign is simple, beautiful, and super easy to make!
There’s not much in the world I find more satisfying than when I find something in a store that I love, and I’m able to make it on my own. There’s something that feels so good about making my own version of a cute piece of home decor!
And that’s exactly what happened here. I found a sign that I loved at Magnolia in Waco, but it was a little out of budget for me. So, I decided to make my own. And I think I like it even better than theirs!
Even better? I was able to make this little farmhouse style sign for free using things I already had around the house. If you don’t happen to have a workshop full of project remnants to pull from, you’ll need to make a few small purchases. I’d estimate this DIY wall art might cost you about $20 to make yourself.
Ready to hear how to do it?
HOW TO MAKE A DIY wood gather SIGN:
MATERIALS:
- One 1X12 pine wood board (cut to whatever size you need, we measured ours to fit with the window)
- Stain
- White paint
- Sandpaper
- Paint markers
- French cleat (for hanging)
Step one: Prep the sign
I started by staining and then painting my board. Staining is an important first step if you want a distressed board. It makes a big difference in the final look! You can use whatever color suits your preferences, but I used Dark Walnut for the stain, and plain white paint on top.
Click here for a full tutorial on how to use wood stain, if you aren’t familiar.
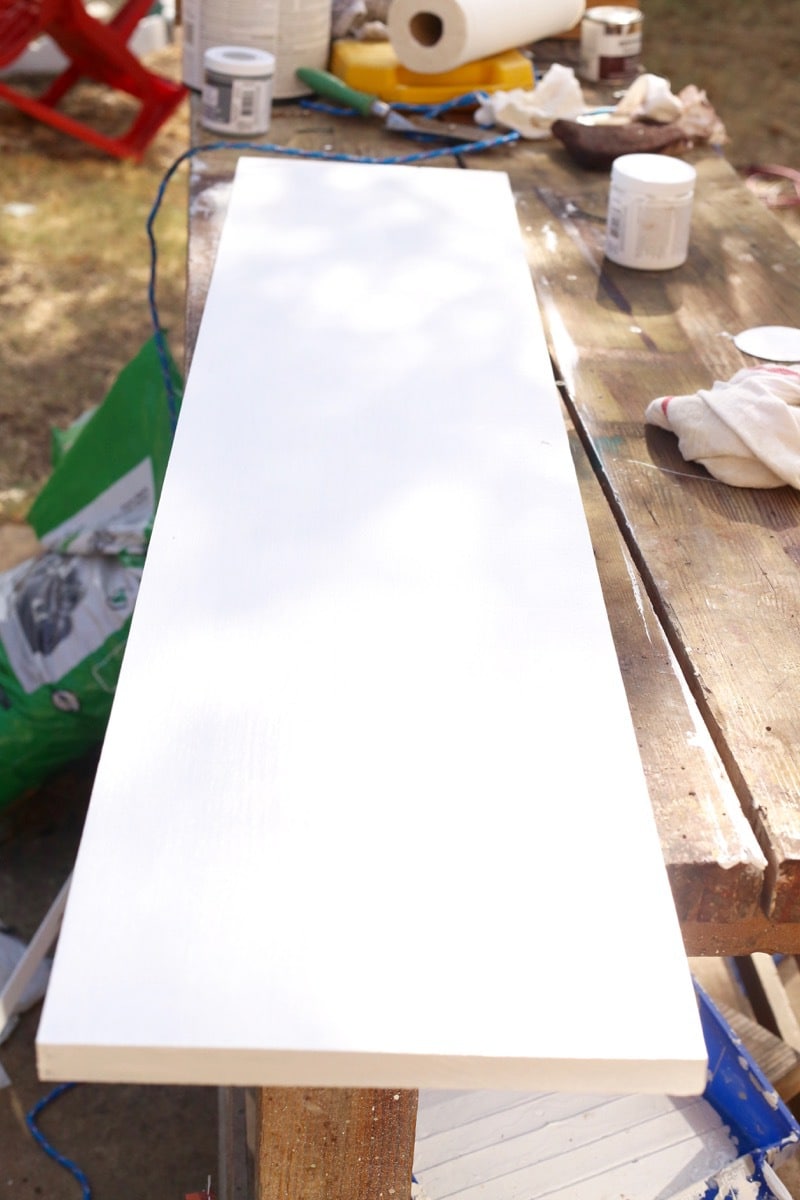
Once it was painted and completely dried, I did my distressing. I’m not big on the super distressed look, so I did some light sanding all along the edges of the board. I focused on the corners and the ends of the board and just lightly sanded until the paint started to come up and the stain was visible. There’s no “right” way to do this – just try a few different techniques until you land on what you like. It’s almost impossible to mess it up!

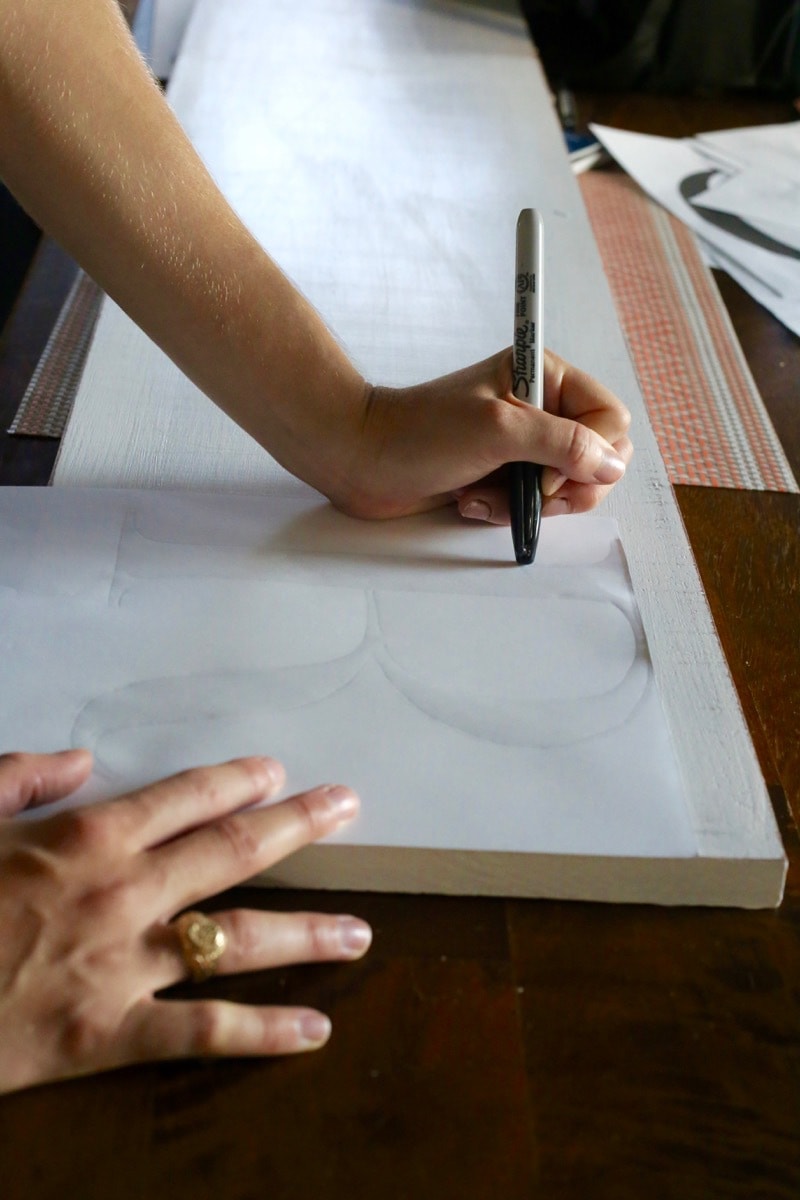
Once I had my boards properly distressed, it was time to add the lettering. I decided to try a new lettering technique (I’ve been using a shading/pencil transfer approach) and it worked so well. Here’s how I did it:
How to transfer letters onto wood
I started by printing all of the letters for my board backward. To do this in Word, you need to:
- Put the phrase you’re typing into a text box
- Right-click the text box
- Select “Format Shape”
- Choose 3-D rotation
- Rotate the text box 180 degrees
Then, just print and you’re good to go!
I laid out all of the letters on my board upside-down. Meaning, the printed side was touching the board and the back of the paper was facing up. So, looking at the board the letters were facing the right way.

Then, I took a Sharpie (with the lid still on) and used a good amount of pressure to trace around the outside of each letter.
Then, I pulled the paper back and …. voila!
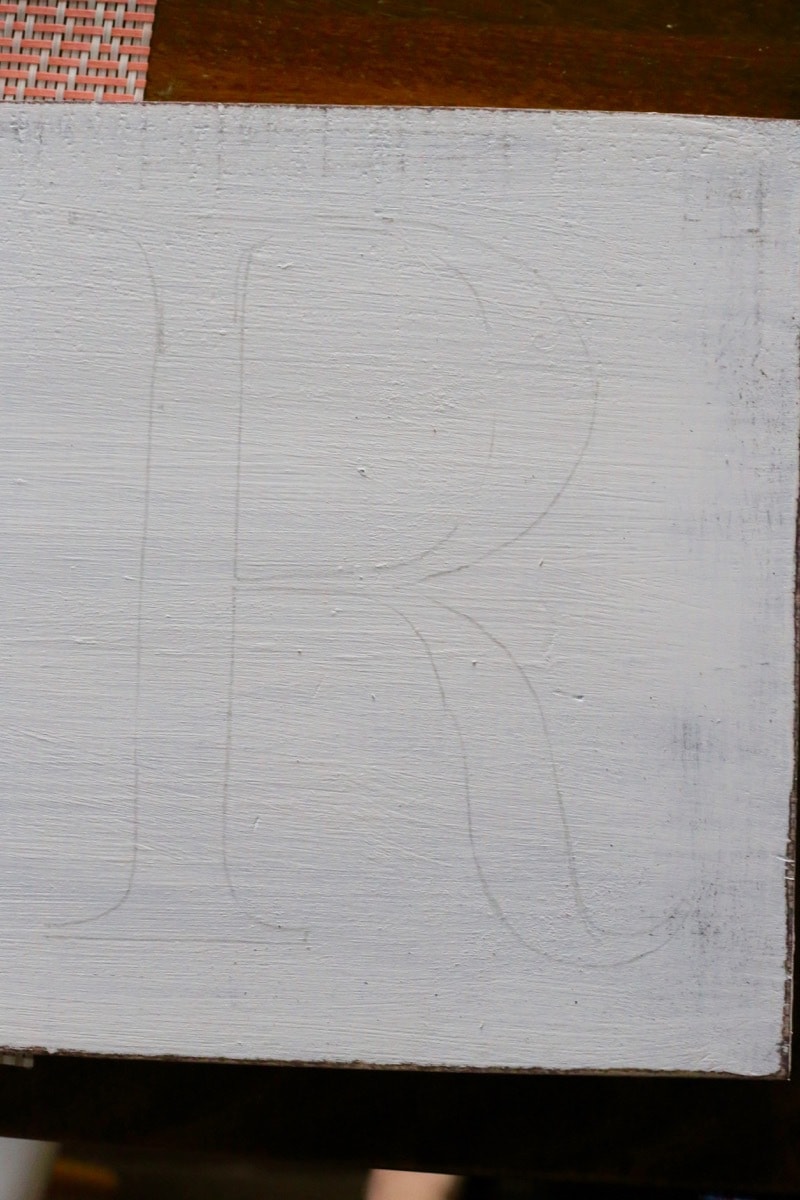
The ink from the paper transfers over to the board, and you’ve got a SUPER clear outline to trace! It’s a lot quicker than the other technique, but it doesn’t work on every material, so you may have to test it out. It works really well on wood, though!
Then, all that was left was to use my trusty paint pens (y’all, these things are the BEST) to trace and fill in the letters.
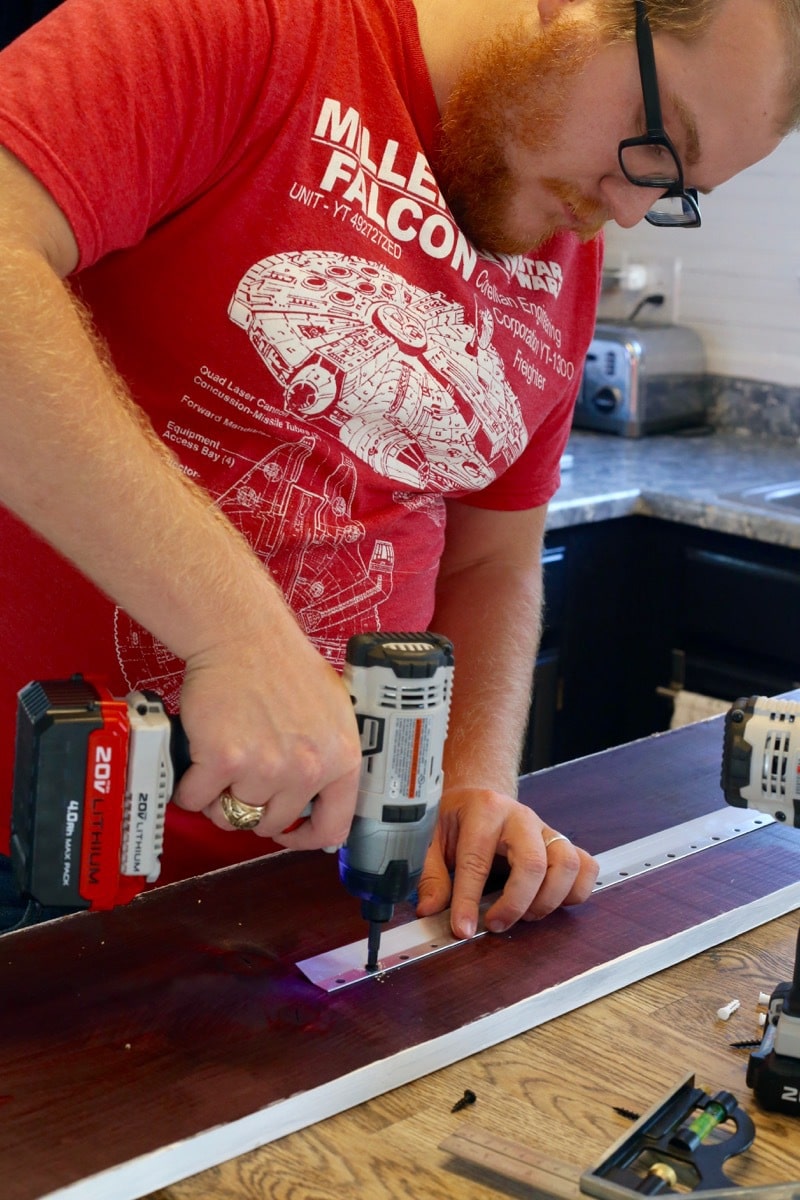
Hanging the gather Sign
Once we were done, we hung it up. Corey grabbed a metal French cleat system to hang it – they make for really quick and easy hanging. You could also attach a hanger to the back and hang with simple nails. For a french cleat, all you have to do is screw in one side to the board and screw the other side into the wall.
Then hang it! You can see how they fit together here:
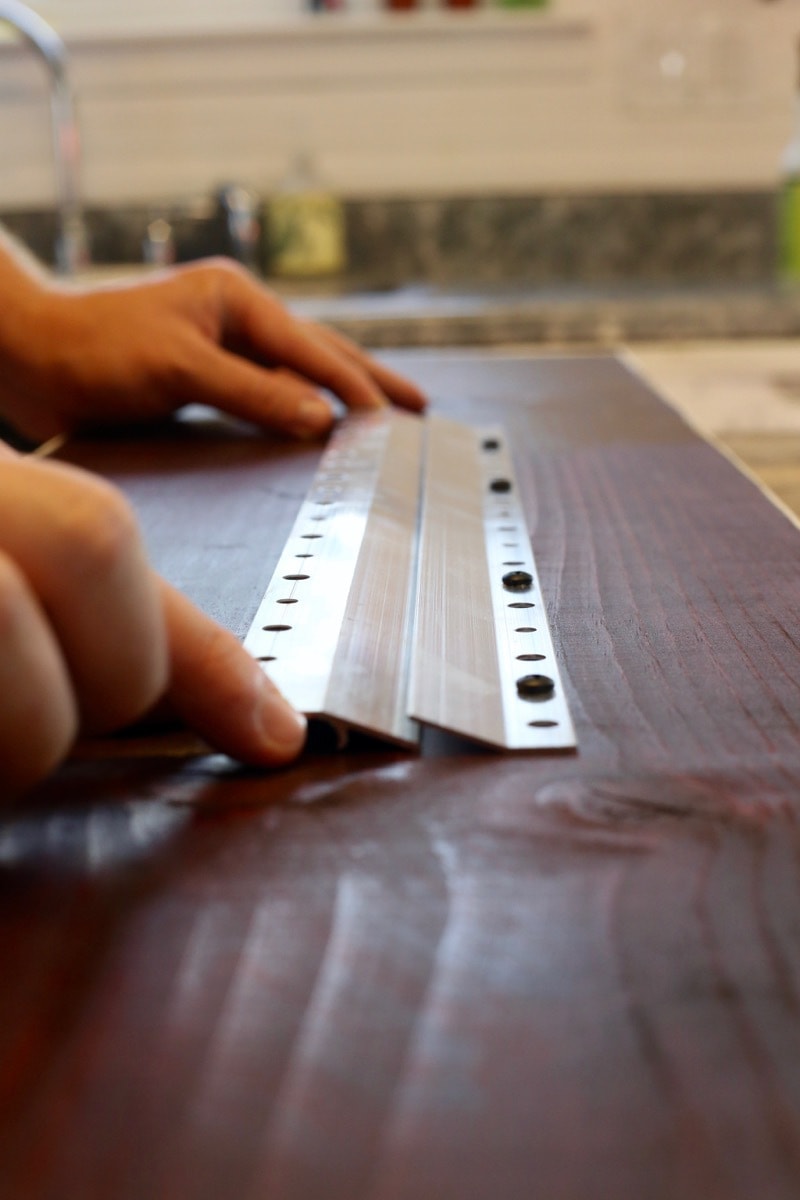
It’s crazy simple and very sturdy.
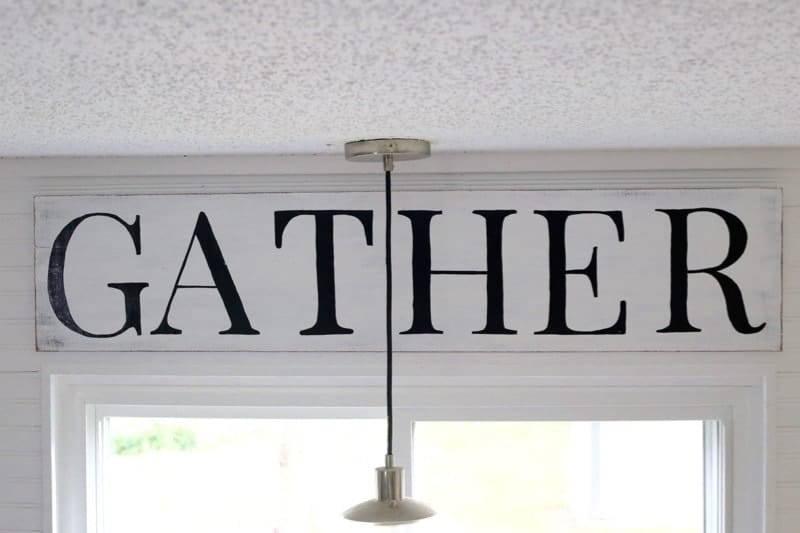
I’m so impressed with how this quick little Gather wood sign turned out – I love how it transformed my kitchen. It’s visible from almost everywhere on the first floor of our house, and it makes me smile daily.
Our kitchen still needs quite a bit of work, but we have come a LONG WAY in the last year or so, y’all! From the painted cabinets to the painted countertops to the backsplash and open shelving, this room is a totally transformed area. We’ve still got a few minor things on our to-do list in here, but it feels good to start adding in some fun accessories like this new sign!
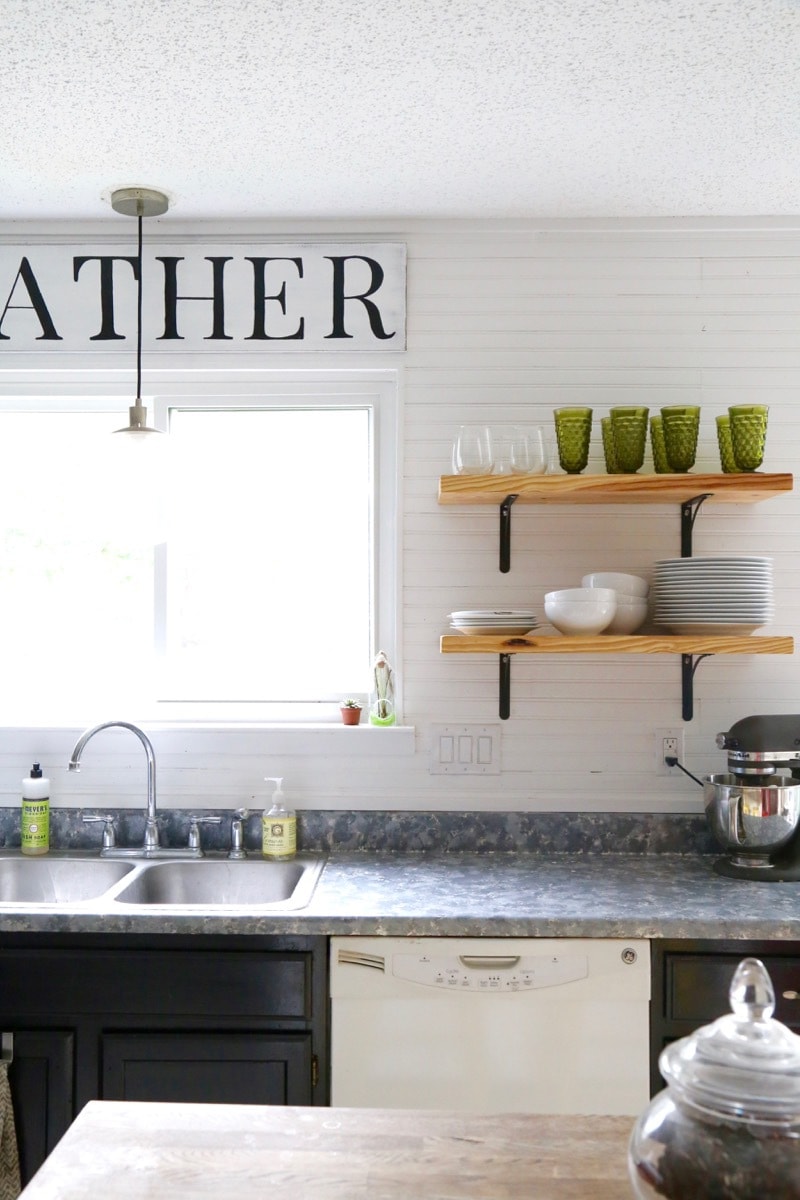
One of my favorite things about this sign is it lets me leave the window above my sink naked! We used to have a bamboo shade here, but I love the light that streams in at all hours of the day. I hated to have anything take away from that! The window didn’t look quite right without anything around it, though, so this was the perfect solution. Now it looks intentional and not like we just forgot to add shades, and I can still soak up the late afternoon sun while I’m cooking dinner.
Shop the Post!
If you see something you love in our kitchen, just click around below to find the source!

Next up in the kitchen? I’m determined to finally get some hardware back on our cabinets!
Have you jumped on the Fixer Upper bandwagon yet? What would you love to copy from Joanna’s designs?!
I love this sign! Would you remember what font you used?
I believe it’s Playfair Display!
Beautiful job, I love it!
Thank you!
Thank you so much. I just moved into a new town house and am starting from scratch. I just got back from Home depot with a board can’t wait to do my sign this weekend.
Aw yay! Hope it goes well!!
Great tutorial and the sign looks perfect above the kitchen window! Thanks for sharing at Welcome Home Wednesdays!
Thanks, Crystal!
Your sign looks amazing. Thank you for linking up with us at #HomeMattersParty. See you again next week.
Hi Amanda! I was a little late to the fixer upper craze, but I’m hooked now! Your ‘gather’ sign is awesome! I need something like that…. btw…love your hubby’s t-shirt! 🙂
Would you consider sharing this at our weekly Dishing It & Digging It Link Party? We are live every Sunday @ 4pm. We’d love to see all your creative projects.
http://www.thestonybrookhouse.com/2016/10/dishing-it-digging-it-link-party-117.html
Thanks, Lori! 🙂 His shirt is from Target. 😉
Love this sign, Perfect timing posting it in the fall, around thanksgiving when we gather together, and gather the harvest. Very nice. Pinned
The sign looks great. And you made the instructions so easy to follow. Pinned.
Your Gather sign looks great above the sink. You did a great job. I want one! Thanks for sharing with us at Merry Monday.
Thank you!
Your sign came out great and I love how simple it was to make!
Thanks, Kate!
I love signs like this! Yours makes such an impact in the kitchen. It looks great! I hope you’ll share it at The Crafty Corner link party this week. 🙂
Thanks, Antonella!
We’ve got some room above our kitchen sink and I’m thinking I’m going to have to make one of these just for that spot too! Love it! The Wednesday “To Grandma’s House We Go” link party just started over at grandmashousediy.com and I thought you might be interested in joining it, thanks!
The sign is perfect there! You did a great job. It has the perfect amount distressing, in my opinion, too!!! Well done.
Absolutely love it! I’ve been trying to decide where I can hang a farmhouse sign in our home. Your’s is so inspiring. Pinned!
Thanks, Kati!
Oh, I love your sign so very much!! It’s perfect above your window. I’ve been wanting to create a sign for above my sink and I just keep putting it off. With how great yours looks, it makes me want to get my butt in gear! Pinning!
Thank you, Jenny!
I love it Amanda!! Pinning!
This a great sign. I haven’t tried that method of transferring letters or the paint pens. Thanks for the info. Your sign looks great above your window.
Thanks! It’s the easiest method ever – can’t recommend it enough!
Your sign is so beautiful and I love the idea of using a french cleat to hang it instead of a regular nail! So much sturdier! Pinning!
Cat
Thanks so much, Cat!
This is great and so simple to make! I love that it is so over sized, it really makes a statement in your beautiful kitchen.
Love this sign!
Sadly I’m not on the Fixer Upper train, but this looks great! Love the light fixture
If you hadn’t mentioned the letter placement, I’d never have noticed! Just be proud that you DIYed it instead of paying top dollar for someone else to do it for you. Great job!
Thank you! I’m SO pleased with how it turned out!
I follow you on Insta and I saw the post about this sign, but I never actually got to see what was “messed up.” When I saw this post, before I got to the bottom, I was scrutinizing it and had come to the conclusion that you’d started over and fixed the sign — until I got to the end! I still don’t see a problem. All this novel to say: looks amazing! I have a nice blank wall in my dining room that I want to do something like this on — I’m thinking maybe “Eat. Drink. Be merry.” Or perhaps “Say grace”
Thanks so much for sharing that, Jamie! That makes me feel better about it, haha. I LOVE the idea of doing a “Say grace” sign – please share photos if you do it!!
Adorable, Amanda! You know I love my Fixer Upper. This is the perfect addition to your kitchen!
Thanks, Amy!