
How to Make Floating Shelves for Your Closet
Last updated on June 24th, 2024 at 11:37 am
Have you ever wondered how to make floating closet shelves? In this post, I’ll show you a simple way to create DIY floating shelves for your closet or another small nook in your home!

Yesterday, I shared the big reveal of our massive, incredible master bedroom closet makeover. If you haven’t seen that yet, go check it out. Then, come back so you’re all caught up. Today, we’re going to talk about the DIY floating shelves we installed in the closet.
Go ahead, I’ll wait.
You good? Okay. Let’s talk about those shelves.
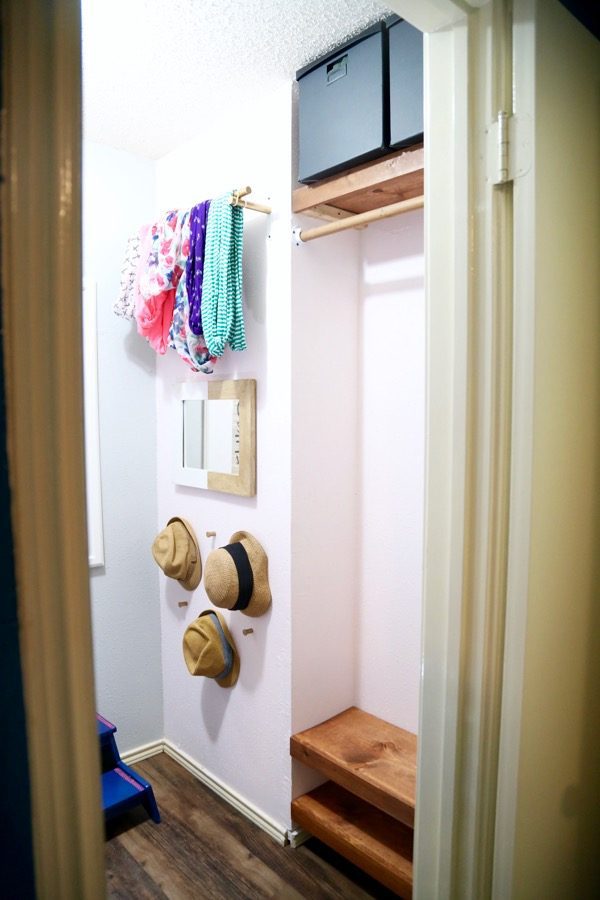
My side of the closet is pretty simple – I don’t have a ton of clothing so I really don’t need anything fancy. But, I definitely wanted it to be pretty. I knew Corey would come up with something both functional and nice-looking. So, I told him what I wanted and let him go to town.
Of course, what he came up with is absolutely perfect! These DIY floating shelves are incredibly easy to put together. And, they look nice and high-end (but they’re really made of mostly scrap wood). Love it when that happens!
How to Make Floating Closet Shelves

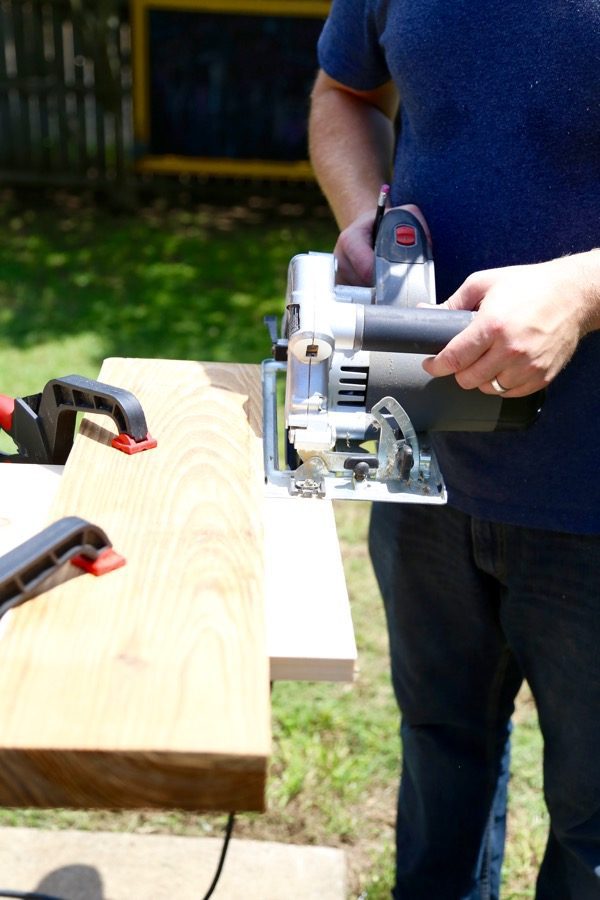
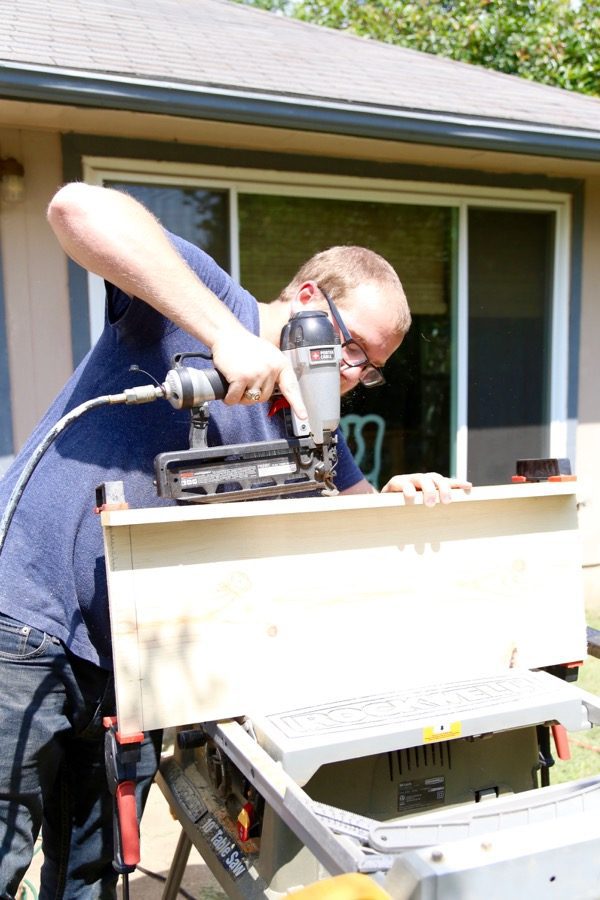
Step 1: Cut Your Wood To Size
Corey used a homemade fence for his wood to be sure the line was nice and straight – he measured the distance from the edge of the guard of the circular saw to the blade itself, then he added that measurement to the size of the shelf. Then, he positioned a second piece of wood on top of the piece for the shelf at that measurement and clamped it down. This way, he was able to run the side of the saw along the piece of wood to keep his cut straight, and he ended up with the right size shelf.
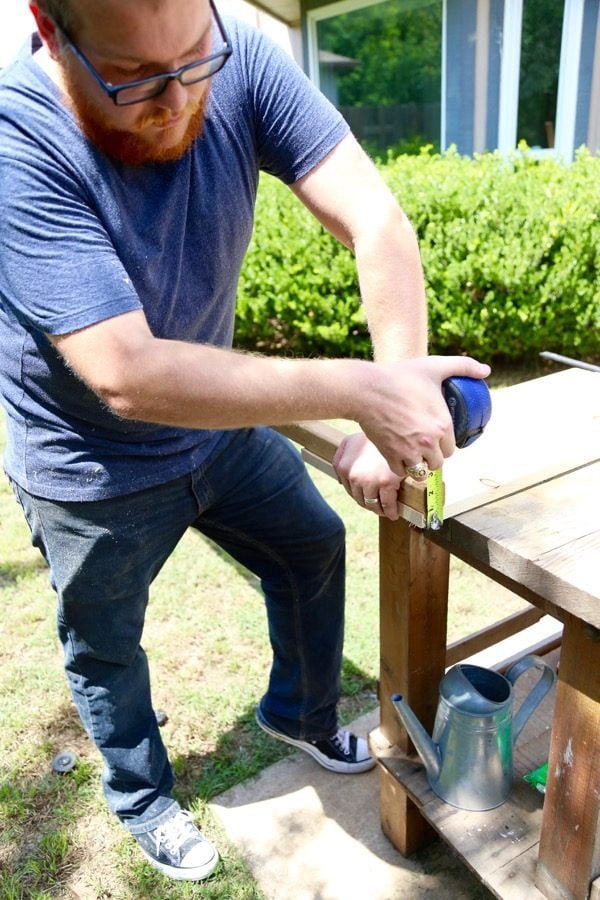
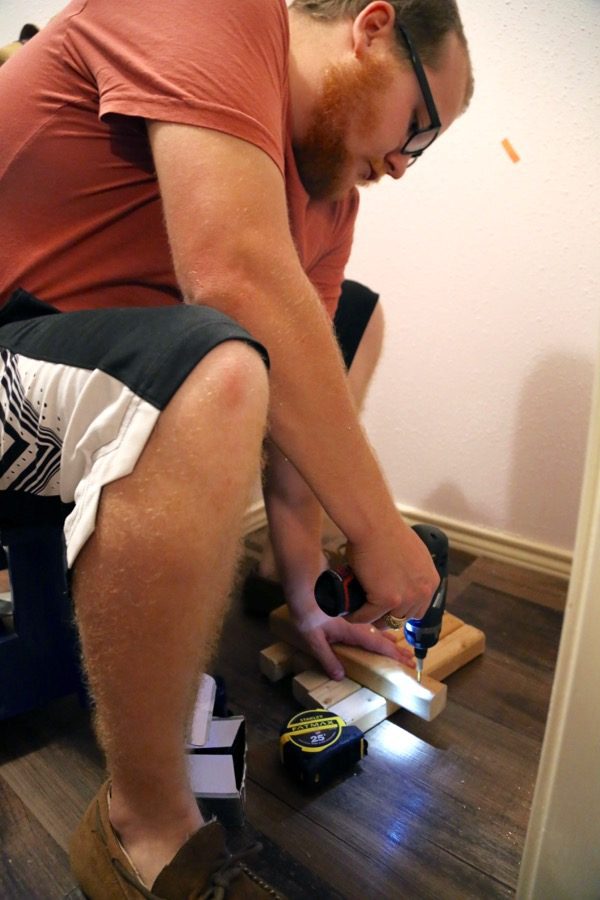
Step 2: Add Facing
Once all of the shelf pieces were cut to size, he cut another piece of wood for the facing. To measure how thick it needed to be, Corey just placed the shelf board on top of the boards he’d be using for the brackets, then he measured how tall they were together. That number gave him exactly how tall the front piece needed to be in order to hide the supports.
Once everything was measured and cut to size, he used some wood glue and nails to attach the front piece…
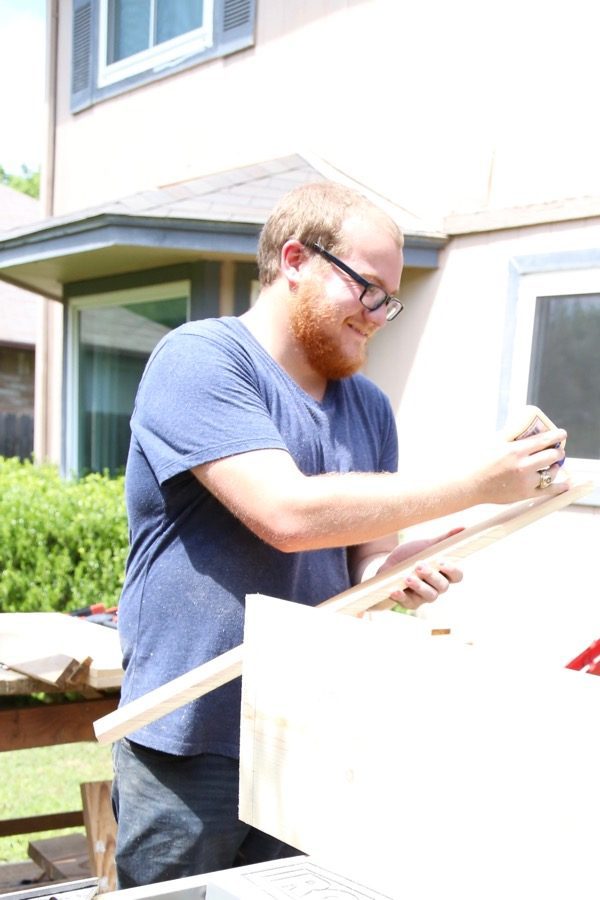
…and then I sanded and stained the whole shebang to get it ready to hang.
Installing DIY Floating Wood Shelves
Once our shelves were built, Corey hung the brackets that the DIY floating shelves would rest on. He just cut some scrap wood down to the right length, drilled some pilot holes, and hung them on either side of the wall.

After the brackets were hung, we just rested the shelves on top and called it a day! If you’re worried about the shelves getting pulled off, you could always screw the shelving into the supports on either side, but if the measurements are done right it will be a very, very tight fit.
This whole project was beyond simple, and I am in love with how pretty they look!
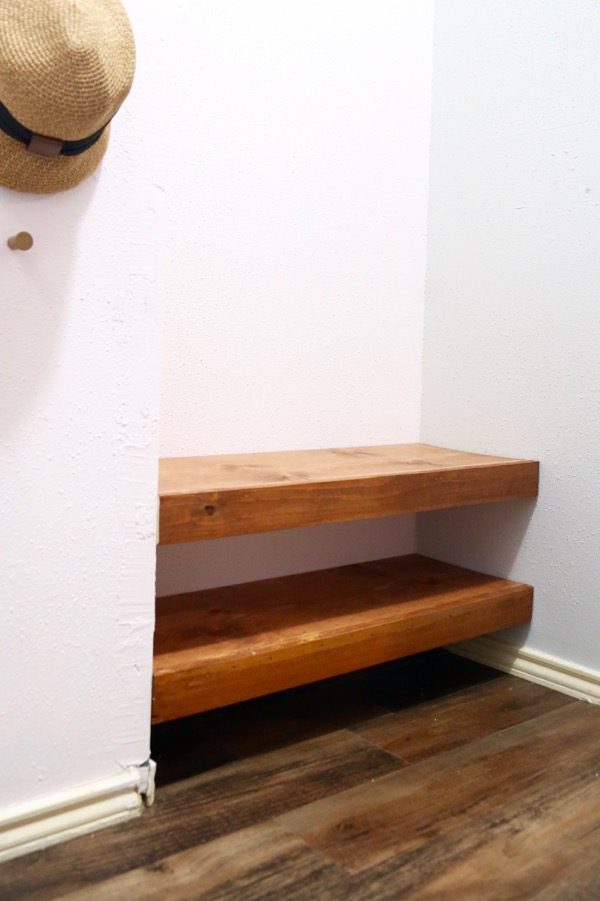
We’ve been talking about doing something similar in our powder room downstairs, so this was a great trial run for that project. They took less than an hour or so to put together (a little longer if you include dry time for the stain), and this awkward little area of the closet is so much more functional now!
And that, my friends, is all it takes to put together your own DIY floating shelves.
My mind is swimming with all of the other possibilities for where these shelves could go – the laundry room, our powder room, Jackson’s closet…the list goes on! Where would you put these in your house?
Very informative post specially for those who want to make shelves at their own. You did a great work , explain everything in detail, i appreciate your effort and hope you will come with more informative material. I like to use these types of shelves in my home because these shelves are handsome, easy to build and inexpensive. And they’re strong even though they have no visible supports. They appear to float on the wall, no clunky hardware or brackets. You can use these curved wall shelf or Floating shelves for many purpose like for displaying collectibles, photos, travel mementos, or other decorations. This type of shelf uses a special construction to give the appearance that the shelf is extending directly out of the wall with no supports, hence the name “floating”. Floating shelves can be built from traditional solid wood or, alternatively, from a hollow-core construction.
Thank again.