How to Install Wallpaper (It’s Not THAT Hard!)
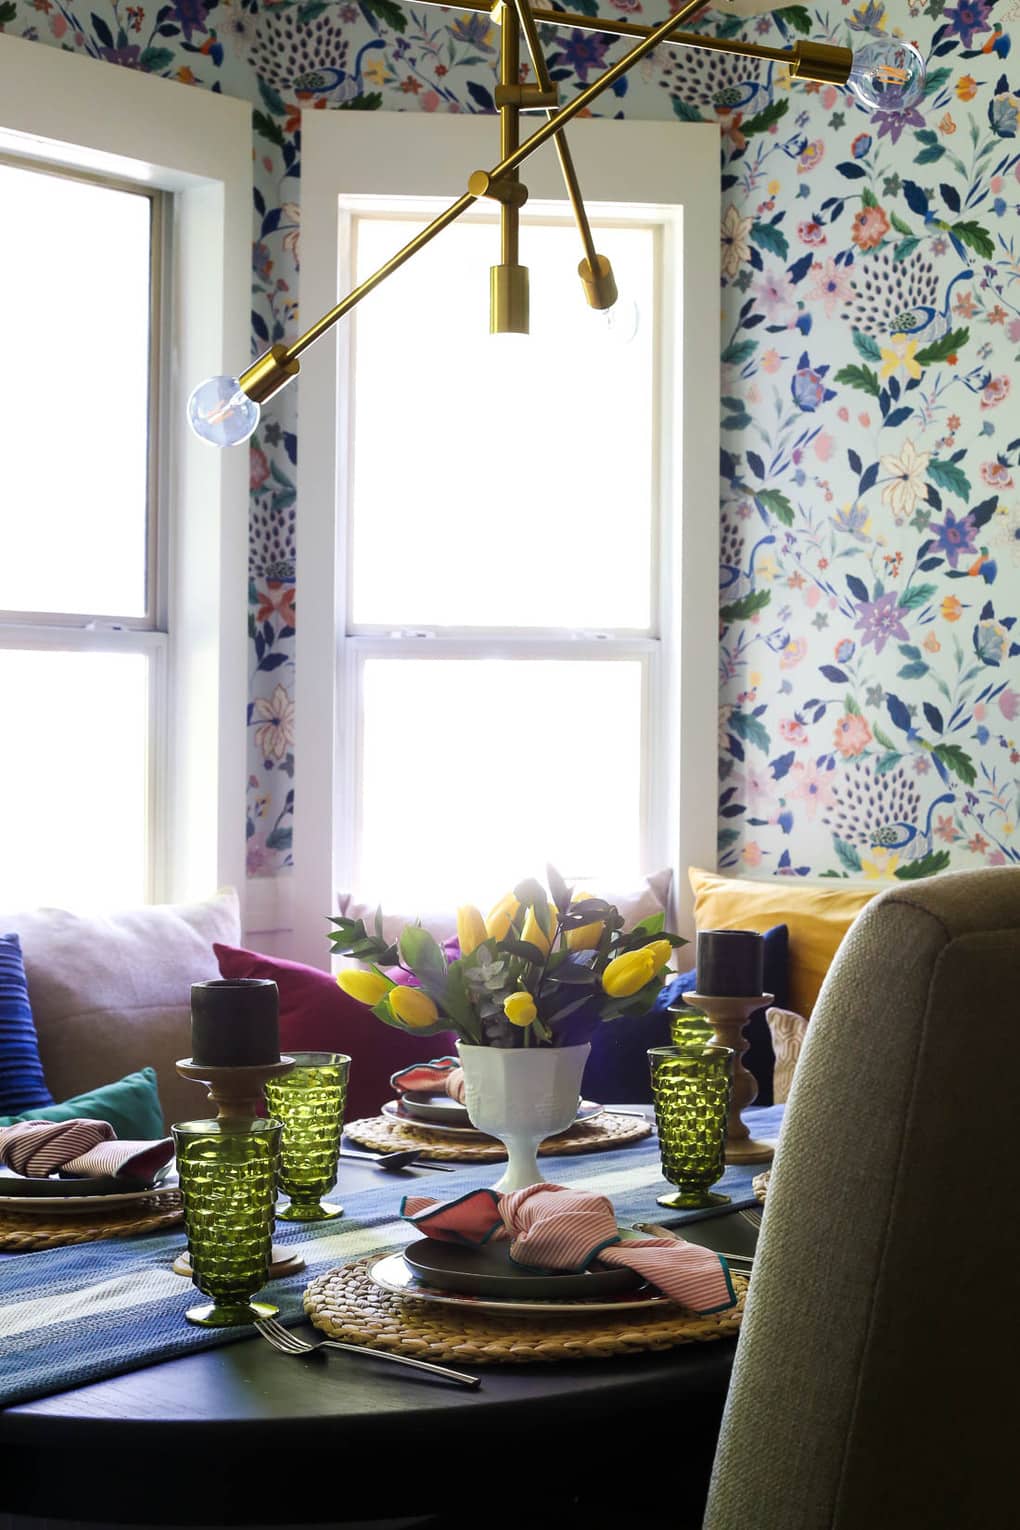
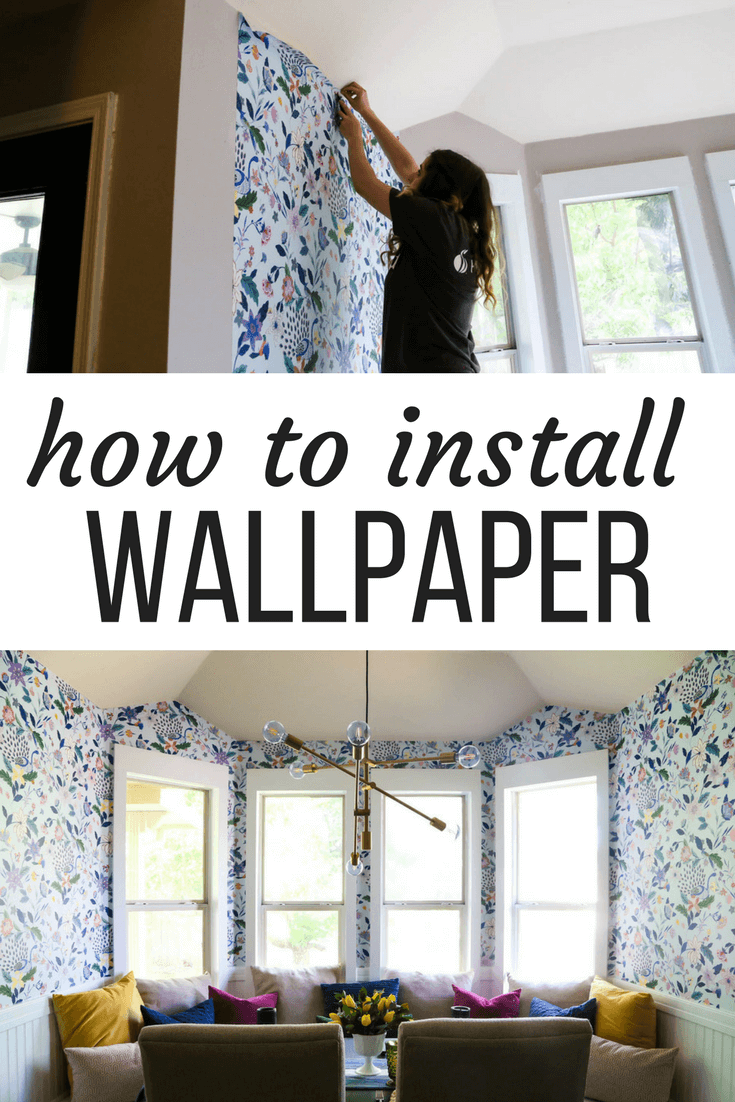
Recently, I lost my mind and decided to hang wallpaper in our dining nook. It wasn’t an easy project, but the end result is so worth the effort! Today, I’m going to show you how to install wallpaper if you want to try it in your own home.
Sometimes there are projects that I am just terrified to take on.
For example, there was quite a bit of anxiety about tiling our kitchen backsplash. And back when we painted our kitchen counters, I was pretty sure it would be a total disaster. And I’ll never forget the panic I felt the entire time we were renovating our old master bathroom.
But, to be honest, I’m not sure any project has ever given me as much anxiety as hanging wallpaper in our dining nook did. I was quite literally shaking when I went to hang up the first piece of wallpaper. My heart didn’t stop pounding until I was at least a third of the way through.
Why all the nerves?
Installing wallpaper is a nerve-wracking process. Generally speaking, it’s something that most people think of as an “expert-level” DIY project. If you mess it up it can look horrifyingly bad. Plus, it’s a giant pain to remove.
No pressure or anything, right?!
Well, we just wrapped up our dining room renovation and I have officially survived my first experience hanging pre-pasted wallpaper. We used the Sylvia Wallpaper from Anthropologie, and I’m just head over heels in love with it. I’ve had a few questions along the way about what the process is like. So, let’s dive in and get all of your questions answered!
What Tools Do I Need to Install Wallpaper?
Not much! Here’s the rundown of everything I used to hang our pre-pasted wallpaper:
- Pre-pasted Wallpaper (Ours is from Anthropologie)
- Spray bottle (We have these and I love the quality!)
- Utility knife + extra blades
- Wallpaper smoothing tool
- Putty knife (Optional, but I found it very helpful)
- Level
- Measuring tape
You may also want a wallpaper seam roller, but I found that the smoothing tool got the job done just fine! Oh, and perhaps most importantly – you’ll want a second set of hands on call just in case you need some extra help! I did most of this project by myself, but there were a few times where I absolutely needed Corey’s help.
Note: If you aren’t working with pre-pasted wallpaper, you’ll also need some wallpaper adhesive and a foam brush!
How to Install Wallpaper
I had a bit of a unique situation hanging wallpaper in our bay window nook. My research told me that this is one of the most challenging places to install wallpaper thanks to all of the windows and corners. So, if you’re installing wallpaper in a plain old room or just on one straight wall, it would be a much simpler project.
As a quick reminder, I’m no pro when it comes to installing wallpaper. This was my first time ever hanging wallpaper, but I did tons of research and I’m really proud of how the project turned out despite my newbie status. So, here’s how I got it done.
NOTE: These directions are the process I followed to install pre-pasted wallpaper from Anthropologie. But, there are lots of different types of wallpaper! You may need wallpaper paste or to follow a slightly different process. Be sure to follow the manufacturer’s instructions.
Before You Begin
It’s generally recommended to use wallpaper primer (or regular primer) on your walls before wallpapering. This helps ensure you’re starting with a clean, fresh surface. It also makes eventual removal easier! I skipped that with this project, though, and it worked fine.
Prepping Your First Strip of Wallpaper
The first strip of wallpaper is the most important one. It is the one that helps ensure everything else is straight! I decided to start in a corner. Generally, you don’t want wallpaper to wrap fully around a corner (for example, with half of a length of wallpaper on one side and half on the other). As the wallpaper dries, it can pull away from the corner. So, typically speaking you want to shoot for no more than one inch or so overlapping a corner.
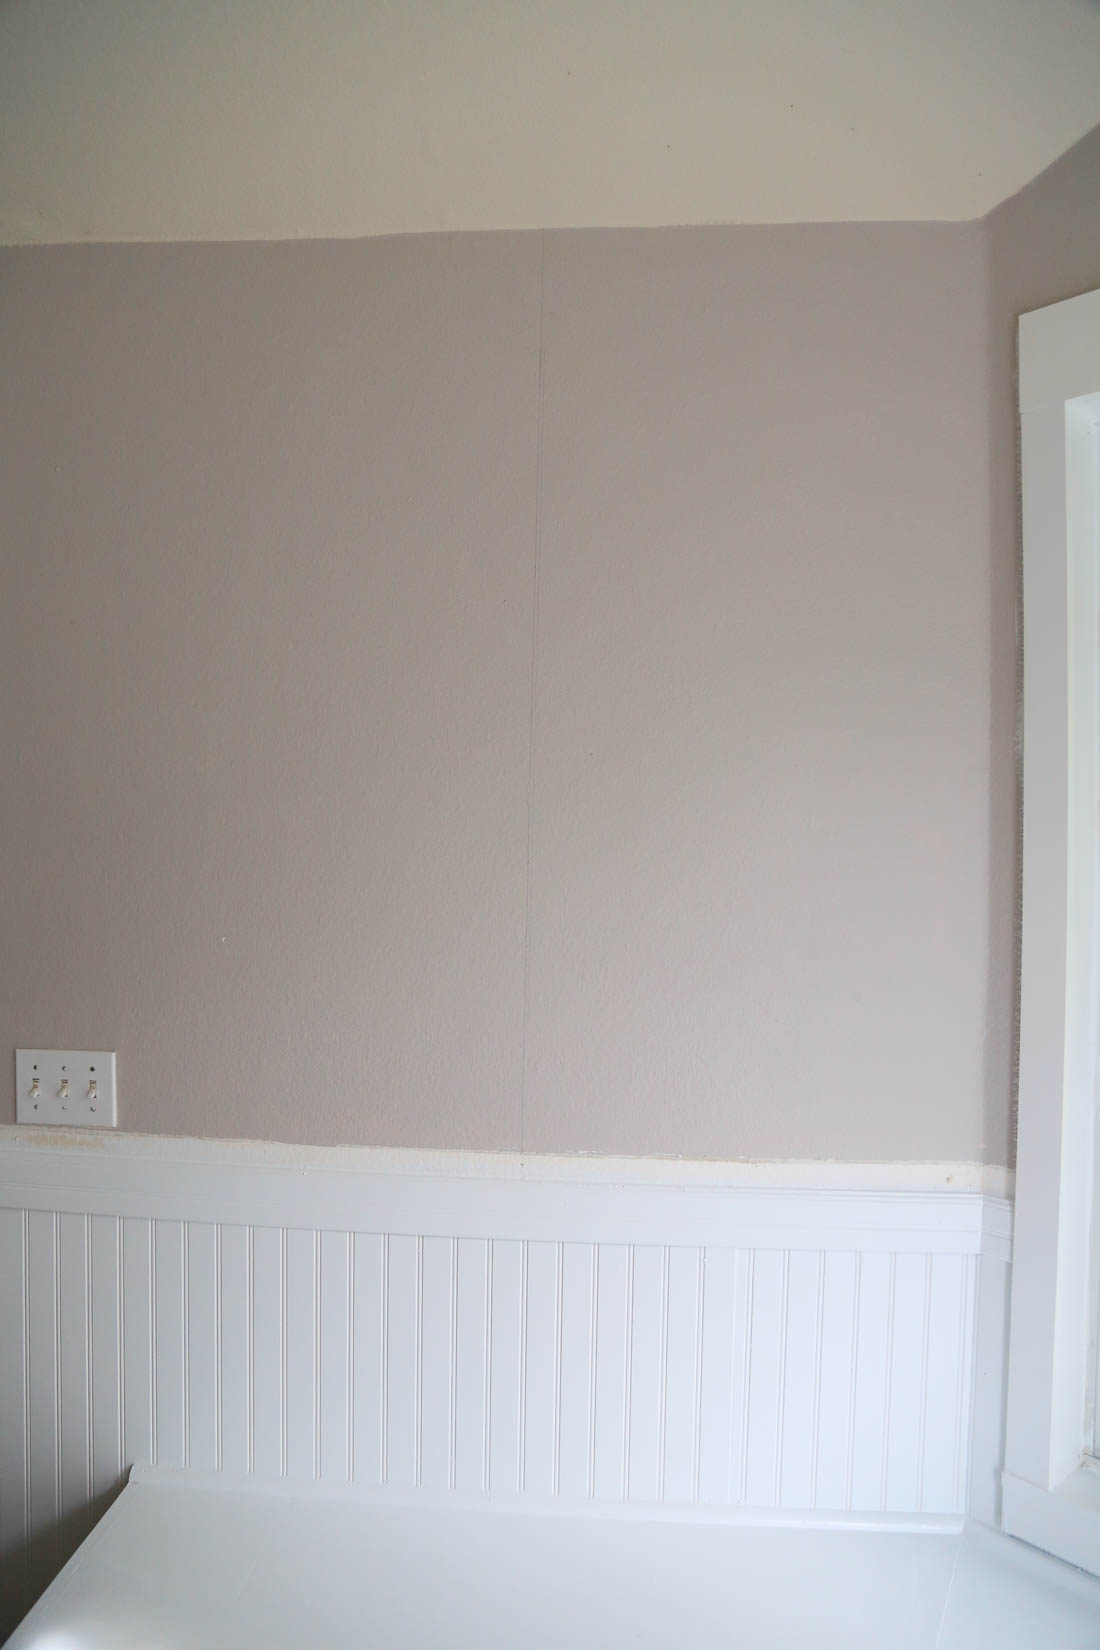
Start with the most inconspicuous corner in your room, and measure how wide your roll of wallpaper is. Subtract one inch from that and draw a plumb line down your wall (use the level!) at that measurement. Our wallpaper was 27″ long, so I measured 26″ from the corner and drew a line.
Measure how long you need your wallpaper strip to be, then add about 4″ – two inches at the top and two at the bottom. This gives you a little wiggle room with the installation and ensures you don’t accidentally cut it too short and waste a whole bunch of that pricey wallpaper!
Use a straight edge of some sort and your utility knife to cut the wallpaper. Then, fill your spray bottle with lukewarm water. Fully soak the back of the wallpaper using sweeping strokes. Put a little extra focus on the edges of the wallpaper to ensure a really tight seam.
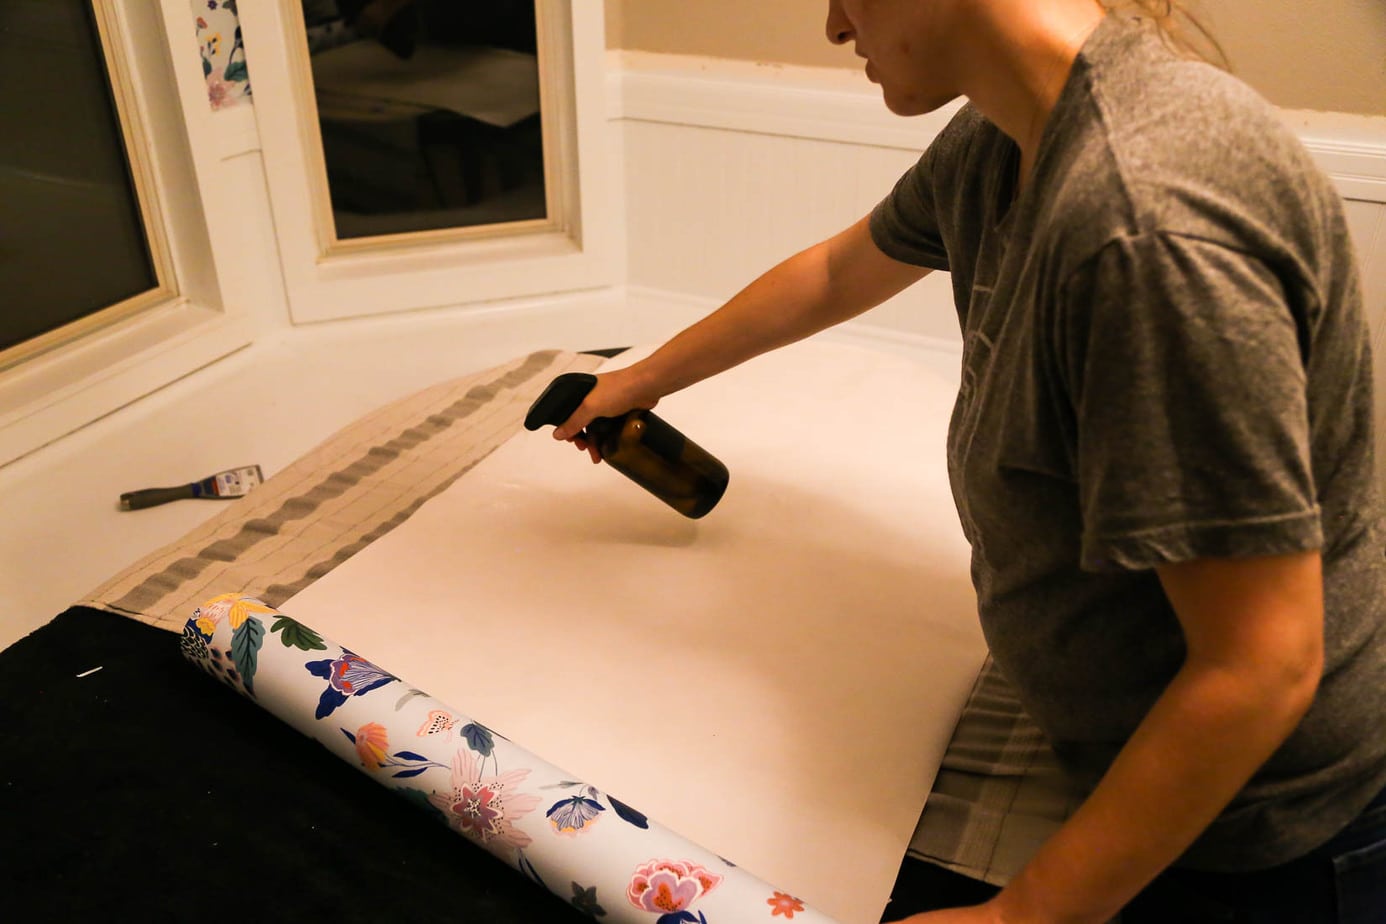
Once your wallpaper is fully wet, gently fold each end towards the middle. Do not crease it! This is called “booking” the wallpaper and helps activate the wallpaper glue. Allow it to sit for 2-3 minutes before installing it.
I recommend taking this time to calm your nerves and remind yourself that the world won’t fall apart if your wallpaper installation is a disaster.
At least, that’s what I did.
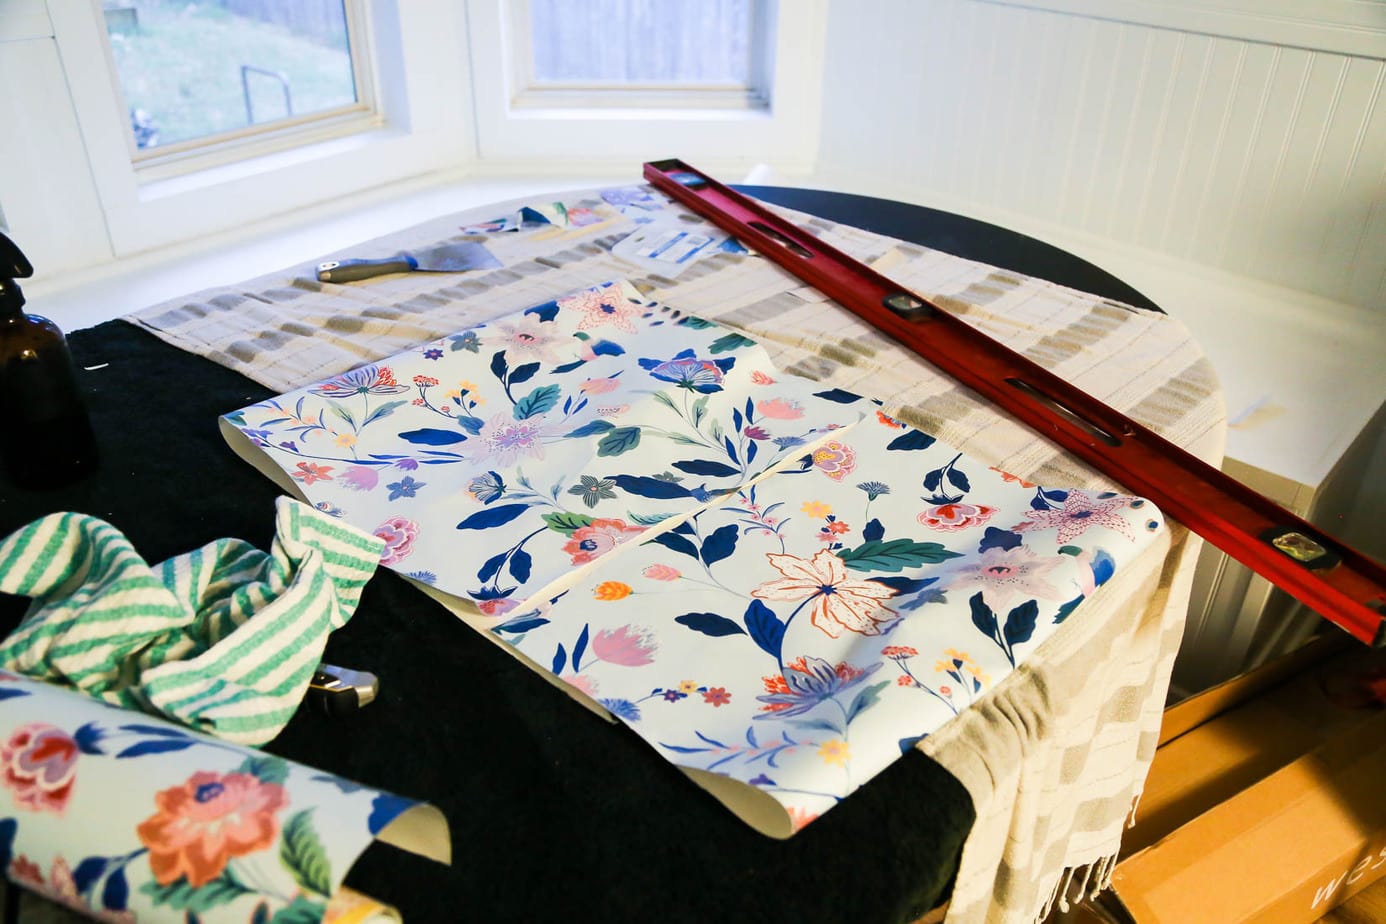
Hanging the First Strip
Once the two minutes or so are up, it’s time to install it! Grab the wallpaper and gently unfold one end. Be sure to grab from the top if your wallpaper has a “right side up”!
Apply the wallpaper to the wall, gently sliding it into place right up against the line you drew earlier. This particular wallpaper had quite a bit of wiggle room. I could move it around for a good two minutes or so before it started to become more difficult to adjust. So, don’t stress too much! Just try to get it lined up straight against the line on the wall. I typically left the bottom half of my wallpaper folded until I had the top part mostly smoothed out. Start by smoothing it with your hands just to get it in place. Then, grab your smoothing tool and gently press out any air bubbles or creases (use it at a 45-degree angle to the wall). Many people also recommend a damp sponge or cloth for this part of the process.
This part can be scary at first. But as long as you work slowly and patiently, you’ll be fine. Don’t be afraid to pull the wallpaper slightly off the wall to re-adjust. You have a couple of minutes before it starts to fully adhere!
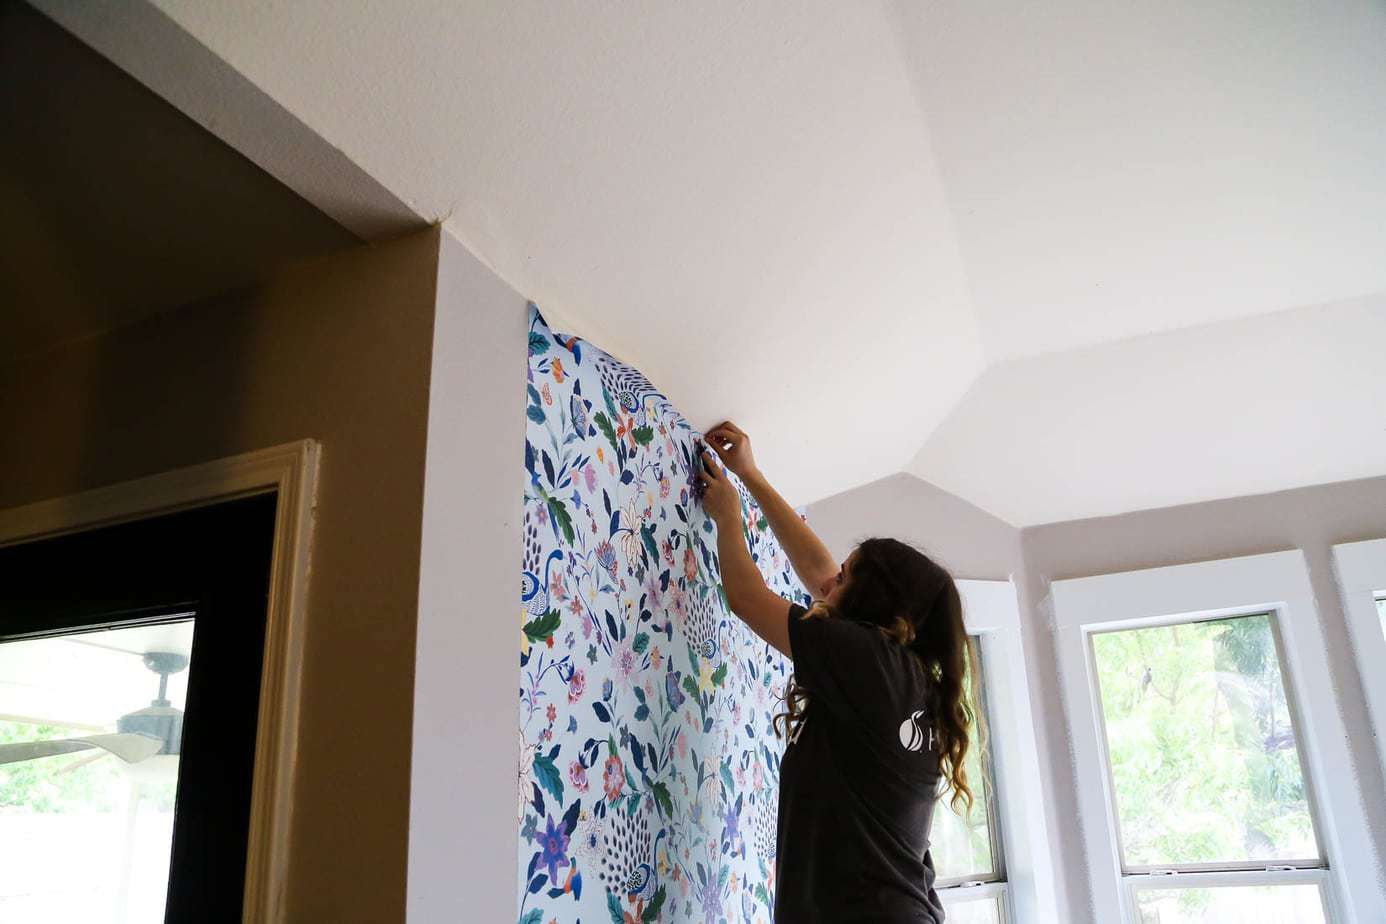
Smooth the Wallpaper, Then Cut Off Excess
Once you’ve go the wallpaper in place, grab your putty knife (you can use the wallpaper smoothing tool for this, but I preferred the thin edge of the putty knife). Gently press it into the crease at the ceiling. Run the utility knife along the edge of the knife to cut the wallpaper. Continue along the length of the paper using the putty knife and utility knife to ensure a straight and clean edge.
Do the same thing on the bottom of the wall, and you’ve officially installed your first piece of wallpaper!
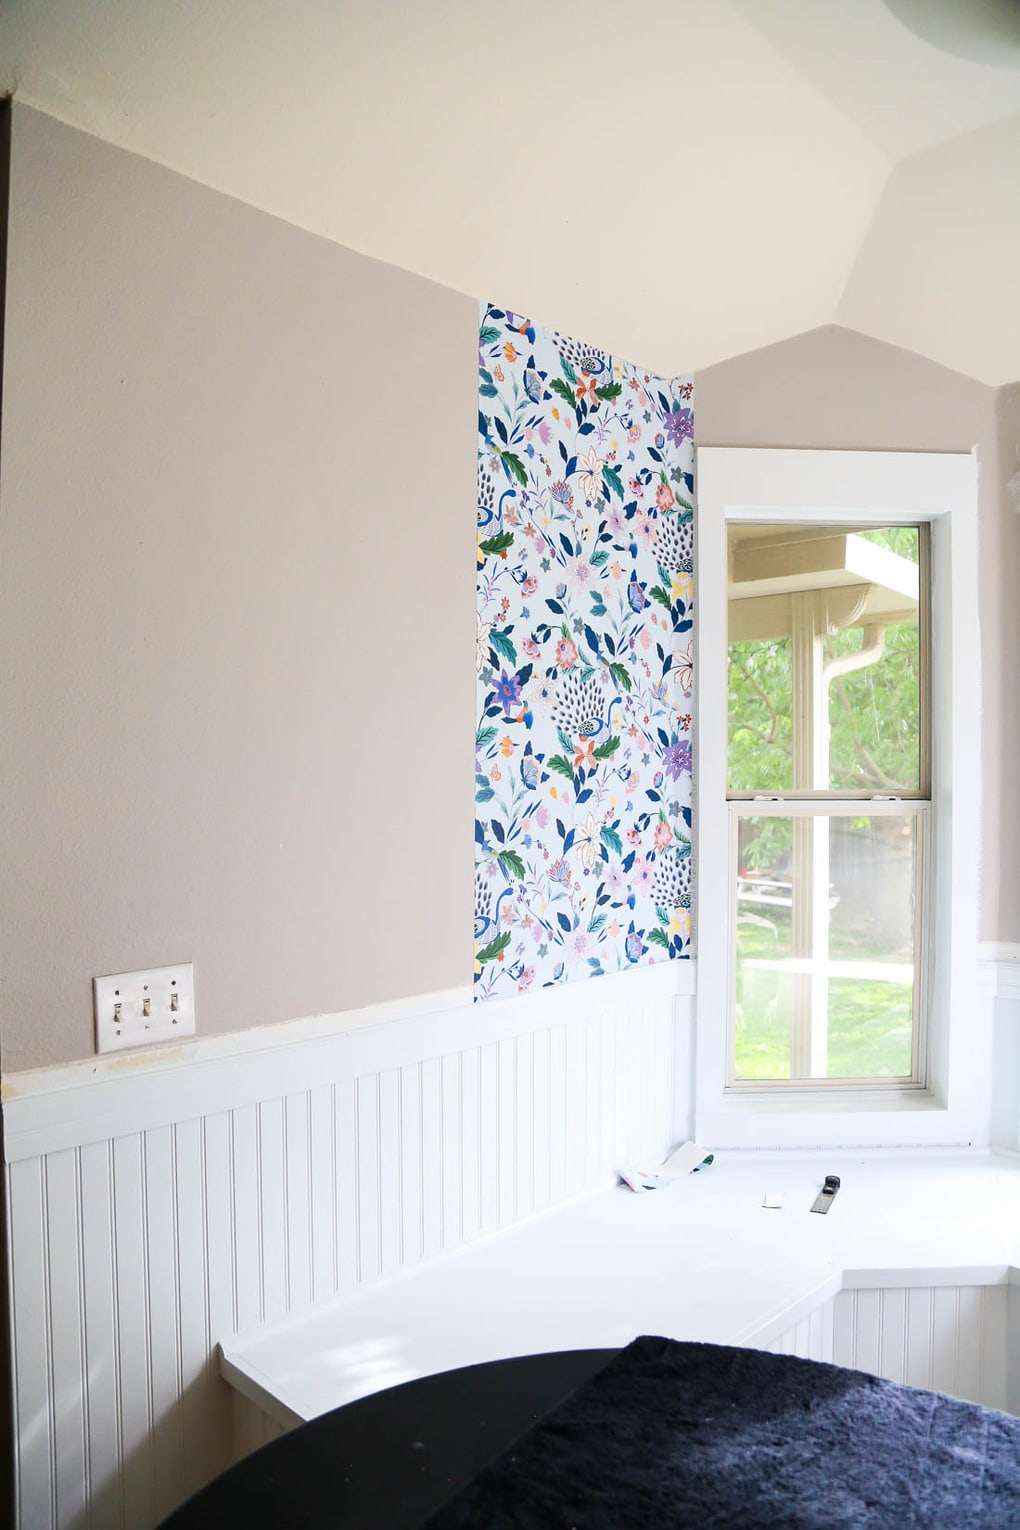
Repeat (Again, and Again, and Again!)
For the next piece, grab the entire roll and bring it over to the wall. You want to start by finding where the pattern lines up, then measure from there. Generally, you’re going to end up wasting at least a few inches of wallpaper along the ceiling to ensure the pattern fits. It’s annoying, but it’s just how it goes.
Once you’ve got your next length measured out, just repeat the process! Be sure that when you’re aligning your seams, you don’t overlap them. Also make sure you also slide the wallpaper into place. Try to start about 1/4″ away from where you need to be, then gently slide it until it butts up against the next piece. This gives you the cleanest seam and helps avoid peeling wallpaper down the line!
Working Around Outlets
In most rooms, you’re going to have at least one light switch or outlet to work around. For these, you’ll want to take the face plate off and cover any sockets with painter’s tape. I found the easiest way to do this was to simply install the wallpaper right over the hole for the outlet. Then, I’d use my utility knife to cut an X where I could feel the hole. Then, cut off the excess using either scissors or your knife and re-install the faceplate! It’s super simple, I promise.
Frequently Asked Questions
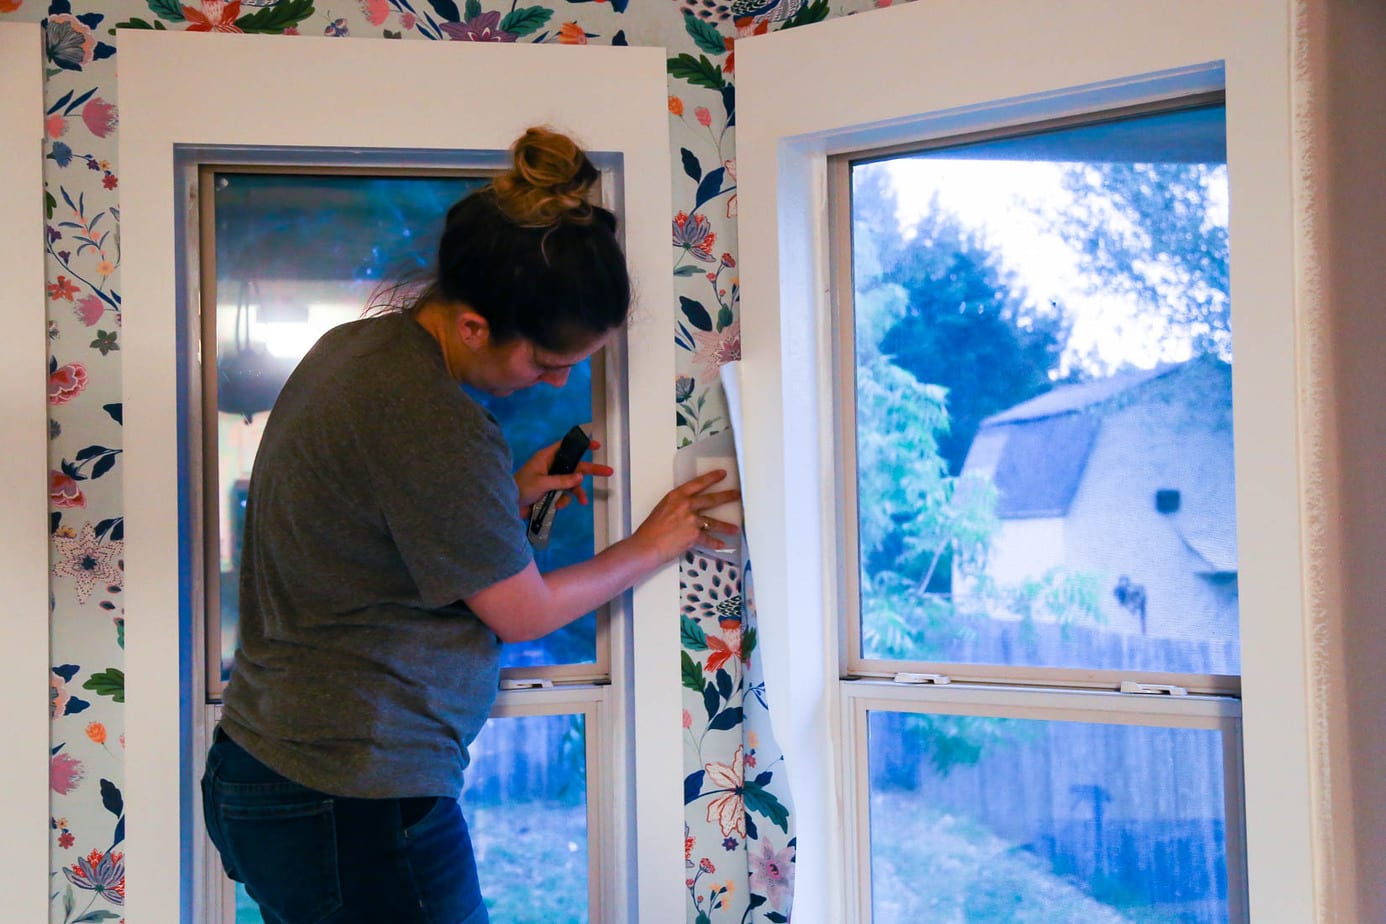
What About Windows?!
Installing wallpaper around a window is tricky. But, I feel like it’s kind of similar to wrapping a giant present! We installed trim around our windows before getting started on this. It meant we didn’t have to have to wallpaper the drywall inside of the window area! This made the process infinitely simpler (and looks pretty great, too).
To install wallpaper around our window trim, I simply measured the piece of wallpaper as if it were a normal run and cut off the excess. On some parts, we actually were able to use leftover wallpaper scraps to piece together the smaller areas without creating more waste. But, it wasn’t easy to find pieces that worked. For example, a couple of the windows consist of one larger piece along the top of the window plus a long skinny piece in-between the windows. However, this isn’t possible until you’ve created a bit of waste. And even with the excess wallpaper, it may not be possible if the pattern doesn’t match. So, for at least the first window you’ll need to measure as normal.
I started at the top, smoothing out the wallpaper above the window and up to the top piece of trim. Then, I used my utility knife (paired with the putty knife!) to cut along the top of the window. At this point, you’ll have a lot of extra wallpaper flopping around. So, I grabbed some scissors to cut diagonally up the window and removed a bit of the excess. Be very careful with this and cut far away from the side of the window – only cut off wallpaper you know you won’t need.
Once at least some of the excess is gone, you can use the utility knife to cut along the side of the window, as you see in the image above.
Repeat for the other side of the window, and you’re good to go!
But What if I Make a Mistake?!
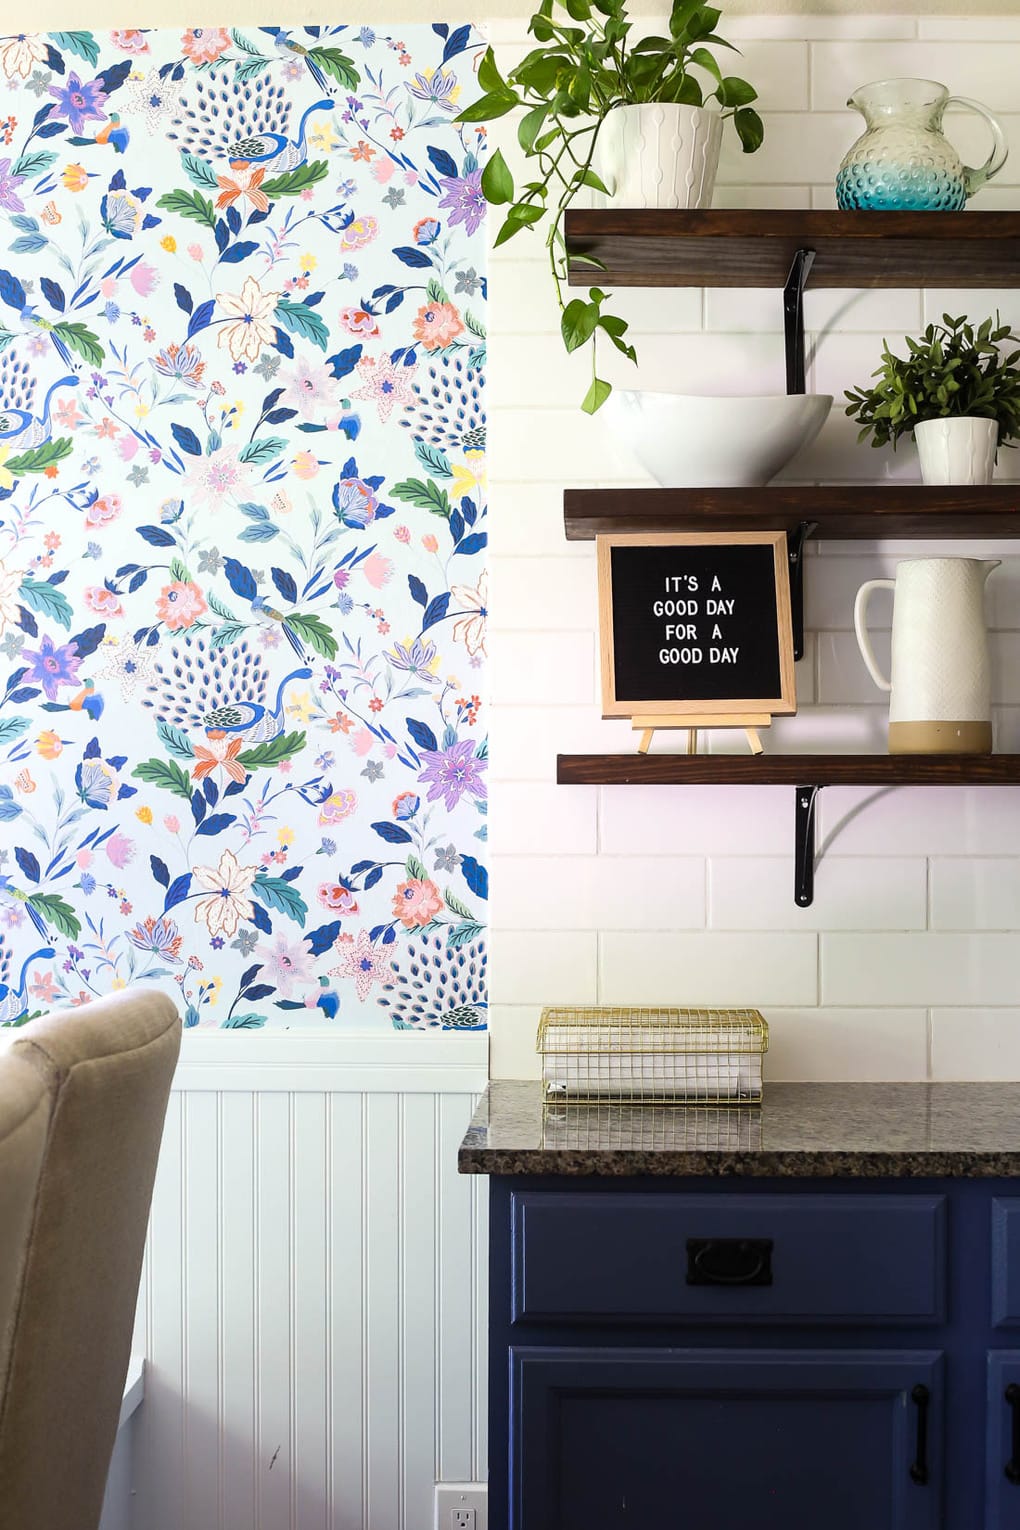
Can I let you in on a secret?
YOU WILL.
It’s okay. It’s fine! To be completely honest, if you’re dealing with a highly-patterned wallpaper like this one, it’s unlikely anyone will even notice. I promise.
Here’s a quick example: On my first window, something went a little wonky (I’m still not sure what), and the piece along the top of the window ended up being slightly angled. As in, my wallpaper was no longer hanging perfectly straight. And you know what that means, right? All of the rest of my wallpaper has to line up perfectly with it, so of course now the rest of the room was going to be wonky.
If I was working with a geometric pattern like stripes or something that mattered for it to be straight, I would have had to pull that piece down and start over. But with a more organic pattern like this, you can’t even tell that half of the room isn’t hung perfectly straight. You also can’t tell that where the wallpaper meets the tile in the image above, the bottom part of the wallpaper is patched with a strange triangular-shaped piece because (thanks to the not-so-straight hanging job), the top part of the wallpaper went all the way to the tile but the bottom part didn’t.
You can’t tell unless you’re about two feet away from the wallpaper and looking for a seam. And even then, it just looks like a seam. Not like a mistake.
So, rest easy and just give it a go. There are many little areas on this wallpapering job that I made mistakes but I can assure you I’m the only one who will be scrutinizing the room enough to even notice, much less care.
What Do You Think About the Anthropologie Wallpaper?
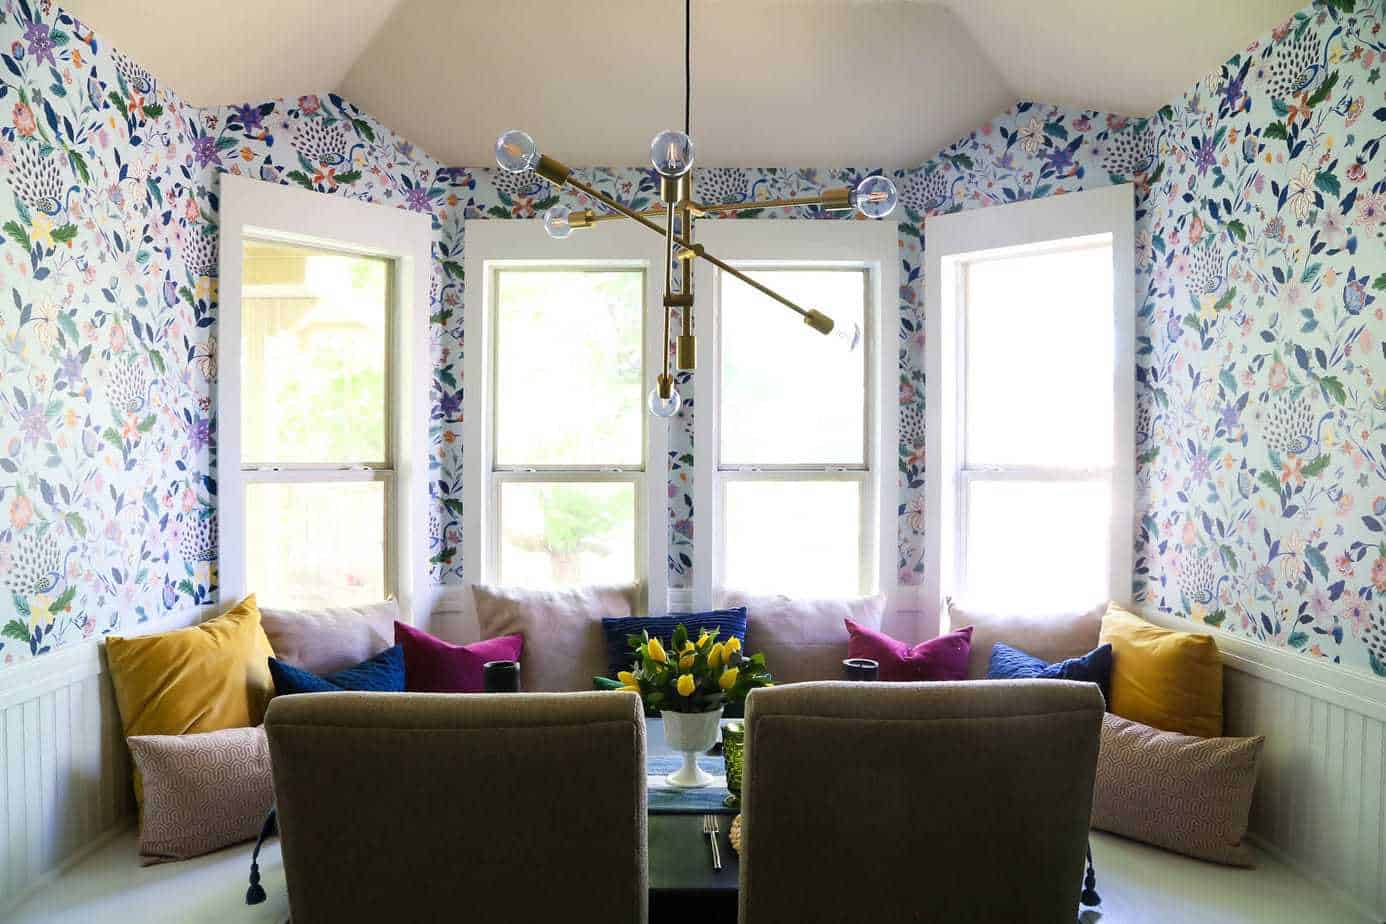
I’ve had a soft spot in my heart for Anthropologie’s wallpaper for years. Seriously – I’ve been thinking about Anthro’s wallpaper since 2014. We looked in a few other places first and chatted with a few brands about partnering for this project, but in the end, none of the opportunities really felt right and so we decided to go with a brand we felt confident we could trust.
Anthropologie’s wallpaper is definitely on the expensive side. But, if you’re working with a smaller area it’s honestly not that bad. We caught a 20% off sale and spent just over $200 for the wallpaper in this space.
As far as the quality of our Anthropologie wallpaper, I don’t have anything to compare it to but I was definitely pleased. It’s thick and has a very high-end feel to it, and the installation process was as easy as can be expected. I might be someone who has no other wallpaper experience (and therefore no real authority on the subject), but I can definitely say I’d use Anthropologie’s wallpaper again.
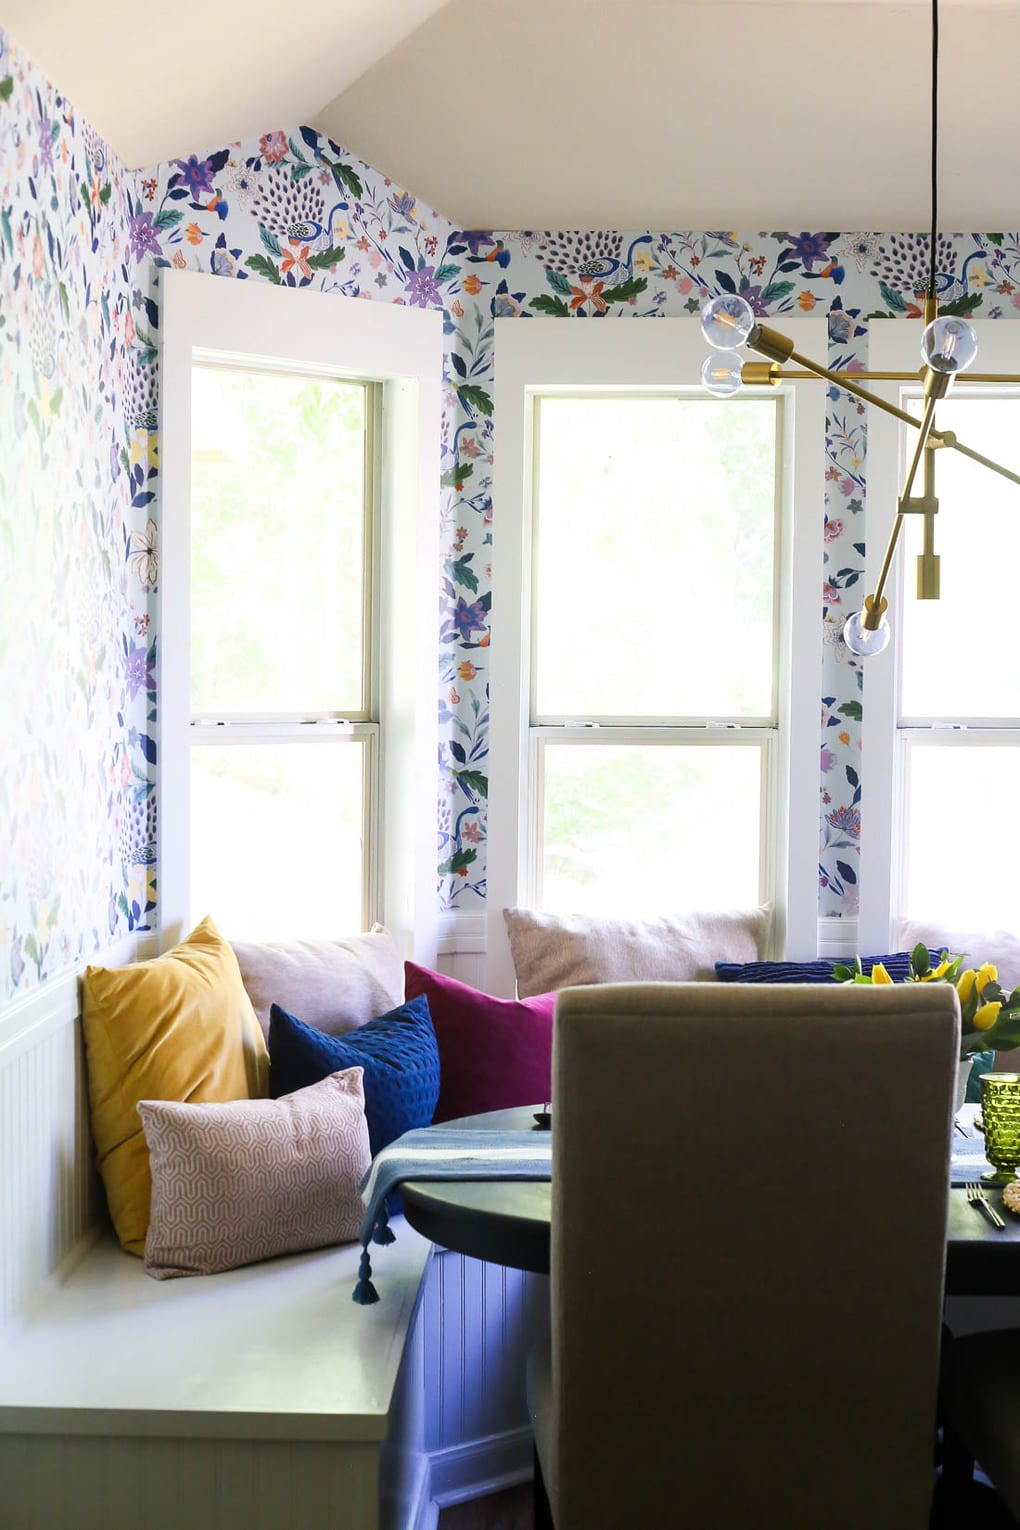
I hope that this post can give you a little bit of confidence if you’re thinking about installing wallpaper in your own home. It isn’t a simple project (at least, not if you’re installing with tons of corners and windows), and it requires a fair amount of patience, but I think it’s so worth the effort and I’m so glad we decided to take it on!
Have you ever wallpapered a room in your house before?!


Hi, wait enjoy your blog and I have been reading it for a few years I first came across it when I was trying to learn how to install my wallpaper from Anthropologie. It is not the peeling stick kind.
I finally have the nerve to go ahead and try it but I can’t find your instructions maybe it’s because I’m using my Android phone I will look on the laptop but if I remember right you had shared several details about your project.
I just love your house and all the projects you do and the hints and tips and hacks that you share thank you very much Amanda
Lisa Martin
Thank you for the detailed steps! I am wondering about the wall edge – it looks like your wall on the left stops and turns a corner … Did you just stop the wallpaper there? Any special tricks? I am about to wallpaper a “nook” and the outside edges are stressing me out!
Yes, I just stopped!
This is such stunning wallpaper! Thanks for sharing these tips and inspiration!
How much wasted paper did you end up having? I’m thinking of wallpapering my entry hallway, which has 4 doors and a double door wide opening into the living room. I thought it would be cheaper since it’s so much less wall fo cover (half walls too with a chair rail), but I’m thinking I will end up wasting so much with the cutouts?
You’ll need to account for the doors/windows in order for the pattern to line up – there’s a fair amount of waste with a room with a lot of doors!
Does the single roll come in pieces or is it just one full sheet.
Thanks.
It’s a full sheet!
Can you chat about the texture of your walls? Mine are a light orange peel, seem similar to yours. The installer, who quoted me $600 for a 5×8 powder room, went on and on about how important it is to skim coat/primer and then do the wall paper. I remember my mom hanging a wall paper border mid 1980 and there was no skim coat/primer applied. Did you do any sort of wall prep?
We did not skim coat ours. You can see the texture through the wallpaper if you get up close to it, but it’s not enough to bother me in the least!
Looks amazing!!I do have wallpaper from anthro but now looking at your post want to install asap.
Can I know how if you used any glue?
Thanks
This wallpaper is pre-pasted, so you just need to follow the directions I outlined here!
This is so pretty! I love the idea of doing wallpaper as an accent in a space like this. I’m confused by how you did it for around $200 though – wouldn’t that just be two sheets?
Hey Jillian – two rolls of the wallpaper was just enough to cover this space! Each roll covers about 50 square feet.
It looks gor-gee-mousse! So beautiful, had to create a whole new compliment word, lol
Thank you so much!
Obsessed with this! I cannot stop looking at it! Where did you get your light fixture? It’s so much fun!
Thank you!!! The light fixture is from West Elm – you can see it right here!