
DIY Giant Christmas Bells
I made some oversized Christmas bells to use on my front porch this holiday season and it was so simple! Today, I’m sharing the process.
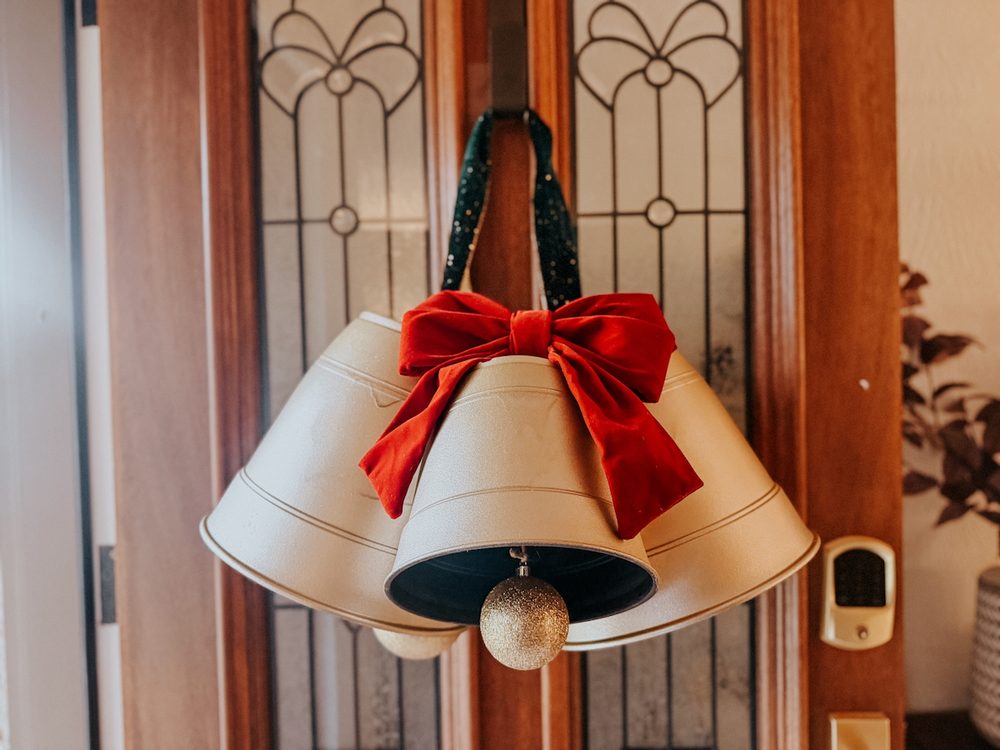
When I started thinking about how I wanted to decorate our front porch for Christmas this year, I kept going back to images I have seen of front porches with giant, oversized bells hanging with garland. There are lots of places you can buy oversized bells, and they even make inflatable ones just for this purpose. But, I didn’t love the vibe of the inflatable ones, and the ones I’ve seen for purchase are so expensive. So, I decided to make my own!
It’s really easy to make your own giant Christmas bells using some plain planters and Christmas ornaments. I already had almost all of the supplies on hand, and it only took me a few minutes to put these together! I styled them on our front door for this post, but the plan will be to add them to some big fluffy garland around the door on the front porch. Stay tuned for that later this month, because I’m really excited to make it happen!
But today, let’s talk about how to make oversized Christmas bells.
How to Make Giant Christmas Bells
Materials Needed:
Amounts listed below are for one bell. Adjust accordingly if you plan to make more!
- Simple plastic planter (the larger ones are 11″ planters and the small one is a 6″ planter)
- Gold spray paint
- Twine
- Gold Christmas ball ornament
- Drill
- Eye hook
- Nut (make sure it fits on the threads of your eye hook!)
Step One: Paint the Planter
First up, you want to spray paint the planter gold. I like to start with a black planter because then it has a nice dark base that can help it look antique if any of the plastic shows through. I just painted the outside of the planters, but you could paint the inside as well, if you’d like!
If you need help with spray painting, I have a full guide on how to spray paint right here that should give you a good overview.
Step Two: Drill Hole + Add Eye Hook
Drill a hole in the bottom center of your planter. This will be how you hang it and how you add the ball into the bell. After drilling the hole (make sure it’s about the same size as the threads on your eye hook), insert the eye hook from the outside of the planter.
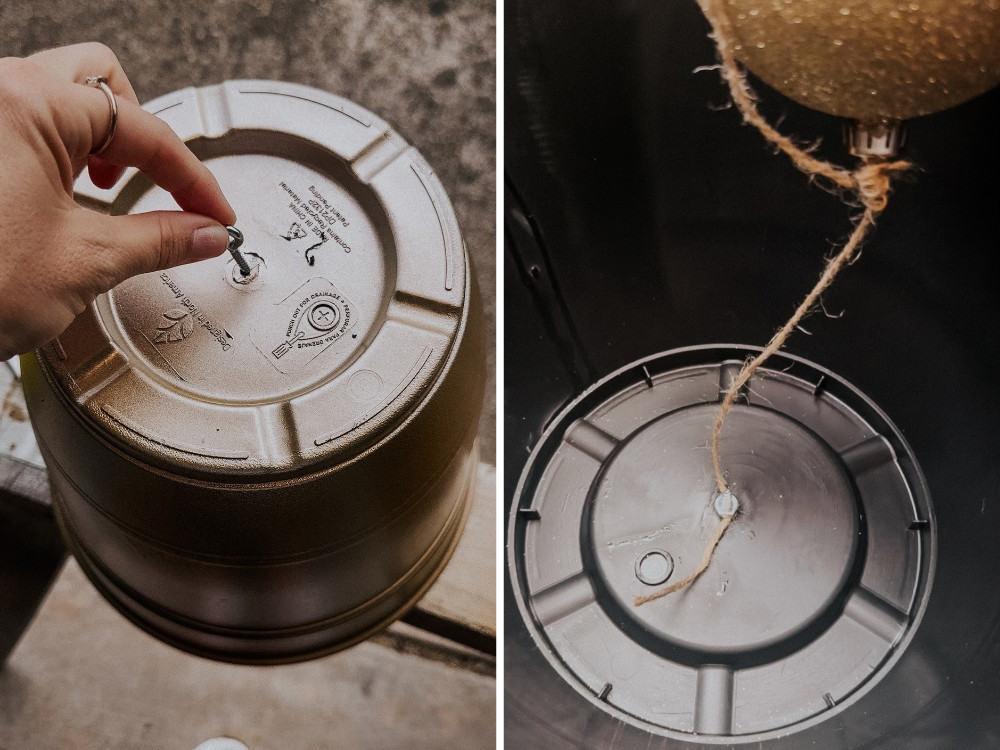
Now, cut a piece of twine (I just eyeball it, you can adjust it if needed!) and tie it to the threads of the eye hook on the inside of the planter. Screw the nut onto the eye hook to help hold the twine in place.
Step Three: Add the Ornament
Now, grab the ornament and tie it onto the other end of the twine. Play around with the length of the twine until the ball hangs just below the opening of the planter. You want to be able to see about 1/3 of the ball when the bell is hanging upside down!
Cut off any excess twine, and you’ve got a giant Christmas bell!
Step Four: Grouping + Hanging Your Oversized Bells
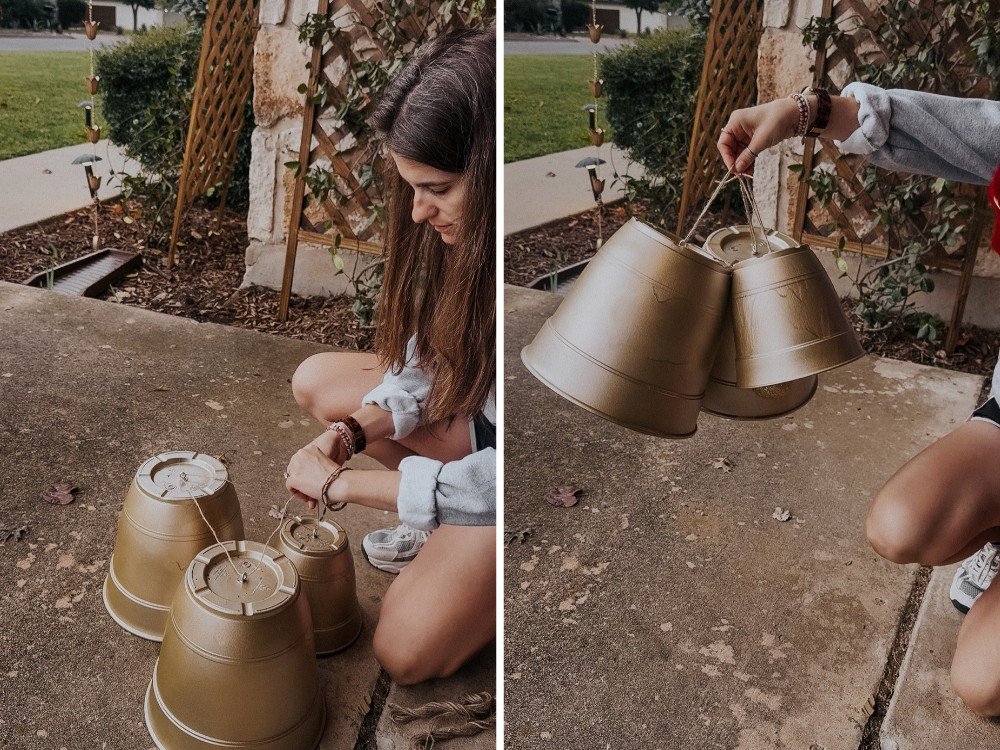
Now, for hanging them! You can use the eye hooks and some ribbon or twine to group the ornaments together. I just made a loop that went through all three eye hooks and tied it, then used that to hang the bells in a cluster. You can add a bow to help hide the connection points!
When I hang these on my garland, I will probably remove the clustered twine and hang them individually, so I have more control over where they sit. But, it’s really easy to play around with placement until you find something that works for you.
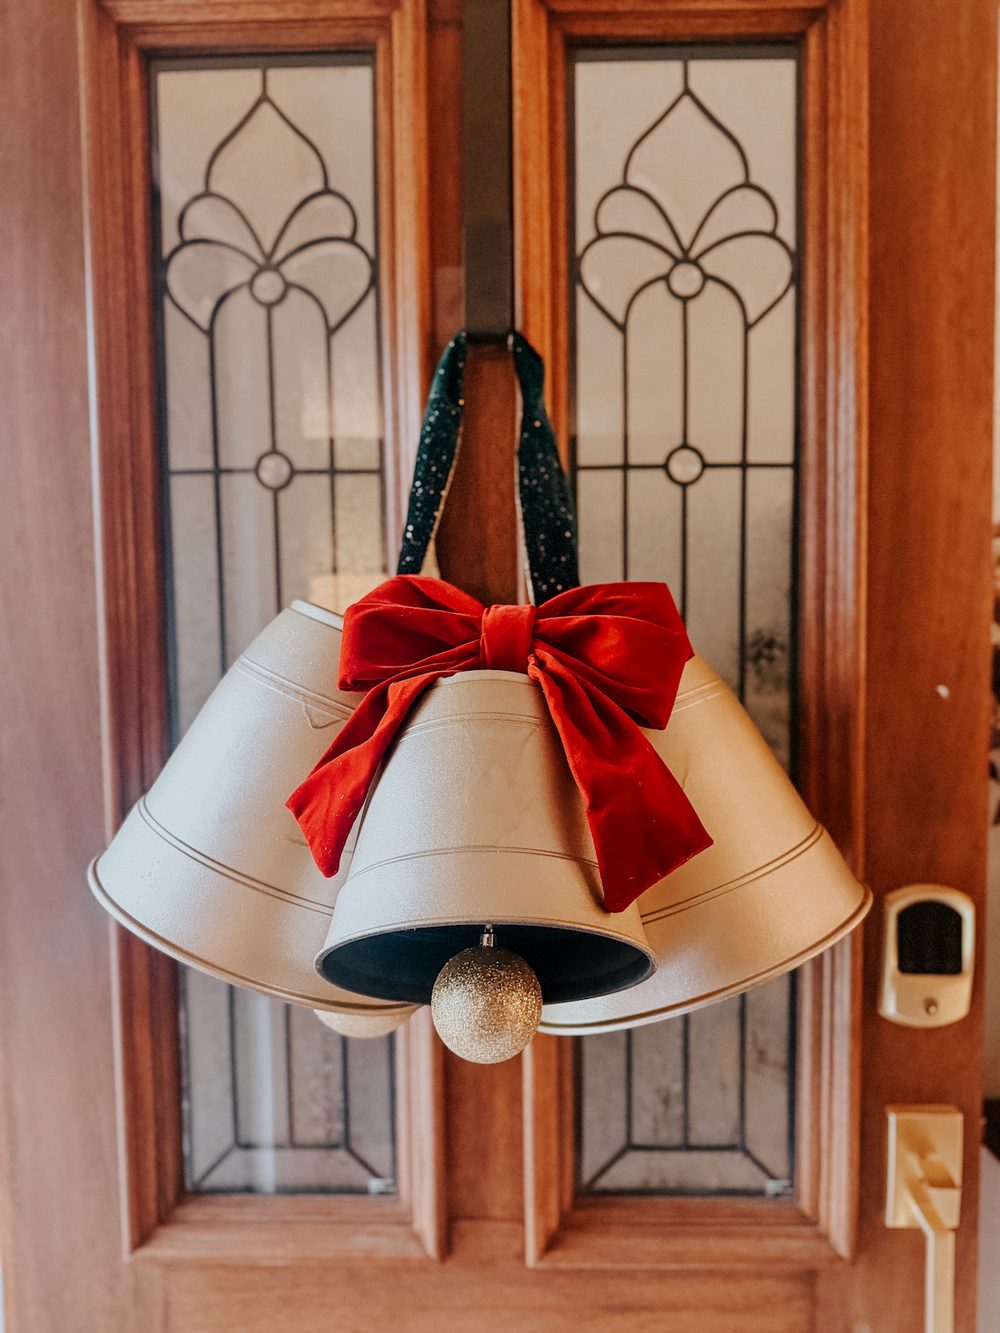
This is a really simple and fun project that is going to make your front porch feel so festive. I’m so excited to get ours all set up – stay tuned later this week for the reveal!