
DIY Shaker-Style Peg Rail
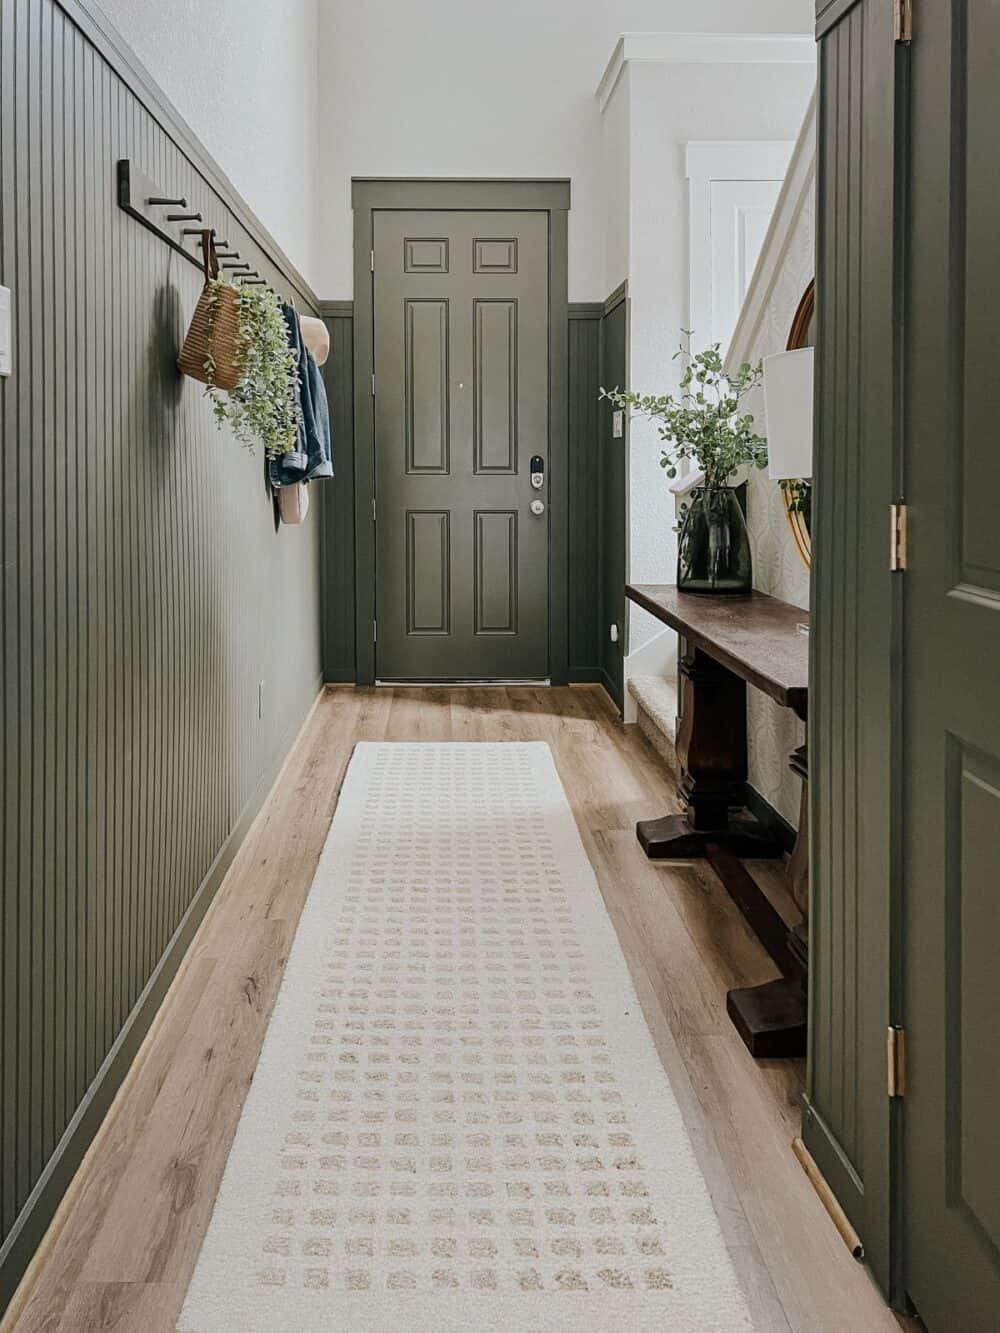
Our entry refresh is inching closer and closer to the finish line, and I think it’s safe to say today’s project took us one HUGE leap in the right direction! I’ve always felt like the long wall across from the staircase needed a little something. I didn’t want to add art (we have family photos on the other wall going up the stairs). A mirror wasn’t necessary (there’s one on the staircase wall). It was a huge blank canvas. After a couple of years of contemplation (literally), I figured it out. A peg rail!
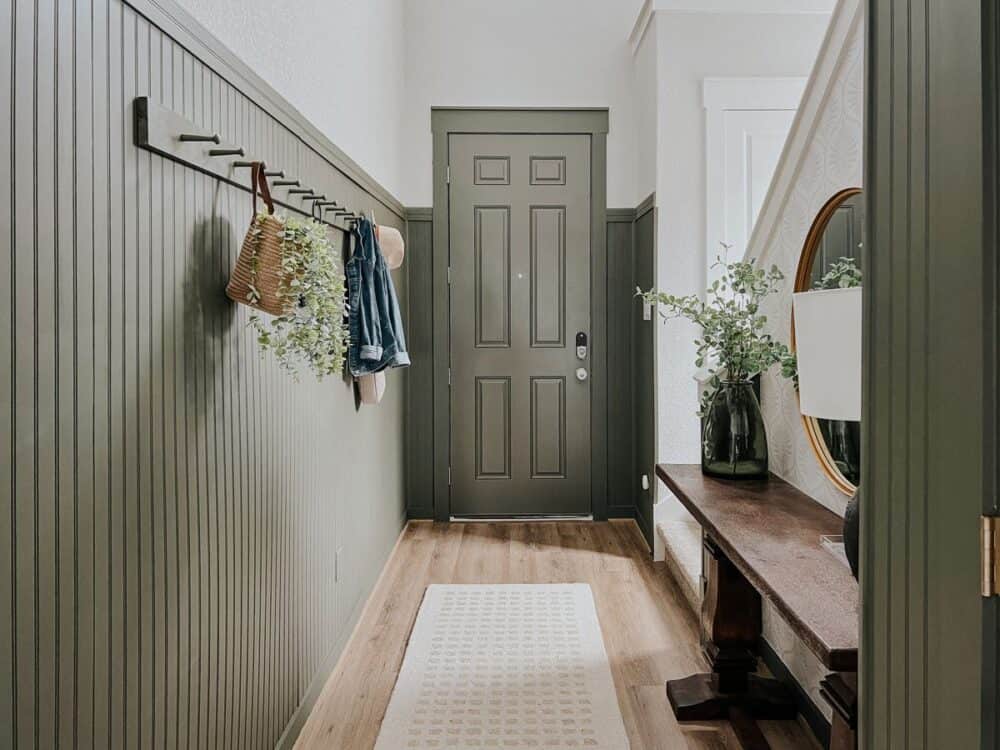
I made this (incredibly easy) DIY shaker-style peg rail for the wall and I cannot get over how good it looks. It feels like it was always meant to be here, and it really fills the space in perfectly.
This is such a simple solution for a big, empty wall. I promise, anyone can make one. It only takes a few minutes to put together and requires almost zero DIY skills. Promise.
Let’s get to it!
how to make a diy shaker-style peg rail
Materials Needed
- 1×4 pre-primed board, cut to desired length
- Shaker pegs
- Measuring tape (see some measuring tips here)
- Drill (here’s how to use it!)
- Stud finder
- Paint or stain
- Wood filler (click here to learn about how to use it!)
how to make the peg rail
First up, paint (or stain) your board and allow it to fully dry. Mine is painted the same color as the entry – Bonsai Trunk by Behr.
Once it has dried, measure and mark the holes for your pegs. I played around with a lot of different spacings, and I landed on 6 inches between each peg. It doesn’t matter if you don’t need that many pegs (goodness knows I don’t), but it looks better when it’s a little more full!
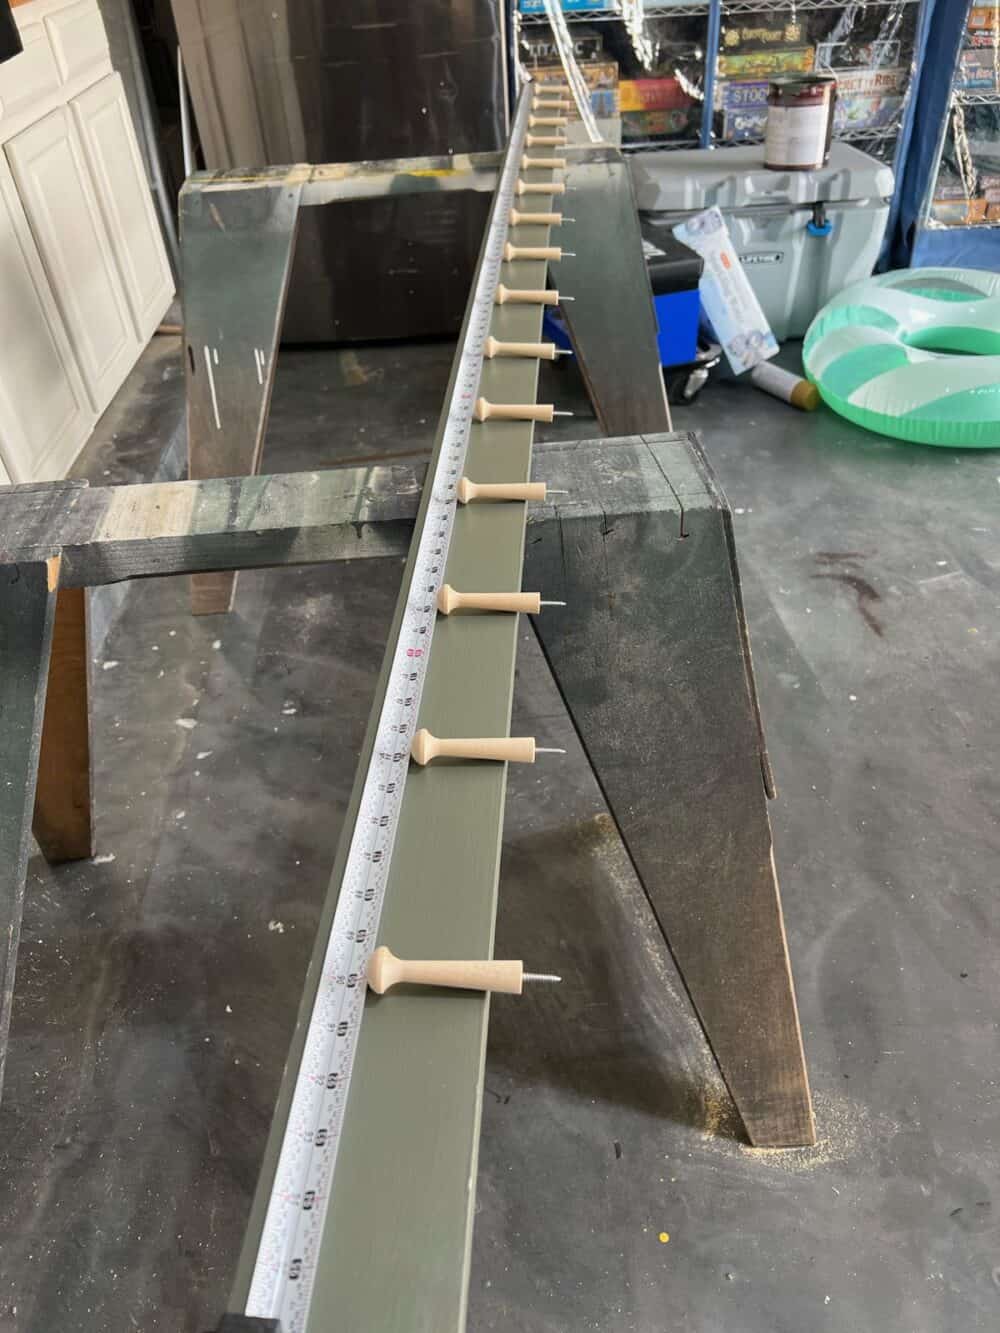
After you’ve marked for all of your holes, pre-drill a small hole in each marking using your drill. Then, screw the pegs into the holes.
Boom! You’re done. Seriously. That’s it!
You can paint or stain the pegs themselves prior to installation if you want. I just painted them afterwards and it wasn’t too difficult.
how to hang the peg rail
Hanging the peg rail is just as simple as building it. Just find the studs in your walls and mark them at the height you want to hang the peg rail. Grab some 3″ screws and drill directly through the peg rail and into the studs.
Make sure to countersink your screw a little (meaning, screw it in slightly past the face of the board) – this will allow you to cover it up! Grab some wood filler and fill in the area around the screw.
After the wood filler has dried, here’s a quick trick for sanding it down: use a wet microfiber cloth! Sandpaper can make a huge mess and may mess up your existing paint finish. Wet down a microfiber cloth and scrub at the wood filler to remove the excess. It’s really easy, doesn’t make a mess, and leaves your paint finish pristine!
Then, use your paint to touch up the wood filler. It’ll practically disappear!
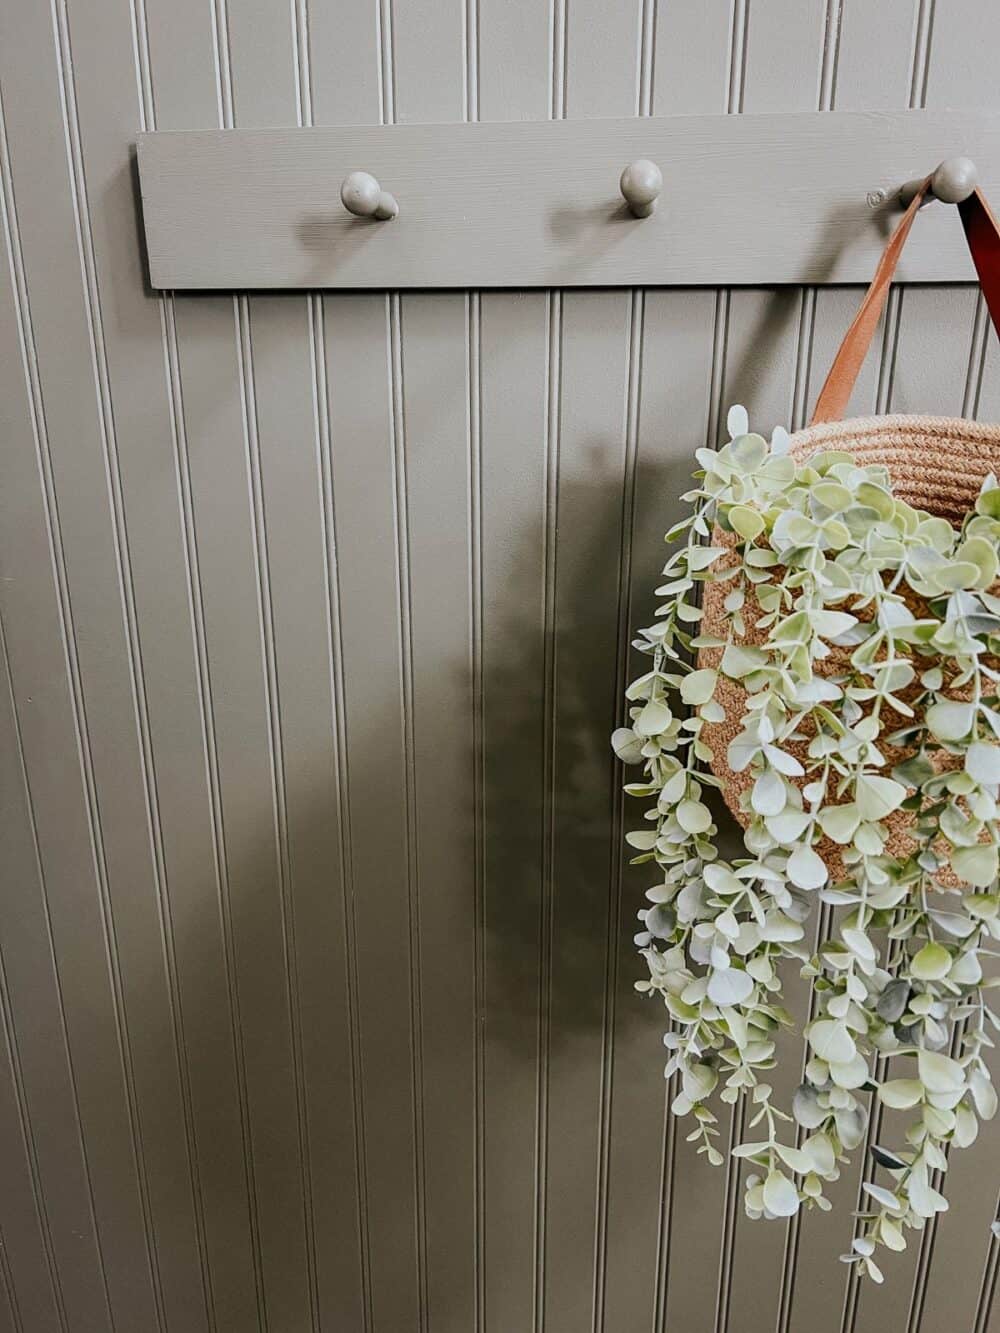
And just like that, you’re done. You have a beautiful new shaker-style peg rail ready to be filled up. I honestly felt like it looked so great even without anything on it. The empty peg rail filled up the space so nicely, and I knew it was the right choice before I even hung a single thing on it.
But, of course, if you have peg rails you’ve gotta fill them up!
how to style a peg rail
Styling the peg rail is half the fun. Keep in mind that you don’t actually want to fully fill it up – it will look overcrowded. Less is more here!
If you need the peg rail to be functional, be sure to save some space for the things you might be hanging. I have a coat closet right across from this with plenty of storage, so it’s mostly decorative. I occasionally hang my purse on it, but that’s about it.

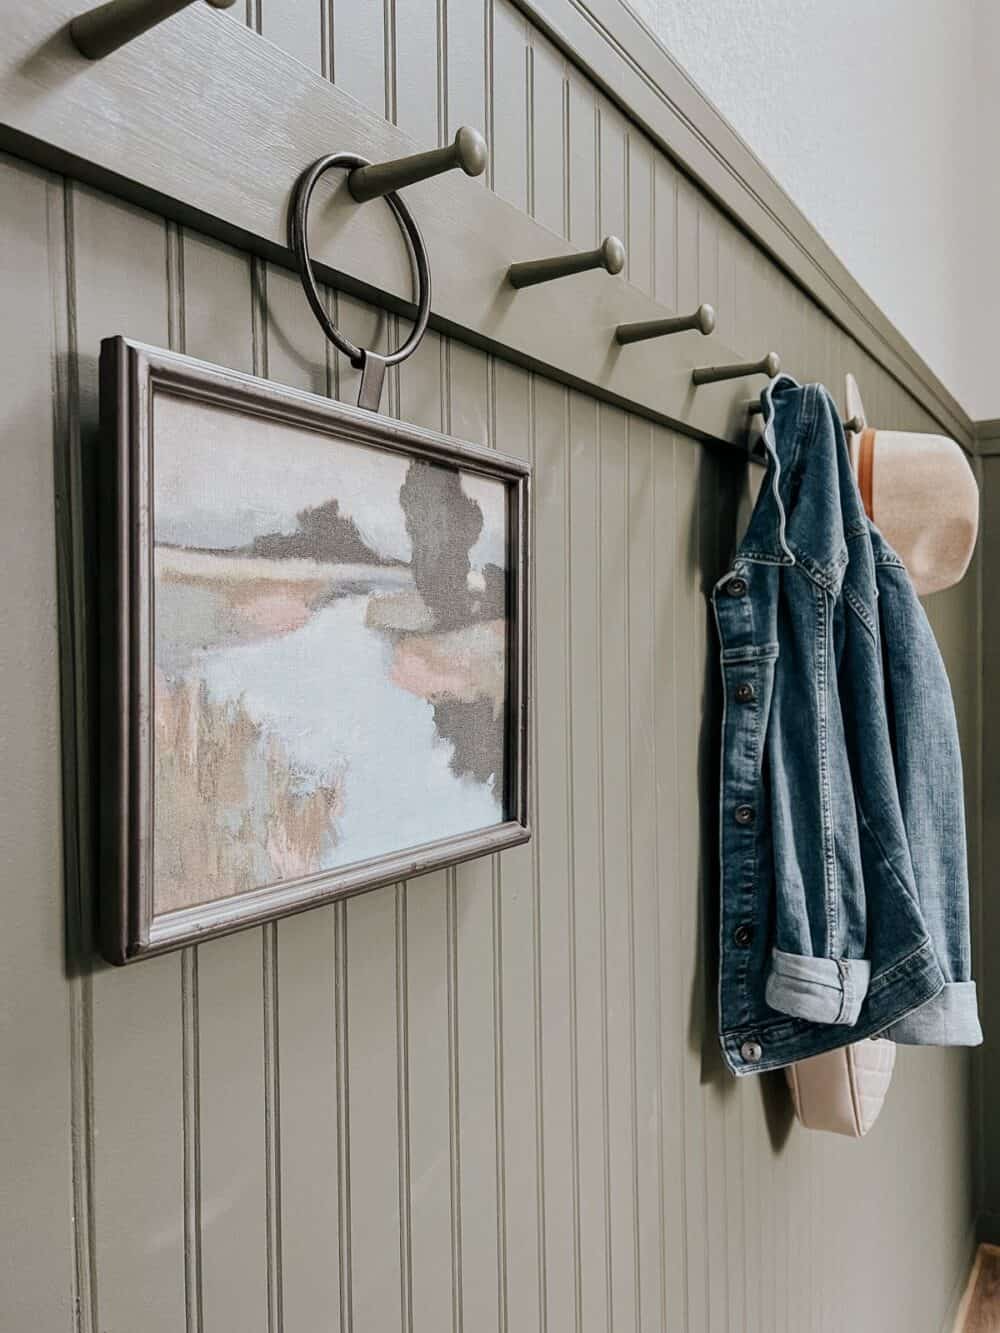
Will you laugh at me if I admit to you that I purchased a hat just to style on this peg rail?
Listen – I had been planning on buying a new fall hat for quite some time. So, this was just a good excuse! And, doesn’t it look so cute?!
There are tons of different things you can use to style a peg rail in the entry. I like to keep it mostly to functional things (like bags and hats) with just a couple of small accents.
Peg Rail Sources
I also love the idea of a big ol’ straw bag on a peg rail. I don’t use one or have a need for one and it felt a liiiiiiittle over the top to buy one just for this. But, if you’d use one, here’s a really cute option!
If you’d like to add a little shelf to the top, it’s a really cute way to add some art as well. Since I was hanging this in a really narrow space, I decided to skip it. But, if the space was any larger, I definitely would have!
Peg rails are great for the entry, kitchen, mudroom, hallways, or just about anywhere else. I love ours, and now that I’ve tried it out I might just have to make another one for somewhere else!
Love your ideas! I just bought a house and it’s the same as yours lol! I found your page on ideas on hanging pictures on staircase wall and saw my own house. Do you have any ideas on the empty space on top of the hallway closet?
We leave it blank! I don’t want to put anything up there that I need to dust, haha.