Shower Details + Wall Progress {Bathroom Renovation Week 4}
We’re getting close to the finish line on this bathroom renovation, and today I’m sharing the details on the shower fixtures we chose, how the walls are coming along, and a quick list of what’s left!
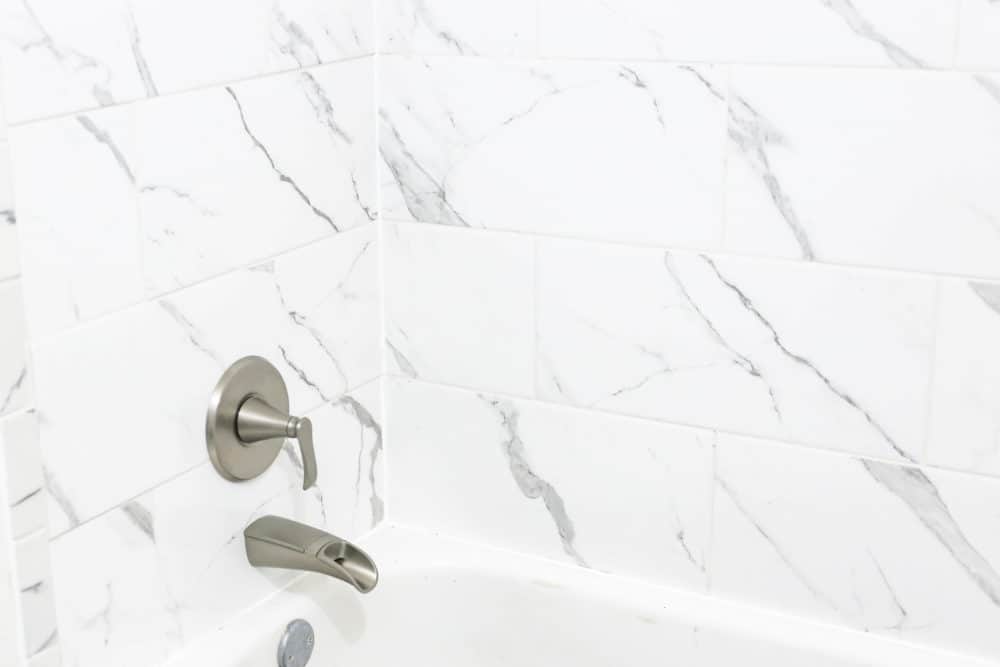
It feels really exciting to say that I’m officially done tiling in the bathroom, which means that we’re probably about 75% of the way finished with this renovation.
This week was a big one – you saw last week that we had finished laying tile, but things were still looking unfinished since it wasn’t grouted and the walls were still a mess. Well, things have come a long, long way since you saw it last and I’m excited to show you what we worked on this week!
But first, let’s do a quick review of what has happened so far.
Bathroom renovation details
- We’re currently participating in the Jeffrey Court Renovation Challenge. You can vote for us to win the $5,000 grand prize by clicking here (you’ll be my favorite forever!). We’re renovating our kids’ bathroom, and the goal is to knock it all out in just six weeks – we’re on week four right now.
- In WEEK ONE, we revealed the plans and all of the (nasty) before photos.
- In WEEK TWO, we completed the demo and started to worry we were in over our heads.
- In WEEK THREE, things were back on track because we finally finished tiling and the bathroom was looking much better.
UPDATE: Wanna skip ahead and see the rest?
- WEEK FIVE is all about the walls and our new black beadboard
- WEEK SIX is the BIG REVEAL!
And that brings us to this week. You can watch this week’s Renovation Log below (it’s a fun way to get a live-action look at what happened this week), and then you can catch more details in the post after that!
Note: If you’re reading this in a feed reader, you may need to click through to the post to see the video. You can also click here to watch it on YouTube!
Shower fixtures + Details
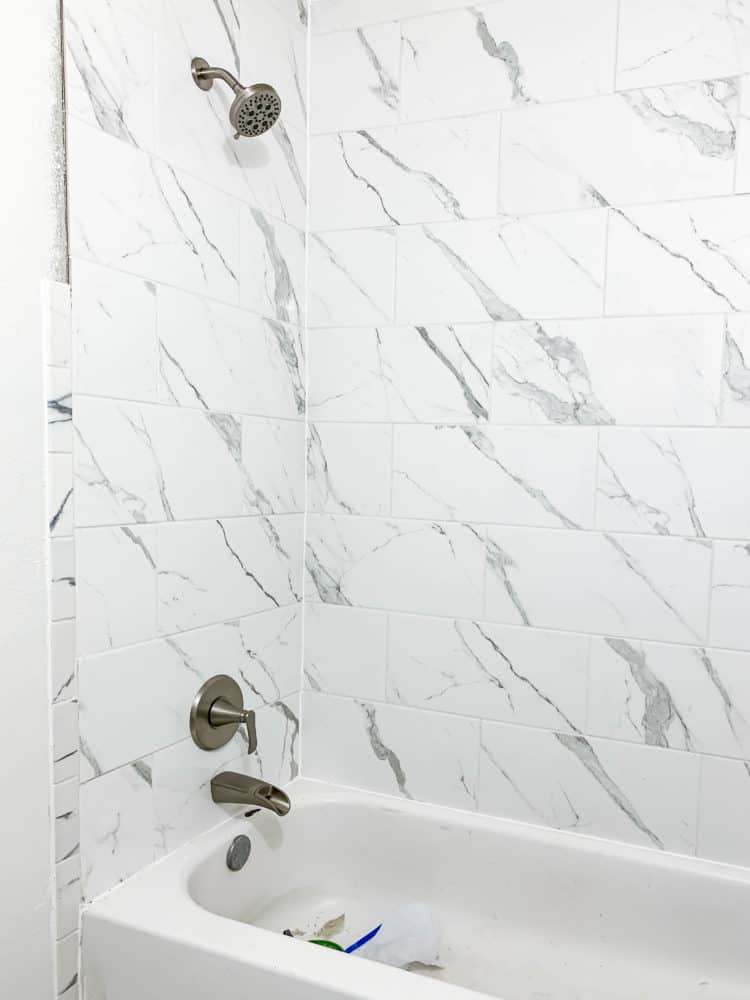
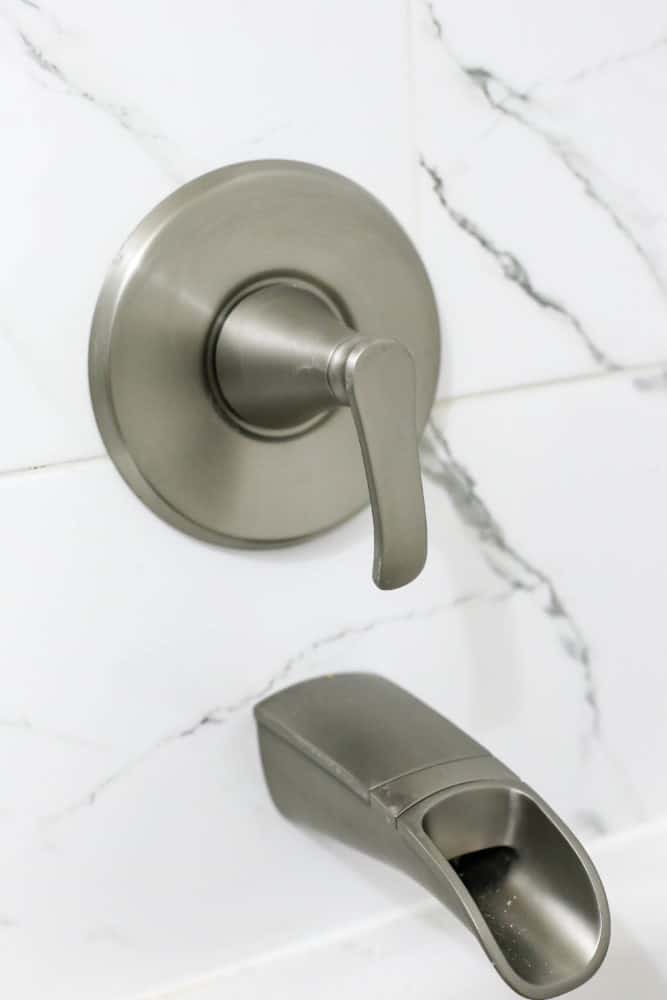
This post is sponsored by Pfister, but all of the opinions and hard work are all me! Thanks for supporting the brands that support Love & Renovations.
The first thing I wan to talk about is the bathtub area. Every time I walk by this bathroom I stop for a moment and gaze lovingly at it – I cannot even begin to tell you how much I love the gorgeous tile that we chose for this space. (As a reminder, this is the shower tile and this is the floor tile we’re using). I was worried the large scale would overwhelm the space but I honestly think it was the perfect decision.
We still need to finish the trim pieces along the edges of the shower (long story, but we didn’t order enough so we’re waiting on a couple more pieces to arrive at our store, then we’ll get them installed this week), but other than that this part of the room is done. Once I finished adding the grout (which really made things look more polished!) and caulking the corners and edges of the tile, it was finally time to install the new shower and tub fixtures.
The first thing I’ll note is that we had a plumber come out and raise the shower head piping so that it was probably about 18 inches higher than where it started. Most builder-grade homes have the shower valves installed way too low, and it’s awkward for taller people to shower in! Since the walls were all opened anyways, we figured it was the perfect time to raise it up and make it a little more functional for everyone. A bonus is that it looks way nicer when it’s up a little higher!
For the bath and shower fixtures, we chose to use Pfister’s Jaida collection. I love the curved, elegant lines and how sleek the pieces look in the bathroom. It kind of looks they they were made exactly to fit in this space and I cannot stop being all heart-eyed over them! We have matching fixtures for the vanity, which I’ll share more about later, and I just can’t get over how fancy this bathroom feels now!
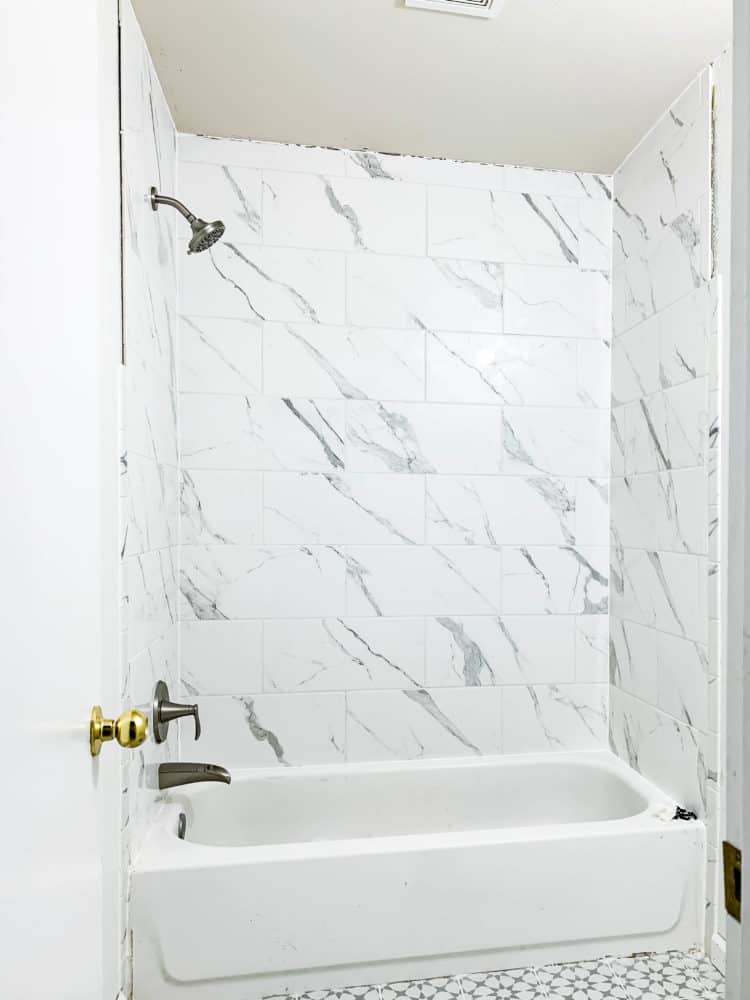
My favorite little detail is the diverter (the switch to divert the water flow from the tub to the shower). It’s integrated into the spout so it’s hidden when it’s not in use and is such a small thing but it really affects how the finished product looks. I just love a company that pays attention to those tiny details!
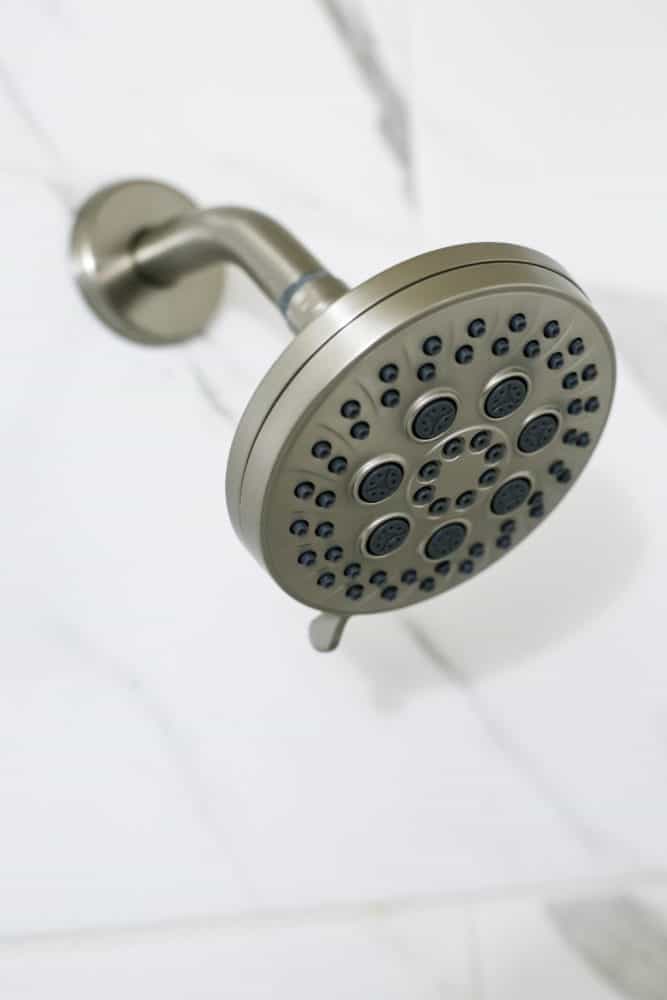
Another favorite detail? It’s a spot-defense finish, which means I won’t have to spend forever scrubbing it down constantly (just me, or is a fingerprint-y faucet the worst?!). The shower head has adjustable pressure options, and I cannot wait to take my first shower in here. I already warned Jackson I may use this bathroom more than my own.
I can’t emphasize enough how much of an upgrade it is to swap out the tub and shower faucets in a bathroom – even if you can’t replace the entire thing, just that little upgrade can make a huge difference. No one should ever live with a crappy shower spout. It’s such a simple fix that will revolutionize your daily showers! You can find the Jaida collection right here for the tub and shower – and just wait until you see the faucet on our vanity in a couple of weeks…it’s gonna be so dreamy.
Texturing the walls
The other big thing we accomplished this week was getting the walls fully textured and painted…oh, and making a total pivot in our plans that adds a lot more work for me and kind of changes the entire design of the room.
No big deal.
You see, we had a lot of drywall to repair and patch and, while we didn’t realize it until after we had started re-texturing the new drywall, the old walls had a lot of problems. From flaking paint to holes to areas that needed new texture, they were kind of a hot mess.
The issues were still pretty evident in some places once I finished the texture and added a coat of paint, so I decided to switch things up a bit. I was already feeling like the room was a little too white and that it needed something to ground it, so on Monday evening we decided to add some beadboard to the bottom half of the walls.
Oh, and we’ll be painting it black.
It’s a risk. It’s a bold move. I think it’s absolutely what we should be doing and I can’t wait to see how it turns out. So, you’ll have to wait until next week for the actual finished walls. Sorry!
Back to the texturing, though – because I did still have to retexture the top part of the walls. This was the part of the project that intimidated me the most (yes, even more so than tiling!), because it was totally uncharted territory for me. But, in the end, it was really simple and I’m pleased with how it turned out! If you remember, we started off the week with drywall that had been installed but it wasn’t taped or mudded, not to mention textured to match the orange peel in the rest of the bathroom.
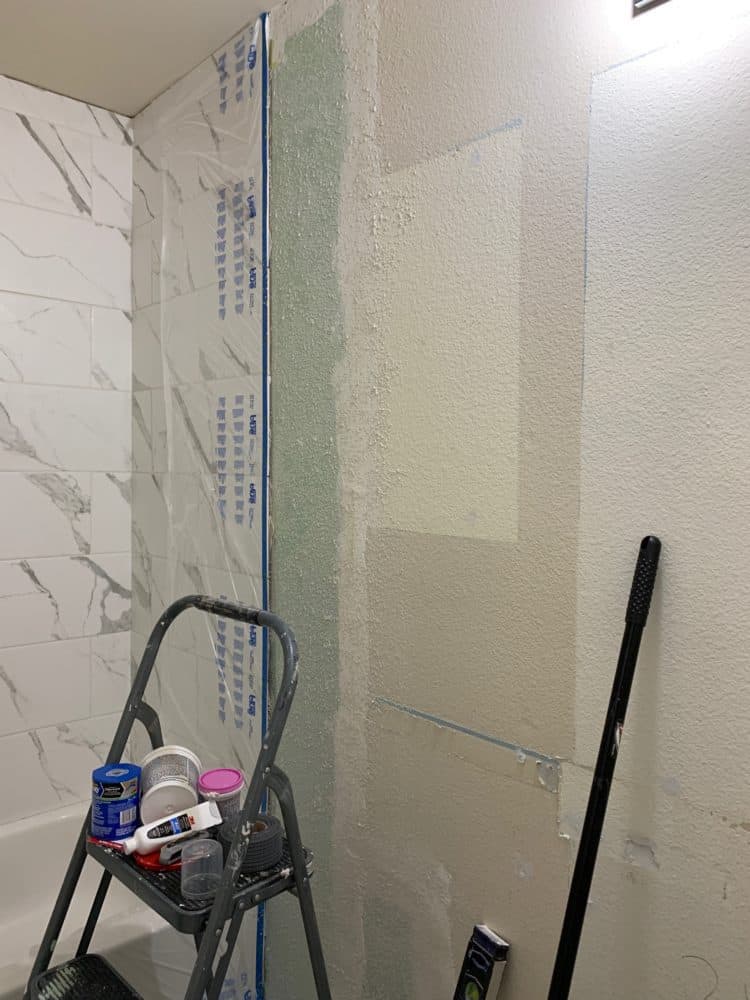
I’ll be honest, I put this off until the last minute but once I got working on it, it really was much easier than I had anticipated. Here are the steps I took to get the new drywall texture to match the old stuff:
- First up, you need to seal the seams of the walls. Use drywall tape and joint compound to do this – just apply the tape to the seams, then add a layer of joint compound on top. Let it dry for 24 hours, then sand it down and add another layer. Let it dry for 24 hours then do it AGAIN (yes, there’s a lot of waiting), and then you’re done!
- Once your seams are finished, you can texture. I used this orange peel texture spray can to apply it and was shocked at how simple it was. I covered the tile around the area to be textured with this painter’s tape + plastic dropcloth combo, then I just sprayed it on the non-textured parts of the wall. Be sure to feather the texture out a bit so it blends with the existing texture!
- Once the drywall texture has time to dry (the can says 30 minutes, but I found that it needed a few hours before I could sand it), sand down any of the sharp points so that it matches the existing texture, then it’s ready to paint!
I think the top half of the walls looks pretty great – it’s the bottom part that still needs work. So, once we add the beadboard in this week we should be good to go!
So, what now?
We’re getting really close to the finish line, and most of the rest of the stuff on our to-do list at this point is just installing things! Oh, and completely re-doing in the walls. No big deal. I’m not worried, you shouldn’t be either.
Here’s what’s left in here:
- Add trim tile to the shower area
- Caulk along the seam between the trim and the drywall
- Add + paint baseboards
- Add + paint beadboard
- Replace the vanity light
- Install the new vanity (this one is sitting in our garage just waiting to go in!)
- Install the new toilet
- Replace the outlets and light switch to match the ones we’ve used elsewhere
- Decide if we want shelving above the toilet (if yes, install it!)
- Install towel hooks, toilet paper holder, etc.
- Organize and decorate!
Don’t forget that you can vote for us as your favorite renovation at this link right here! You can also check out all of the other incredible renovation while you’re at it – it’s been so fun to see how everyone’s spaces are coming together!
