
The Simplest (No-Drilling!) Hanging Plant Wall
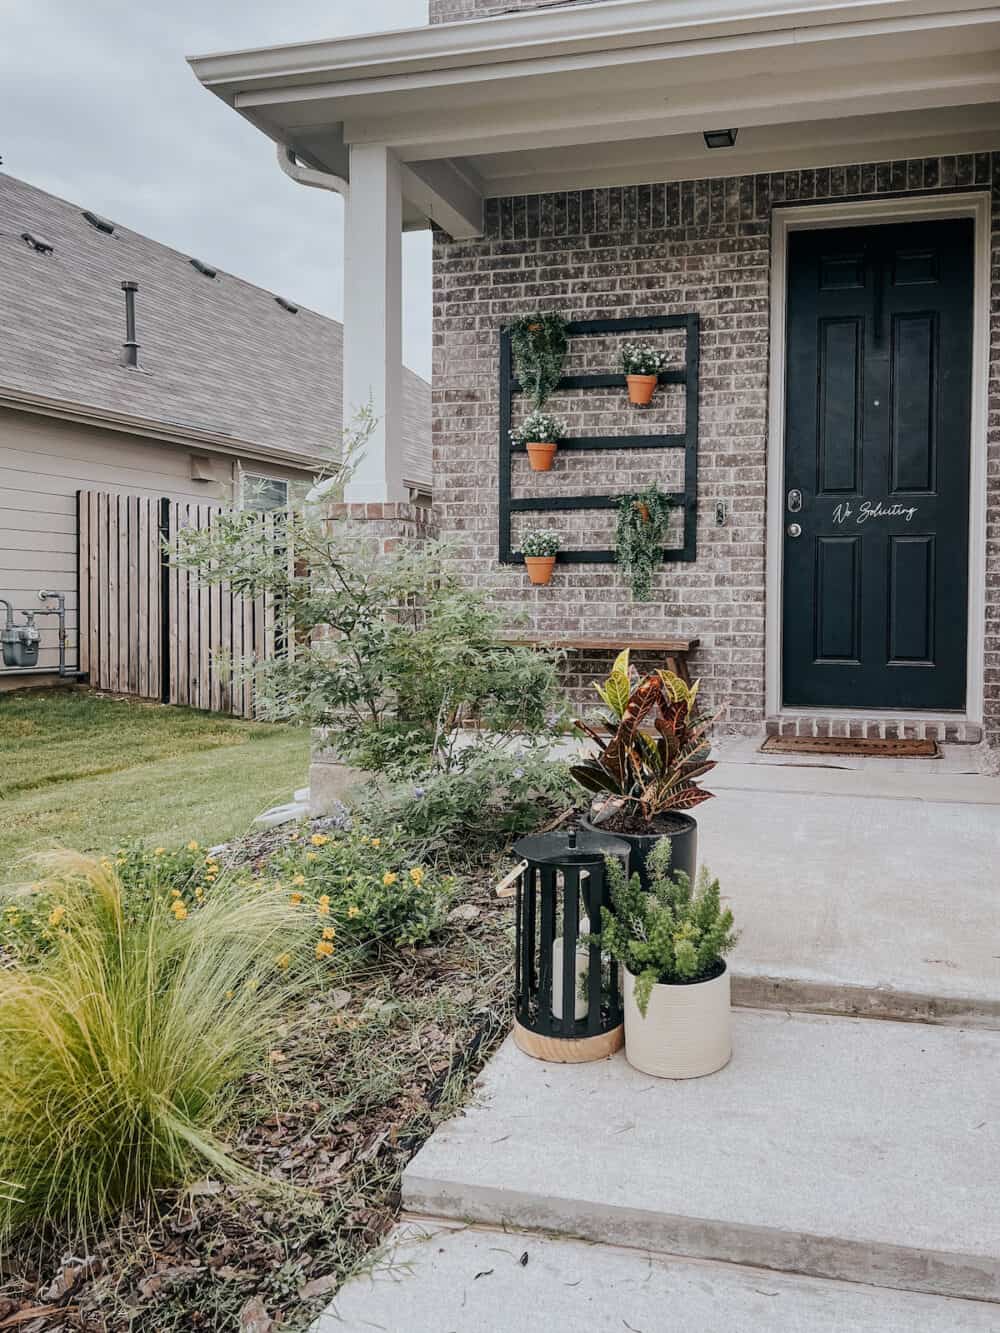
One thing that’s always bothered me a little bit about the front porch on our home is that it’s got a large expanse of blank brick wall. It’s not a huge deal, but there are no windows to break it up, nothing to add visual interest…just a big ol’ wall of brick.

For probably close to a year now, I’ve been brainstorming various ways I could spruce up this little area and add something to fill up the wall. I’ve had (and rejected) dozens of ideas. I don’t want to drill into the mortar, because I want to be able to switch things up easily. I don’t want anything that feels too cheesy or out of place. And, I don’t want anything expensive or complicated. But I want it to look good.
It was a tall order.
Finally, a few weeks ago I realized I could sit around coming up with ideas for another year before I landed on the perfect solution, or I could just try something already. So I decided to go for it! I gave myself a budget of $50ish, so it felt low-commitment. Then, I told myself I wasn’t allowed to second-guess anything. Just go with my gut. And the end product? Well, I actually surprised myself a little with how much I like it!
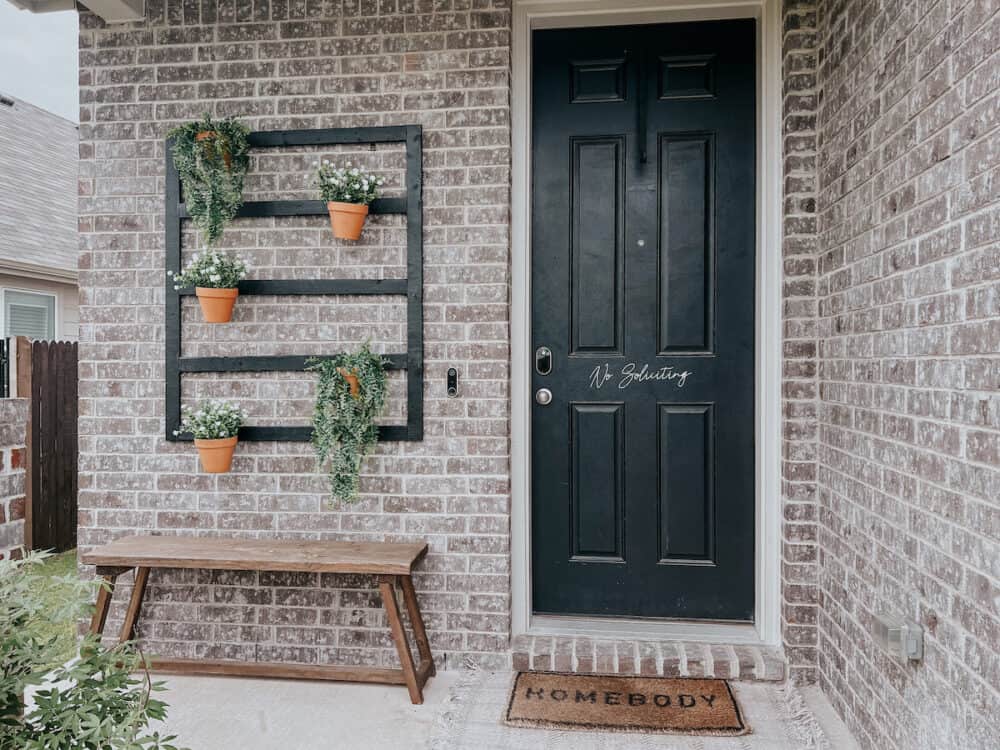
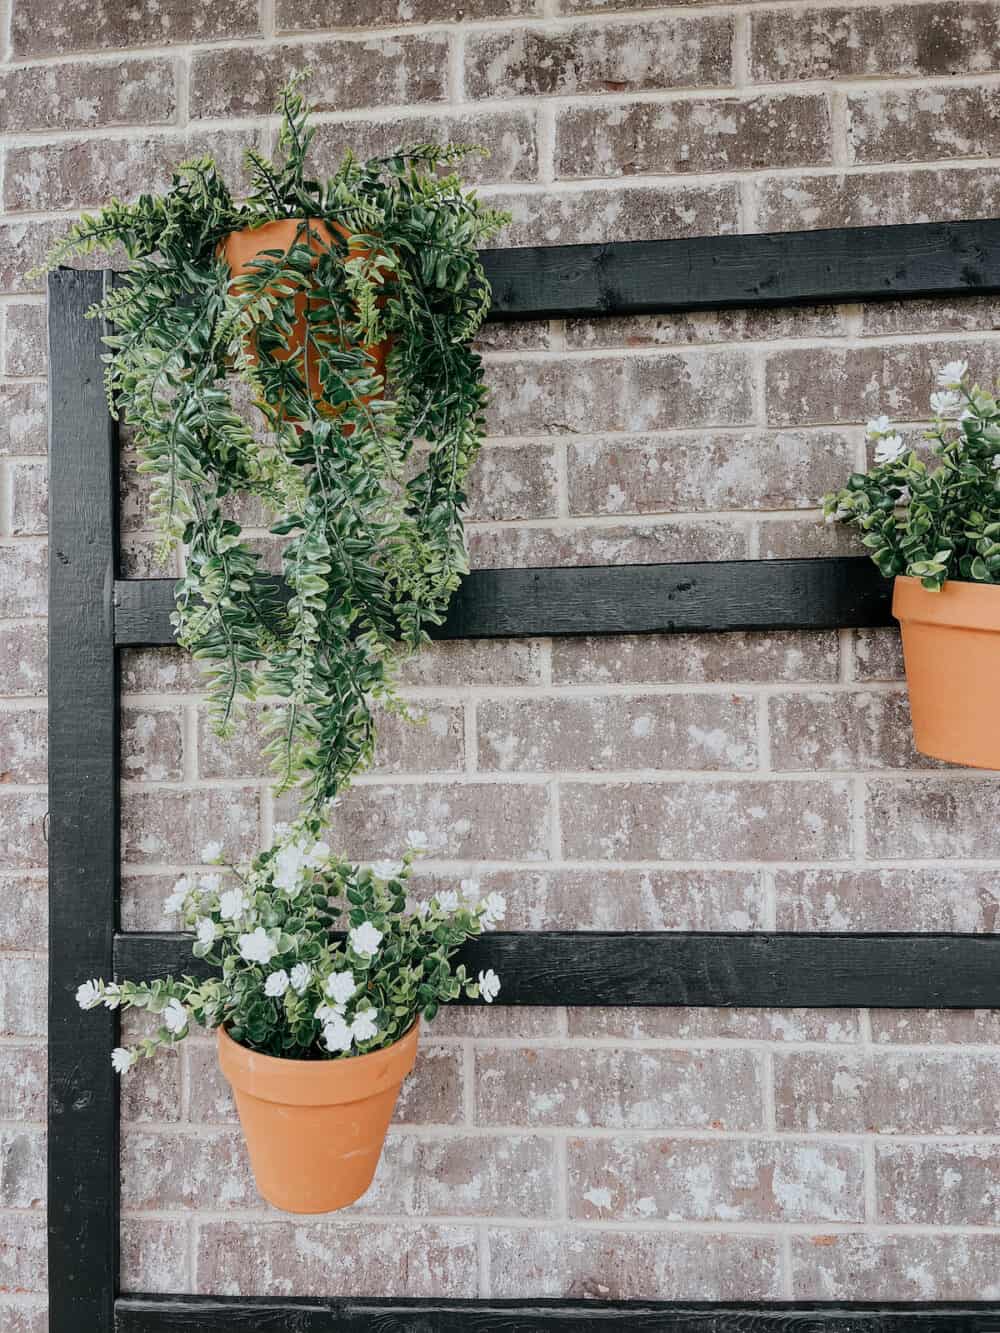
DIY Front Porch Plant Hanger
The obvious solution for me was plants. Because that’s the solution for everything. But, I didn’t want real plants – I’m not great at keeping up with them out front for some reason. Also, I wanted something low-maintenance that I could easily pull down in the fall and winter months if I want to put up something seasonal. So, this was a win-win that checked basically every box!
I may end up adding another plant or two to it, but for now I’m honestly so happy with how it turned out! Here’s a rundown of how I put it together.
Tools + Materials
I’m sharing the measurements that worked for my space, but you’ll want to adjust based on the size of your wall!
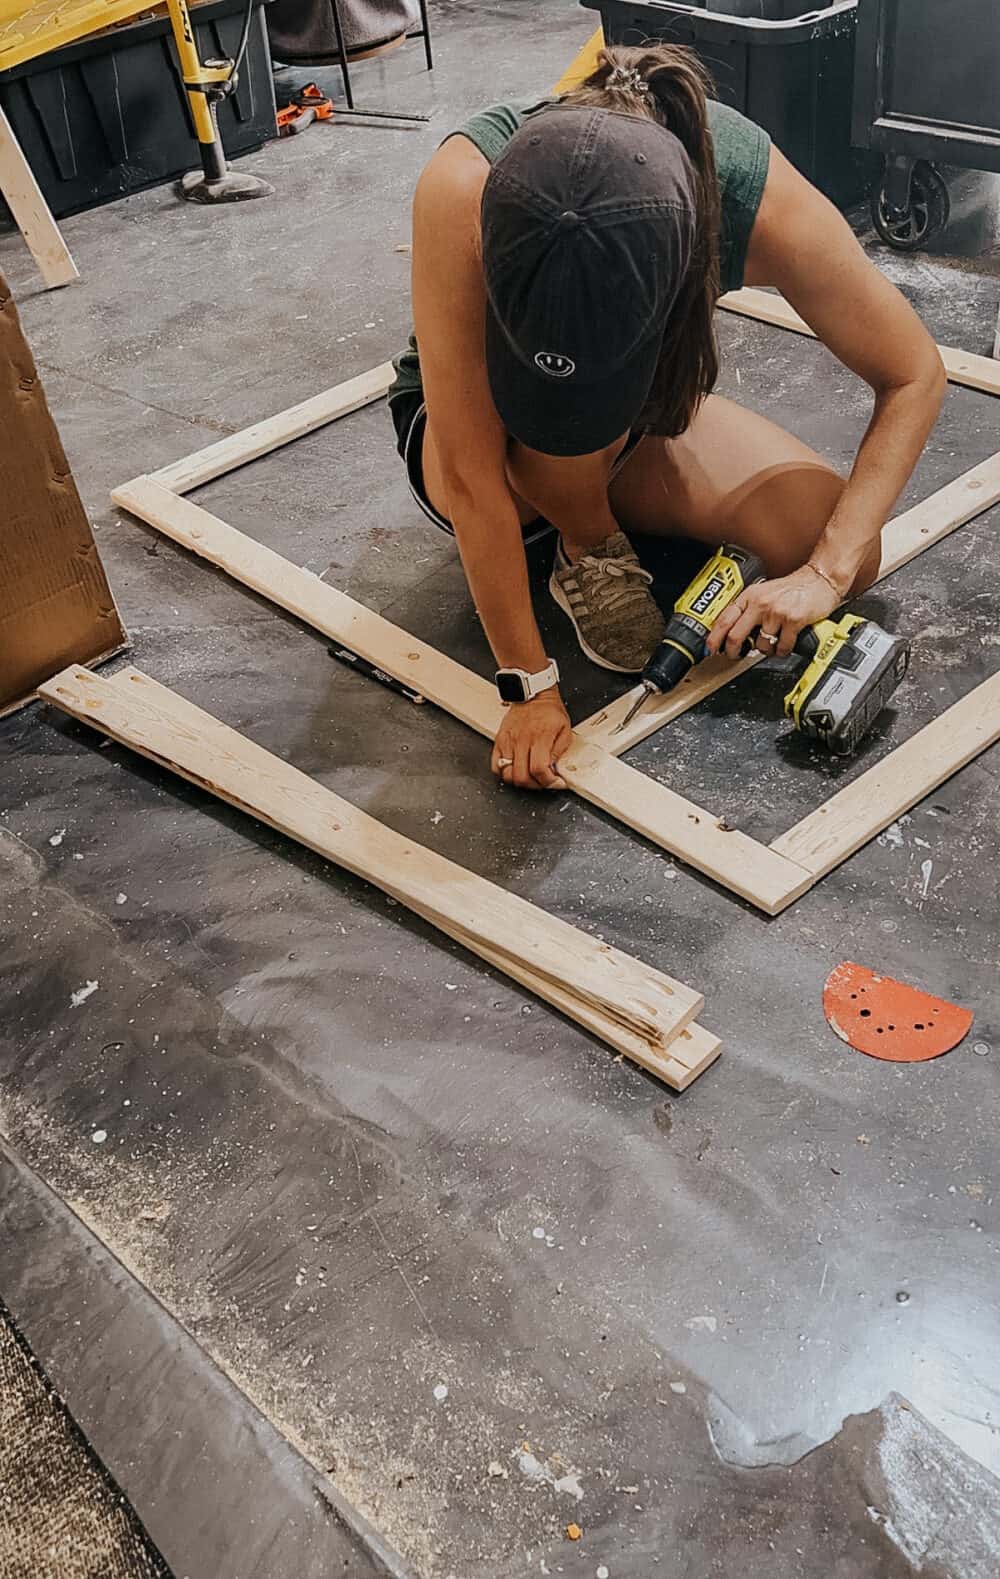
Step One: Assemble Frame
I started with a simple rectangular frame with boards going across. I assembled this using pocket holes and wood glue. Click here if you need to learn how to create and use pocket holes!
I cut the vertical pieces to 4′ and the horizontal pieces to 3′. The horizontal pieces sit about 1′ apart on the frame. All you have to do to assemble this is add wood glue, then drill into your pocket holes! I recommend using a speed square to make sure things stay straight when you’re attaching everything.
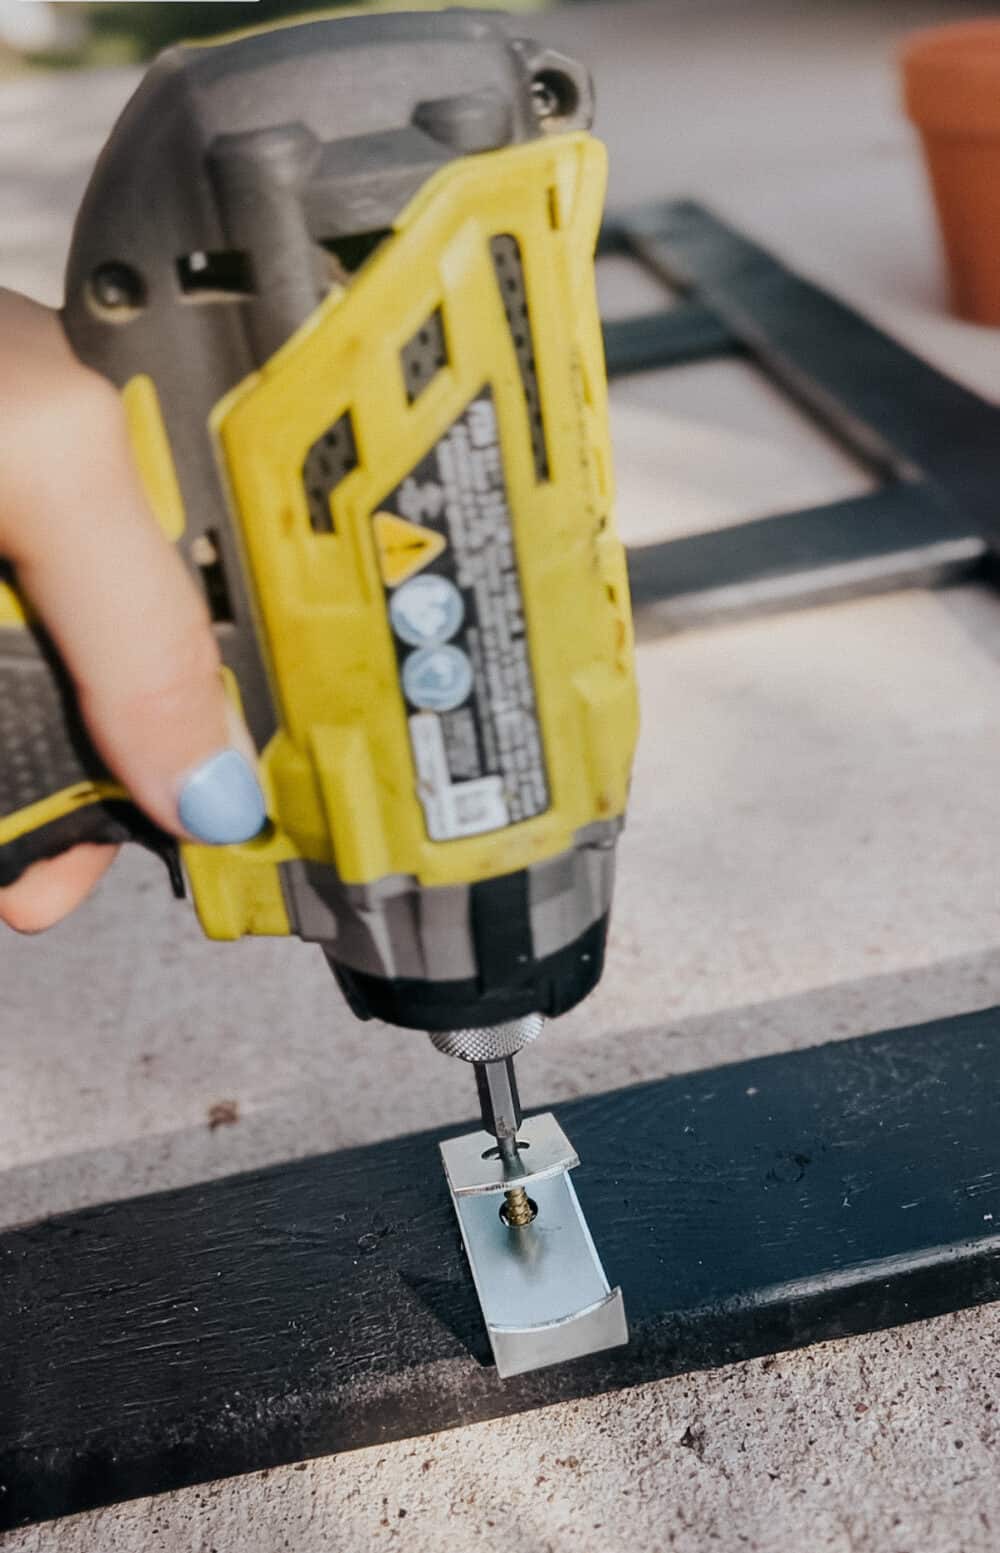
Step Two: Paint + Add Clips
Next up, it’s time to paint or stain your frame! I wanted it to contrast nicely with our lighter-colored brick, so I went with black. I used my favorite paint sprayer to paint it, but you could also use spray paint or paint by hand if you prefer.
After the paint has dried, it’s time for your plant clips. I love these little metal guys. They’re affordable and easy to use, and they become basically invisible once the pot is sitting on them! Just drill a screw through the hole in them, and then slip your planter into place.
I only added five plants for now, because I wasn’t sure about how the weight of this would hold up with the drill-free hangers I used (more on that in a second). But, I think if it holds up for a few weeks, I may go back in and add a few more!
Step Three: Hang + Add Plants
And now, the hard part is done! I promise, this project is so easy. Now, it’s time to hang it. If you’re hanging into siding or wood, you could easily just drill it into place. But, I was hanging it on bricks and I really didn’t want to drill through the mortar. I wasn’t positive this would last forever, and I wanted the flexibility to pull it down for seasonal decor if I get the itch for a change!
So, I grabbed some of these drill-free brick hangers. Each one is supposed to be able to hold 25 pounds, so I figured as long as the entire setup was under 50 pounds I’d be ok. They went onto the bricks really easily and have held up beautifully so far. I took it slowly because I didn’t have a ton of confidence – I started by hanging the frame by itself for a few days just to test things, then I added the plants once I was confident it would stay. They’ve been up for several days now, and I think it’s safe to say the experiment was a success!
I went with faux plants for this so I don’t have to worry about watering them or what to do with them if I change this out. Here’s what I used:
I really love both of them, and I have a few of the flowers left that I’m considering adding in a few weeks once I know this isn’t going to fall (I’m still a tad anxious about it, hah!).
And that’s that! This was a really fun project and a nice, simple way to stretch my creative muscles this summer. With the kids home, it’s almost impossible to do anything that requires too much effort or focus, so this was really the perfect project to dip my toes back into the DIY water. It took less than an hour to assemble the frame, and the rest was done over the course of a few 10-15 minute sessions. Easy peasy!
I’m already brainstorming what I can do to make this space feel great during the fall and Christmas seasons…I could just change out the plants or I could do something else entirely! Turns out, sometimes all you need is to just dive in and DO SOMETHING to get the creativity flowing again. Who knew?!