How to Use a Kreg Jig to Create Pocket Holes
Ready to learn how to use a Kreg jig to create pocket holes for woodworking? In this post, I’m sharing all the details on how to use a Kreg Jig to to join wood quickly and easily!
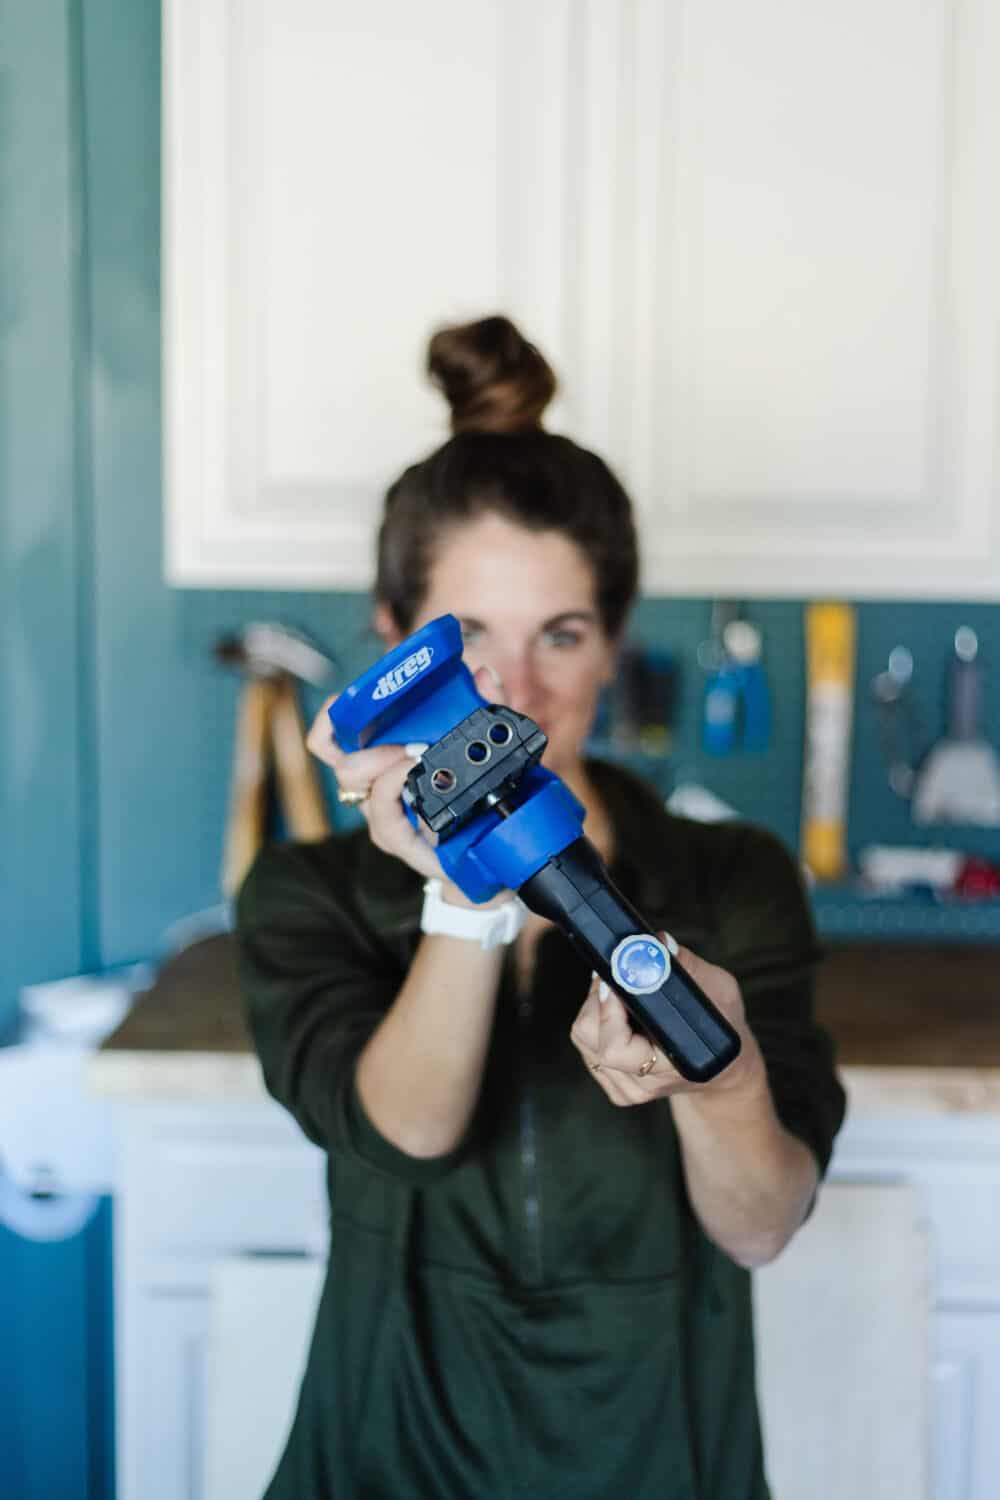
This post is sponsored by Kreg.
Kreg Pocket Hole Jigs are one of the most versatile and useful tools you can have in your workshop. I couldn’t have done most of the building projects that I’ve done on my own without one! And, it’s the first thing I reach for when I need to join wood in a way that won’t leave visible screws.
Creating pocket holes is one of those woodworking skills that might seem a little more advanced. It certainly looks like a pro-level skill, but it’s actually so quick and simple. Today, I’m going to share everything you could possibly ever need to know about how to use a Kreg pocket hole jig. By the end of this post, I’ll have you fully prepared to start creating pocket holes on your own!
What Is a Kreg Jig?
A Kreg Pocket Hole Jig is exactly what it sounds like – a jig used to create pocket holes!
What, you want a more detailed explanation than that? Okay, let’s dig a little deeper.
What’s a Jig?
“Jig” is a term used in woodworking for any device that helps you repeat a process over and over easily. Jigs can perform a lot of specific tasks, like holding wood in place while you drill into it, guiding wood through a table saw, acting as a stopping point to help measure repeated cuts, and more. “Jig” is a catch-all term for anything that helps hold your wood in a specific position while you do something to it. Generally, it’s something that needs to be easily repeated.
What are Pocket Holes?
Okay, so we know what a jig is, but what about pocket holes? What are those?
Pocket hole joinery is a type of joint used in woodworking. They are created by drilling a 15-degree angled hole in one piece of wood, then driving a pocket hole screw through that hole and into the second piece of wood. Pocket holes are very durable and strong joints and are perfect for beginner woodworkers. They’re really easy to create and give you a really professional and polished look.
When & Why Should I Use Pocket Holes?
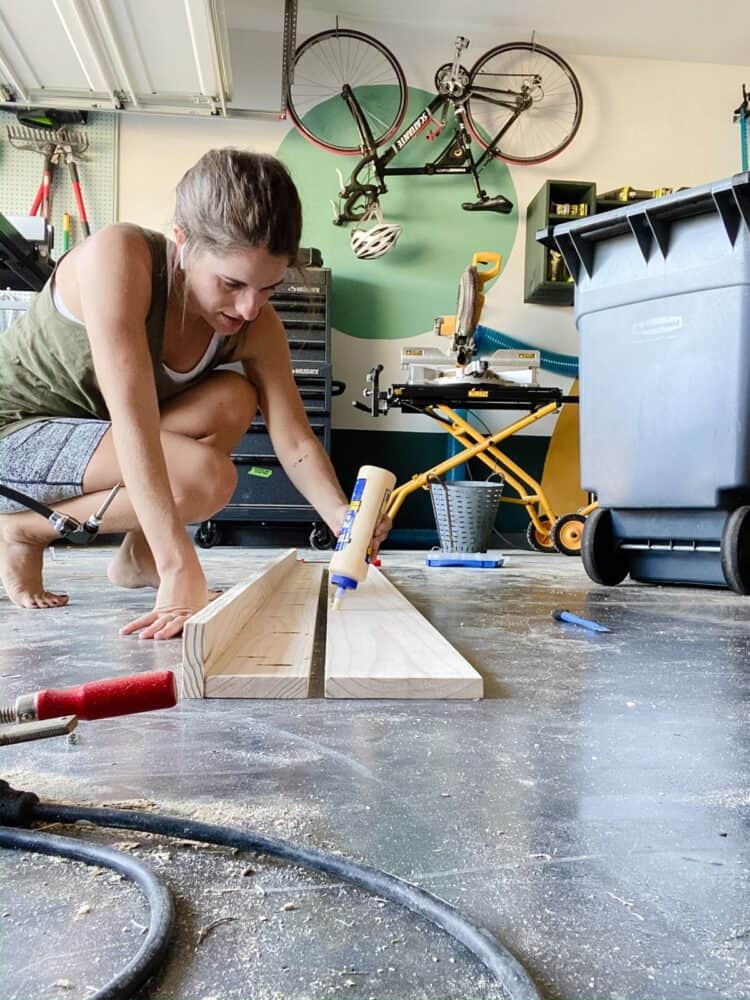
Pocket holes can be used anytime you need to join two boards together and don’t want to see an exposed screw head.
Pocket hole joints are…
- Easy to create
- Strong
- Beginner-friendly
…and they only require two (affordable) tools: a pocket hole jig and a drill!
Pocket holes are great for joining wood at a 90-degree angle like this:
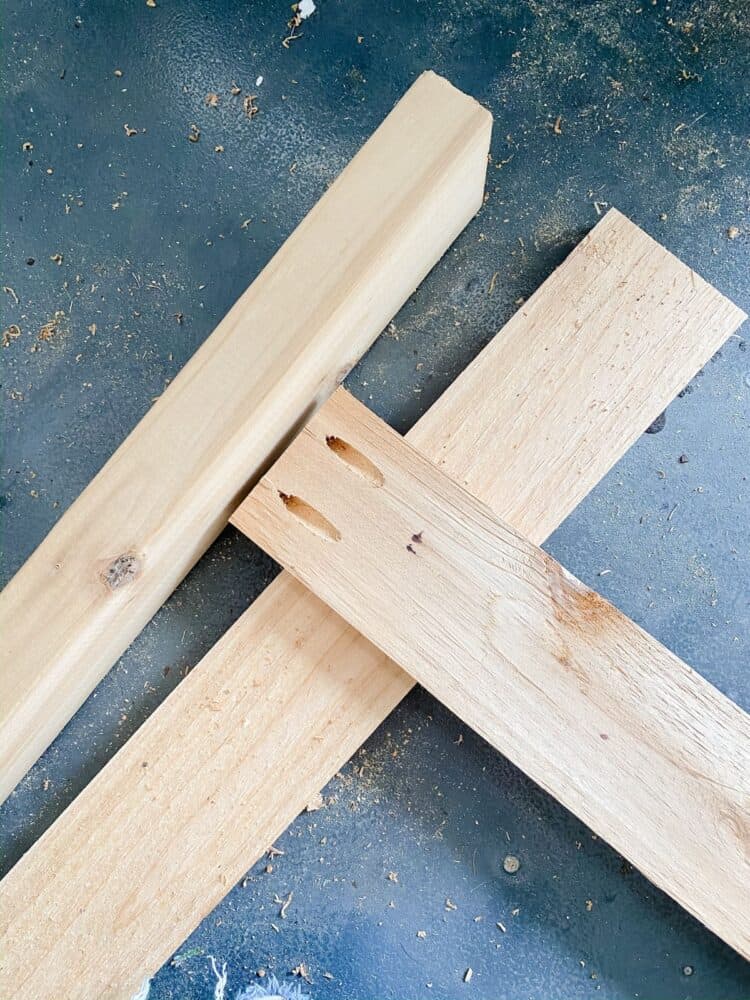
But, they’re also great for joining wood on the same plane if you need a really tight, smooth joint, like we did with our laundry room countertop.
Basically, pocket holes are a really great joining technique to use for almost any building project you have.
Have I convinced you yet? Great! Now let’s talk about how to do it.
Which Kreg Jig Should I buy?
Kreg Pocket Hole Jigs come in a few different shapes and sizes, so there’s one to meet pretty much any need you might have. I’m going to highlight two of them that are both really great options for beginners. Read the descriptions below and choose the one that sounds like it will be the best fit for you!
Kreg Pocket Hole Jig 720
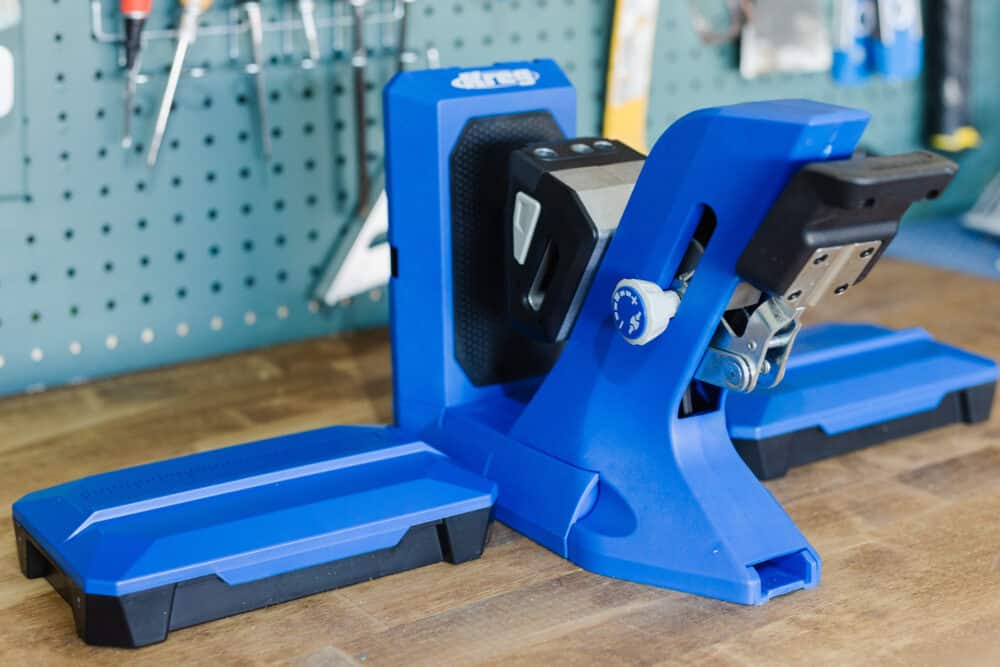
Shown above is the 720PRO, which comes with the Docking Station!
The 720 is Kreg’s most advanced pocket hole jig and has tons of features to make things more efficient. It can simultaneously clamp your workpiece and automatically adjust to the thickness of your material (anywhere from 1/2″ to 1.5″), and it has anti-slip material that prevents your wood from moving around as you work.
It also has a dust collection attachment on the back so that you can easily attach your shop vac to it. This will stop the sawdust from making a mess in your space and save you a headache later (this is especially useful if you’re drilling a lot of pocket holes!).
The 720 can also be attached to a Docking Station, which helps secure the jig to your worktop and make it even easier to drill your pocket holes.
This jig is perfect for beginners who are working mostly on smaller projects, and who need something that’s a little more intuitive and easy to get started with.
Kreg Pocket Hole Jig 520PRO
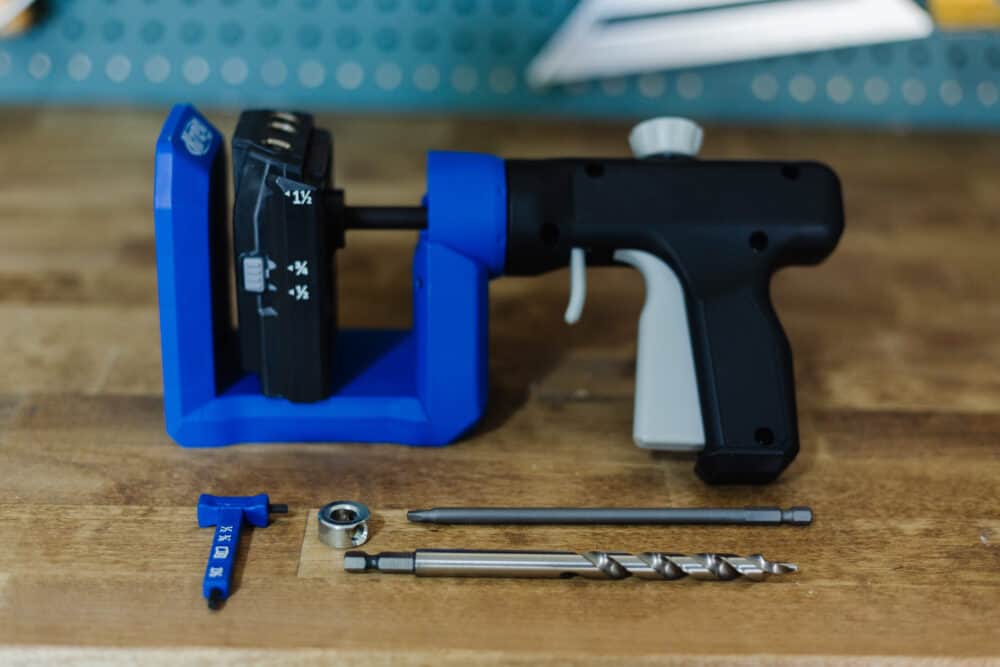
The 520 is a more versatile jig and it’s a really fantastic option too! It has a rotating handle, which allows you to adapt to almost any angle or project, and includes built-in clamping that adjusts to the thickness of your boards.
This jig is a must-have if you’re working with large, awkward-to-move boards or sheets of plywood. It works in almost any orientation, so it’s great for larger projects where you can’t easily stand the wood up in the jig.
The 520 is also compatible with the Docking Station, if you’d like to make it a little more robust setup!
This jig is great for someone who works on a wide variety of projects and who needs to be able to create pocket holes in larger or more awkward material!
There are also a few other versions, but these are the two I’d recommend you start with! You can click here to see the other Kreg Pocket Hole Jig options.
Parts of a Kreg Jig
While there are several different versions of Kreg’s pocket hole jig, they all have some basic parts in common.
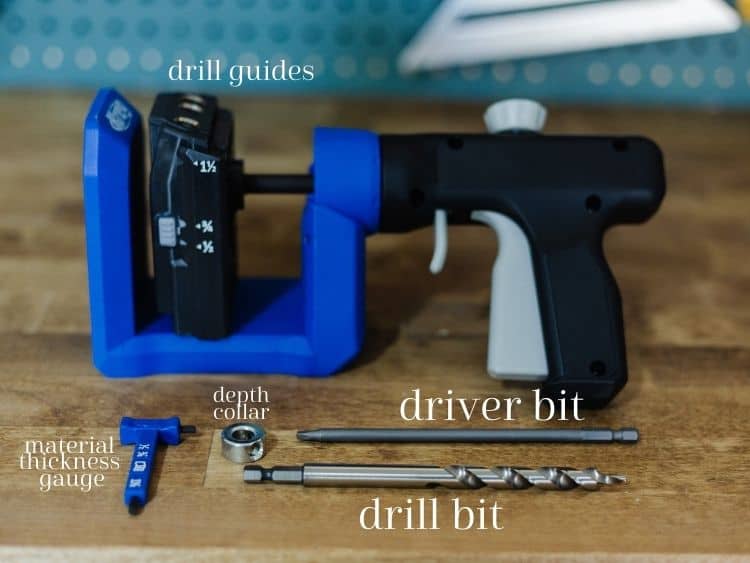
- A drill guide, on the jig itself
- A clamp that helps hold the wood in place (also attached to the jig)
- A material thickness gauge
- A drill bit to create the pocket hole
- A depth collar to set the depth for the pocket hole (more on this in a minute)
- A square driver bit to drive the screws into the pocket hole
In addition to the jigs, in order to create and use pocket holes you’ll also need:
- A drill
- Pocket hole screws
- Clamps
How to Use a Kreg Jig to Create Pocket Holes
1. Find material thickness and set the depth collar
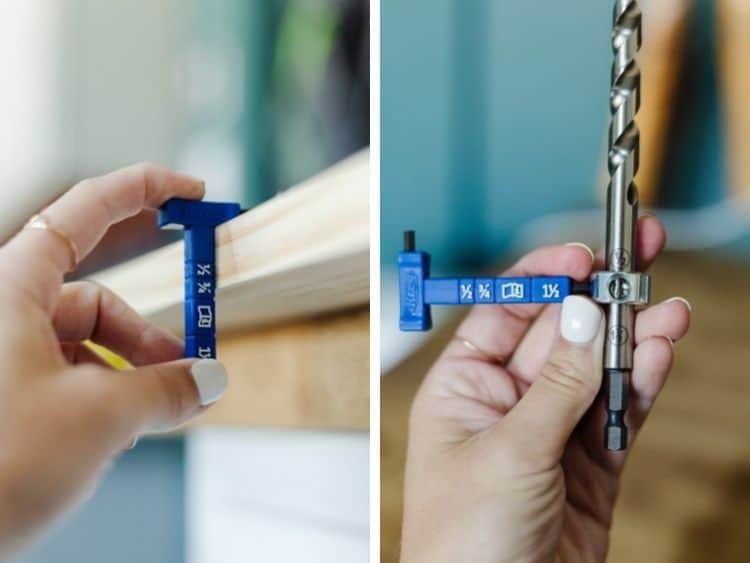
First, you’ll want to determine the thickness of your material and set the drill bit collar. What does that mean? Well, thicker materials will need deeper holes and thinner materials will need more shallow holes. So, you’ll need to attach the depth collar to the drill bit in order to make it stop at the appropriate spot.
If you fail to do this correctly, you’ll just end up creating a giant hole in your wood without anything to help join the wood to the other board. Below is a close-up of what your pocket hole should look like – just a little pilot hole coming out of the end of the board!
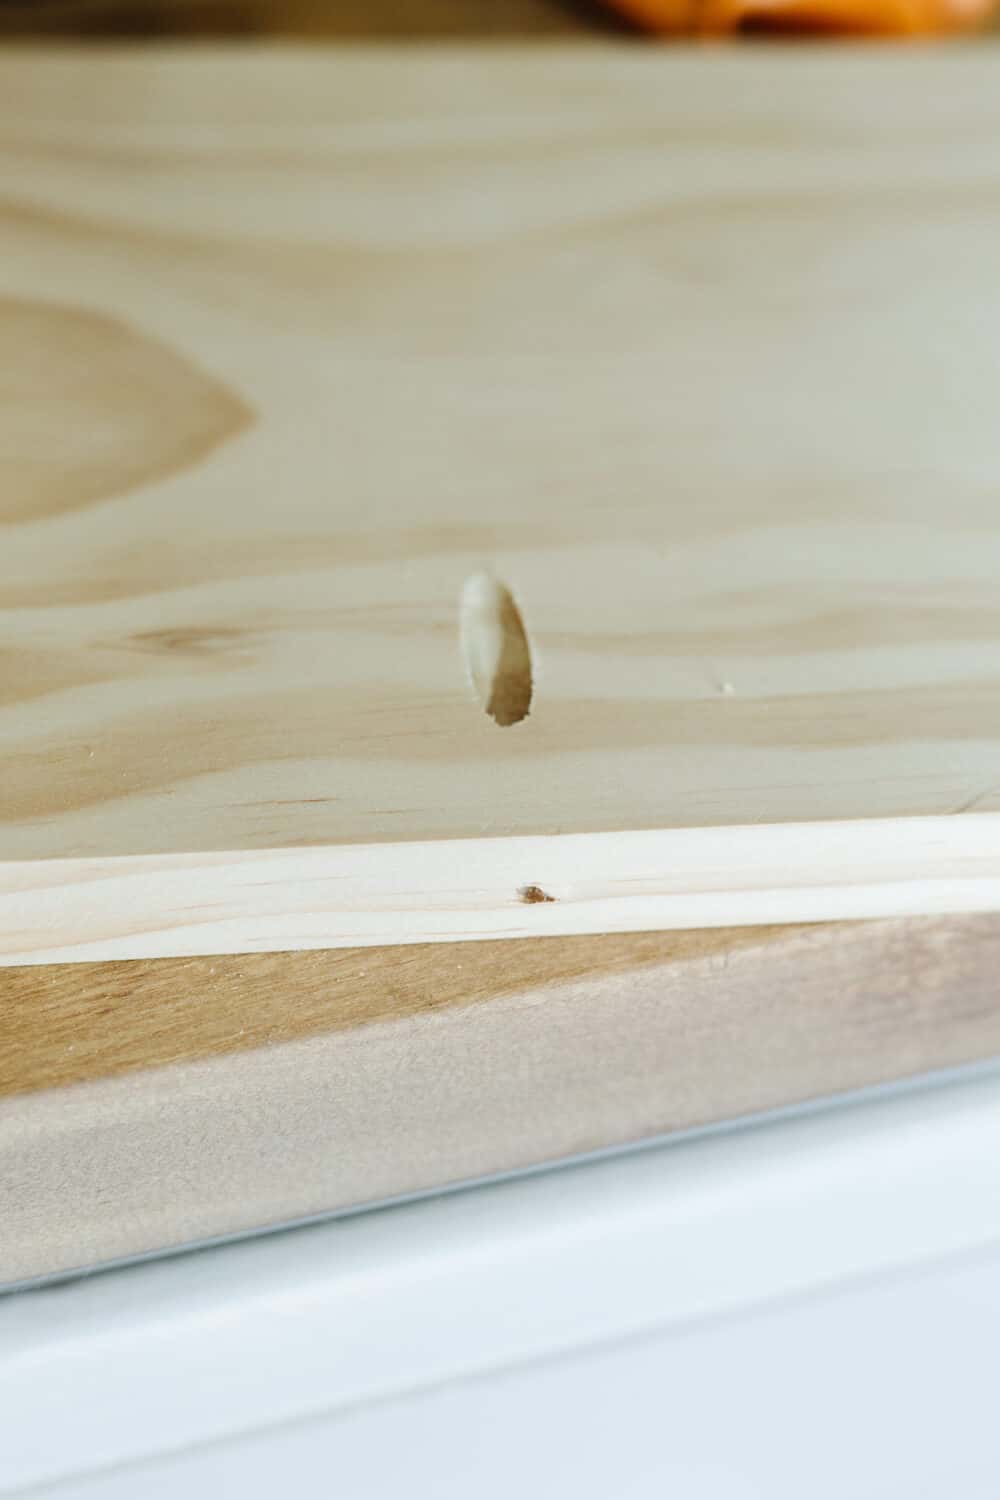
So, let’s talk about how to set this all up. Your Kreg Pocket Hole Jig will come with a material thickness gauge. Simply hold it up to the wood, as shown in the photo below, and check to see how thick your material is. Once you’ve done that, you can slip the depth collar onto your drill bit, move it to the appropriately marked number, and use the end of the material thickness gauge to tighten it down.
2. Adjust the drill guide (Only certain jigs)
If you’re using the 520 (and a few other versions), you’ll need to adjust the drill guide to the appropriate material thickness as well. Press both tabs on the side and slide it to the setting that corresponds to your material thickness.
If you’re using the 720, you don’t need to adjust anything! When you clamp your material, it will automatically adjust to the appropriate settings for the material width.
3. Place Your Wood in the Jig & Clamp
After all of your adjustments have been made and the jig is set up for use, you’re ready to put your wood in place and get started.
How do you know where to put pocket holes?
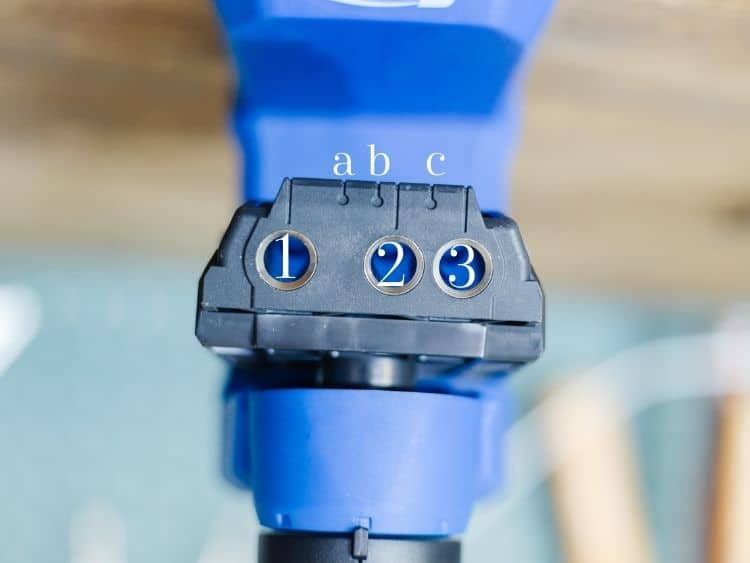
Your Kreg Pocket Hole Jig has a really handy guide to help you determine where to place your pocket holes. There are two sets of markings on the drill guide, and the size of your wood will determine which ones you use.
- For pieces wider than 3.5″, you’ll want to do one pocket hole on each end (anywhere from 5/8″ to 1.5″ from the edge of the board), and then every 6″ to 8″ along the board. You’ll line up your board with any of the lines on the pocket hole guides at the spot where you want the pocket hole, then clamp into place.
- For boards that are less than 3.5″ wide, you’ll use the smaller markings that sit above the drill guides. Center two pocket holes on the piece according to the guide below (this is also included in the manual for the pocket hole jig!)
| Board Width | Center Mark | Drill Guide | ||
| 1-1/4″ to 1-3/4″ | C | 2 & 3 | ||
| 1-3/4″ to 2-3/8″ | A | 1 & 2 | ||
| 2-3/8″ to 3-1/2″ | B | 1 & 3 |
Here’s a closer look at what the lines look like – I’ve even labeled them for you to make it a little clearer!
4. Drill Pocket Hole
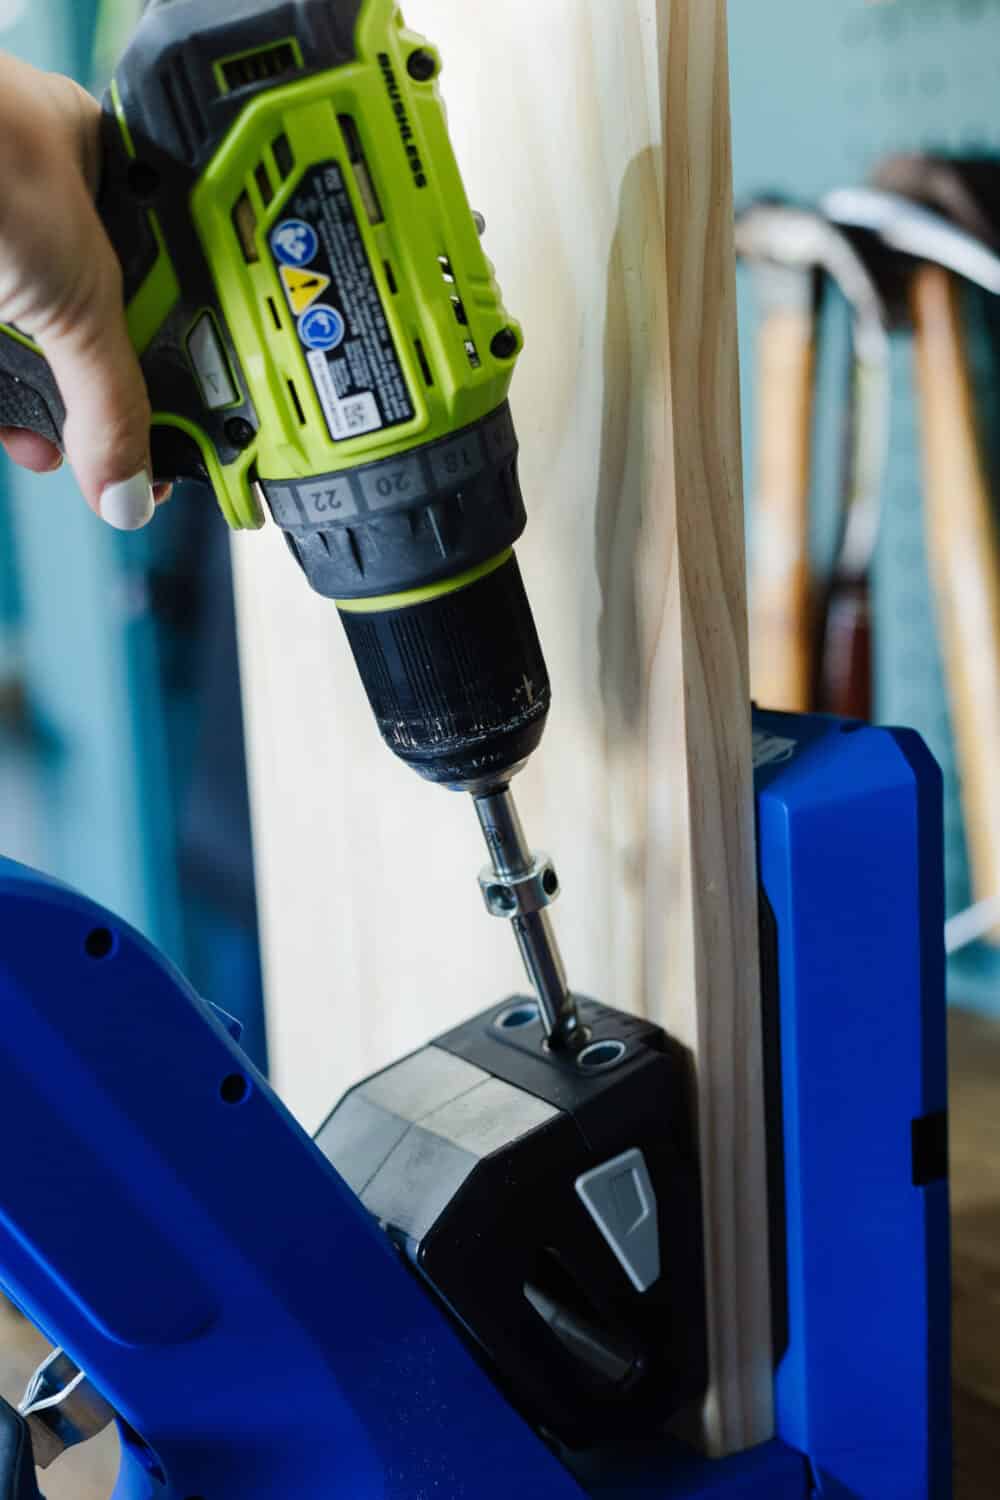
With your wood clamped into place, you’re ready to drill!
Make sure that the wood is clamped securely. It may also be helpful to clamp the jig to your work surface if you find it’s moving around on you.
Insert the special drill bit into your drill (don’t forget the depth collar!), and drill slowly and steadily into the drill guide until the depth collar hits the top of the guide.
Remove the drill bit from the guide while it’s still rotating (don’t reverse the drill, just continue to pull the trigger and pull the drill back out of the guide). Then, you’re ready to unclamp your material and you’ve got yourself a pocket hole!
Joining Wood Using Pocket Holes
After creating all of the pocket holes you need for your piece, it’s time to actually join your wood together.
This is where you really see the magic happen!
Start by clamping your wood in place so that it’s aligned and positioned properly. If you’re doing a face joint (where both pieces of wood are on the same plane), you’ll want to make sure they’re level with each other so you don’t have a lip once you add the screw.
Place your screw onto the driver bit. Then, slowly drill it into the pocket hole until it’s fully seated. It’s important that you do not overdo it here or else you can blow right through the pocket hole and ruin all of your hard work!
For most pieces, I also recommend that you add wood glue along the joint prior to driving in the pocket hole screws. This will help stabilize things even further and ensure a really long-lasting piece.
Choosing the Correct Screws
It’s important when working with pocket holes that you don’t use just any screws. Pocket hole screws are specially designed to prevent drilling through the hole and to hold things nice and tight. So, you should always use pocket hole screws when working with pocket hole joints!
- You should use COARSE-thread screws on soft wood like pine, cedar, plywood, or MDF
- You should use FINE-thread screws on hard wood like oak, maple, or walnut.
Kreg has a really handy guide on their website for choosing the correct screw length. This is really important, because if you choose wrong your screw will poke out the other end of your project! But, here’s what you’ll use most:
- For 3/4″ thick material (which will be labeled as 1″ thick – think 1x2s, 1x3s, etc.), you should use 1-1/4″ pocket hole screws.
- For 1-1/2″ thick material (which will be labeled as 2″ thick), you’ll want 2-1/2″ long pocket hole screws.
If you keep those two on hand all the time, you’ll be set for most basic building projects!
Filling Pocket Holes
So, all of this is great but what about the giant holes that you’re left with in your pieces? Are you just supposed to leave them?!
Well, technically, you can. If you plan so that your pocket holes are placed on the underside or backside of your project, you’ll never see it and you can leave them unfilled. But sometimes you want a more polished look or you aren’t able to put them in a place where they’ll be hidden.
In those cases, you’ll want to use plugs to fill them in!
Kreg has pocket hole plugs that you can use to seamlessly fill in the hole and make it more or less invisible. They even come in different wood types so you can buy the one that will most closely match what you’re working with!
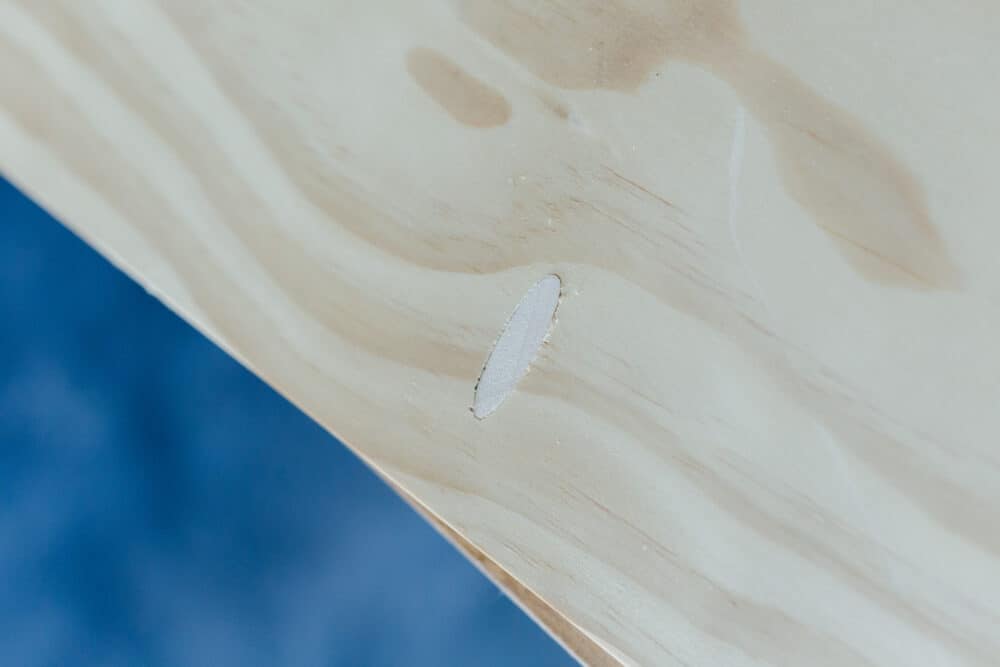
To use the pocket hole plugs, simply add some wood glue all around the pocket hole plug, slip it in place, and let it dry. Then, go back and sand the space and stain or paint as you normally would.
And that’s it! Everything you’ve ever wanted to know about how to use a Kreg Pocket Hole Jig but were too afraid to ask.
If you have any questions, drop them in the comments below and I can update the post as needed! You can also click here for Kreg’s database of tutorials, support, and more.
Need some inspiration to get you started? Here are a few projects I’ve built using my Kreg Pocket Hole Jig
- A DIY raised garden bed
- Our bedroom nightstands
- An art ledge
- Built-in storage in our entry closet
- Book ledges in Grant’s room
You can also find tons of project ideas and tutorials on Kreg’s website, so be sure to browse there too!

