
DIY Tomato Cage Ghosts
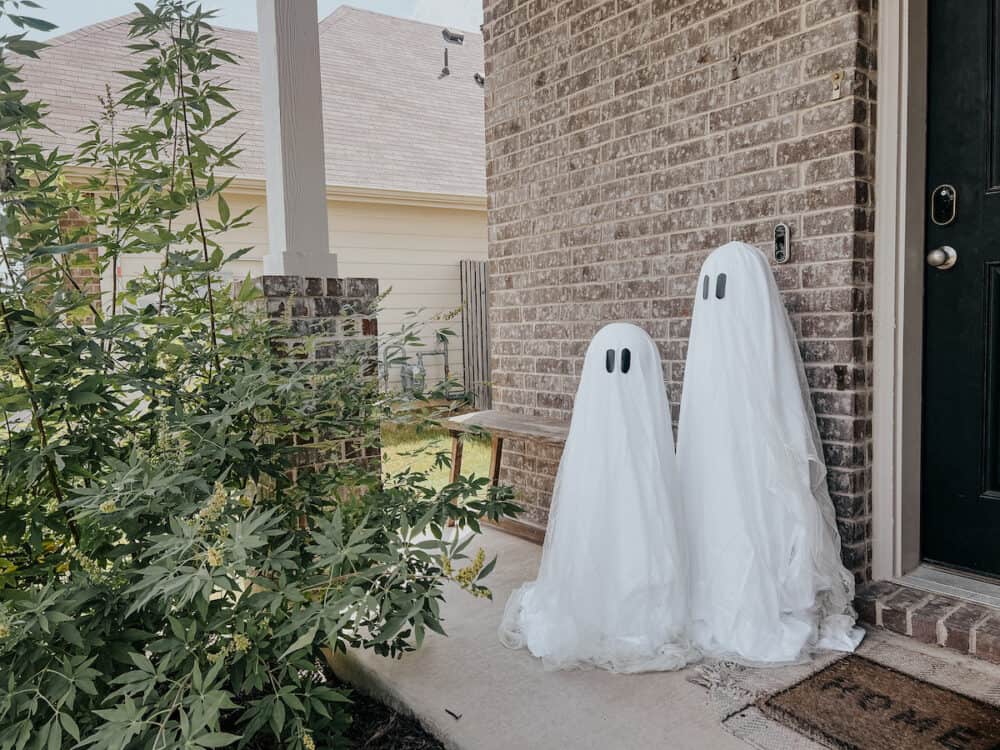
I’ve been seeing these cute DIY tomato cage ghosts everywhere for a few years now and it was finally time to make my own! I couldn’t believe how simple and quick they were to make. They make the perfect Halloween porch decor!
This is one of those DIY project trends that I’ve been seeing all over the internet for quite some time – I won’t even pretend this is my own original idea! But, I love easy seasonal crafts. And, I especially love it when it is a good dupe of a product you can buy for $75+ at places like Pottery Barn. I made these with $4 tomato cages you can buy at Lowe’s or your local garden center. I mean, does it get any better than that?!
These little DIY tomato cage ghosts are perfect for the front porch during the Halloween season, and they take mere minutes to put together. I promise – it’s simple enough that the whole family can get in on making these!
How to Make Tomato Cage Ghost Porch Decor
Materials Needed
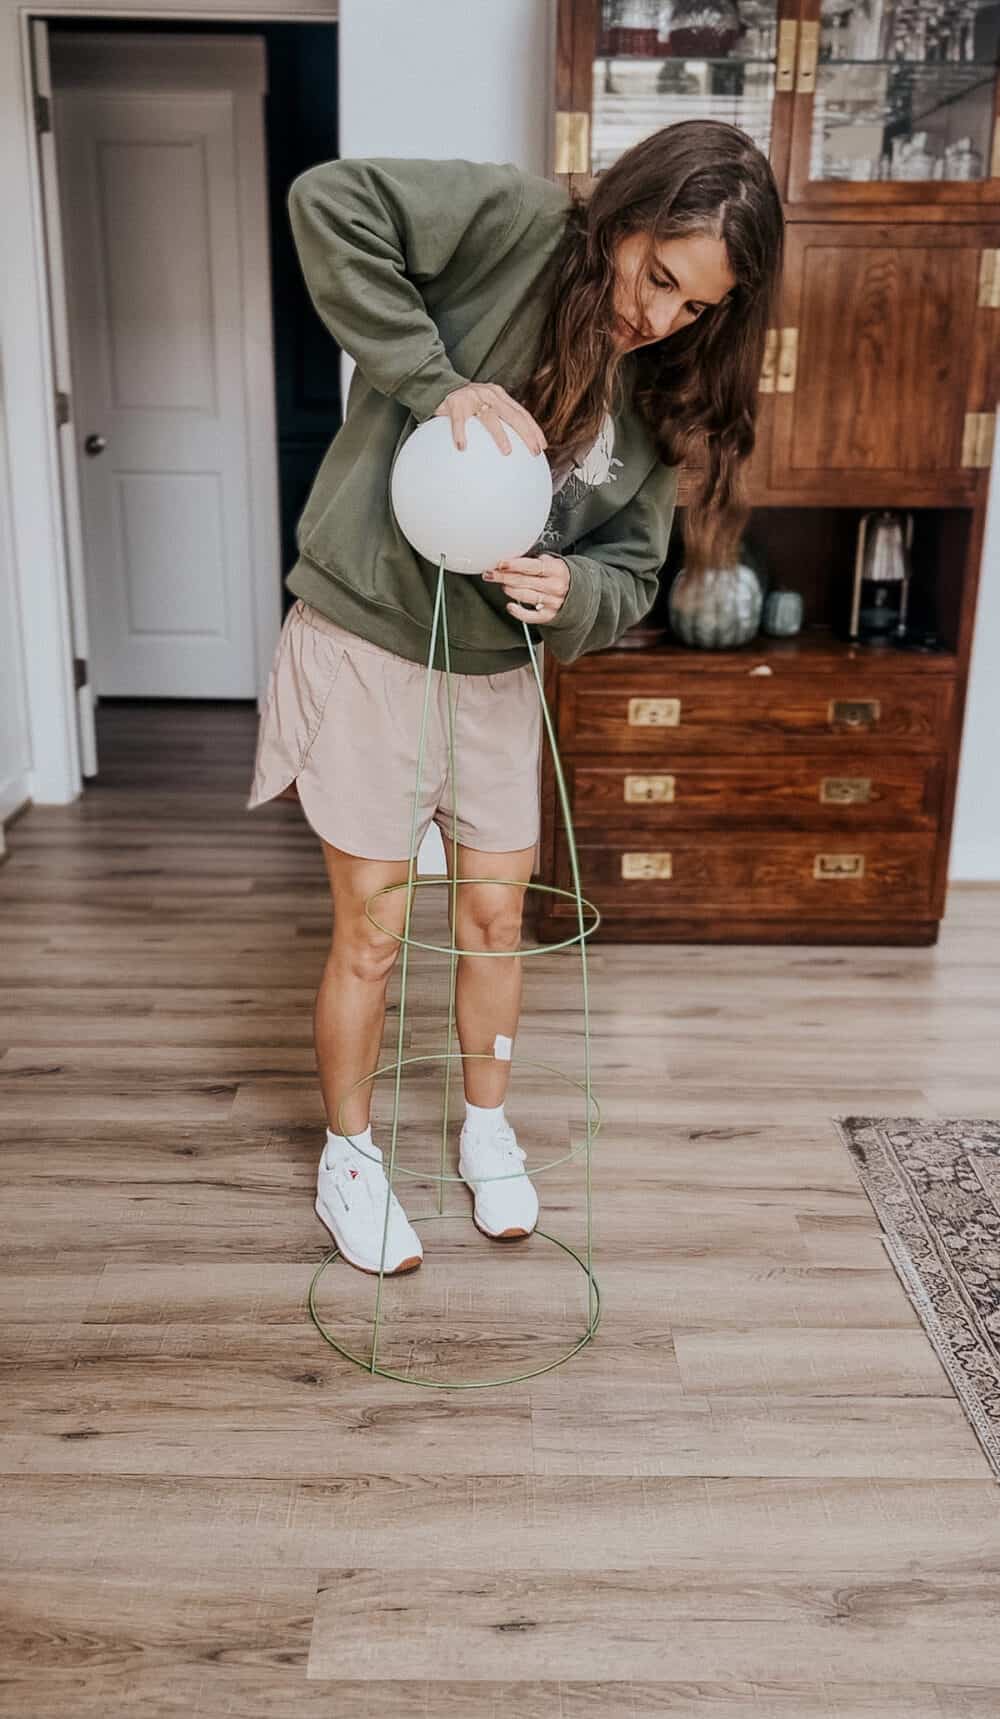
Step One: Add The Ghost’s Head
Your first step is going to be to flip the tomato cage upside down so that the round part is on the ground and the pointy ends are sticking up. This creates a base for your ghost, and gives you a place to add the head!
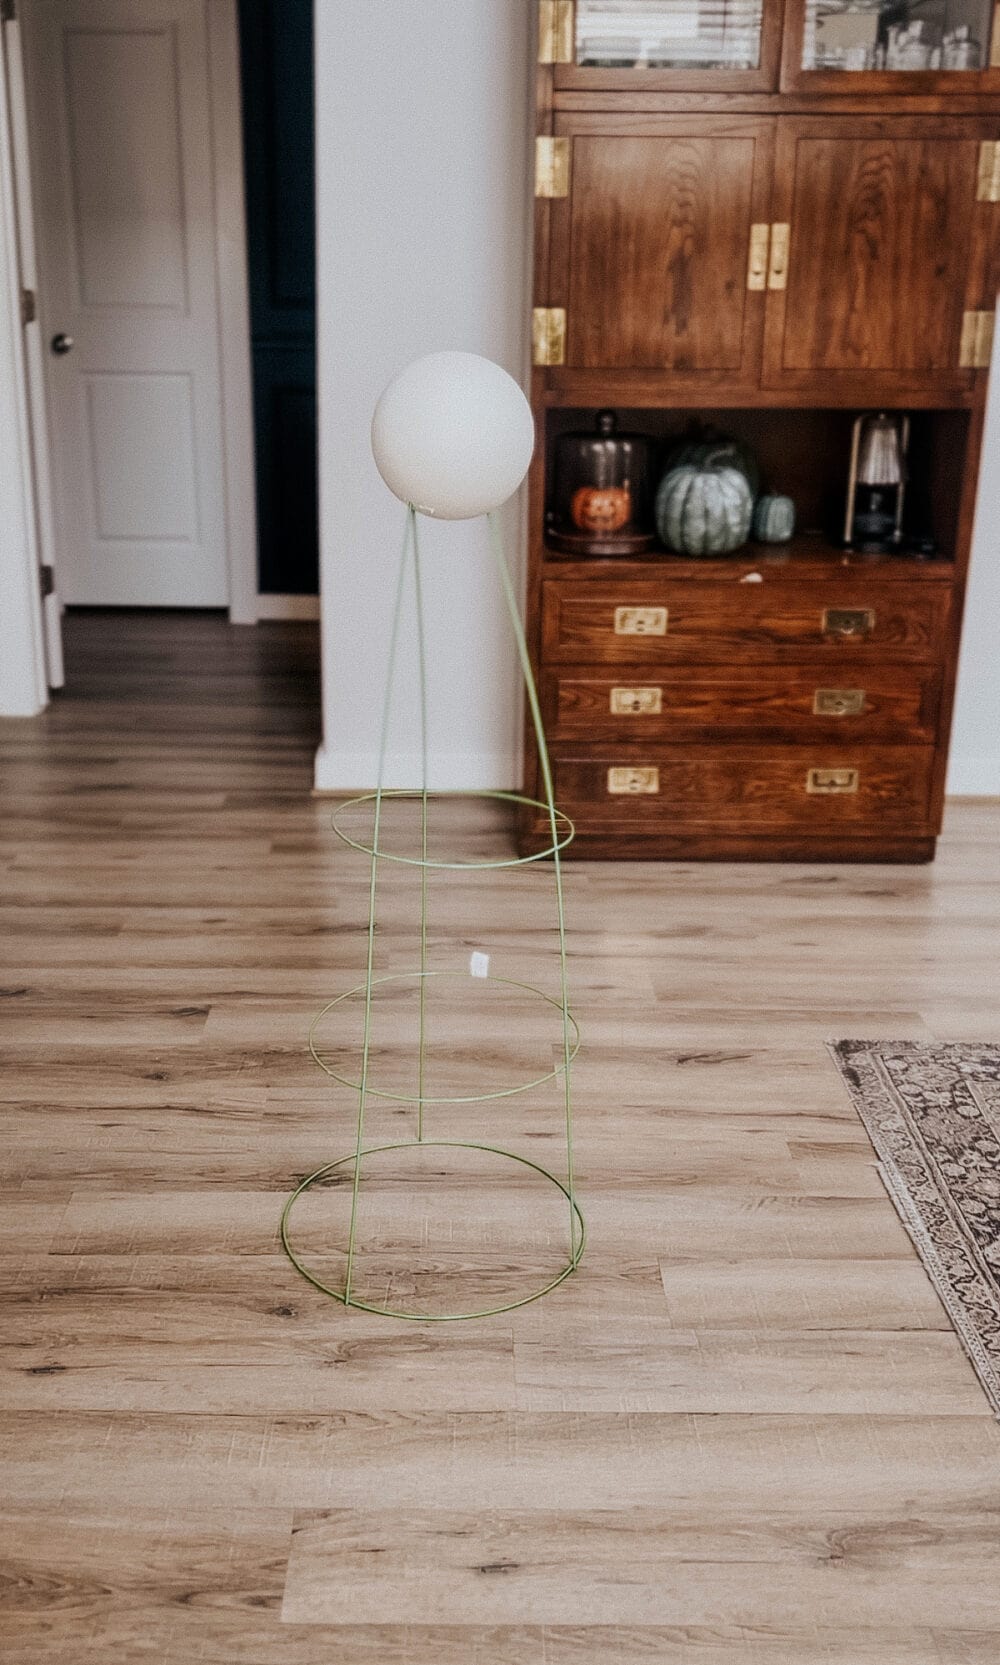
Grab your styrofoam ball and press it into the ends of the tomato cage. You can tie them together with some twist ties first if it makes it easier, but I had no issue just pressing the styrofoam ball into the prongs. It’ll look a little something like this:
Step Two: Add String Lights
This is an optional step, but one that I think makes a big difference in the final product! Grab some battery operated string lights and wrap them around your tomato cage. I used the same twinkly lights that I like to use at Christmastime. They work on a timer so I don’t have to worry about turning them on and off every day, and they give off plenty of light. Plus they’re only about $5 each, which you can’t beat! You can use regular white Christmas lights that plug in, too, if you prefer!
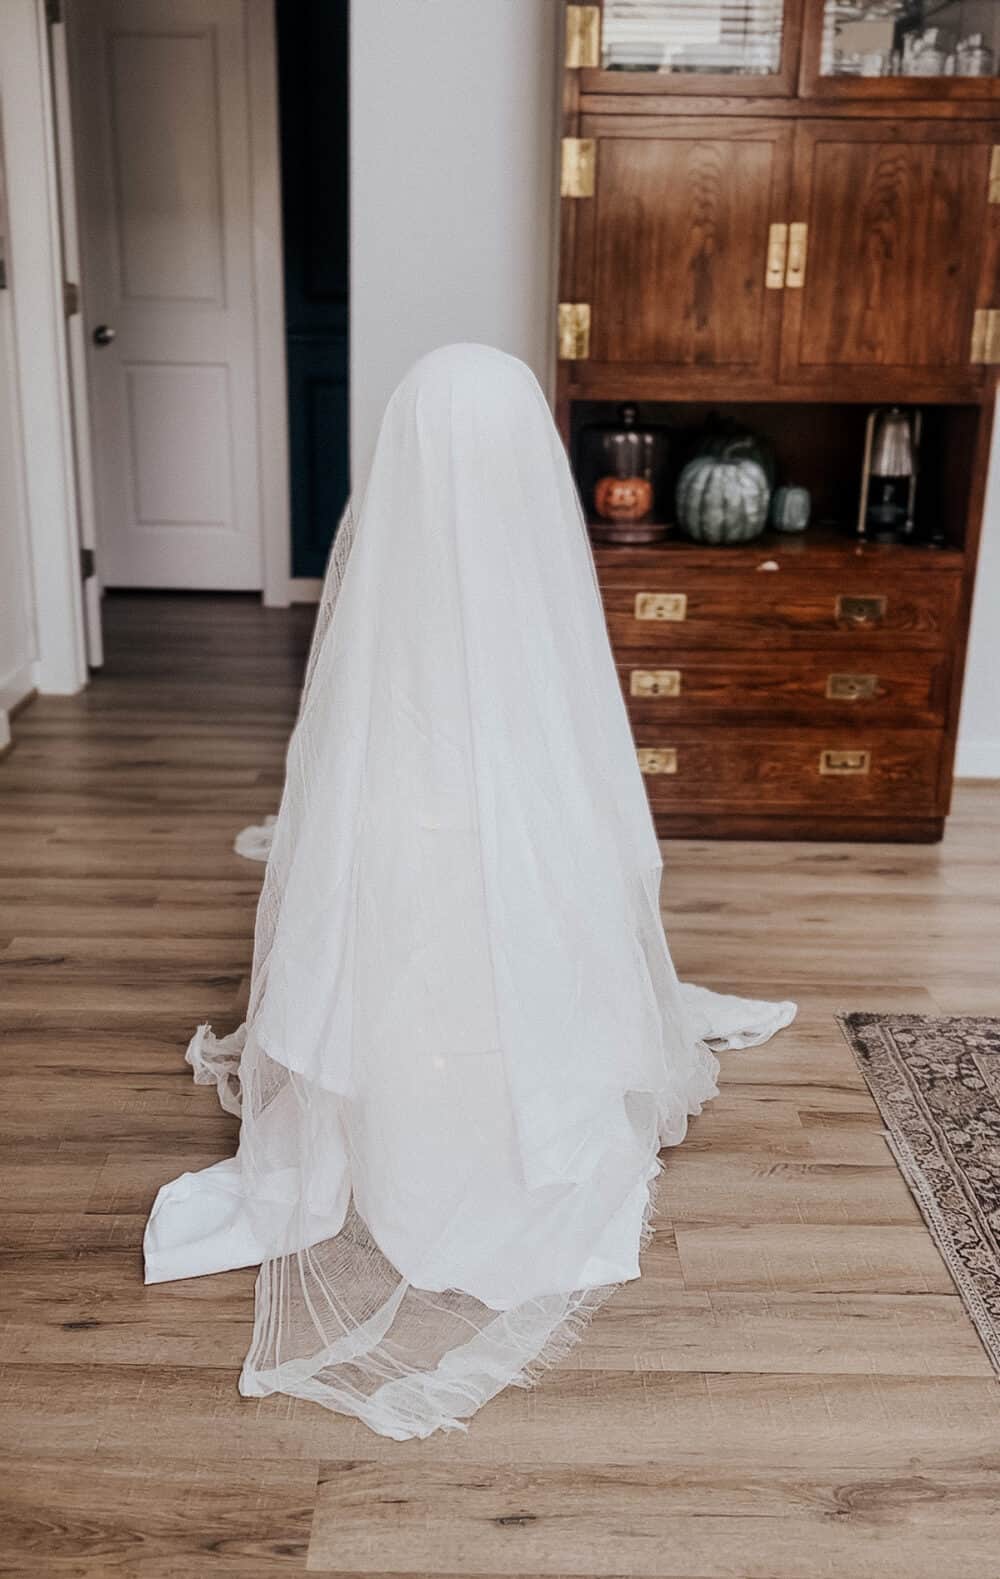
Step Three: Add Your Sheet + Cheesecloth
Now it’s time to make him look like a ghost! Grab your white sheet and drape it over the tomato cage. I purchased a twin sheet set and used one piece for each ghost I made. I trimmed the elastic off the fitted sheet before using it!
You’ll have some extra cloth – you can trim it down as much as you like to make it fit properly. The amount of excess will really just depend on how large of a tomato cage you grabbed. Either way, trim it down to your liking with some scissors. I think a little extra fabric pooling at the bottom looks really nice, though, so don’t go overboard!
Next, grab your cheesecloth and drape that on top of the sheet. This is a totally optional step, but I think that it adds a lot of texture and makes them look a lot more elevated (is that the right word to use for a fake ghost?!).

Step Four: Add Eyes (Optional!)
And finally, you can add some little eyes to your ghost to make him stand out a little more. I’ve seen them made with and without eyes, there’s really no wrong answer here. I just grabbed some black vinyl from my stash and cut out a couple of ovals. Then, I stuck it on the cheesecloth and called it a day! I think you could easily glue black felt or even construction paper on the sheet as well. Heck, you could use a Sharpie and just draw some eyes, too!
You can, of course, also add a mouth, or even accessories. I’ve seen people do all sorts of creative things with these little guys. You can add a cowboy or witch hat, add a broom – whatever makes you smile.
For me? I like ’em nice and simple.
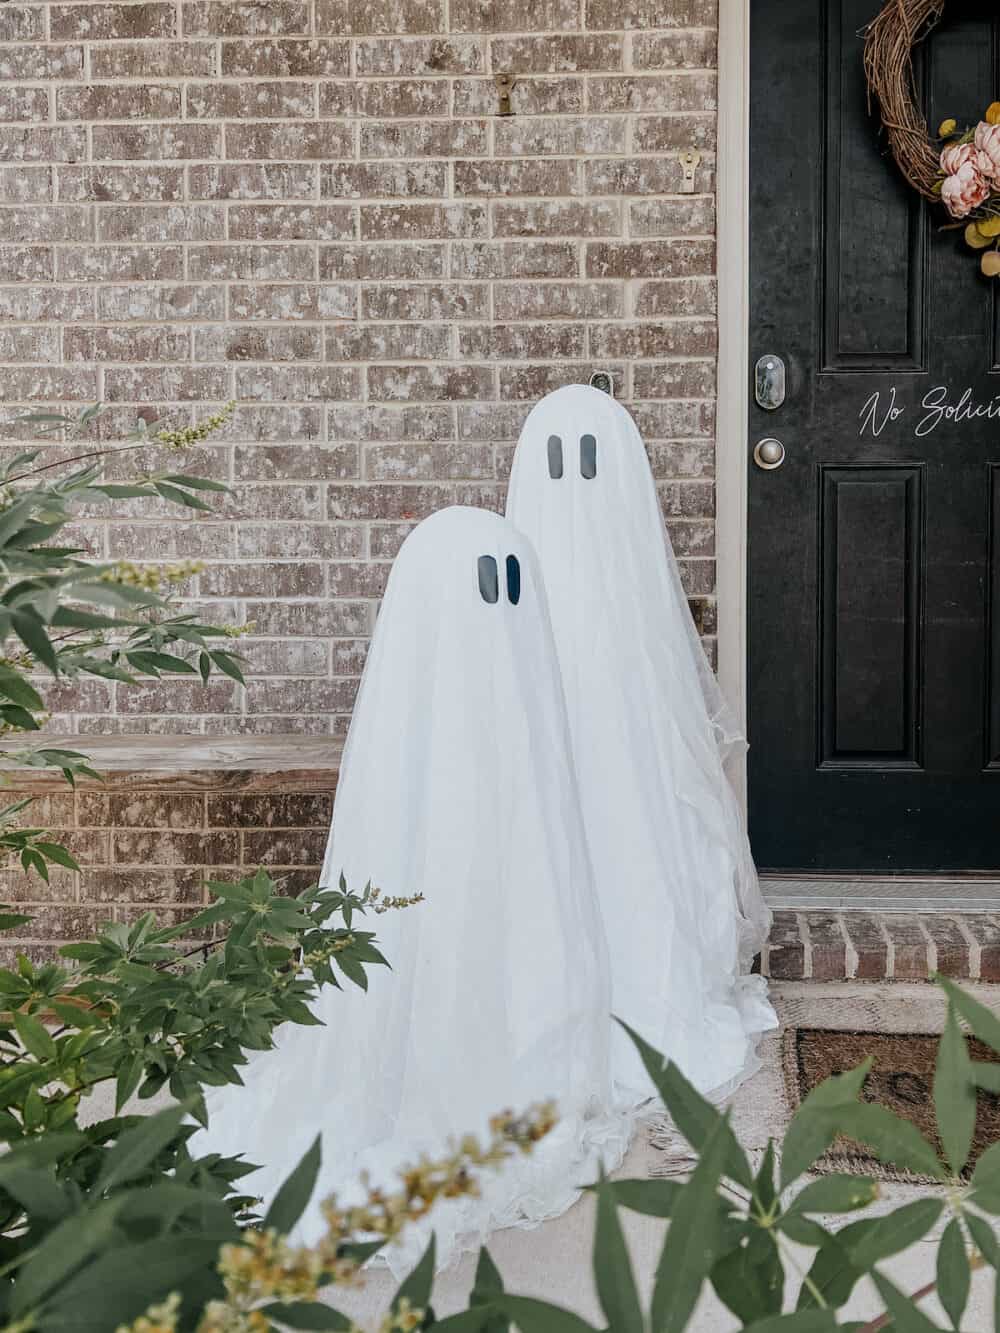
I am in loveeeee with how these cute little guys turned out. They look adorable on my front porch, and really add to the Halloween vibe. My favorite part is that I spent less than $20 a piece on each tomato cage ghost! This is such a fun, easy Halloween decor idea, and I’m glad I decided to finally give it a shot.


Love them but the wind always blows the plastic table clothes off. Sheets maya be heavier and don’t have the issue. Thank you for sharing