
DIY Oversized Wood Lanterns
I love using wood lanterns for my front porch at Christmas time, and this year I decided to make some giant, oversized wood lanterns. It was super easy, and today I’m sharing the details!
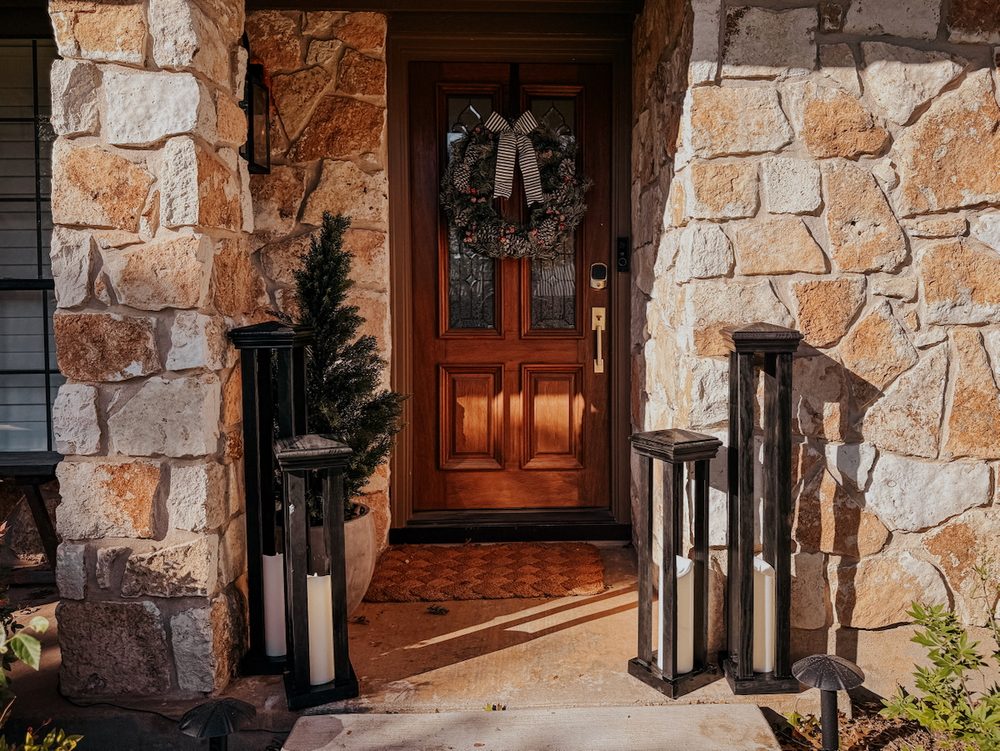
A few years back, I made some really simple wooden lanterns for my front porch at Christmastime. I really loved them and kept them out year-round for quite a few years. But, between storms and children kicking them over and general chaos, they eventually weren’t looking so great and when we moved, we decided they didn’t need to come with us. I’ve really missed having them though, so as we approach the holiday season I decided to try a fresh version of the lanterns. And this time, I went bigger. Like, a lot bigger.
Today, I’m breaking down the full tutorial of how to build simple, oversized wood lanterns for your front porch. This is a really simple project that is perfect for beginner woodworkers. They make a big impact on your Christmas front porch, and I can’t wait to show you how ours look with everything else I’m adding this year!
How to Build Oversized Wood Lanterns
Video Tutorial
Click play on the video below to watch this project come together in real time. It’s a short video that gives a great overview of what the process looks like!
Materials Needed
A note: I’m listing materials below for ONE 24″ lantern. Adjust accordingly for the number of lanterns you want to build and the heights you want them to be!
- (2) 8′ 1×2 piece of pine
- (1) 6′ 1×6 piece of pine
- (1) Wood Post Cap
- Miter Saw (or Miter Box + Hand Saw)
- Wood Glue
- Nail Gun + 18-gauge nails
- Wood Filler
- Paint
- Flameless Candle
Step One: Cut Wood
First up, you’ll want to decide how large you want your lanterns! If you’re going to be using the post caps, you can’t make them wider than about 6″, so keep that in mind as you plan. I built 2 lanterns at 36″ and two at 24″ (they’re both a bit taller when you add in the base and post cap). You can adjust to whatever heights work for your space, but I don’t recommend going any taller than 36″ or they might start looking a little silly!
Once you have your plan, go ahead and cut all of the wood for your lanterns. For each lantern, you’ll need to prep:
- (3) Pieces of 1×6 wood cut to 5.5″ – this should make them approximately square
- (4) Pieces of 1×2 wood cut to the lantern height (again, for me, that was 24″ or 36″)
- You’ll also need to cut wood for the base but we’ll measure and cut that when we get there!
Step Two: Assemble Lantern Frame
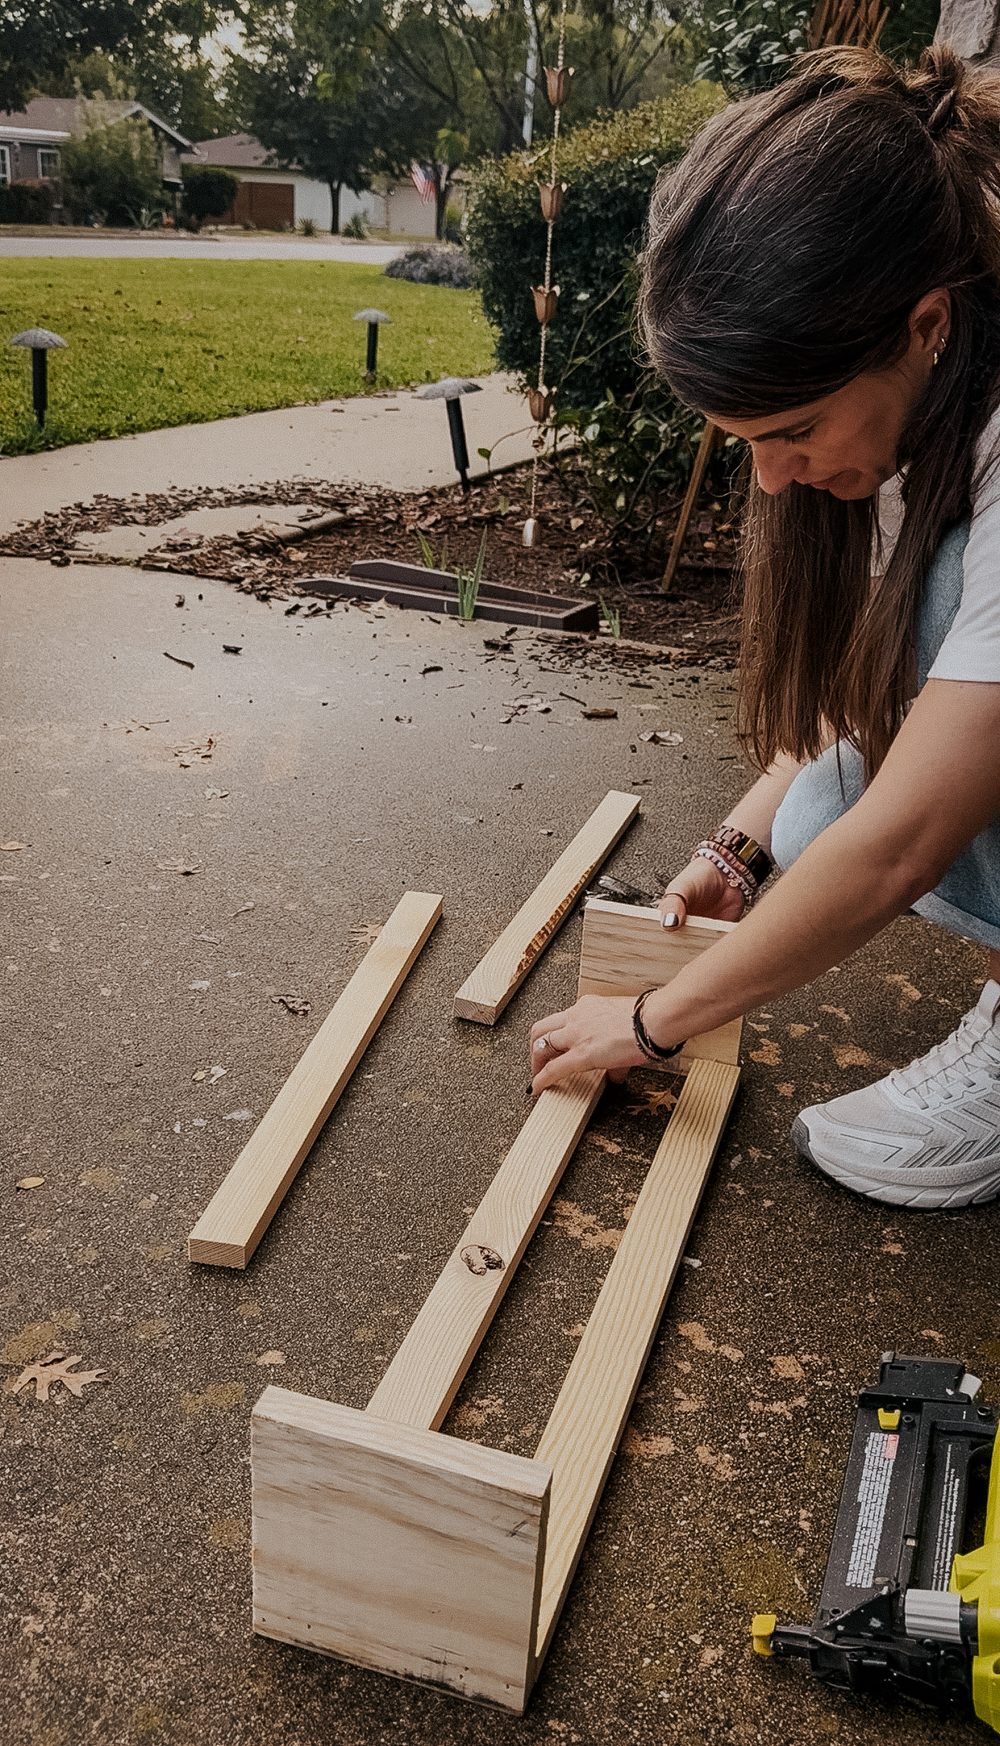
With the wood cut, it’s time to assemble. Apply wood glue to both ends of one of your 1×2 pieces, along with on a corner of two of your 1×6 pieces. Attach the long piece between the top and bottom base with your nail gun.
Continue working, attaching a 1×2 piece of wood on all four corners of your base. Make sure they’re all facing the same way!
Keep in mind here that for the most part, the glue is what’s going to be holding these together – not the nails. The nails are just in place to basically act as clamps while the glue dries. The wood glue is much stronger than the nails will be, so don’t skimp on it!
Step Three: Add Base
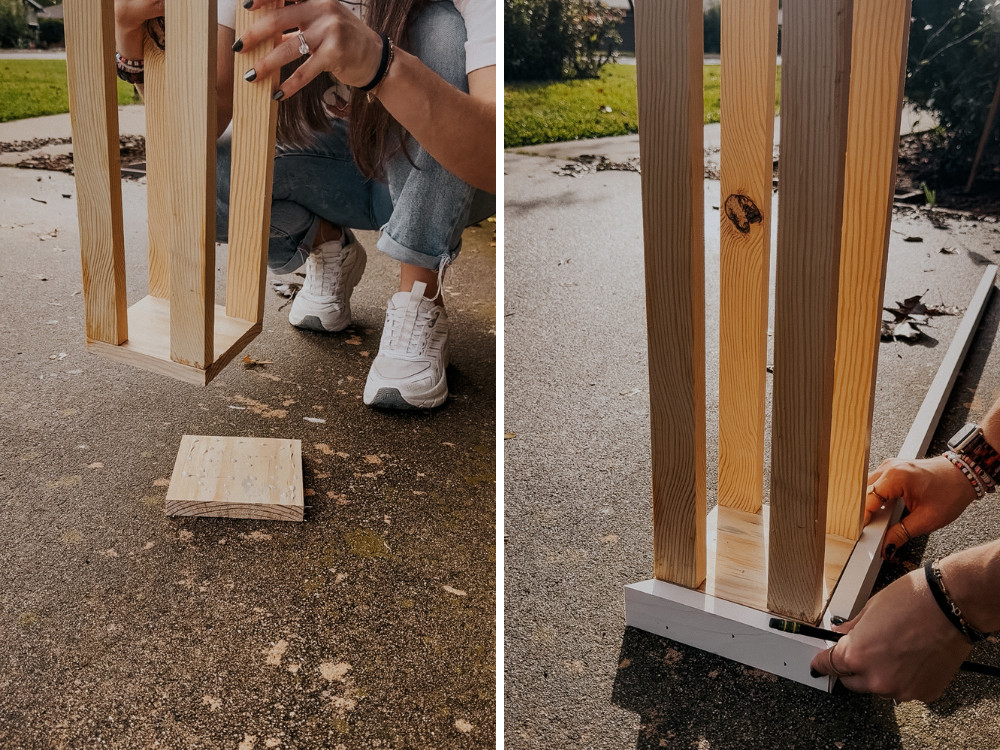
At this point, you should have something that’s starting to look a little like (very basic) lantern! Now, grab your third 1×6 piece and glue/nail it to one end of the lantern, to create a thicker base.
Once you’ve attached it, begin cutting your second 1×2 piece to create a frame around the outside. This just helps beef up the base and make it look a little more substantial! Here’s how I did this:
- Cut one end of the wood at a 45-degree angle using your miter saw.
- Hold the full board up to the base of your lantern and use a pencil to mark where you need to cut.
- Align the wood so that the inner edge of the 45-degree angle will be at your pencil mark, and use the miter saw to cut it.
- Test fit the wood before gluing and nailing.
- Rinse and repeat for all four sides!
Step Four: Add Top
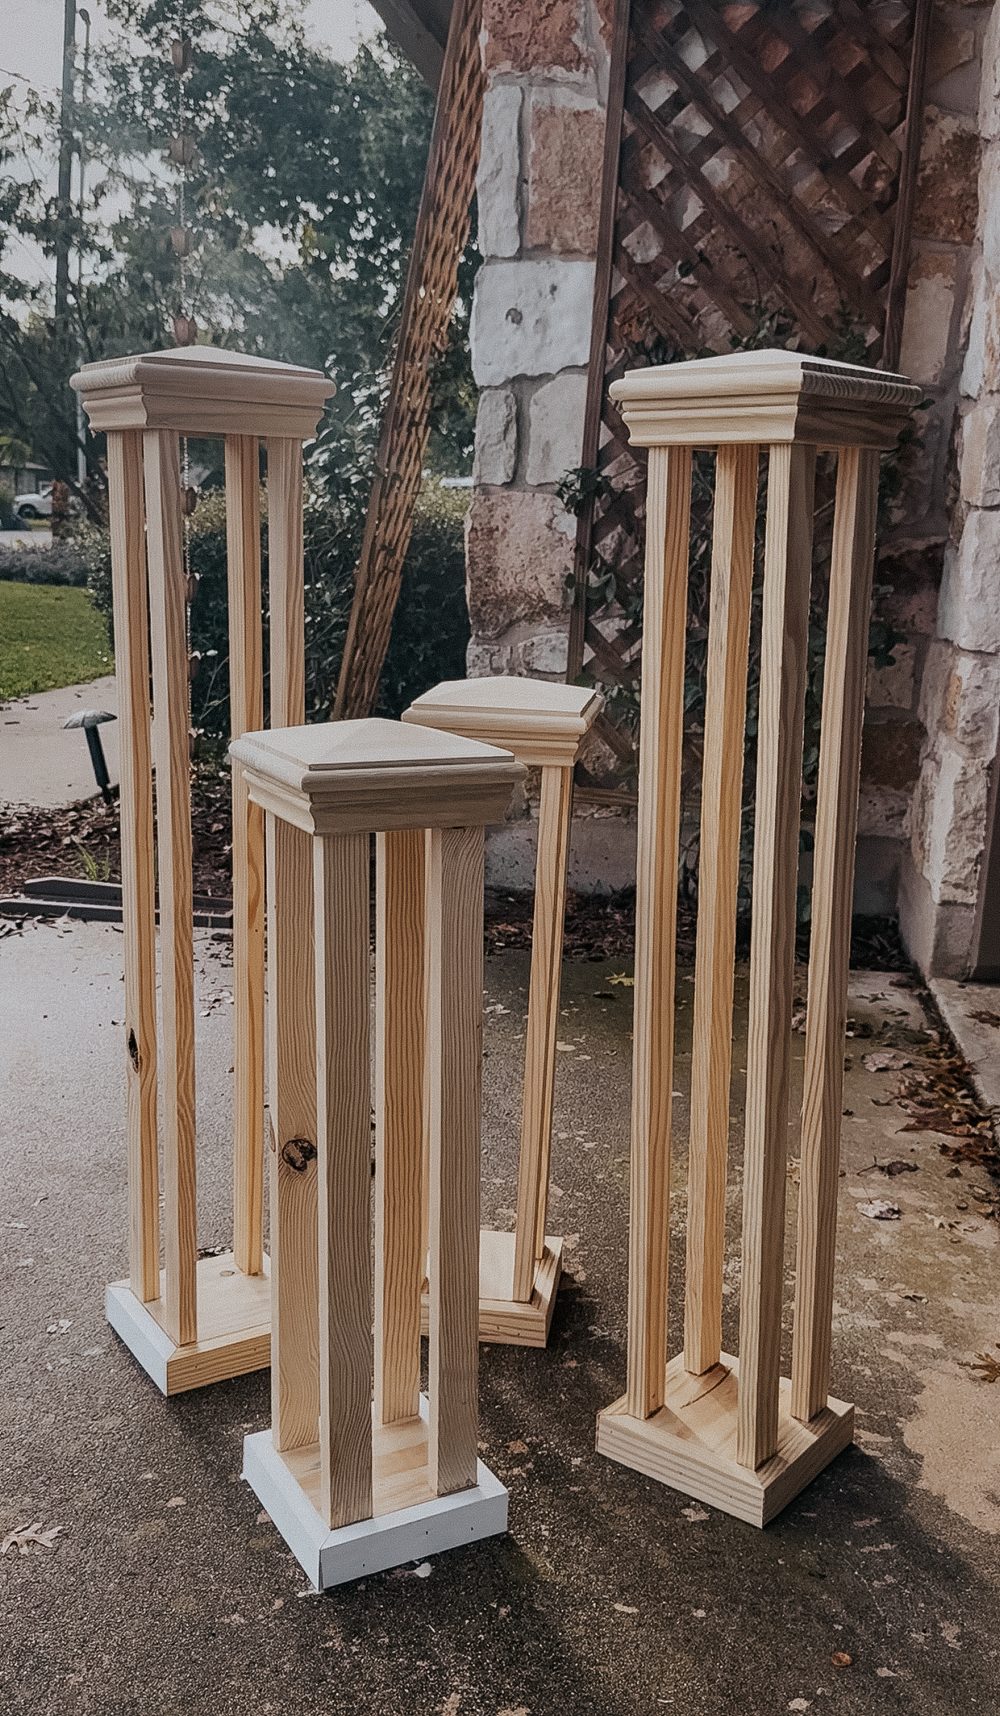
The final step is to attach the post cap! This just helps things look really polished and a little more substantial. I attached mine with glue – just make sure to add glue to both the top of the base and the inside of the post cap, then press it into place and allow it to dry.
If you want, you could also glue a ring pull to the top for an added detail! I couldn’t find one I like but might add one in next year.
Step Five: Wood Fill + Paint
And finally, it’s time for the finishing touches. I don’t know about you but once I reach this point in any project I am desperate to just move on and start painting, but the wood filler is a vital part! It helps things look more polished and professional and makes a huge difference overall. I promise.
- Click here for my full tutorial on how to use wood filler.
- Click here for my tutorial on how to use spray paint.
I just used a plain glossy black spray paint to get my lanterns painted. After they dry fully, they’re ready to go.
Step Six: Display!
Finally, add your flameless candle and set your lanterns up! I did a ton of searching around for the best flameless candle that was tall enough to look substantial in the lantern without being super pricey. I found these on Amazon and they were a great size.
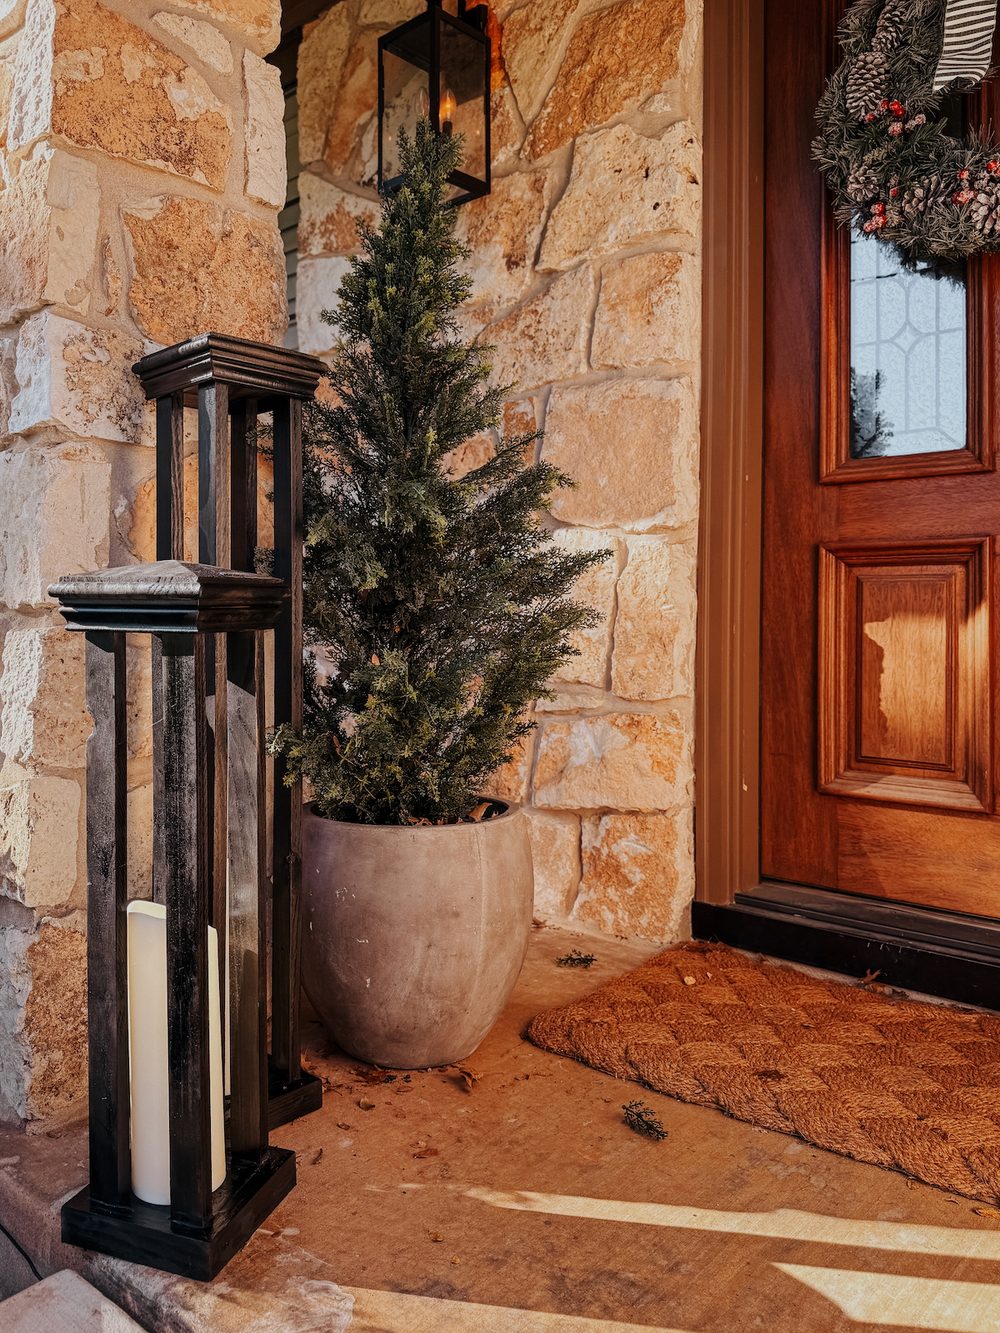
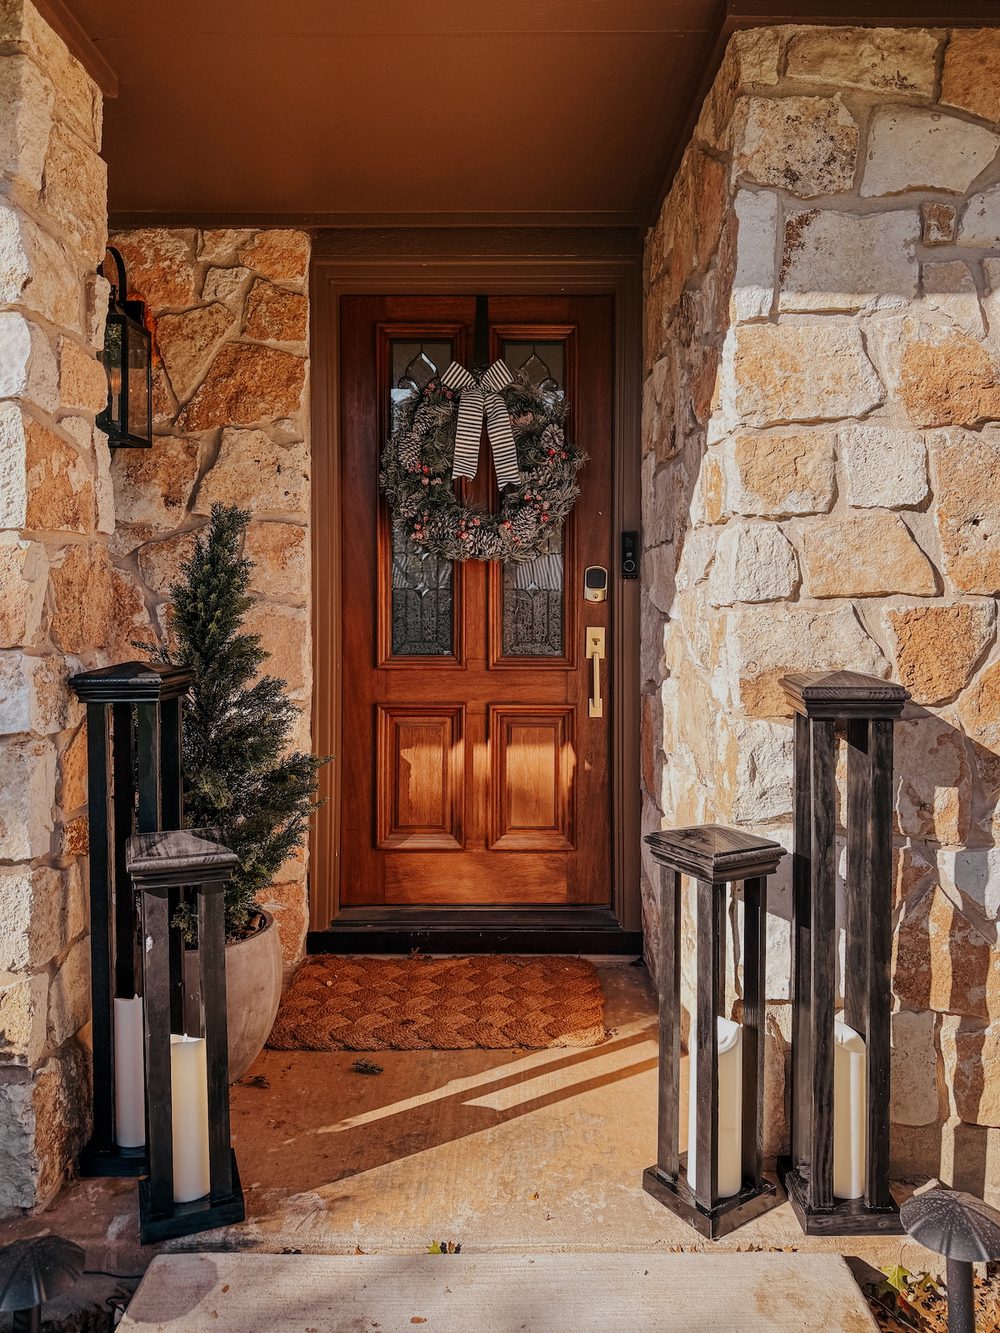
I’m going to be pairing these with tons of garland and twinkly lights and a couple of other DIY projects, so stay tuned to see how our Christmas porch comes together!