How to Make a DIY Tabletop Fire Bowl
We’ve been dealing with tons of mosquitos this year and I wanted to do something about it. So, I whipped up this 5-minute DIY tabletop fire bowl with some citronella fuel and now we have a super beautiful and simple solution!
I love eating outside year round, and you can often find me working on our back patio. But, as we get further into summer I find myself avoiding the outdoors more and more simply because of the mosquitos! They’re everywhere, and it was time to find a solution to keep them away.
On top of the mosquitos, I’ve been looking for a fun way to add some ambiance to our outdoor dining table. So, I figured I’d kill two birds with one stone and make a DIY tabletop fire bowl (filled with some citronella fuel, of course)!
It was one of the easiest little projects I’ve taken on in a while – let me show you how I did it!
Easy DIY Tabletop Fire Bowl
Materials Needed:
Here’s everything you need for your DIY tabletop fire bowl:
- Large bowl
- Sand (I used two of these)
- Stones or glass (I used two of these)
- Tiki torch canister
- Tiki torch fuel
Video Tutorial
Let’s start with a quick video to show you exactly how easy this is. When I say it’s a quick video, I mean it – it’s just over a minute long and walks you step-by-step through the process! But, don’t worry if you aren’t a video person – I’ve got you covered below with some written out directions.
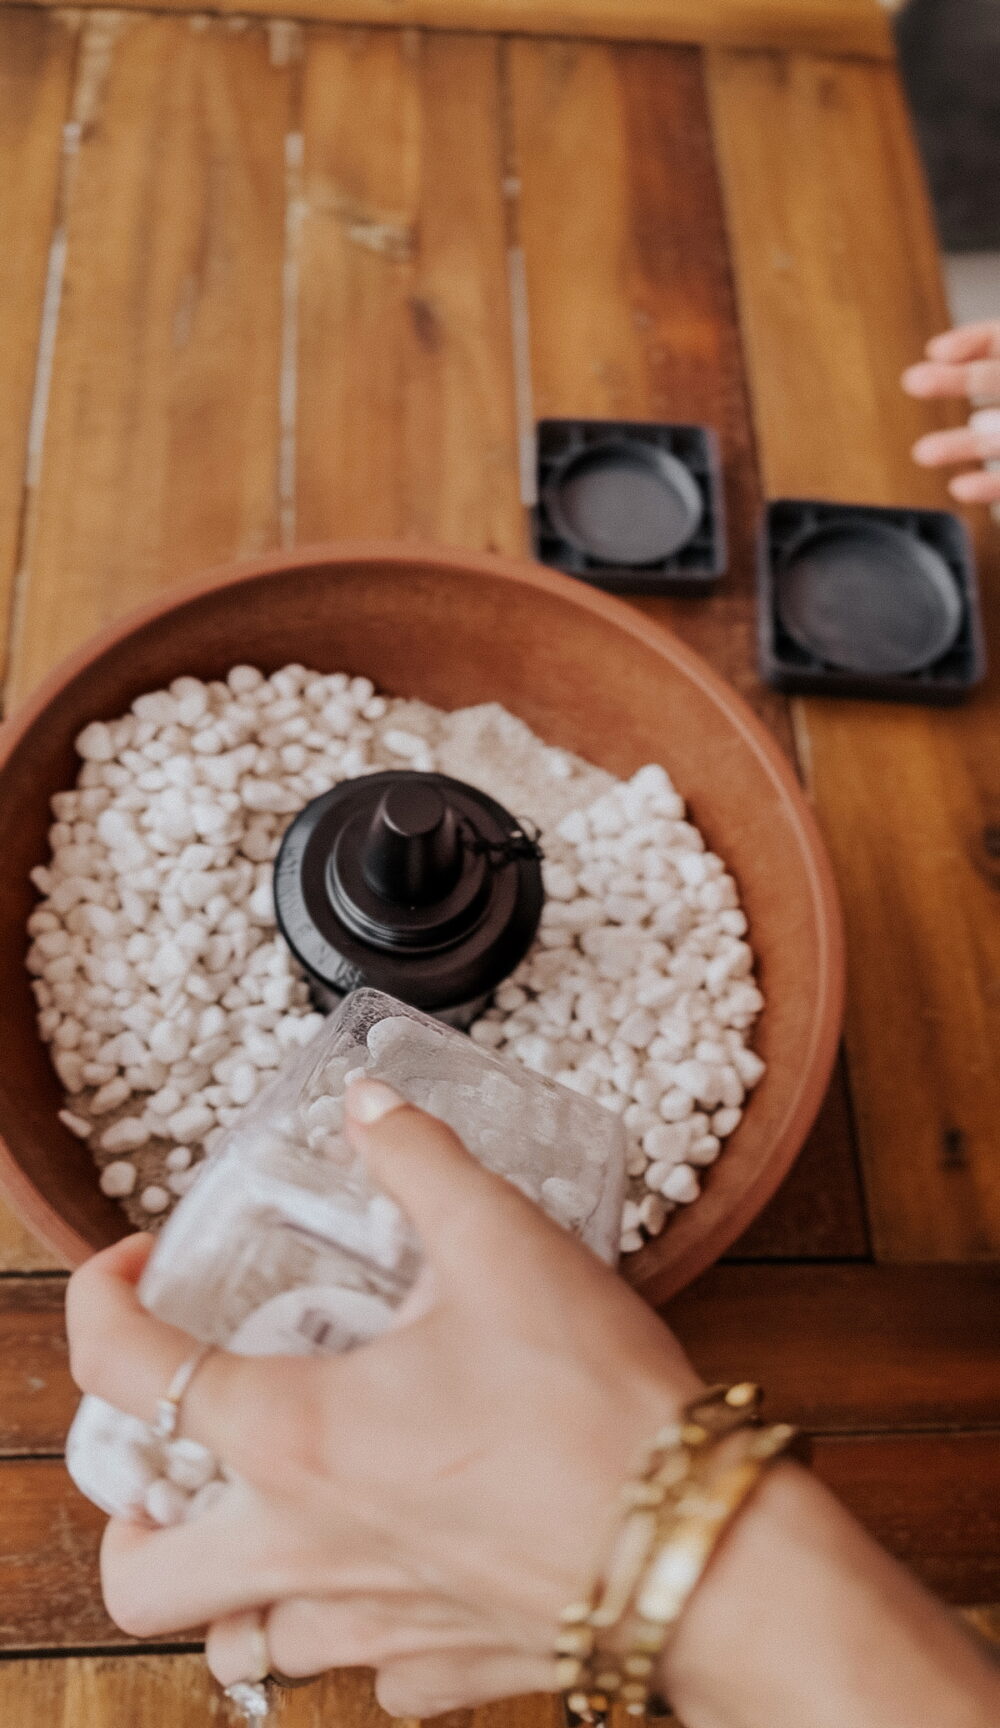
Step One: Place Tiki Torch & Add Sand
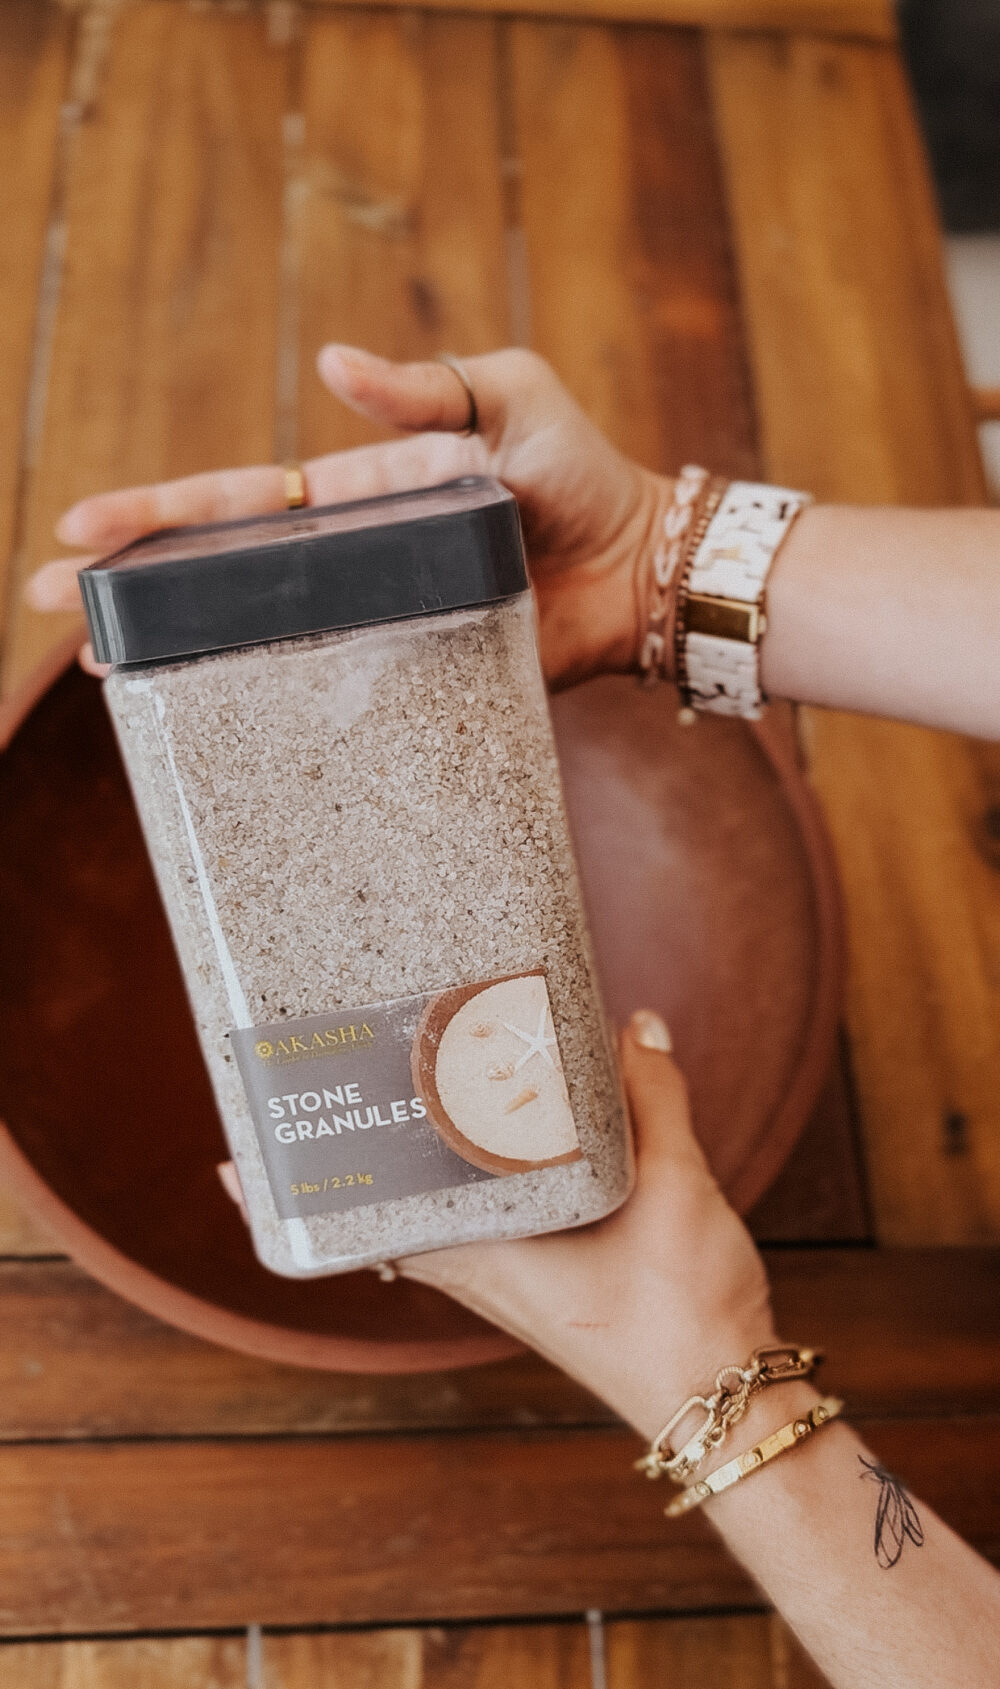
Your first step is to place your Tiki Torch in the bowl and add sand around it. I didn’t fill my torch first but if I was doing this again, I probably would.
I used two of these jars of sand from Lowe’s. This was the cheapest method I could find, but if you’re using a larger bowl or making multiple fire bowls, you might want to just grab a larger bag of sand to save some money.
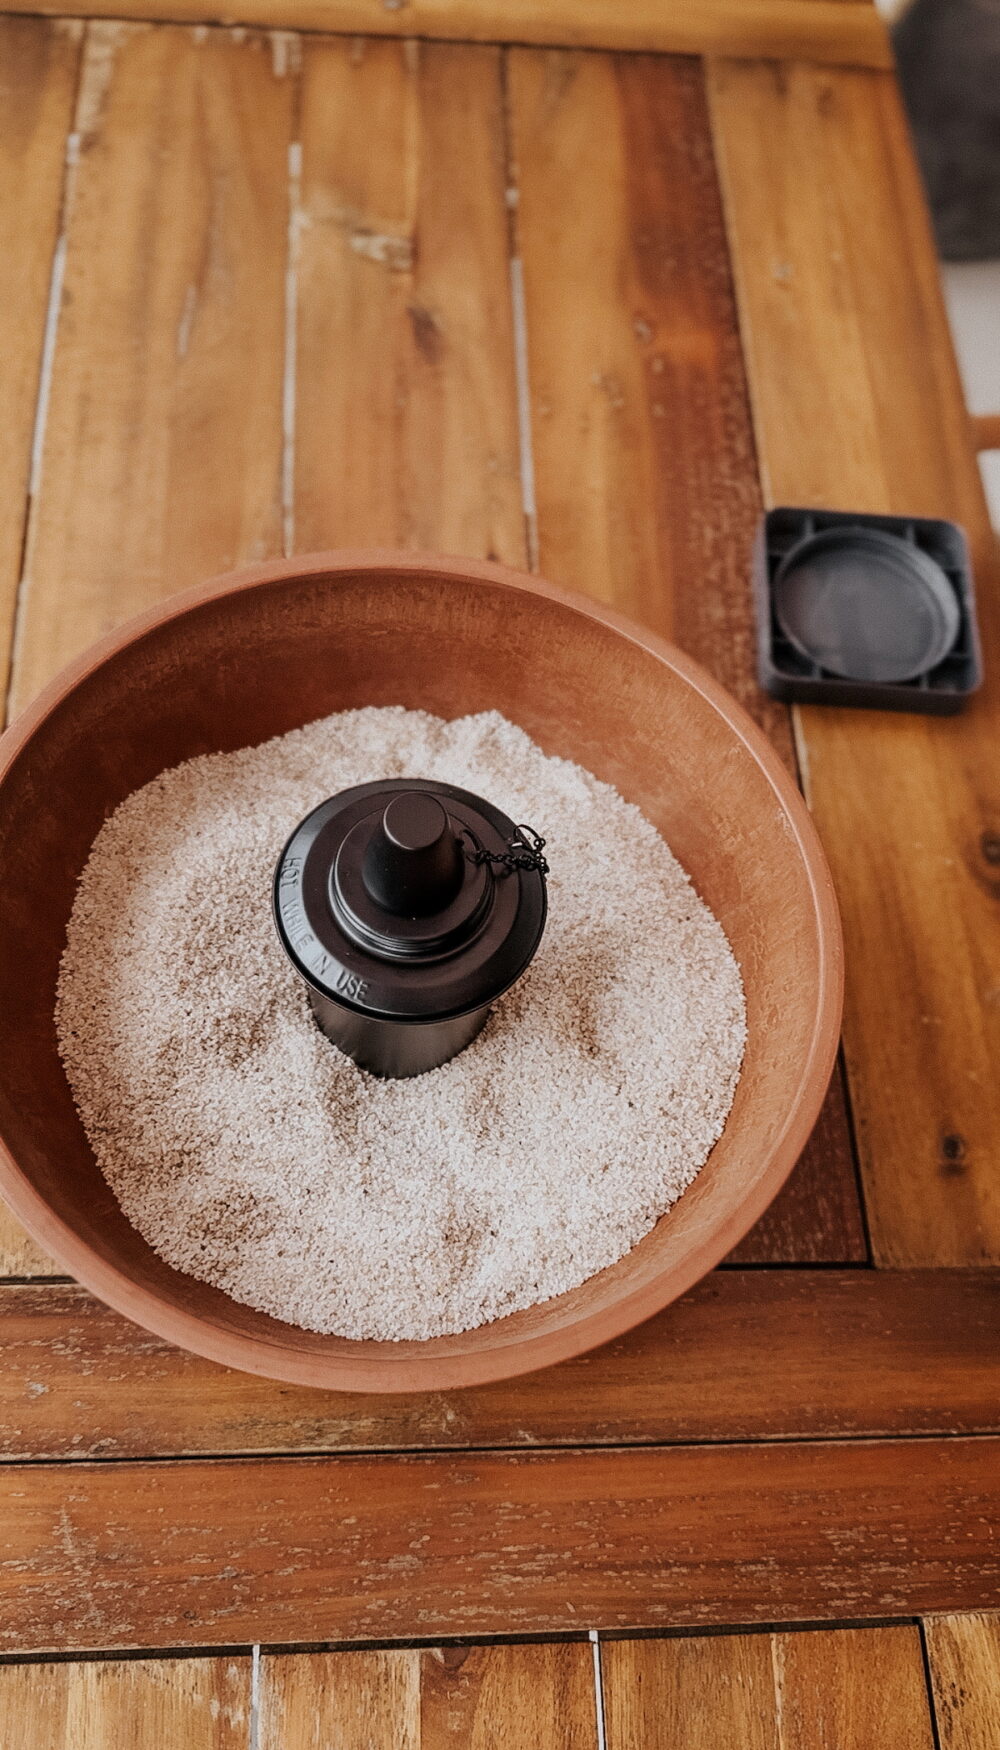
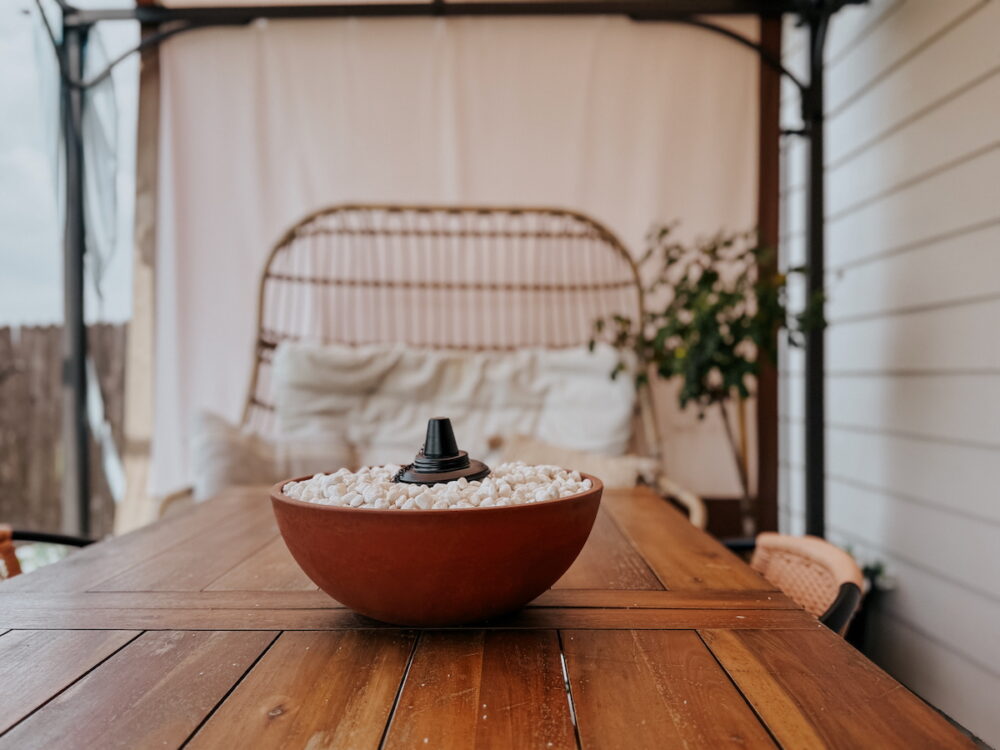
Step Two: Add River Rocks or Glass
Once you’ve got your sand in place, you can add the rocks! I filled the sand up high enough so that I only needed to add a thin layer of rocks around the top. The rocks are a tad more expensive, and the sand helps hold the torch in place.
If you don’t love the stone look, you could also add some glass (they make it specifically for fire pits), or even just fill it up all the way with sand. This is all about aesthetics so go with what makes you happy.
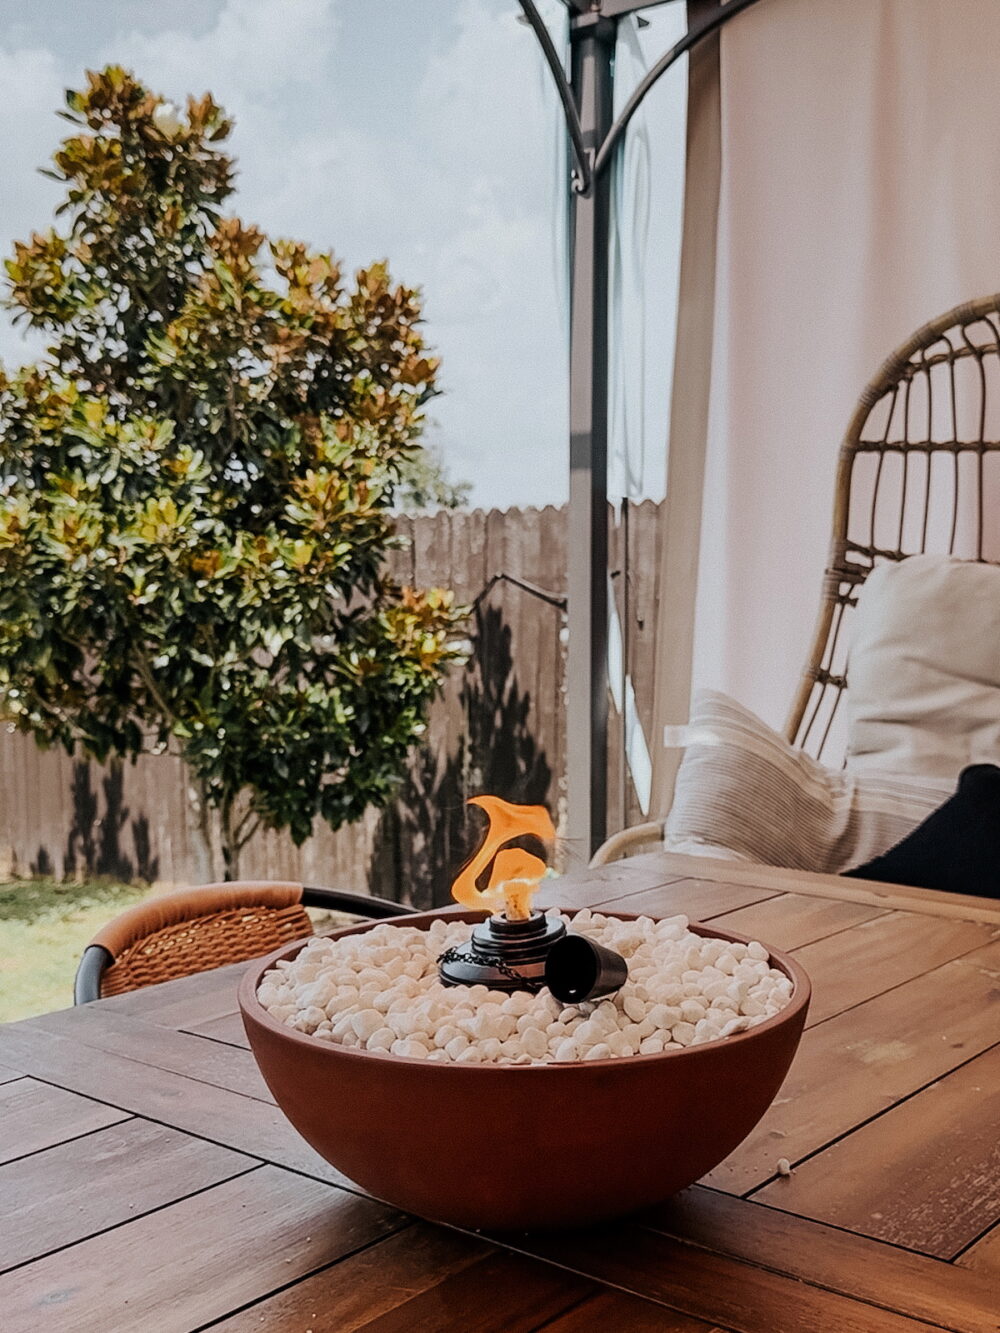
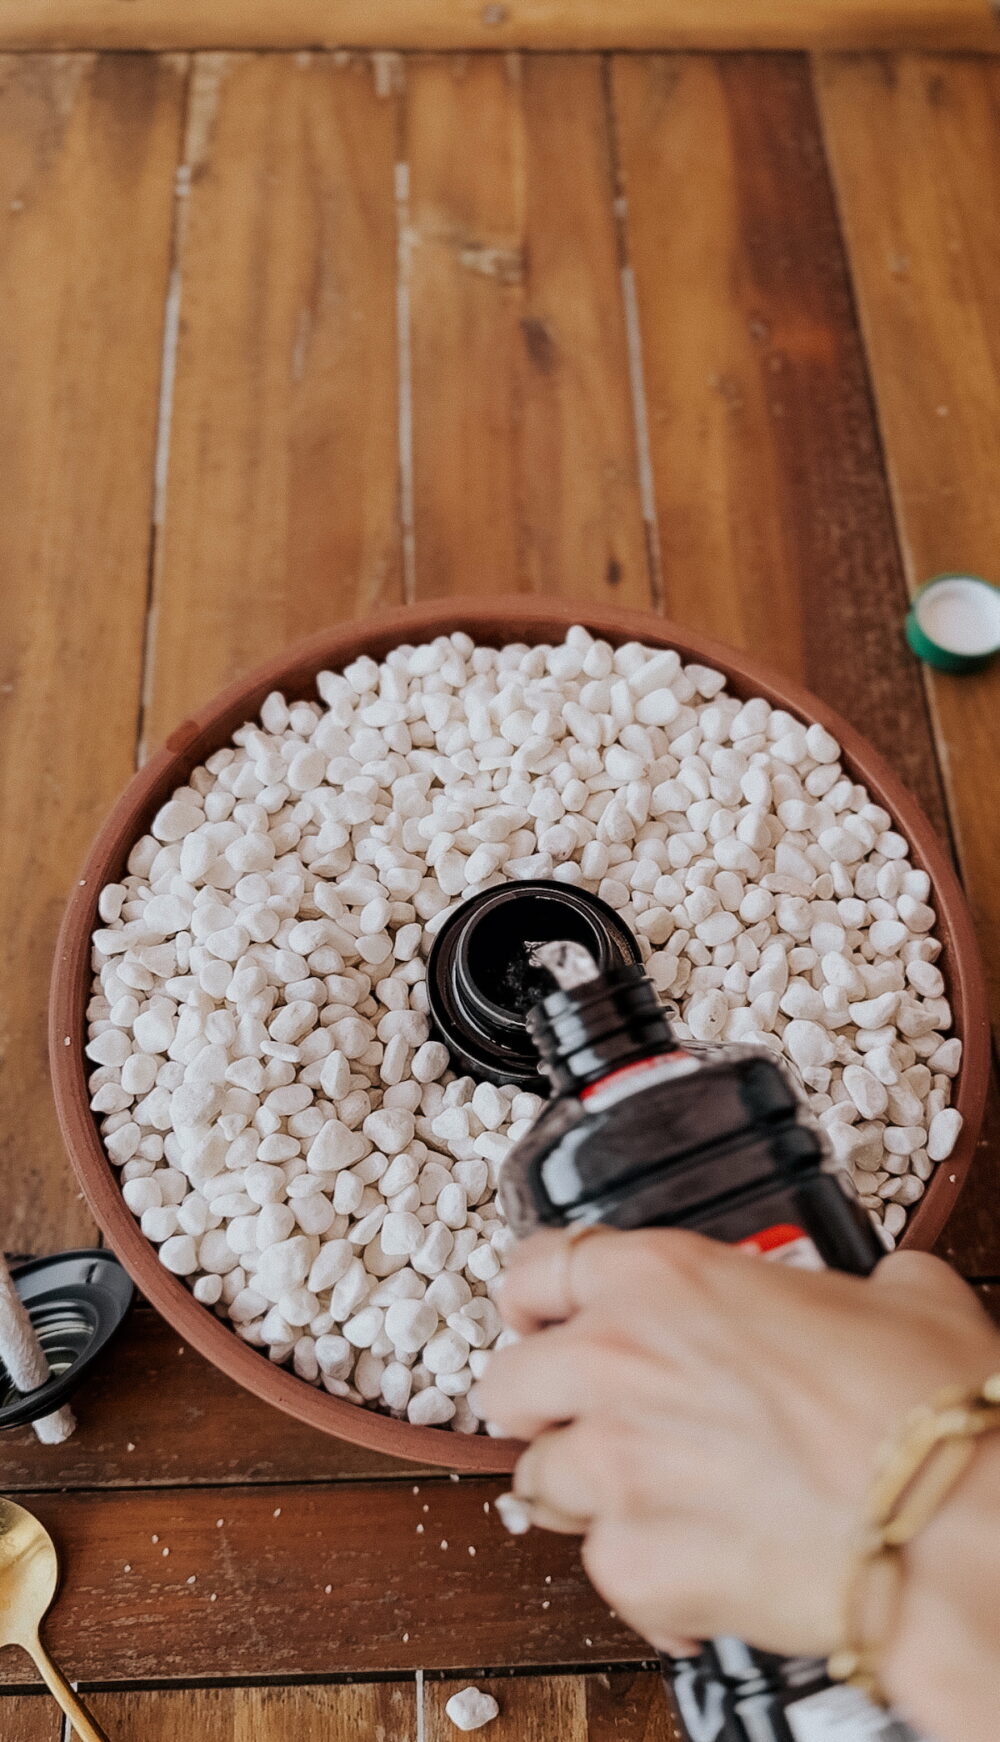
Step Three: Fill Torch + Enjoy!
If you didn’t fill your torch before adding it to the bowl, now is the time. I got some BiteFighter fuel for mine, which is citronella scented and should help keep bugs away. I didn’t see this Clean Burn version when I was buying mine, but when it’s time to buy another jar I’ll definitely grab that instead. Mine is a tad smoky!
And really, that’s all there is to it. Once your torch is full you can light it up and start enjoying your tabletop fire bowl.
Choosing a Fuel Type
Like I mentioned before, my specific goal was to get rid of mosquitos and enjoy the ambiance. So, this Clean Burn BiteFighter fuel is perfect for me. But, if you’d like to use your fire pit to do something like roasting marshmallows, you’re going to want a different fuel!
If I was going to be making s’mores with my fire pit, I probably would go with these Sterno S’mores Cans! Or, if you want something you can put directly in your Tiki canister, an alcohol based fuel like this one will be a great bet.
And that’s it! The cutest little DIY tabletop fire bowl that I know we’ll be using year-round.