
Gorgeous (& Easy!) DIY Shiplap Fireplace
Last updated on January 25th, 2024 at 08:11 pm
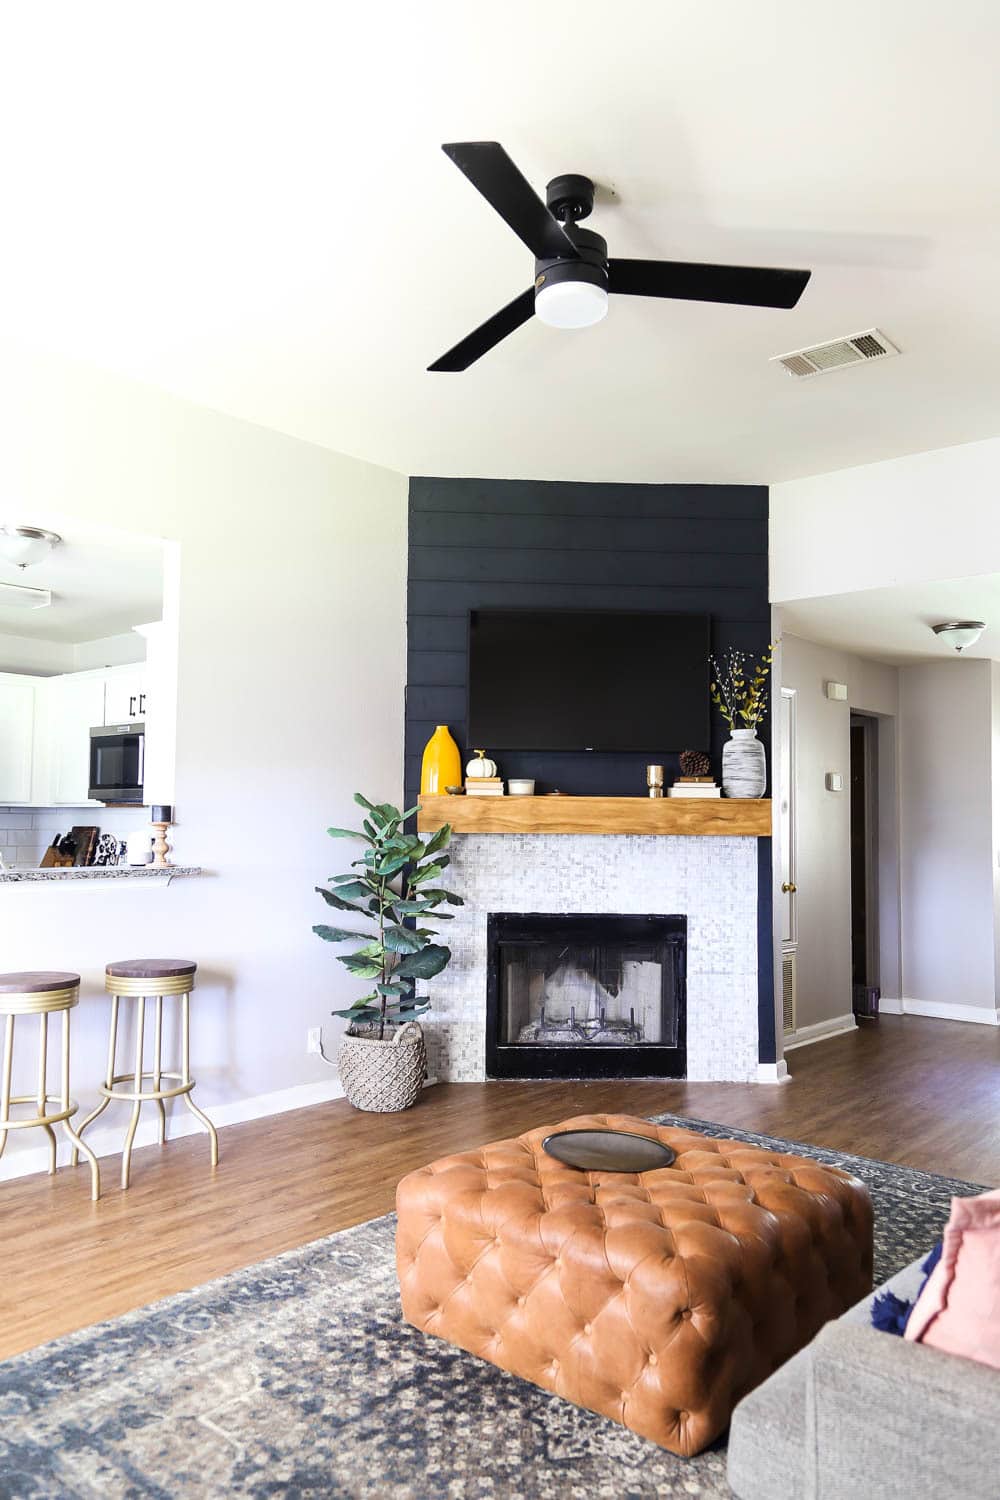
It’s finally time to reveal our beautiful new black shiplap fireplace wall makeover. I feel like I’ve been working on it forever. But, it’s DONE and I couldn’t be happier with it. Read on for how to create your own DIY shiplap fireplace.
I am a big believer that shiplap is a great option for any fireplace. In fact, we’ve lived in three houses and we’ve had three shiplap fireplaces. Seriously! Our first fireplace had white shiplap wrapped around the entire thing. You’re about to read all about the black shiplap fireplace wall in our second home. And, our third home has a DIY electric fireplace with shiplap all the way to the ceiling.
I guess you could say we’re fans of the look.
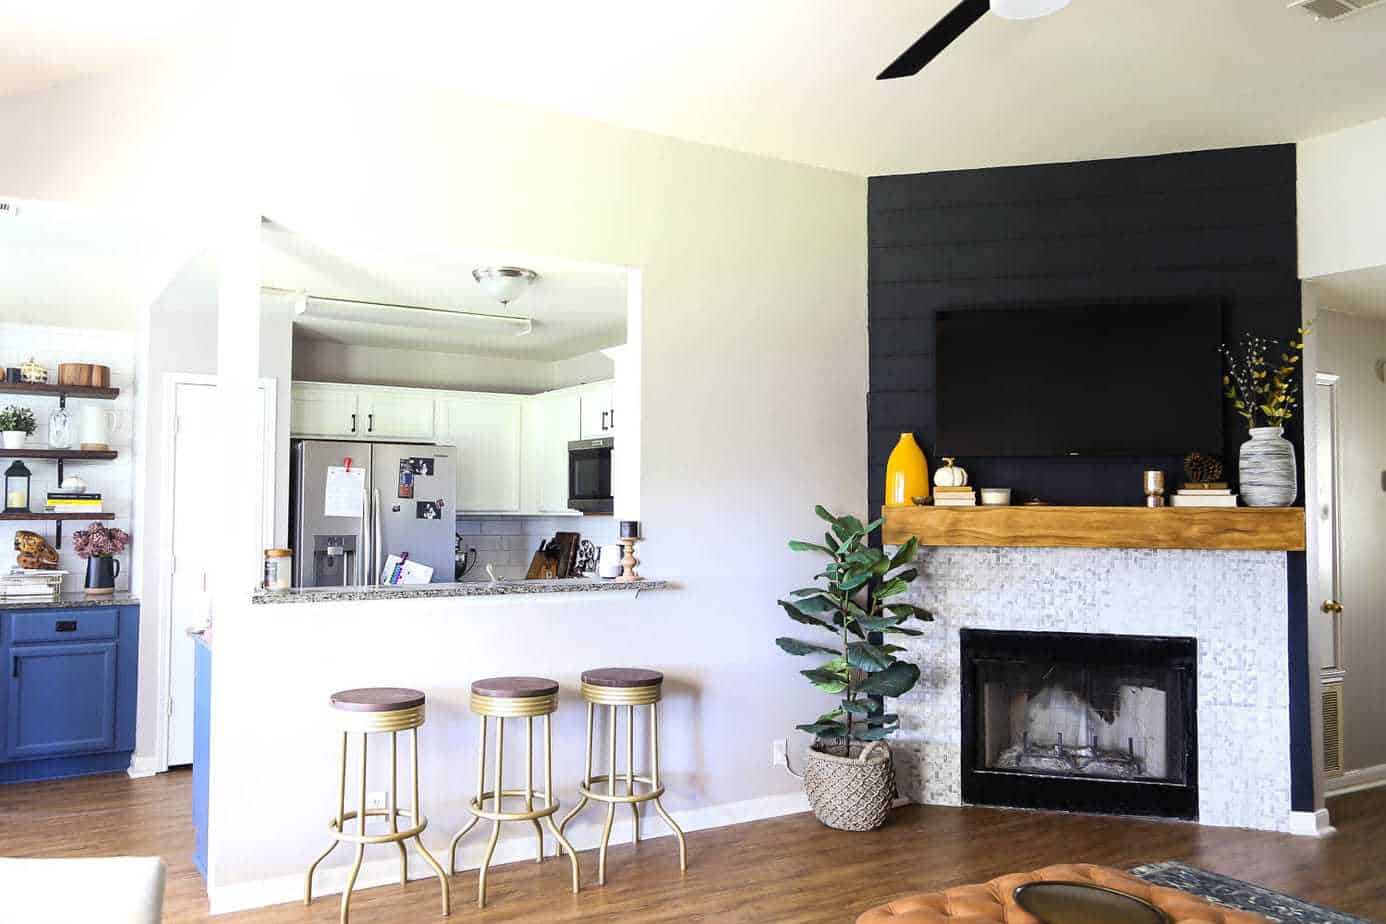
It’s safe to say I’m completely head over heels in love with this fireplace. It genuinely transformed the look of basically our entire home. The living room is pretty small. Plus, everything is open concept. That means you could see the fireplace from almost anywhere in the house. It was a terrible thing before because it was such an eyesore but now? Well, it’s a very good thing.
Our Shiplap Fireplace Makeover: The Before
Let’s chat details! If you’ve got a steel trap memory, you might remember what this fireplace looked like before I got started, but it’s likely you won’t. I’ve only shown it once or twice here on the blog because it really wasn’t anything special to look at. In fact, it was downright ugly.
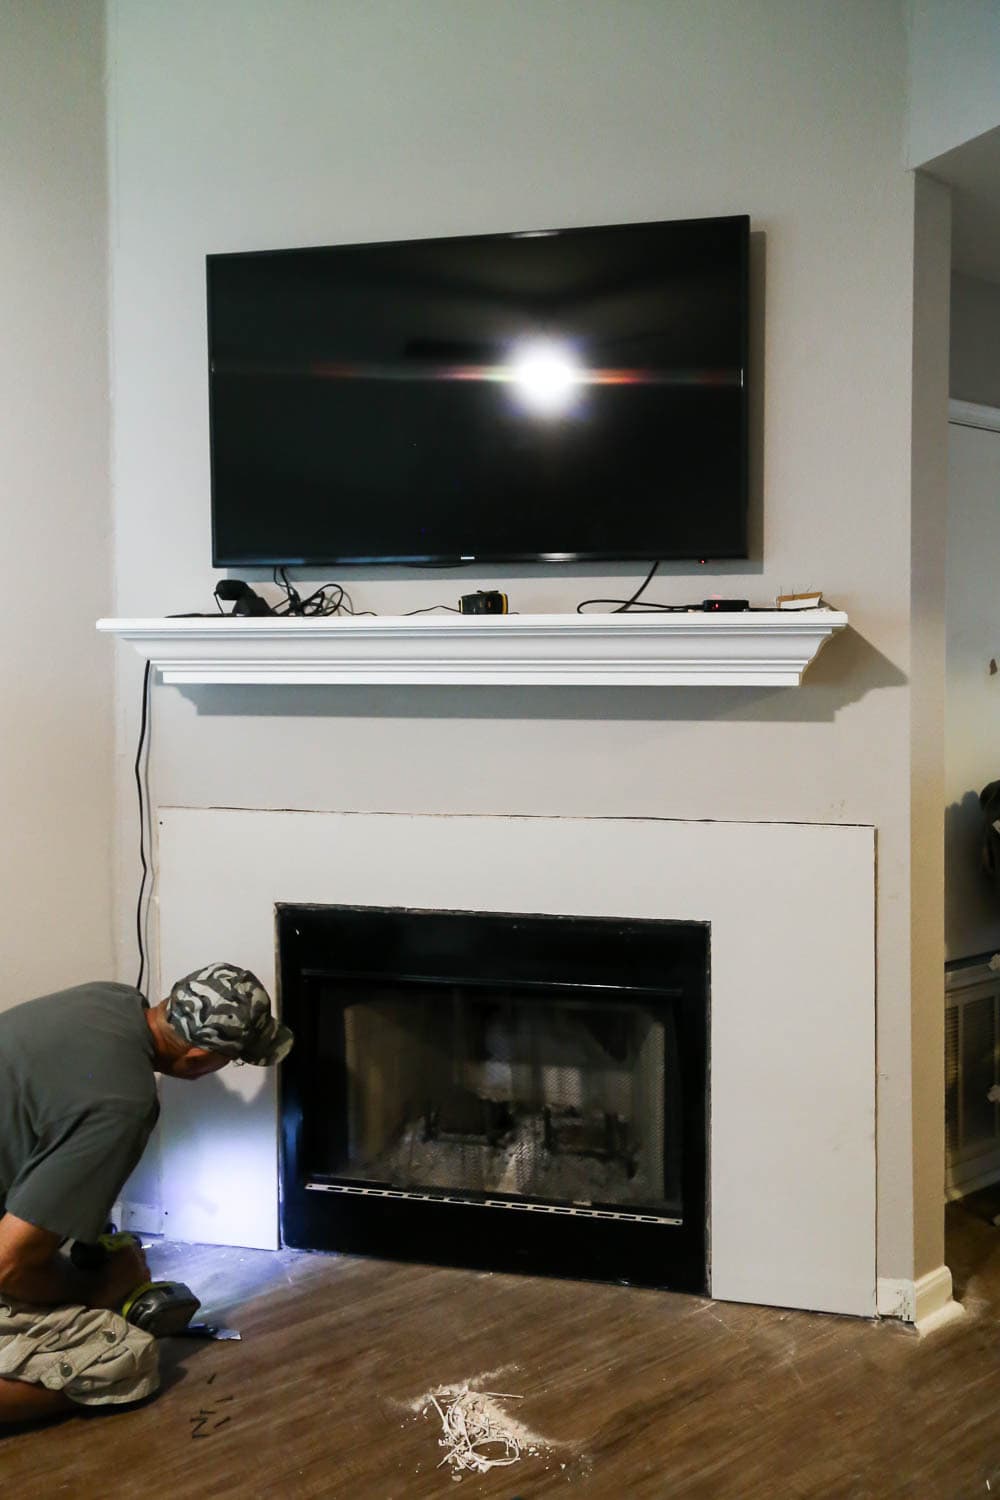
Let’s take a little walk down memory lane – here’s what the fireplace looked like on the day we moved in.
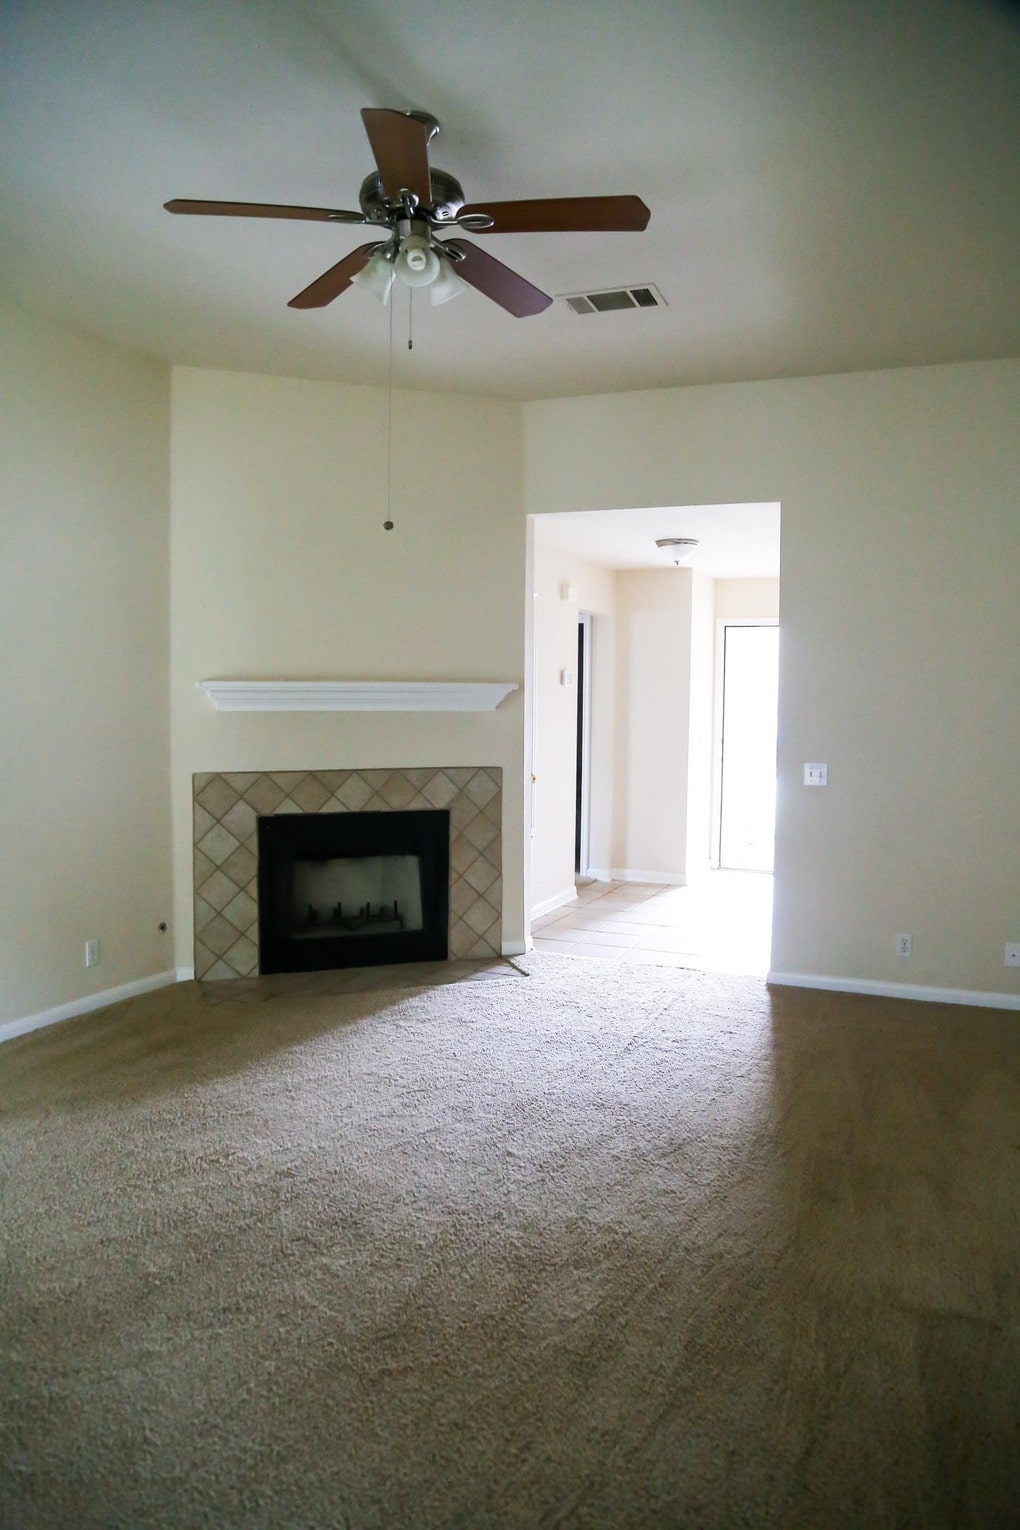
The fireplace presented a few unique challenges for us that we didn’t face last time we were renovating a fireplace. For one, it’s an angled wall, which really isn’t our favorite look. We also didn’t like the tile on the fireplace surround, and with the beige walls and bland details, it was seriously lackluster.
The other big issue we had is that this fireplace is really the only logical place in the room to put a television. So, we really wanted to come up with a solution that would help it blend in a bit.
Enter the black shiplap.
I think black accents are an important part of every home, but here it also serves to hide the TV!
Shiplap walls are often associated with a more farmhouse look, but I’m a firm believer it’s a great look for any home. At the bottom of this post, I’ll show you a few other times I’ve used shiplap to convince you! This would be a really gorgeous look on a brick fireplace, too! Whitewashed brick (or any brick) plus some shiplap boards would be a stunning combo.
So, enough chatting about the decision-making process – let’s dive into how we created this gorgeous shiplap fireplace.
Our DIY Shiplap Fireplace: Related Tutorials
I’ve already shared in-depth tutorials for basically all of the individual steps in this process. So, instead of going through all of it again here I’m going to point you in the direction of each step. As always, if you have any questions about a specific part of this DIY project, just let me know and I’ll be happy to provide more details.
Fireplace Makeover Tips
- How to tile (This post is about a kitchen backsplash, but the process is the same!)
- How to install shiplap
- How to use a nail gun
- How to use caulk
- How to use a miter saw
- How to use a jigsaw
- DIY wood beam mantel
- TV mount tips to hide the cords
Take a look at each of those posts for a more in-depth look at each step of the process. But, since I know we all love to see things come together, here’s a quick overview of how it went.
How Our Black Shiplap Fireplace Wall Came Together
Step One: Demolition
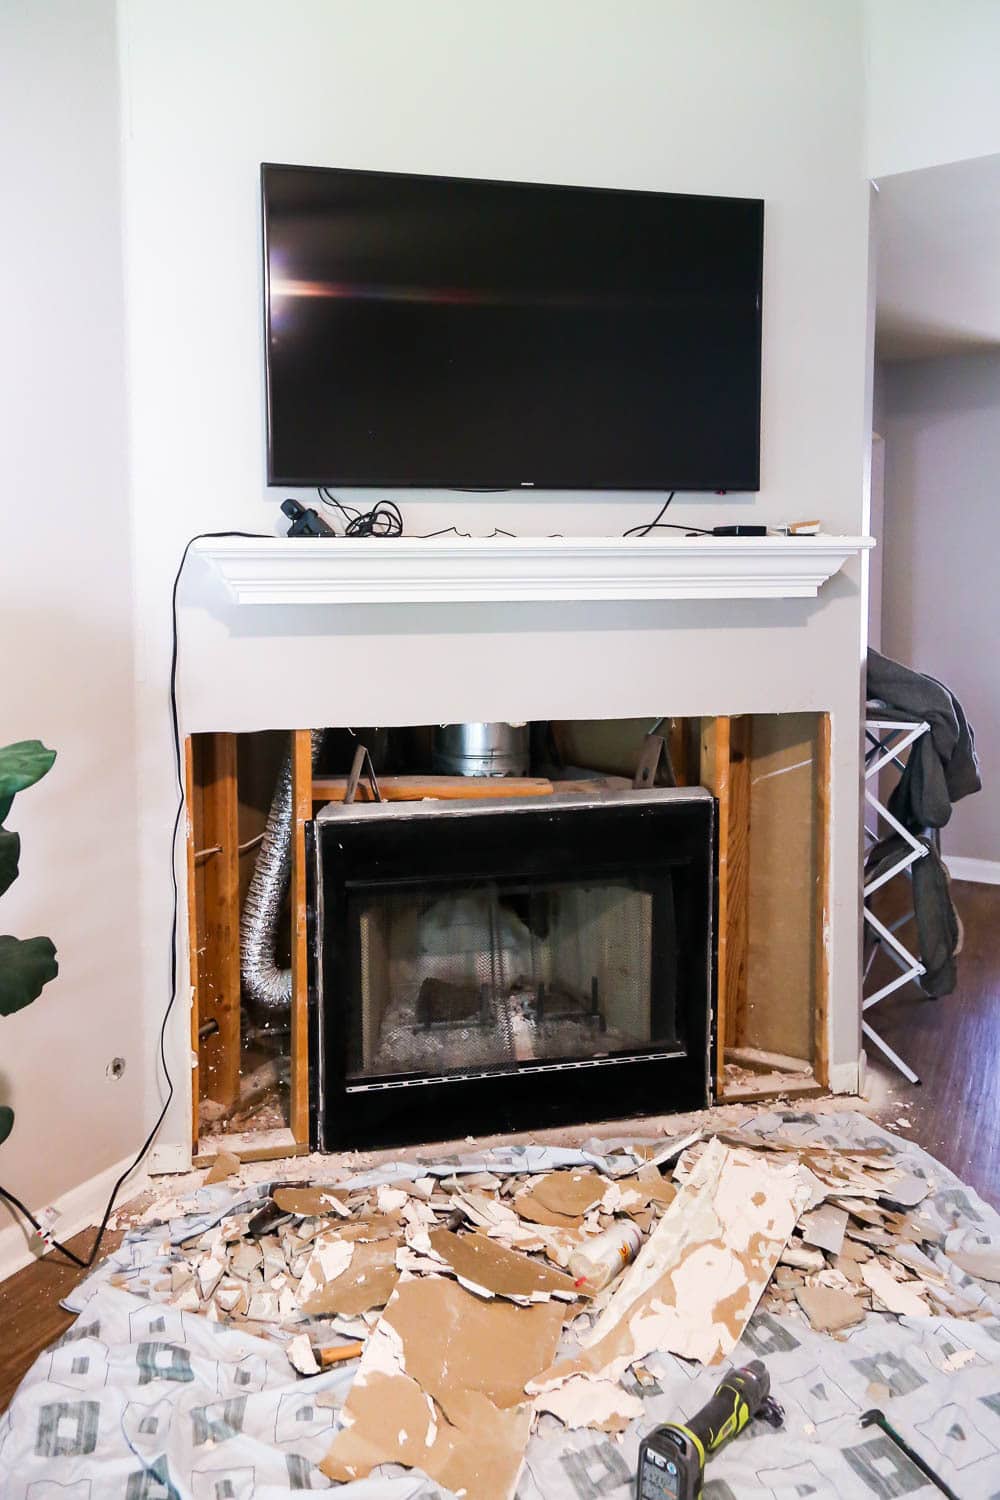
The first thing we had to do was remove the old tile. In my experience, any time I have to remove tile I also end up having to remove and replace the drywall behind it. It all depends on what kind of adhesive was used when the tile was originally installed. But, I’ve never been lucky enough to have easily-removed tile in my home.
It’s a messy job, but it’s pretty fast work. My dad came over to help me, because demo and infants don’t go together all that well, and Grant was only a few months old when I tackled this. We had the tile demoed and the drywall replaced in just a couple of hours.
Once you get it down to the framing, you just need to cut some fresh drywall and screw it into the studs. This entire process produces a lot of dust, so I recommend grabbing a shop vacuum in to help you keep things orderly!
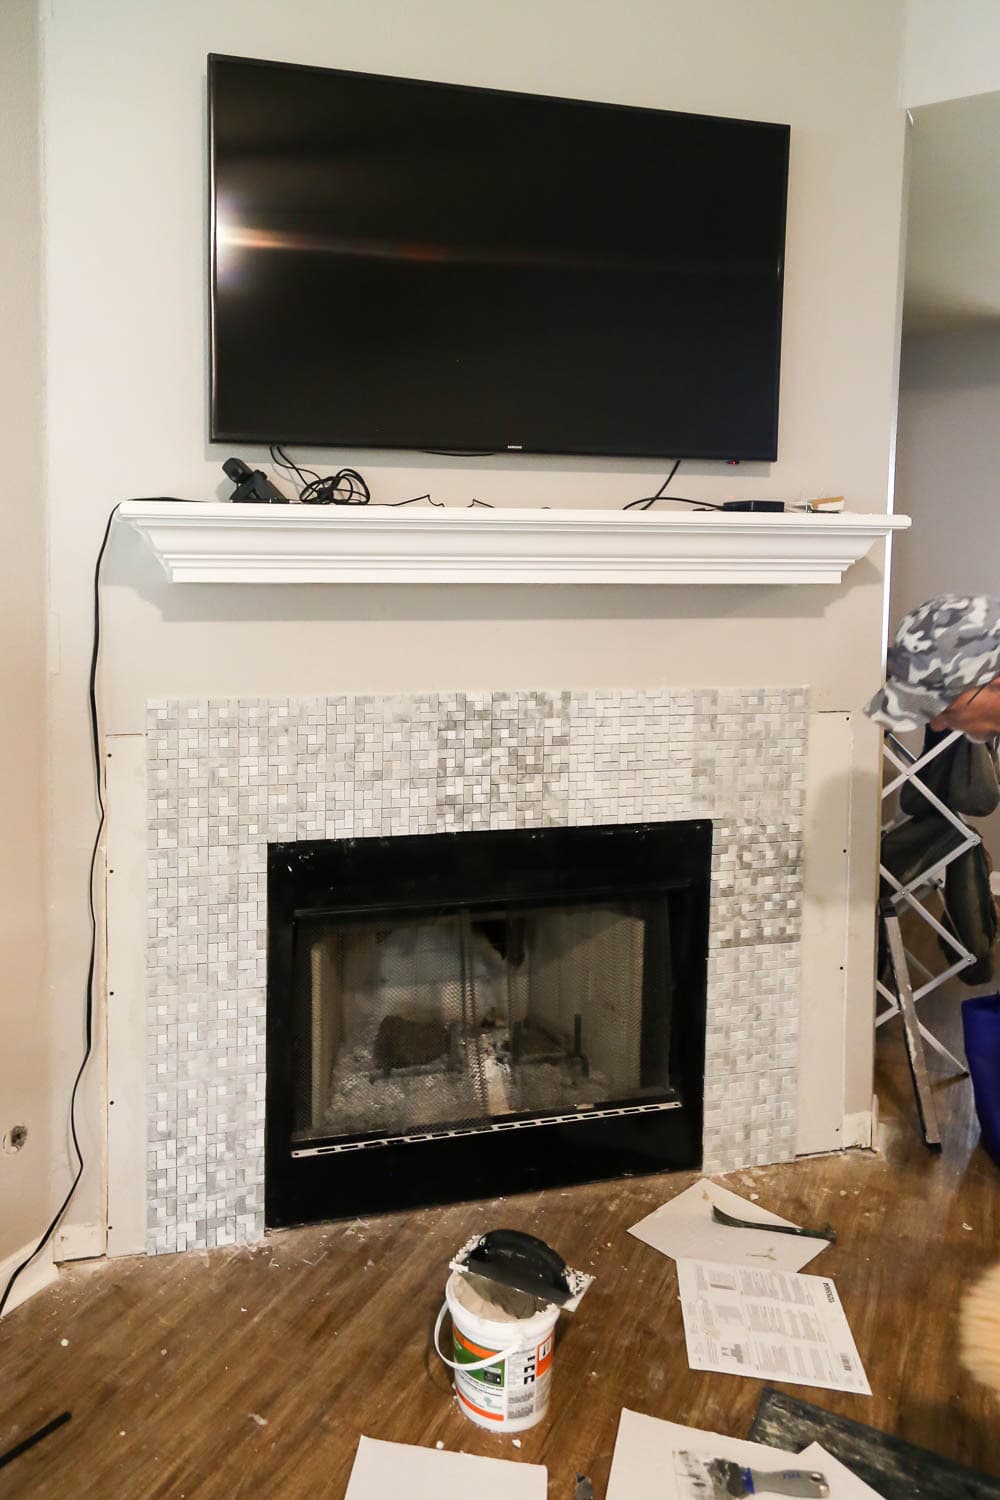
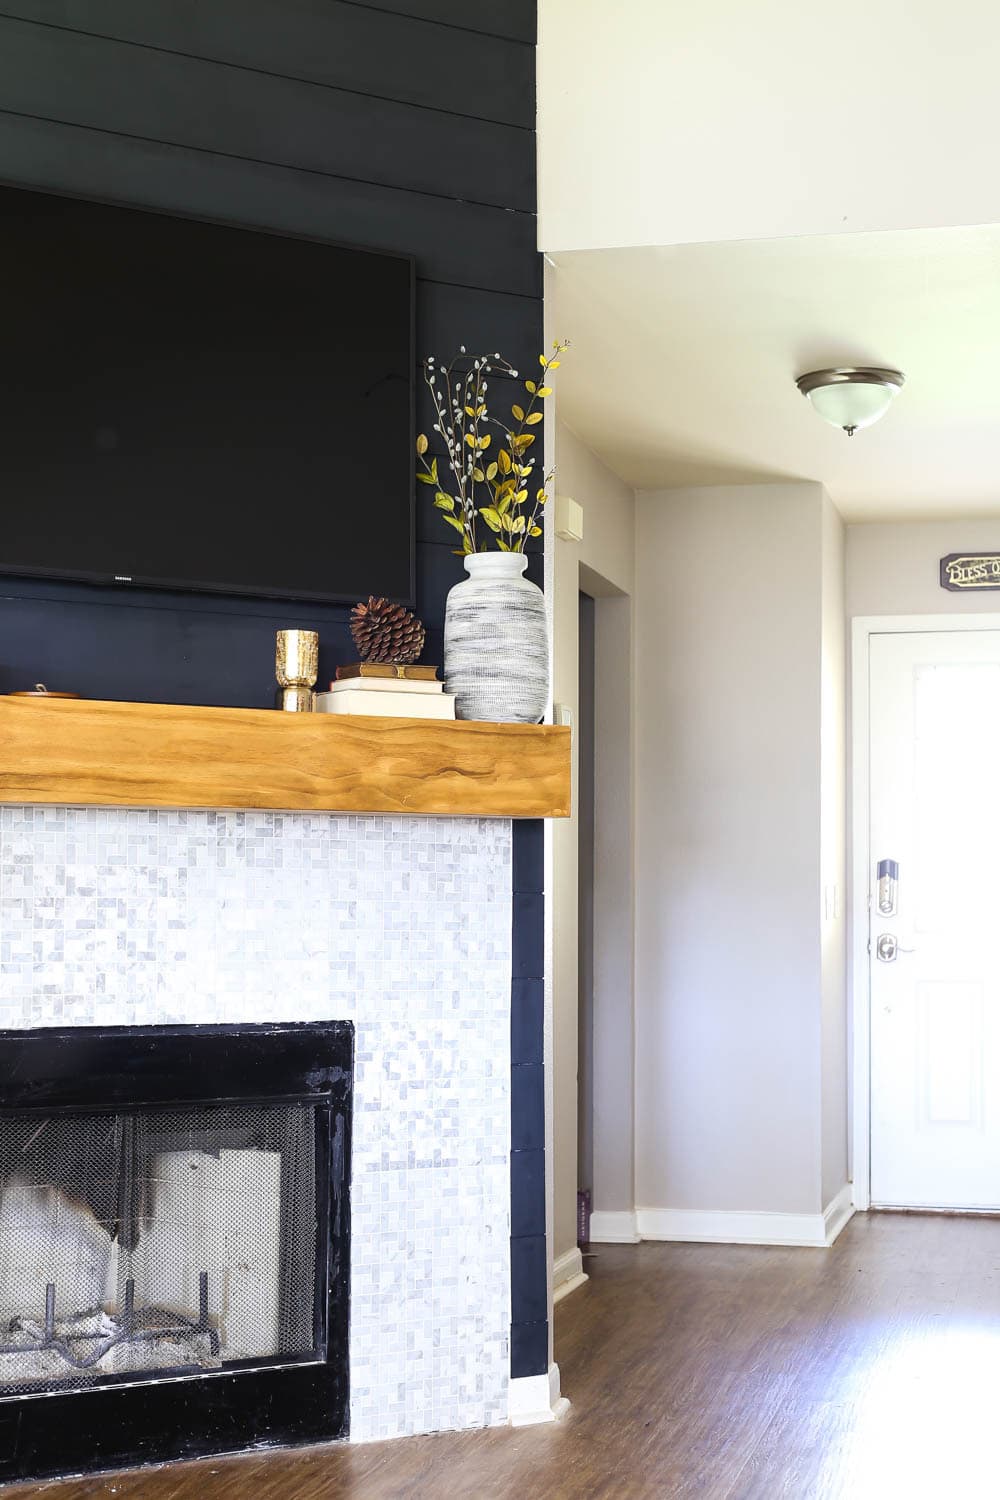
Step Two: Tile
Now comes the fun part – where things start to actually come together. We wanted to go with a mosaic tile on the fireplace surround this time. After some browsing we landed on this tile from Lowe’s. The main reason that we ended up choosing this one is that all of the straight lines make for a very simple install on something like a fireplace. With most mosaic tiles, you have some sort of uneven edge. So, you will have to cut each tile to achieve a straight line on the outside of your tiling area. With these, I could just slightly adjust where I was tiling in order to avoid making any cuts!
We adjusted the width of the fireplace surround to make it a little bit bigger than it was before. I love the look, and it feels really modern and updated.
Step Three: Install the Shiplap
Here’s what I’ll say about adding shiplap to a fireplace (or really, anywhere): yes, it’s much cheaper to go the DIY route and rip down plywood boards to create faux shiplap. However, it’s next to impossible to achieve a look this finished and polished with the DIY method. You have to use some sort of spacers to create gaps. And with most DIY methods, the gaps between the boards reveal the wall underneath. So, you’ll have to paint it the same color as your shiplap before you install it.
If you know me at all, you know that I usually like to take the most affordable route possible. However, when it comes to installing shiplap, I’m 100% an advocate of splurging on the real deal. It’ll make your life a zillion times easier, and it’s pretty much guaranteed to look significantly better.
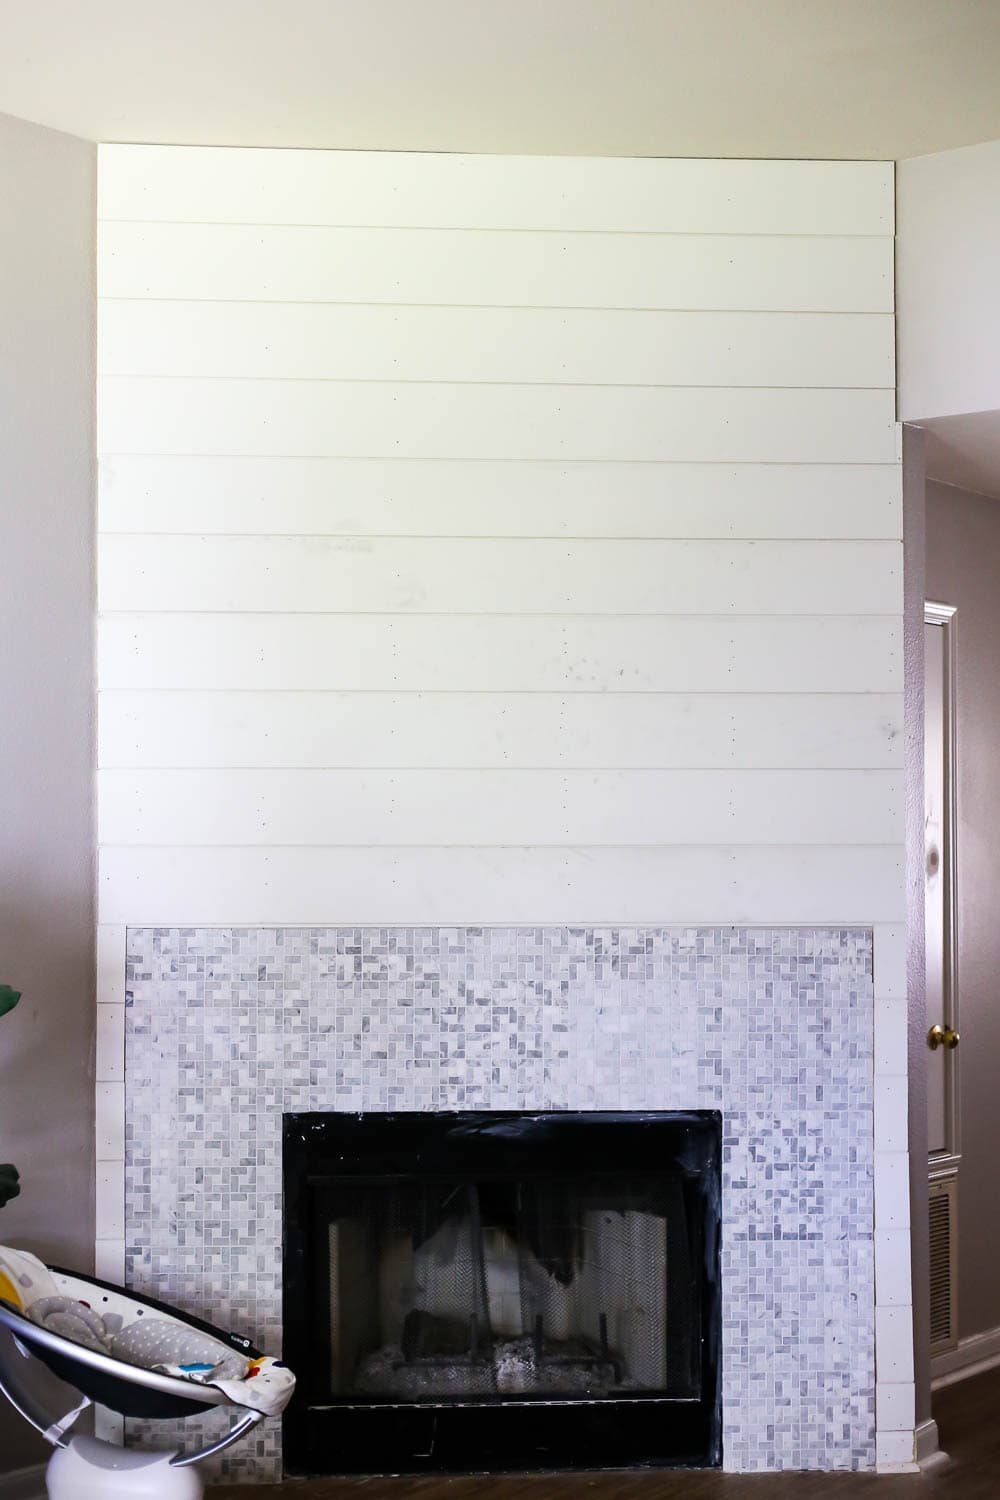
Installing shiplap is so simple. You can find more details about the process on the post linked above, but basically you’ll start with the first board up at the ceiling. Use a stud finder to help you ensure you’re nailing into the studs, and use a long level to help make sure it’s straight. Grab the next board and repeat the process.
If you come across an outlet, use a jigsaw to cut a hole in the board where the outlet is. It takes some practice, but it’s a generally simple process!
Step Four: Wood Fill + Paint
After installing the shiplap, you’ll want to cover up any nail holes. Use wood filler to patch holes, then sand it down before painting.
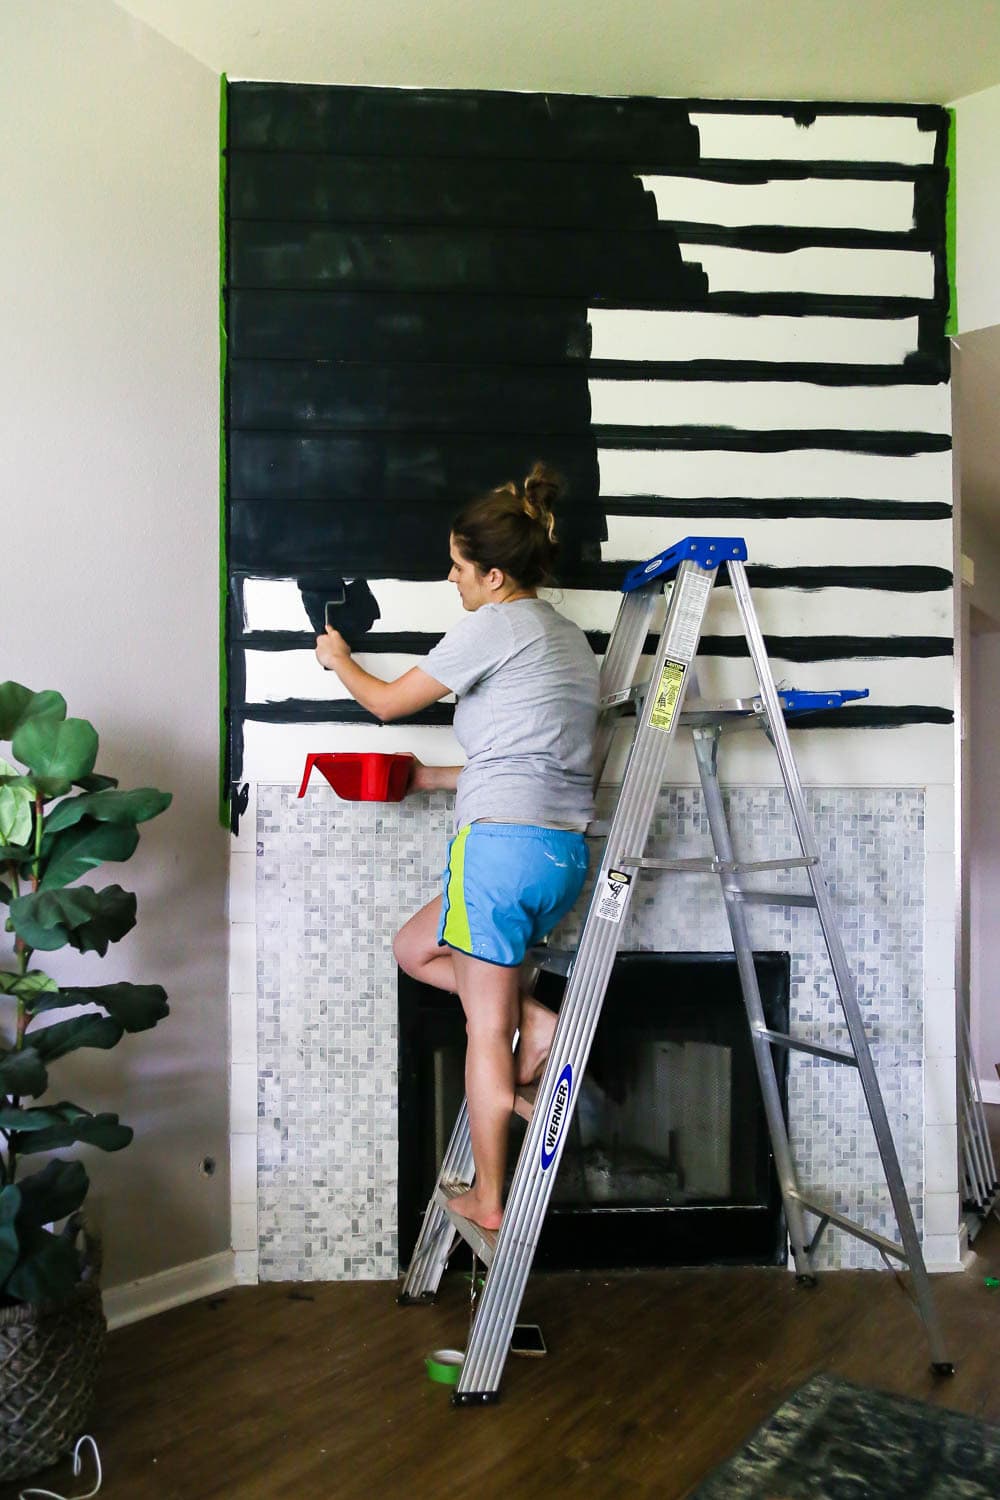
We went with black for our shiplap. It was partially because we wanted to make a statement (it’s gorgeous!), but also because it really helps the TV to blend in. It was probably my favorite design choice of the whole project and I’d choose it again and again. The exact black we chose isn’t available any longer (it was from the Magnolia paint line that was briefly at Target), but if I was doing this today, I’d probably go with Limousine Leather by Behr or Tricorn Black by Sherwin Williams!
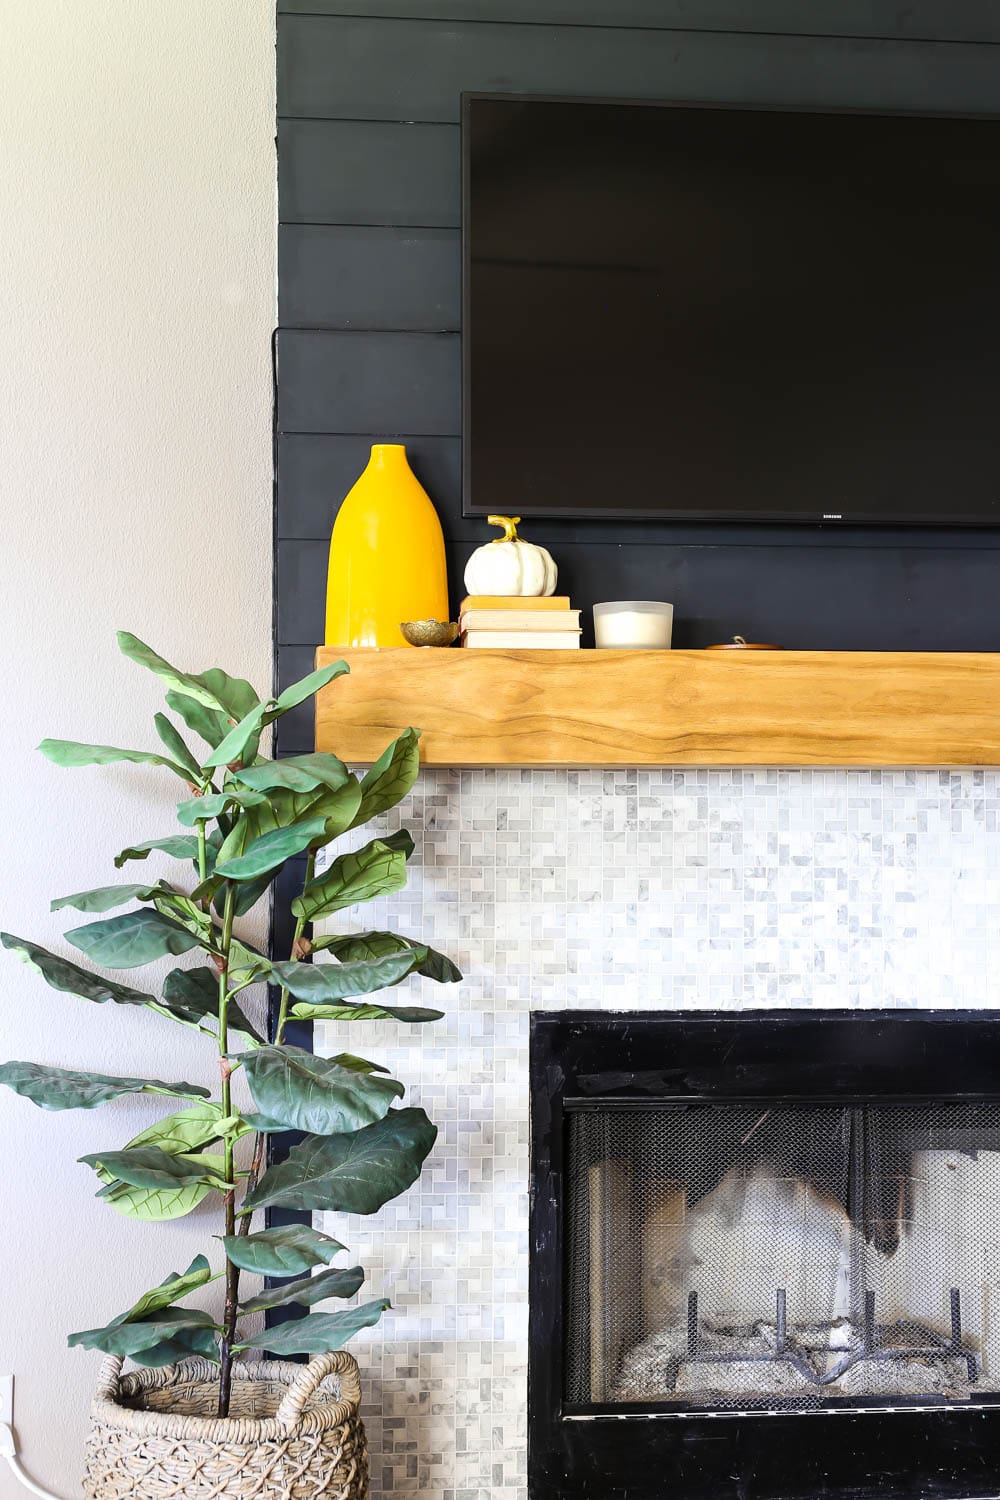
Step Five: Add a Mantel
Once the shiplap and tile were added to the fireplace, it was time to add the finishing touch – a DIY mantel. We’ve tackled creating a mantel once before, and we wanted to go a different (easier) route this time around. You can see the full tutorial for how to build a DIY mantel right here.
I stained the mantel using Minwax’s Golden Oak, and sealed it with Varathane’s Triple Thick Polyurethane.
Once the stain and sealer were dried, I finally (FINALLY) had a beautiful mantel to decorate. I filled it up with a few fall pieces, and did a little happy dance to celebrate the fact that this fireplace was transformed before we had even been in this house for an entire year and I actually get to enjoy it this winter.
I’m so so happy with how our shiplap fireplace turned out, and I can’t wait to use it all winter long. We’ve already lit it a couple of times and did a few happy dances to celebrate!
And I can guarantee you there will be a few more happy dances when I get to decorate it for Christmas in a few weeks, too.
Doesn’t take much to please me, my friends.

I love your ottoman! Where did you get it?
Hi! You can get more info on the ottoman here: https://www.loveandrenovations.com/affordable-leather-ottomans/
Painting the inside of a working fireplace is risky. The fumes during burnoff will be dreadful. Look at high heat paint and read whether it can be used inside the fireplace. Once you have a fire you can’t see the inside anyway😊
We’ll absolutely be using a high heat paint intended for the interior of a fireplace once we do tackle it. 🙂
It looks so beautiful! I’m in love. I have a 1986 fireplace that looks pretty similar to your before, so this is very inspirational to me! I would love to know what paint you end up using on the inside, because I’d like to paint the inside of ours as well at some point.
Thanks so much, Holley! I’ll definitely write about it once I get it done.