
DIY Wooden Puzzles for Kids
These simple wooden puzzles are so fun to make, and the kids love them! Read on to learn how I made them.
This post is sponsored by Inventables.
One of the hardest parts of being stuck at home right now is coming up with creative ways to keep the kids busy and entertained without spending a zillion dollars on Amazon. So, when I got the bug to get out and do a project on my Inventables X-Carve, I figured I could kill two birds with one stone – scratch my creative itch and create a cute new toy for the boys to keep them happy for a while!
I love making DIY toys for the boys because they’re always so excited to know I’m working on a project for them, and it’s a great affordable way to get some new activities in the house. Plus, wooden toys are always better than anything with batteries, lights, or sound, so it’s really a win all around.
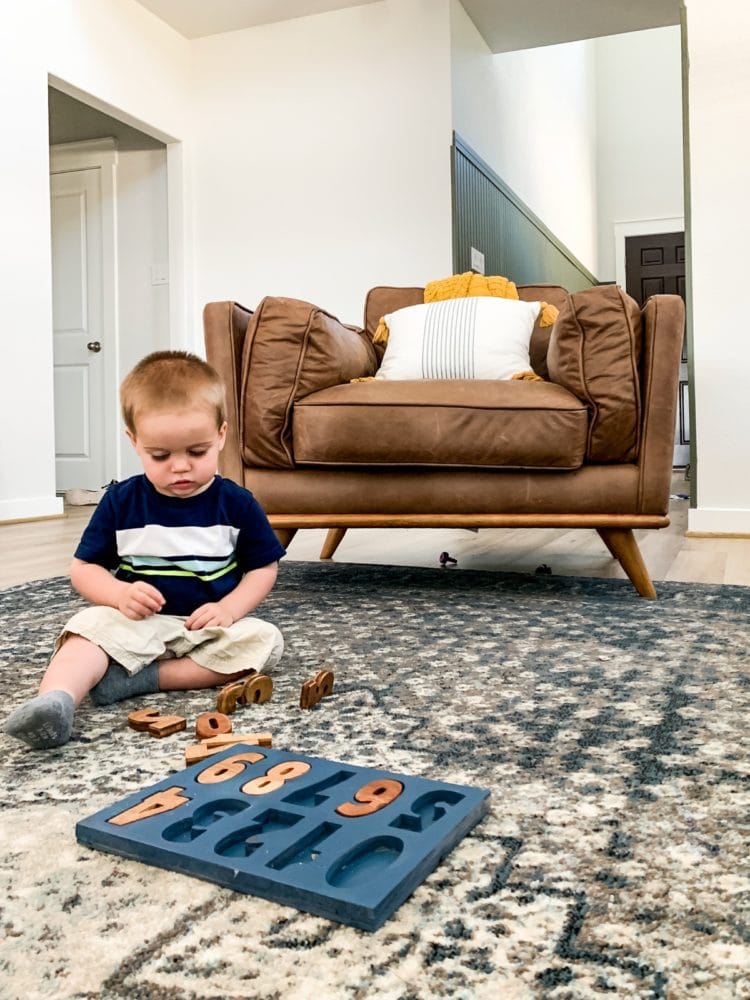
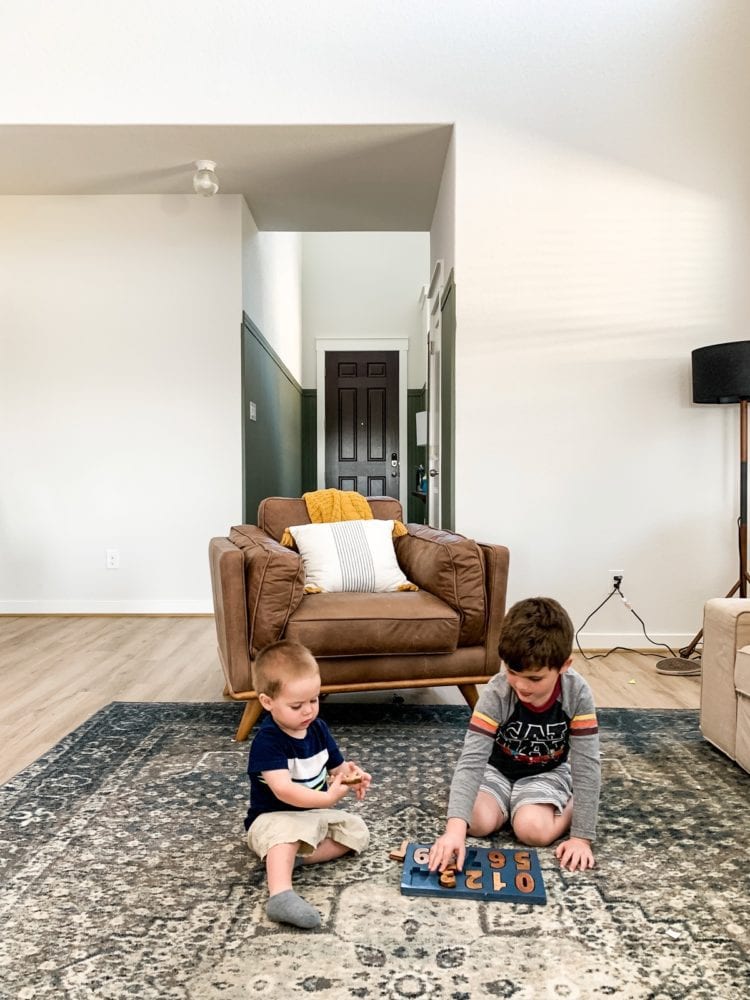
Grant is finally reaching the age where he is getting into wooden puzzles, and Jackson loves to work on slightly more complicated puzzles, so I decided to make a few different puzzles that will hopefully entertain both of them for a while!
I know a lot of you are in the same boat as me (kids at home, quickly running out of ideas for keeping them busy), so I wanted to share this fun idea today to hopefully inspire you to create something for your kids too – even if you don’t do exactly the same thing! And, if you don’t have an X-Carve, keep reading because there is a way to make this without one!
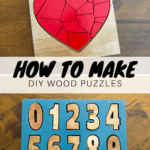
How to Make DIY Wooden Puzzles
tools & Materials
- Inventables X-Carve 3D Carver
- 1/16″ Upcut Bit
- Puzzles SVG file
- Number Puzzle SVG file
- Wood (you can honestly use whatever you have laying around – I highly recommend scrap wood for this project! But, I used some 1/2″ maple plywood)
- 1/4″ plywood (for backing)
- Orbital sander
- Wood glue
- Stain and/or paint
A NOTE: I used my Inventables X-Carve to cut out my puzzle pieces. If you want to make this project but don’t have an X-Carve, you could use a jigsaw or a scroll saw to accomplish the same thing (though, the jigsaw would likely require you to simplify the shapes a bit).
Carve the pieces
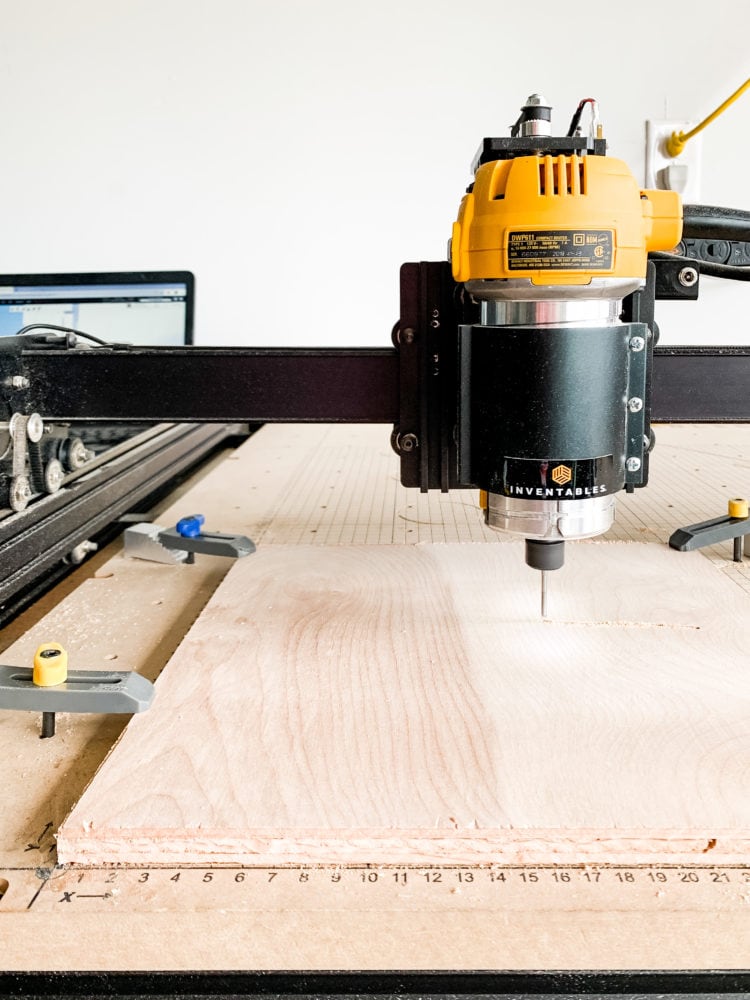
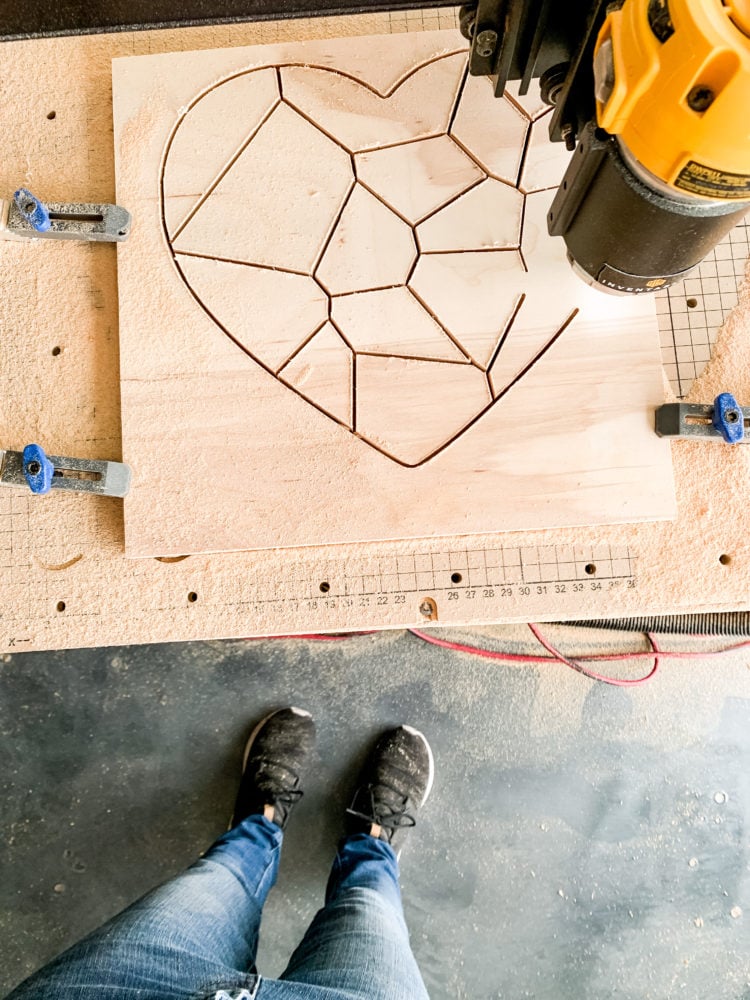
My absolute favorite thing about working with the X-Carve is how simple it makes things. Once you’ve planned out your settings and tweaked the design to your liking you just hit “carve” and it does the rest for you!
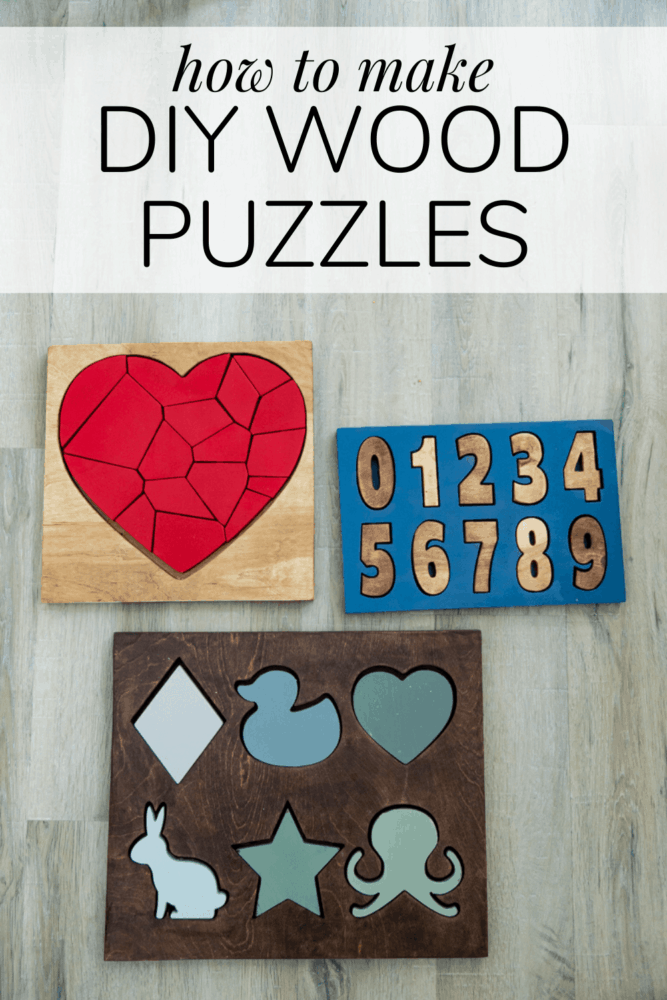
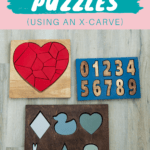
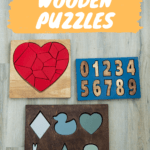
I made three different puzzles – they’re all different sizes just based on what I had laying around. You can easily adjust the size on the carve file to fit your needs, so don’t stress about making yours exactly the same size as mine.
After you’ve carved the pieces to one of your puzzles, you’ll remove the pieces from the negative and sand everything – pay close attention to the edges!
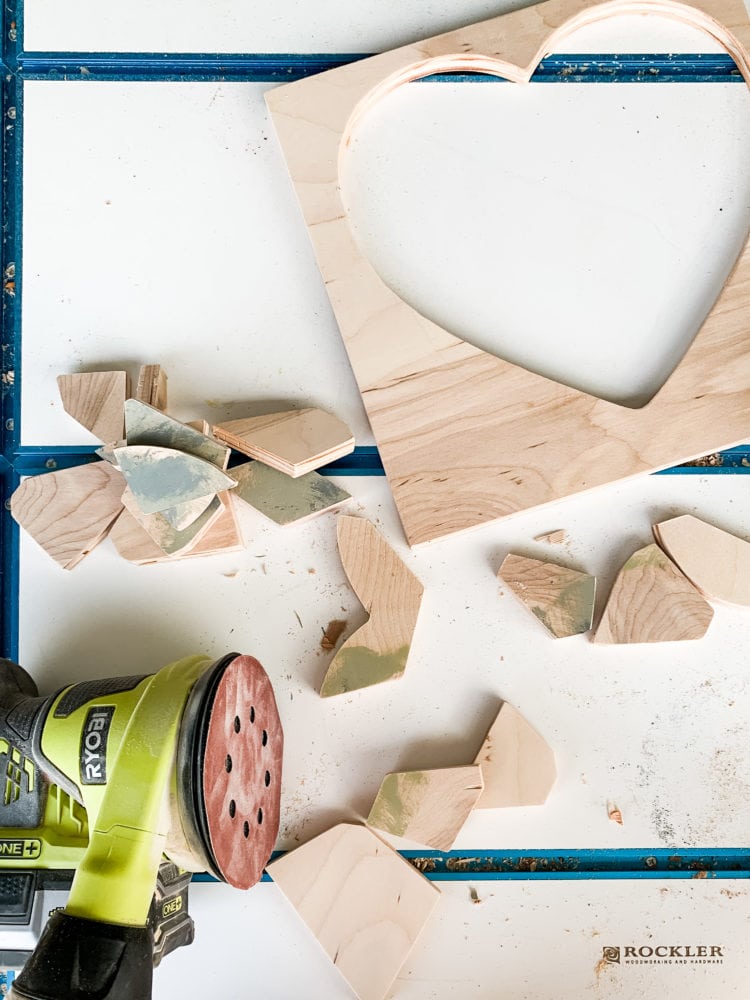
For this project, you’ll use both the negative from the carve and the pieces – the negative will become your board for the puzzle! After you’ve thoroughly sanded everything, cut a piece of your 1/4″ plywood to cover the back of the negative and use wood glue to attach it. Be sure to clamp it down (or just put something heavy on top!) while it dries!
Once the wood glue dried, I ran all of the edges through the table saw just to be sure it was all perfectly flush. This is an optional step, of course, but it definitely made the edges look more polished!
If necessary, give the entire base one more sanding before you add your finish (I needed to re-sand the edges after cutting them with the table saw).
Now you’re ready for the most fun part – the finish!
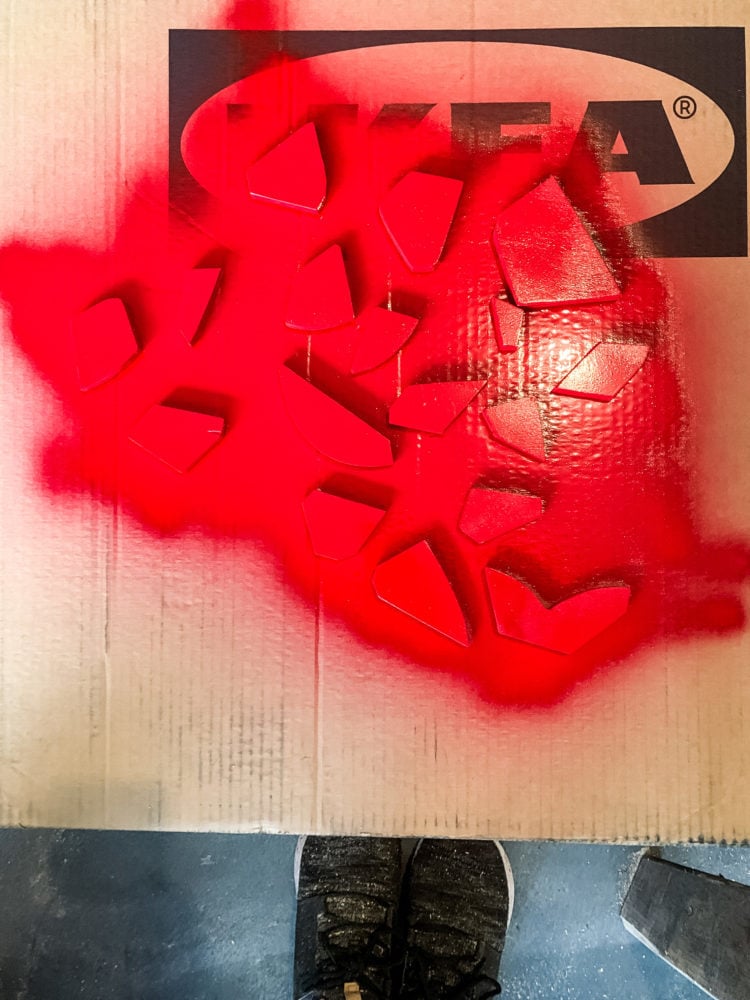
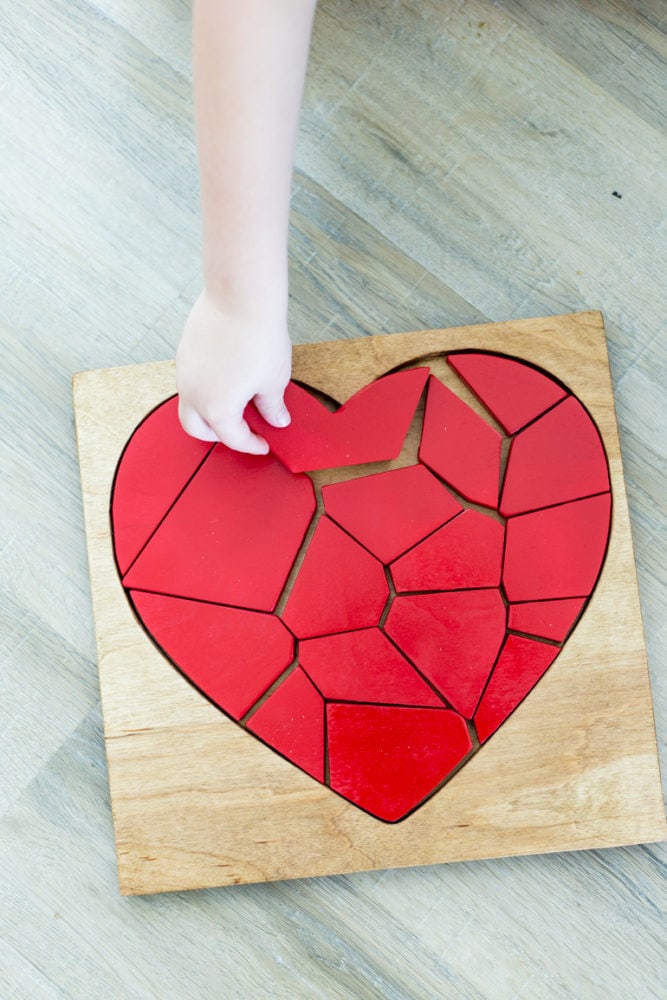
I did something different for each of my puzzles – for the shape puzzle I used some paint samples left over from our entry beadboard project to paint the pieces, then I stained the base. For the heart puzzle I stained the base and spray painted the pieces bright red. For the number puzzle, I used 5 different stains on the numbers for a varied look, then spray painted the base white.
Bottom line? The world is your oyster and you can finish them off however you want!
For all of the puzzles, I sealed them with Watco Spray Lacquer to help the finish stay looking great for years – goodness knows the kids will use the heck out of these, so I want to make sure they stay in good shape for the long haul!
And, that’s all there is to it!
If you want to attempt this project without an X-Carve, simply use a jigsaw or scroll saw to cut out your pieces and the rest is the same.
If you want a more visual explanation, I shared the whole process in Instagram stories while I was working – watch it below!
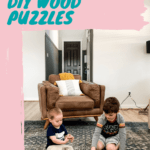
The boys are loving their puzzles and I’m thrilled to have one more X-Carve project under my belt!
If you want to see more of the awesome things this tool can do, here are a few other projects we’ve done with our X-Carve:
- DIY Wooden Baby Teethers
- DIY Bread Boards
- DIY Carved Wood Pumpkins
- Wood Christmas Tree for Kids
- Carved Wood Sign
And, if you want to learn a little more about the X-Carve, click right here to go to Inventables’ website for more information!

this is so awesome, thanks for sharing. Did you just put a thin piece of wood behind the block the shapes were cutout from, or what makes up that back part?
Hi! Yes, it’s a thin piece of wood behind the cut out area!
I love this idea, gonna make my baby a name puzzle but how would I go about sealing the paint in a safe way because he’s only one so he’ll more than likely chew on the letters?