
How to Install a Garage Pegboard
One of my favorite ways to organize tools is with a huge garage pegboard. See how I installed mine here!
When we moved out of our last house, I was really worried about storage in my garage. At the last house, I had a ton of built-in storage and it wasn’t coming with me. We moved here with two tool chests with drawers and nothing else. I was pretty nervous about needing to spend a ton of money to get everything organized and put away.
But, once we got here I realized I could solve pretty much all of my problems with a garage pegboard! Let me show you how I did it…
Installing a Garage Pegboard
Video Tutorial
I put together a quick video showing the full process from start to finish. So, if you’re a visual learner, just hit play!
Tools + Materials Needed
- 4×8 Pegboard
- Circular Saw (only if you need to cut it down!)
- (2) 1×2 furring strips
- Drill/Driver, Bit Set, + Screws
- Stud Finder
- Level
- Paint (optional)
- Pegboard hooks
Total Cost:
All I needed to purchase for this project was the pegboard, the furring strips, and the hooks. I had everything else on hand already. So, my total for this project was a whopping $52. Kind of wild considering the alternative was spending hundreds of dollars on some cabinetry and more drawers!
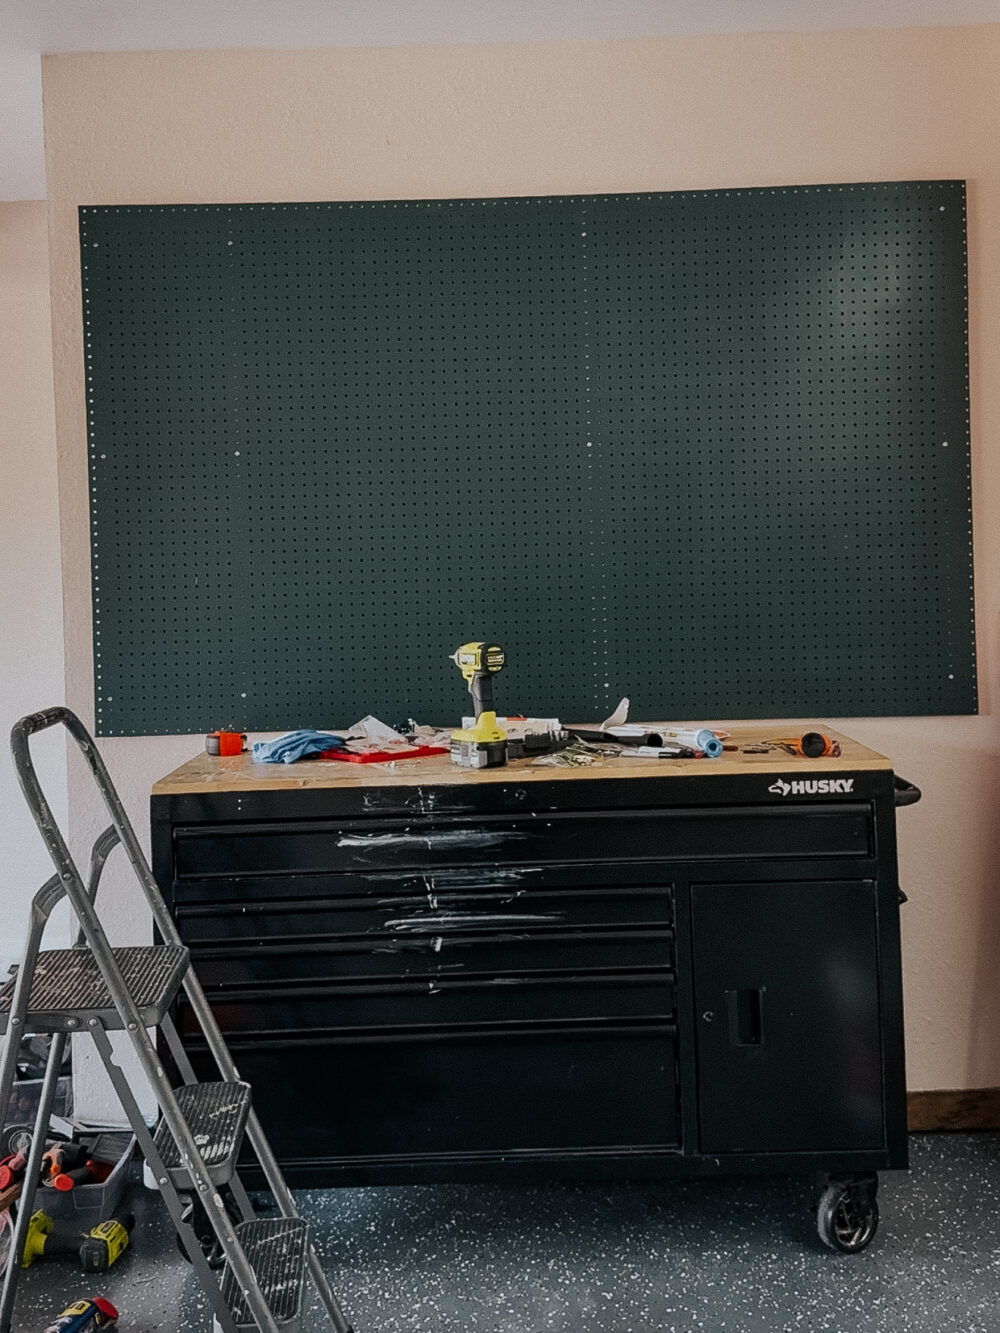
Step One: Cut + Paint the Pegboard
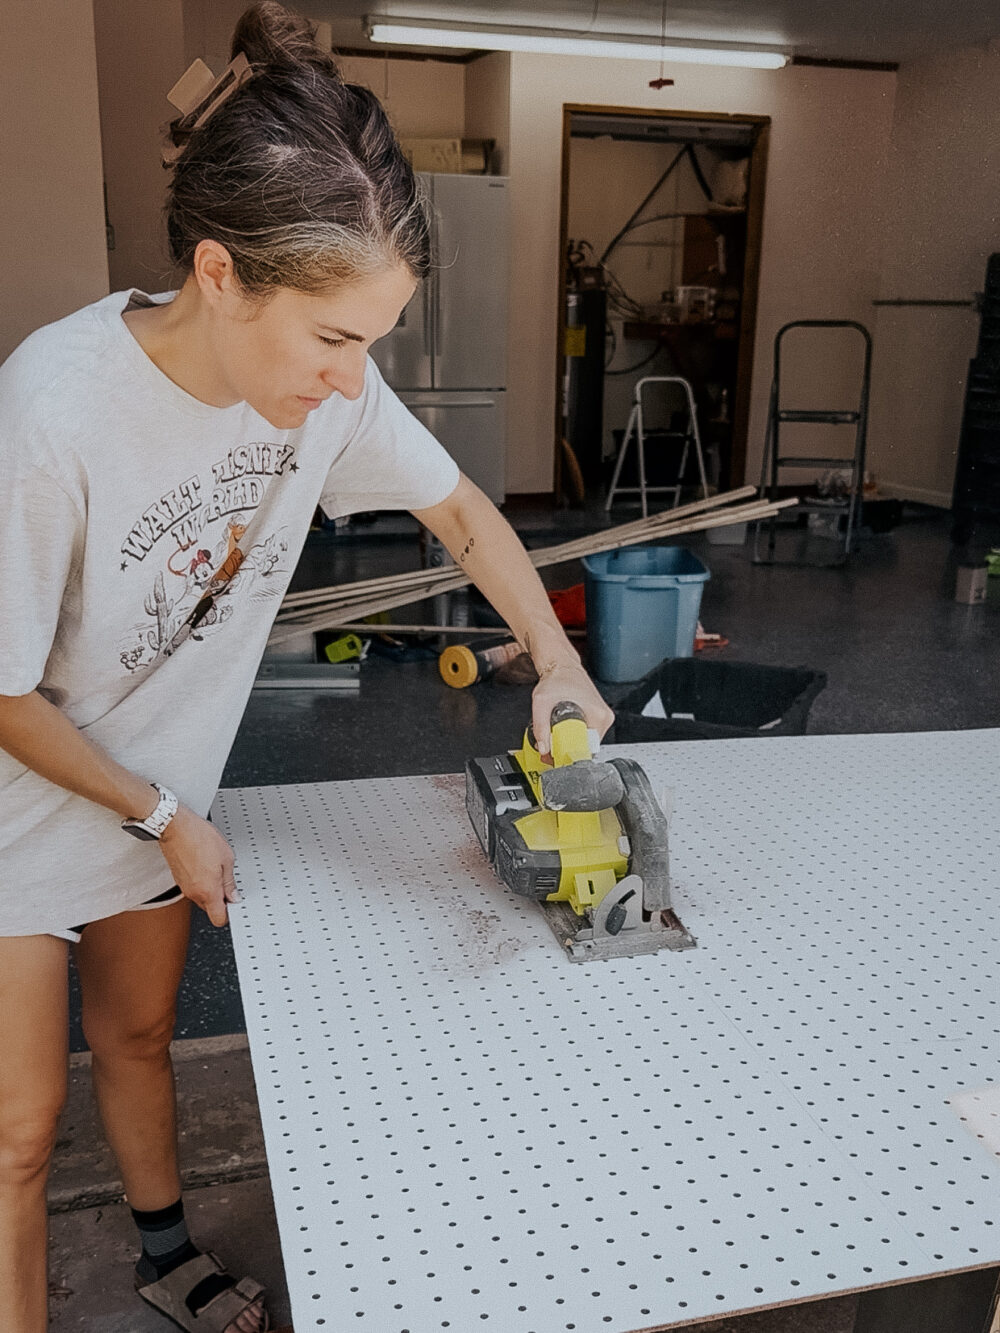
Let’s talk installation. This is so incredibly simple, I promise your mind will be blown. Your first step is to figure out where you want the pegboard to be, and cut it down to fit. I wanted to keep it as big as I could so I could really pack the tools on. I only needed to cut about 18″ off of mine, and I saved the piece I cut to possible add a small pegboard somewhere else!
Unless you have a table saw, I recommend using a circular saw to cut it down. Just draw a straight line on the board where you need to cut and do your best to follow it. Learn how to use a circular saw here, if you don’t know how!
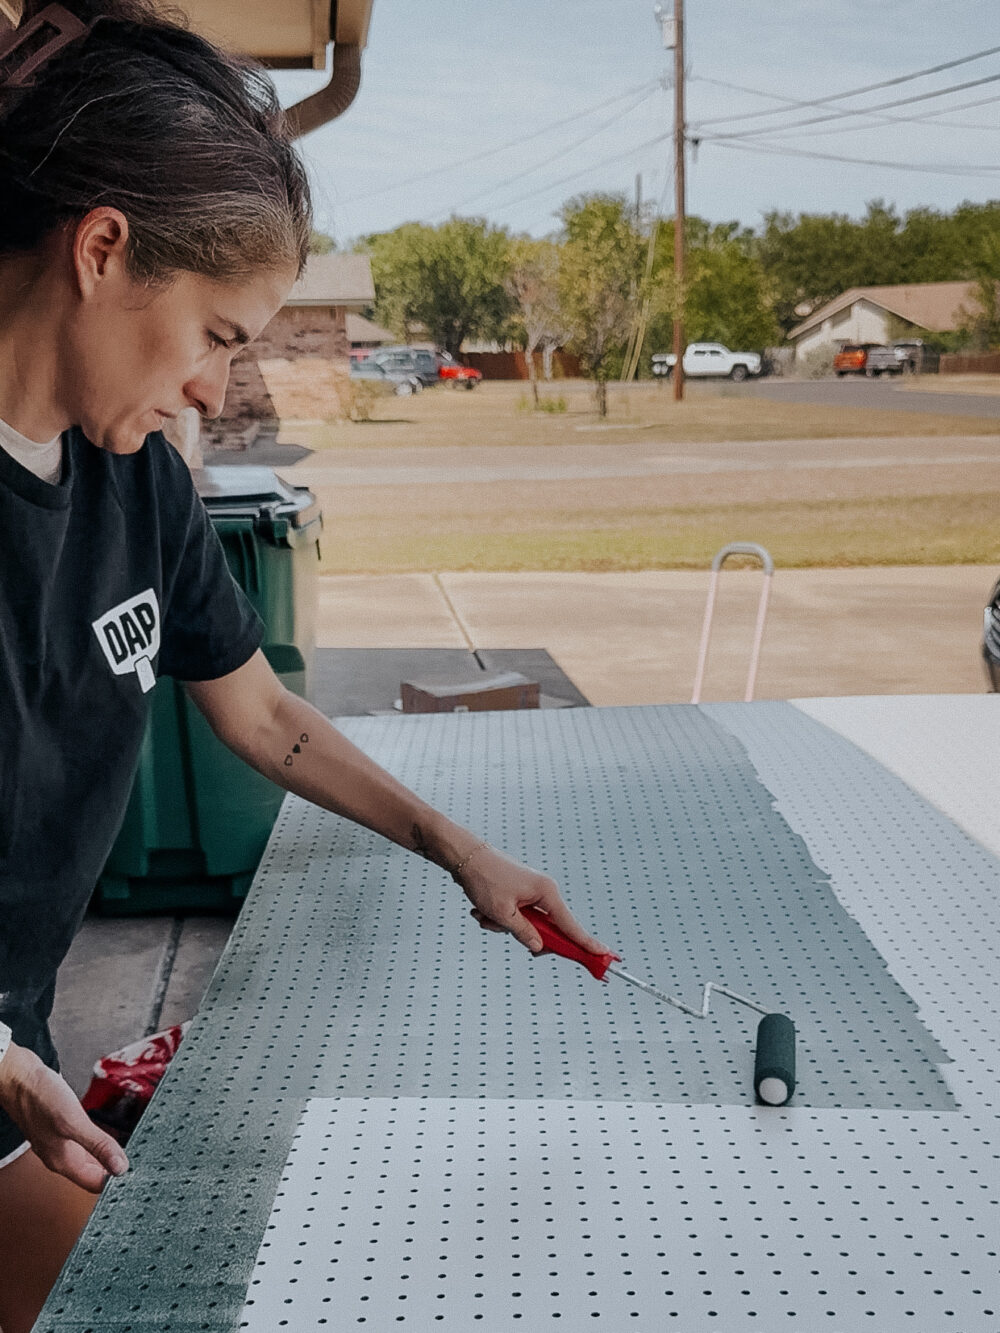
Once you’ve cut it down, you can paint it if you want! It’s obviously not necessary (and can get scratched up with all the taking tools on and off), but it’s fun to customize it a bit! I painted mine with some leftover Black Evergreen by Behr from an old project.
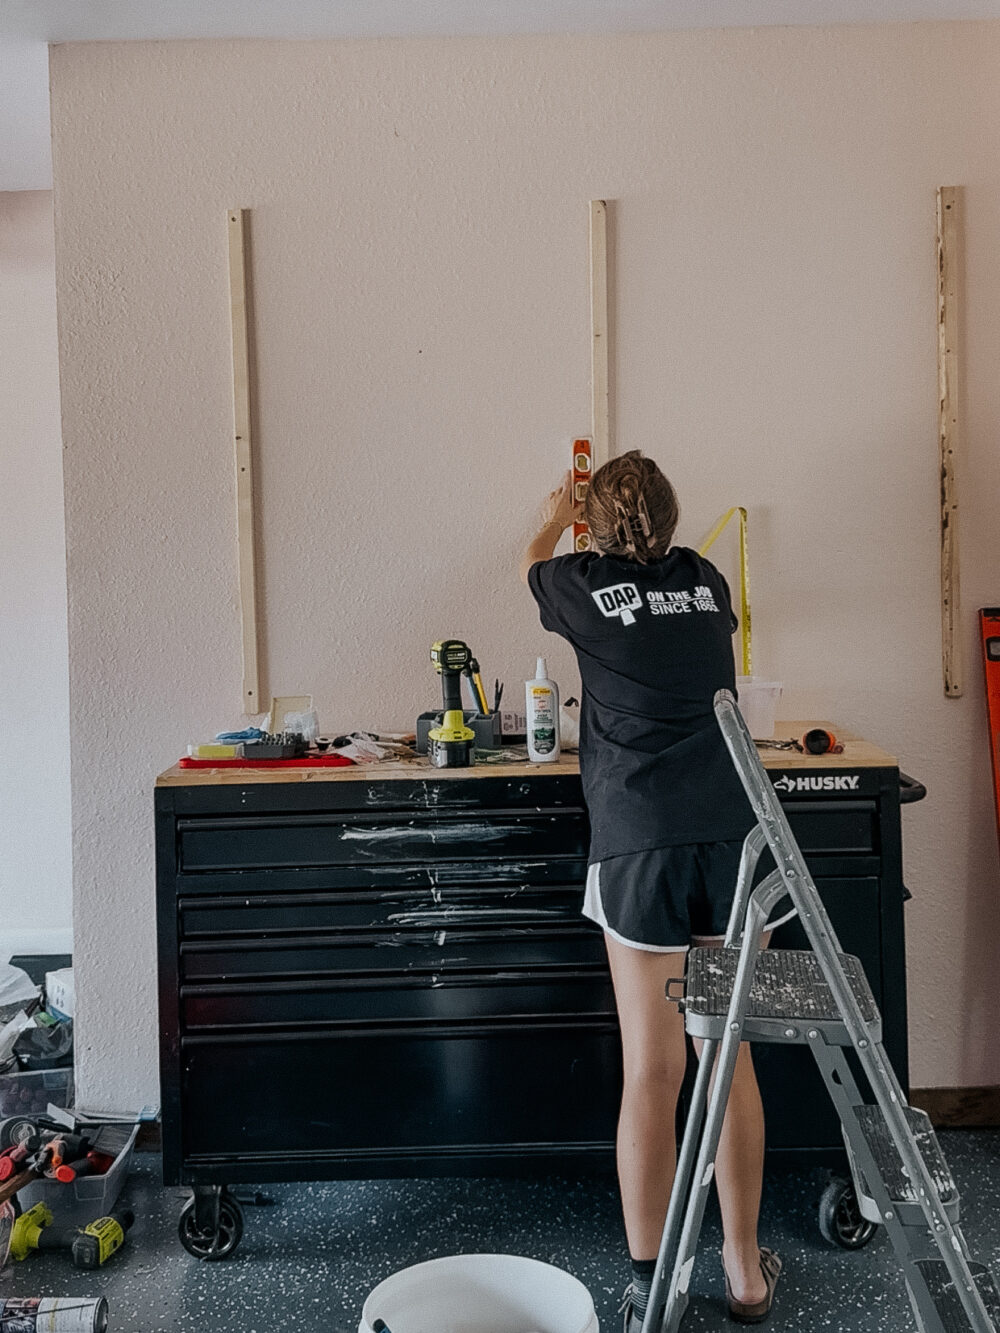
Step Two: Hang Furring Strips
Next, it’s time to add the supports for your pegboard. Cut your furring strips down to be a couple of inches shorter than the vertical length of your pegboard. You’ll need more furring strips the longer your pegboard is – I used three.
You’ll want to screw these directly into the studs on your wall. This is vital because there will be a lot of weight on your pegboard and the last thing you need is for it to come crashing down! You could use anchors instead, but it should be easy enough to get them all into studs!
Just pre-drill a few holes down the length of your furring strip, find a stud in the wall, and hang it up at the height you want your pegboard.
One of my studs was inset pretty far from the edge of my pegboard, so I added a fourth strip right where the edge of my pegboard is. This one isn’t there to support any weight, it’s just to keep the edge of my pegboard from flopping around.
Step Three: Attach Pegboard to Supports
You’re almost done already! Once you’ve got the supports in place and firmly attached to studs, you just need to attach the pegboard to your supports.
Hold it in place (it can help to have a second set of hands here), and use some wood screws to attach the pegboard to the furring strips using the holes that are already in it. I used 3 screws in each furring strip and it feels really solid!
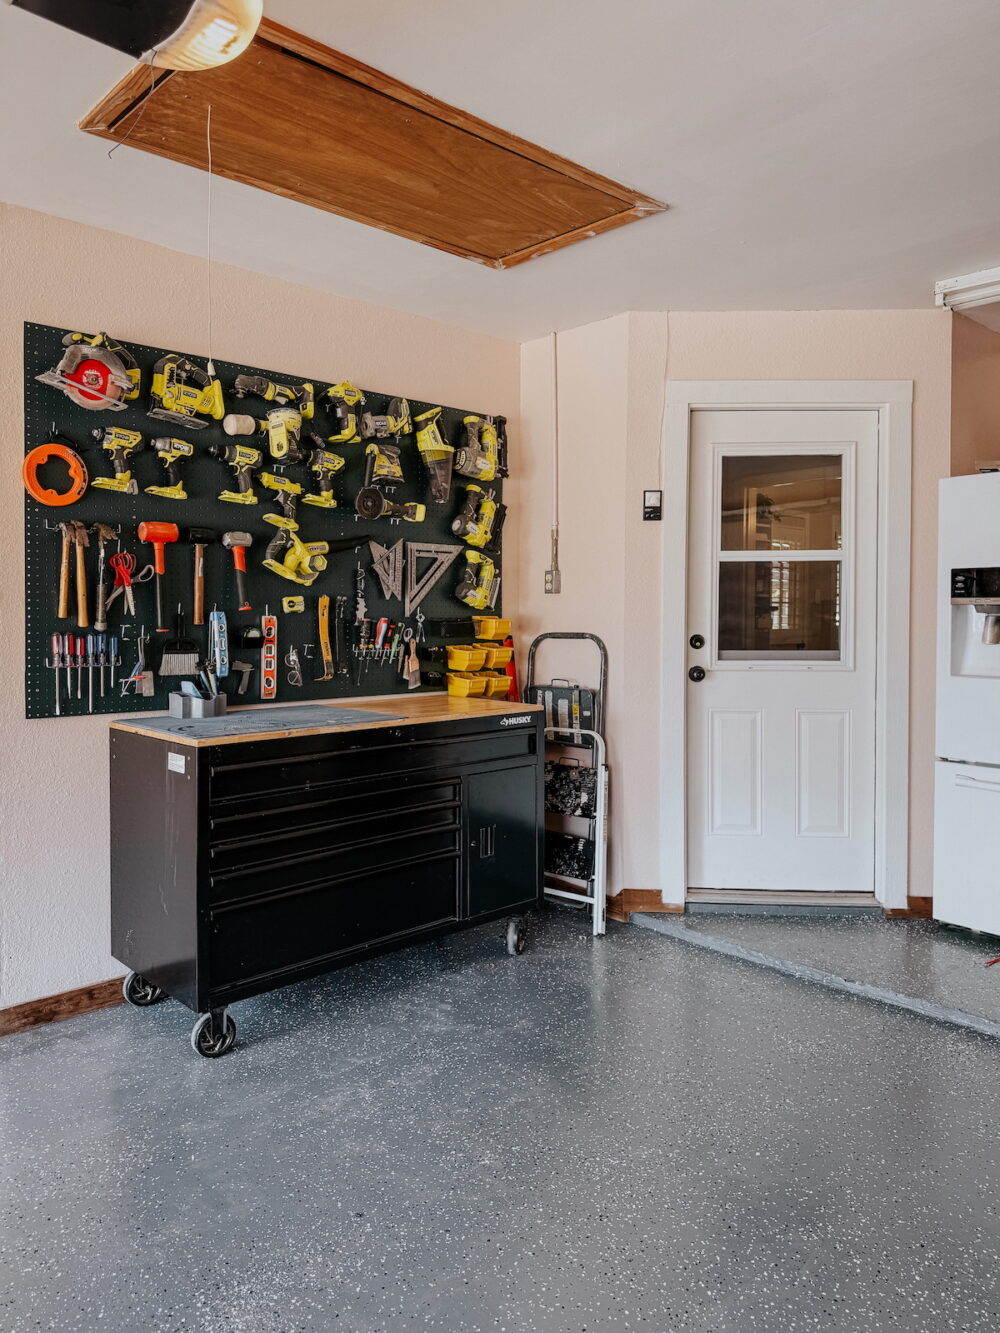
And then…voila! You’ve got yourself a pegboard.
You can add a frame to it if you want to spruce it up (I did that here!), but it’s not at all necessary. I think it looks great as is.
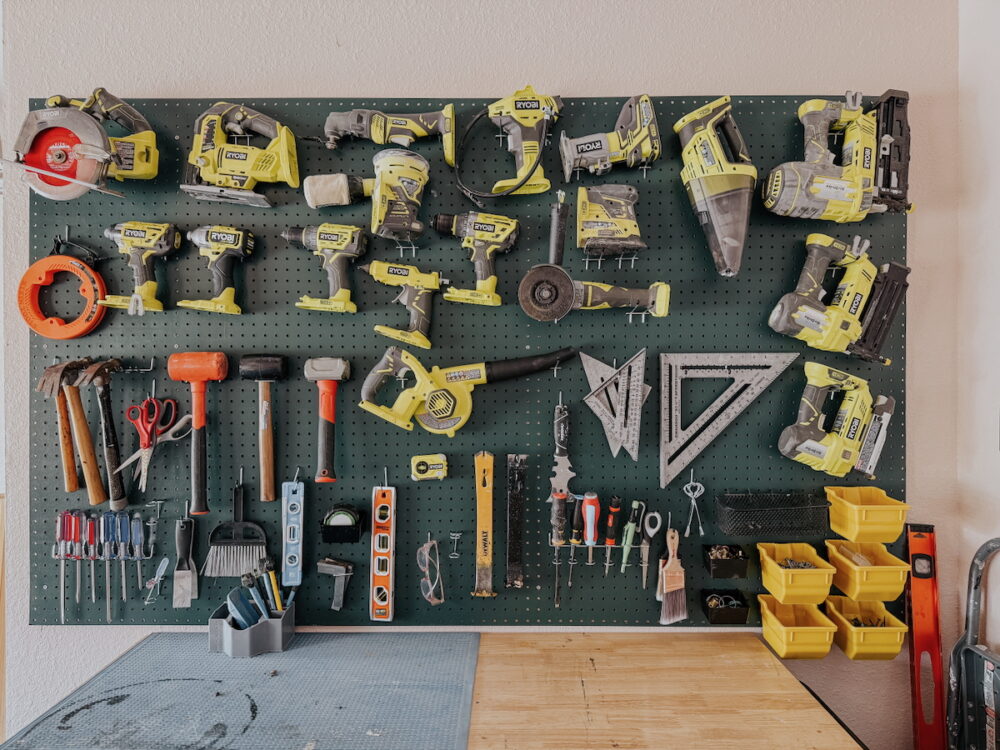
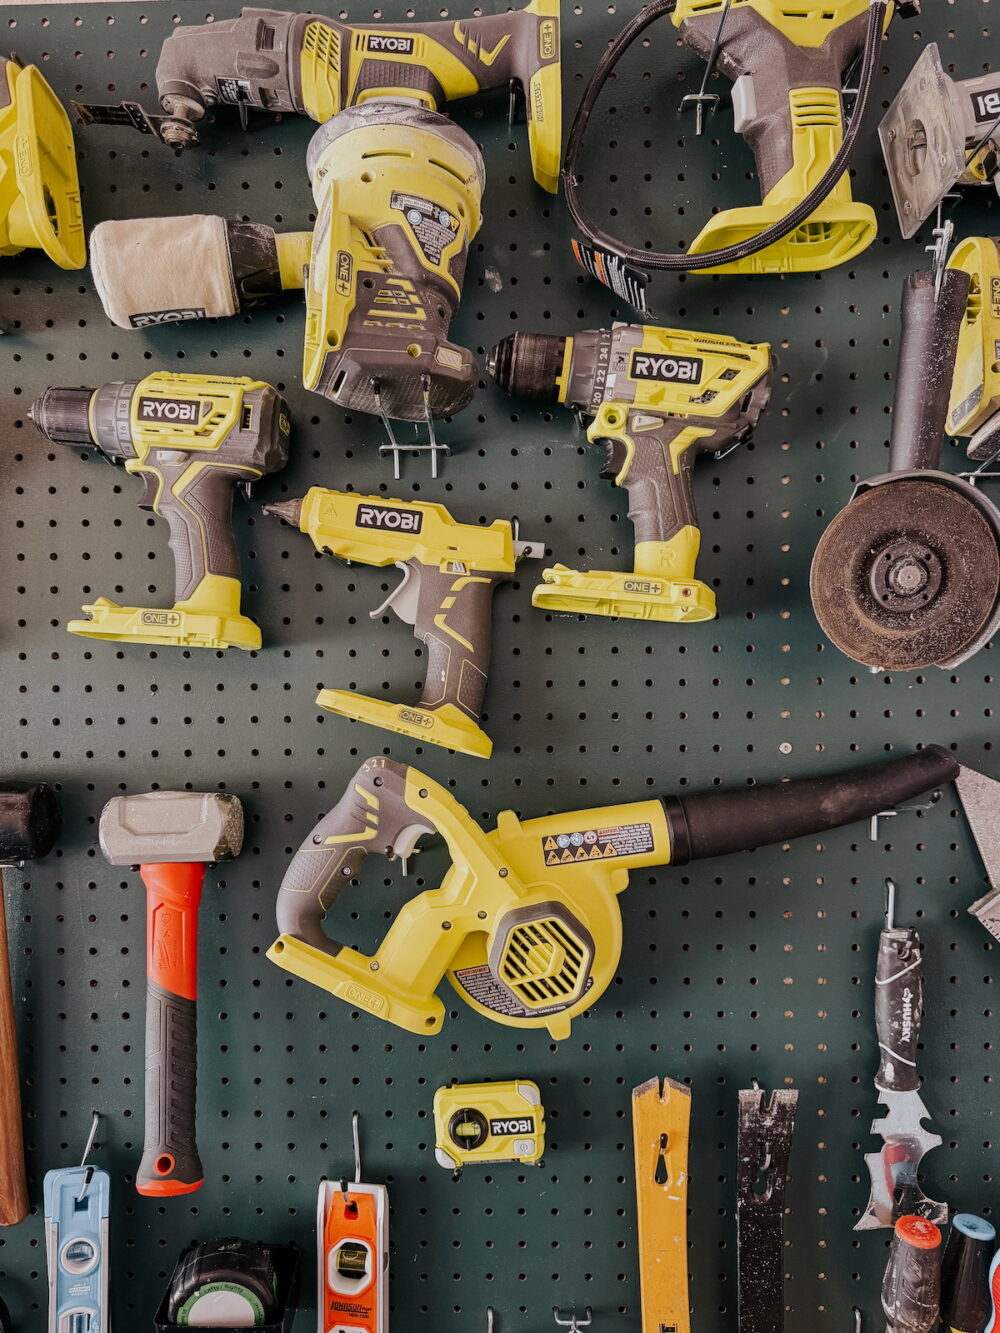
Step Four: Hang ALL THE STUFF!
With the pegboard on the walls, it’s time for the fun part. Grab your pegboard hooks and go to town! This is a very imperfect process and you have to really play around with it to find your flow. I chose to hang my lesser-used tools up at the top and as I got lower I hung the ones I used more. There’s a lot of adjusting as you work and playing around with what types of hooks work best, but this part is really fun and so satisfying.
I ended up having more than enough room for everything that I needed to hang on my pegboard, and I was honestly pretty astonished at how much I could fit. The drawers in my work bench and my tall tool chest both still have plenty of room to hold things.
And that’s all there is to it! If you need some extra storage in your workshop, adding a garage pegboard is truly the most effective and affordable method. All you need is some wall space and about an hour to hang it up!