Simple DIY Tool Storage
This simple DIY tool storage setup is easy to build and holds tons of tools to help you keep your workshop organized and clean.
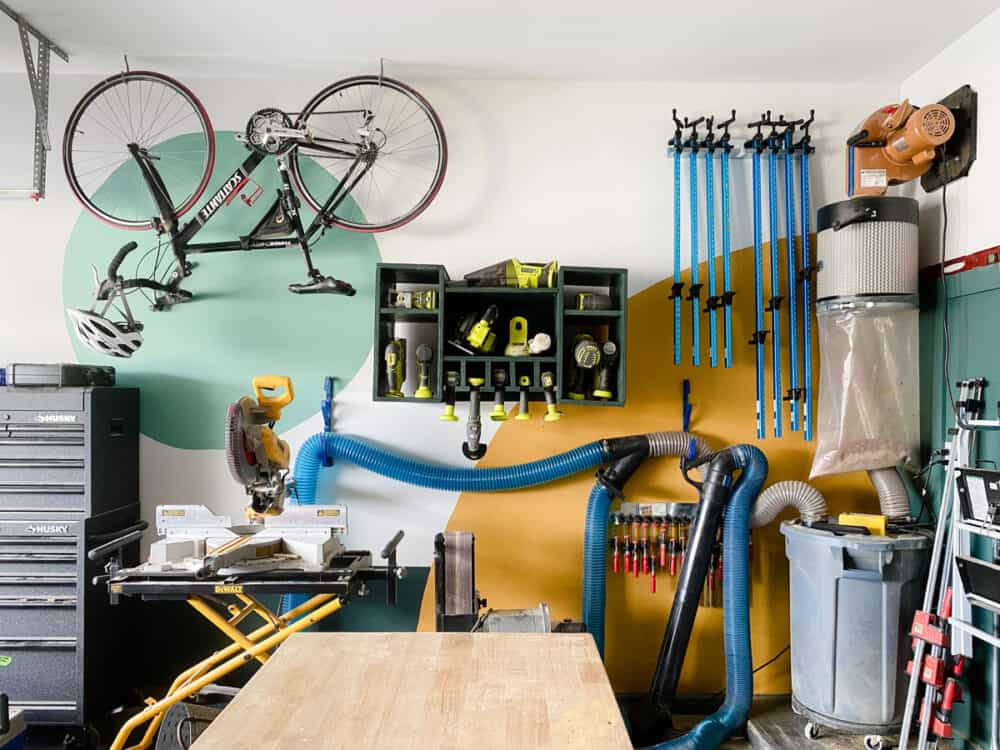
This post is sponsored by Kreg and Build Something.
We’re quickly approaching our one-year mark of living in this house! One of my biggest goals for this year was to get our garage as organized as I possibly could. We’ve always used our garages as a workshop space, but we’ve never really and truly taken the time to et them as organized and functional as they could be. And as a result, we’ve always been pretty frustrated by our workshop spaces!
I’ve been working on slowly organizing our workshop one section at a time. And, I’m also doing my best to make it look great in the process. I started with the back wall and added some board & batten to make it cute. Then, I painted a little mural when I organized another wall.
This time around, I needed some tool organization. We’ve been just throwing our tools into a cabinet in our workbench. It was not working. They were in complete disarray all the time and I often ended up leaving them out because it was such a pain to shove them all in the cabinet.
Enter the tool storage cabinet!
Creating a DIY Tool Storage Cabinet
I researched a ton of different DIY versions of this basic idea, and I pieced together a design that would accomplish exactly what I needed – to get all of my most-used tools in an easy-to-access and fully organized spot. Now, I can grab them easily and (more importantly) clean them up easily! Here’s how I made it happen.
Materials Needed
Step One: Cut Plywood
First up, you’ll cut your plywood according to the cut list below!
- 4 Box Pieces – 20.25” x 16”
- 4 Box Pieces – 10.5” x 16”
- 2 Box Shelves – 9 1/8 ” x 16″
- 2 Shelves – 18″ x 16″
- 4 Drill Supports – 4″ x 8″
- 4 Drill Supports – 2.25″ x 8″
- 2 Side Drill Supports – 3/4″ x 8″
- 1 Backing – 19″ x 21.5″
Step Two: Assemble Side Boxes
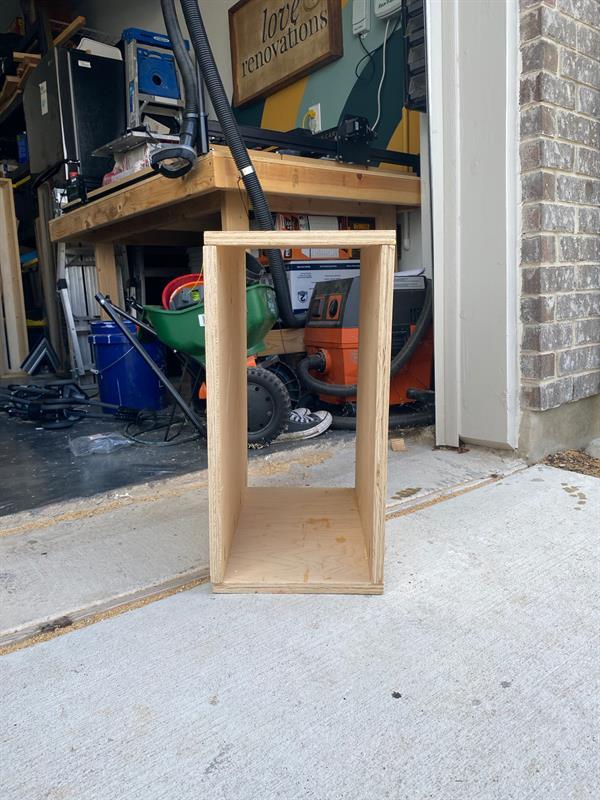
Grab the pieces labeled “Box Pieces” in the cut list above. Use two of each size to create a simple rectangle, as shown above. Use pocket holes and wood glue to assemble these!
I recommend using corner clamps to help you ensure the boxes are square as you assemble.
Step Three: Assemble Drill Hangers
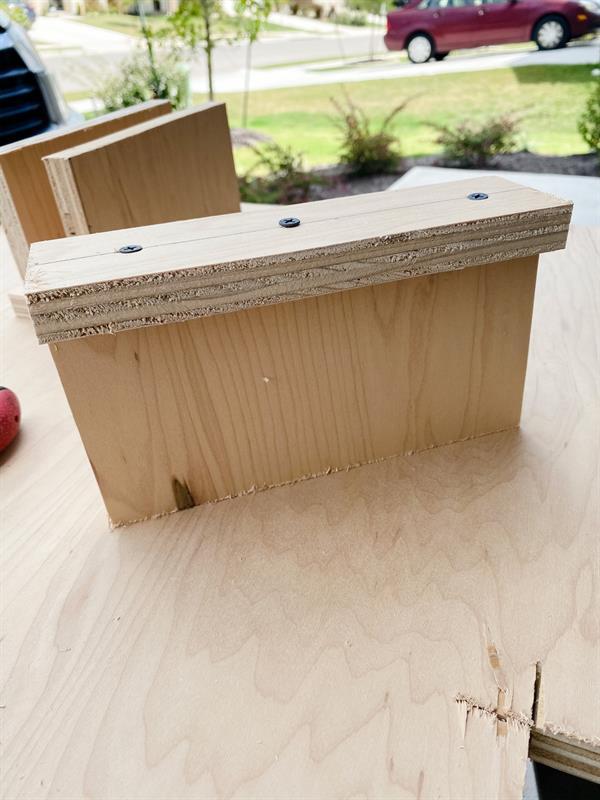
Now, you’re going to assemble the pieces that you’ll hang your drills from. Do this by using regular screws sand wood glue to drill one 2.25″ x 8″ piece into the bottom of a 4″ x 8″ piece. It’ll look like the image above! Be sure to pre-drill 2-3 holes in the smaller piece before drilling.
Step Four: Mark Spots on Shelf for Drill Hangers
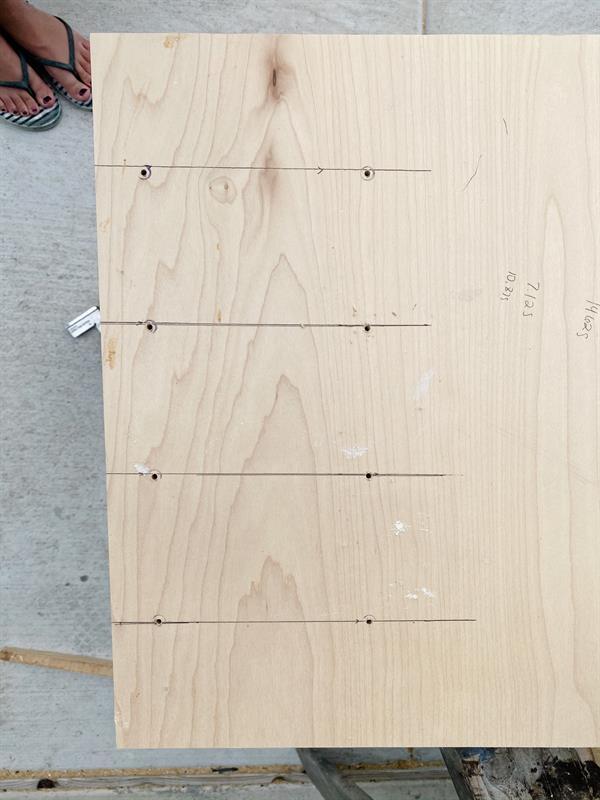
Grab one of the 18″x16″ shelves and mark lines where the drill hangers will go. Here’s a breakdown of where you need to mark:
- Measuring from the 16″ side, draw your first line at 3 3/8″ from the end
- Each line after that should be spaced 3.75″ apart
After marking the spots, pre-drill the holes for the drill hangers. You will not hang them until after attaching the shelf. Here’s what it should look like:
Step Five: Attach Top Shelf!
Now, it’s time for things to start coming together! Drill some pocket holes into the short sides of each of the 18″x16″ shelf pieces. Then, grab the top shelf (the one that doesn’t have the marks for the drill hangers). You’ll hang it about 3″ from the top of the boxes, and when it’s assembled it’ll look like this:
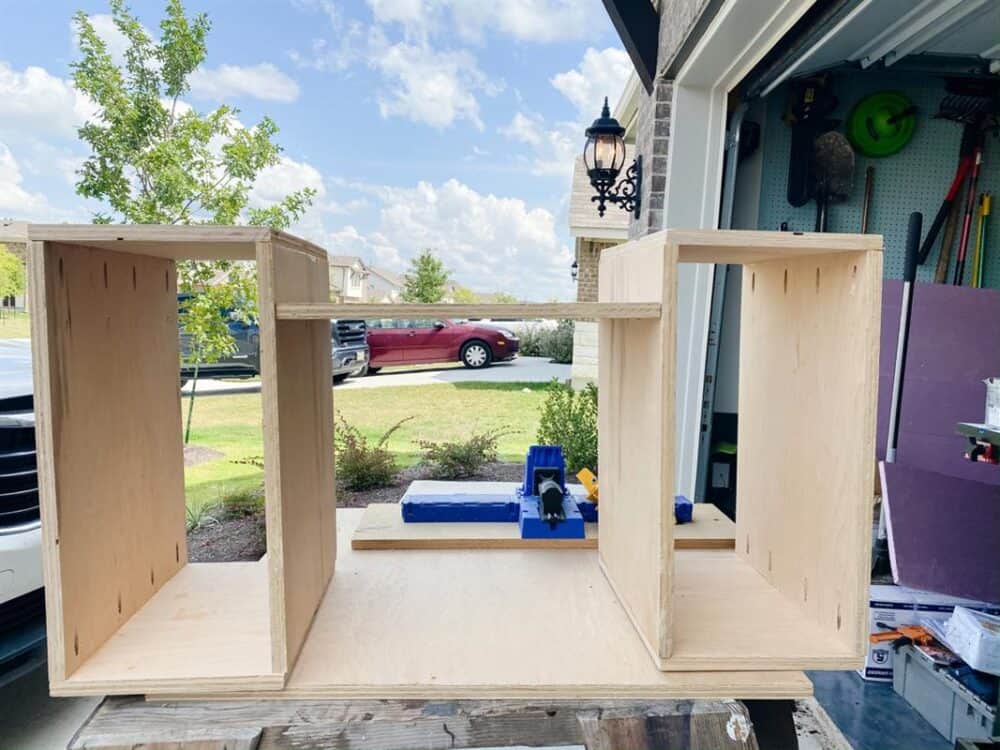
You’ll use wood glue and the pocket holes to attach this, just like before!
Measure down 10″ from the bottom of the first shelf, then attach the second one. This should be the one where you’ve pre-drilled holes for the drill hangers! Make sure that the pre-drilled holes are facing up.
Step Six: Attach Drill Hangers
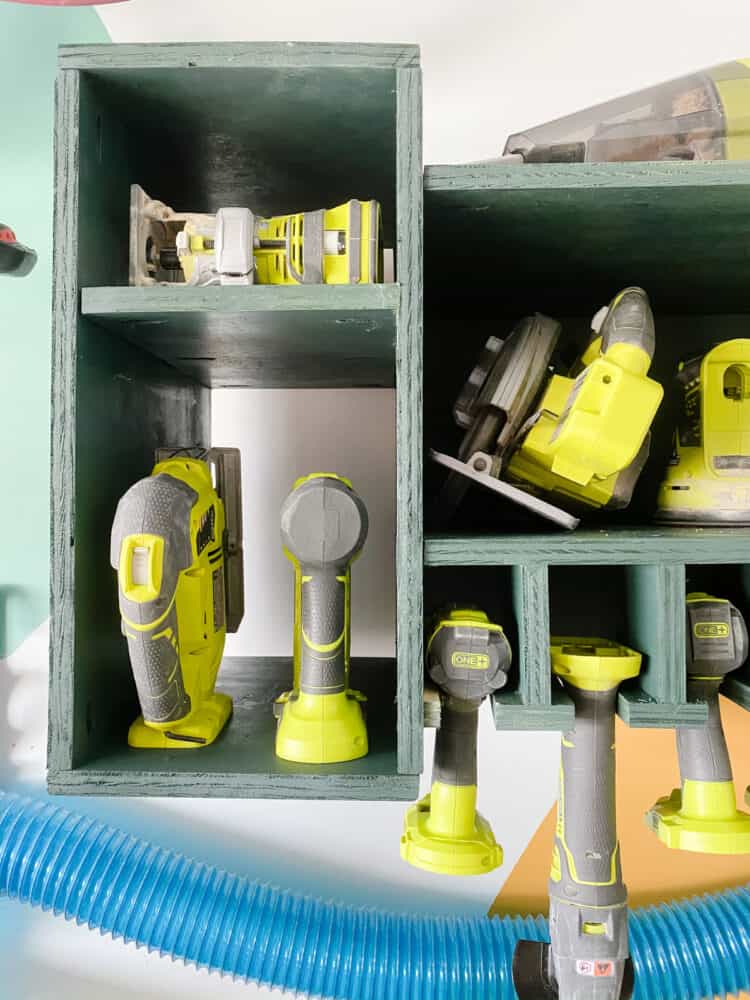
Add wood glue, then the drill hangers into the pre-drilled holes on the bottom shelf.
Then, using wood glue and screws, attach the two 3/4″ x 8″ pieces to each box, approximately 2″ from the bottom of the box and set back 1/2″. (Be sure to pre-drill the holes to avoid splitting the wood). This will help hold the drills in the end on place, and you can see these pieces in the image below.
Step Seven: Attach Shelves to Boxes (Optional)
Drill pocket holes in the two 9 1/8″ x 16″ pieces (NOTE: I highly recommend assembling your boxes prior to cutting these pieces, then measuring and cutting based on your box, to account for any variations).
Using wood glue and pocket holes, add a shelf in each box, approximately 13″ from the bottom of the shelf. This is obviously an optional step. If you prefer to store taller tools in this space, leave it open!
Step Eight: Attach Backing
Using wood glue and a nail gun, attach the 19″ x 21.5″ piece to the back of your organizer.
Step Nine: Sand and Paint or Stain
Now, you’re ready to sand it down so it’s smooth, then stain or paint it.
I built this over a couple of days all by myself and, while it’s not at all perfect (there are a couple of wonky shelves, for sure!), it is always so satisfying to see a design from my head come to life!
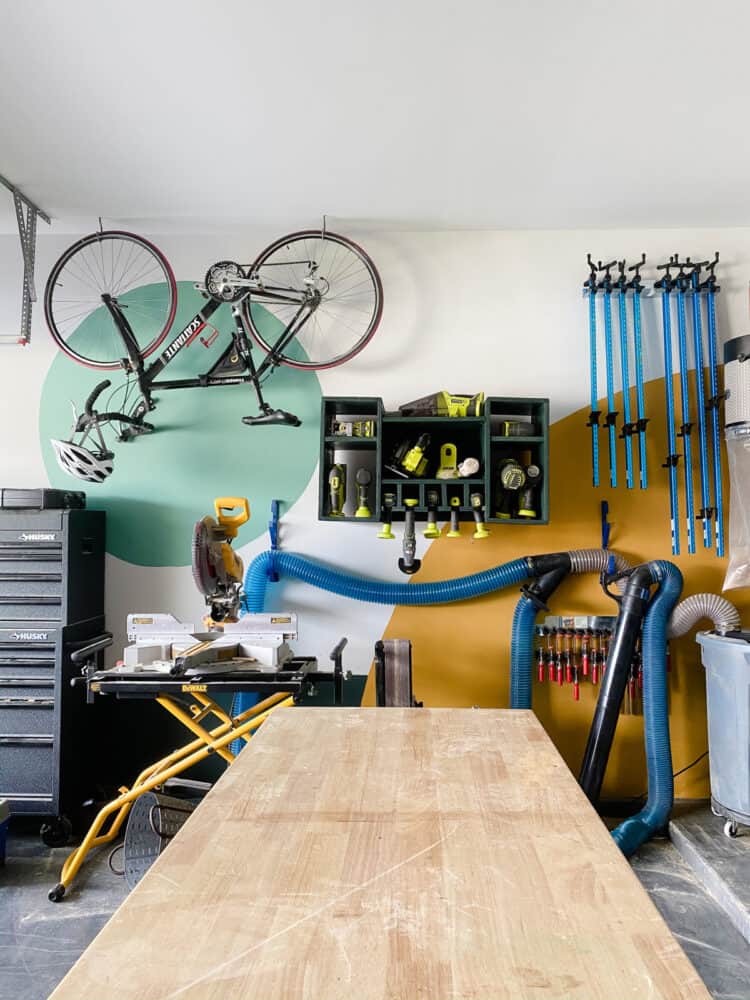
This tool organization system holds so much and I was honestly a little surprised once I finished it at how many tools I was able to put up there. I already find that the garage feels way cleaner, and it’s so much easier for me to put things away when I’m done because it all actually has a dedicated spot (what a novel concept!).
Of course, I decided to paint my tool storage cabinet a fun dark green color (Hunt Club Green by Rust-Oleum). I wanted it to feel like it belonged with the rest of the fun colors on the wall, and I love how it turned out. I’m a big believer that your spaces stay more organized for the long haul if you take the time to make them look pretty too (versus just organizing without making it look nice). I have a feeling that this cute little wall is going to be highly motivating for me when it comes to keeping the garage clean!
Plus, I already feel so much more inspired just being out here now – there’s something about letting your creativity run free all over the walls in the space where you want to be most creative that’s really satisfying.


Your garage just makes me feel happy. Great organization. I definitely need to work with my husband to get our garage looking more like this!