
How to Use a Circular Saw
Last updated on June 27th, 2024 at 11:31 am
Have you ever wondered how to use a circular saw? Well, today is your lucky day! We’re talking all about the circular saw, what it’s used for, and how to use it.
It’s time to learn a new tool! I love taking the time to dive deep into teaching you how to use power tools for your projects. Today, we’re talking about one of my most-used tool: the circular saw. This is a really handy tool to have on hand, especially if you don’t have a table saw. I use mine constantly, and I promise if you learn how to use it, you’ll find a whole new world of project opportunities opening up!
Let’s get right to it, shall we?
What is a Circular Saw
A circular saw is a portable saw that can be used to cut wood down and make it shorter (similar to a miter saw). It can also make rip cuts, which is cutting through wider pieces of wood to make it narrower. It kind of combines the functionality of both a miter saw and a table saw into one portable little tool. It’s quite a powerhouse! This is the circular saw that we have and LOVE, and you can browse some other options here.
What is a Circular Saw Used For?
Circular saws are used to make straight cuts. Most DIYers will use them to cut sheets of plywood or pieces of lumber.
You’ll generally make two types of cuts with a circular saw:
- A Crosscut goes against the grain of the wood, typically to make a piece of lumber shorter.
- A Rip Cut goes with the grain of the wood and is used to make a piece of wood (usually plywood) narrower.
If you’re just getting into DIY and want to learn a power tool, this is one of the first tools you’ll want to buy. It’s much more affordable than buying a larger saw, and it’s perfect if you don’t have a lot of space to store tools. It’s obviously less precise than using either a miter saw or a table saw. But, with some preparations and practice it can definitely be a great substitute if you don’t have the budget or space for a big ol’ saw.
Circular Saw Basics
This is a really straightforward tool to use. Basically, pull the trigger, cut the board!
Okay, maybe not that simple. But almost.
Here’s the video with all of the details on the circular saw and how it is used (plus some bonus bloopers if you stick around until the end because I couldn’t resist).
But, if you can’t – or don’t want to – watch, keep scrolling for all the info you need! If you prefer, you can watch the video on YouTube right here!
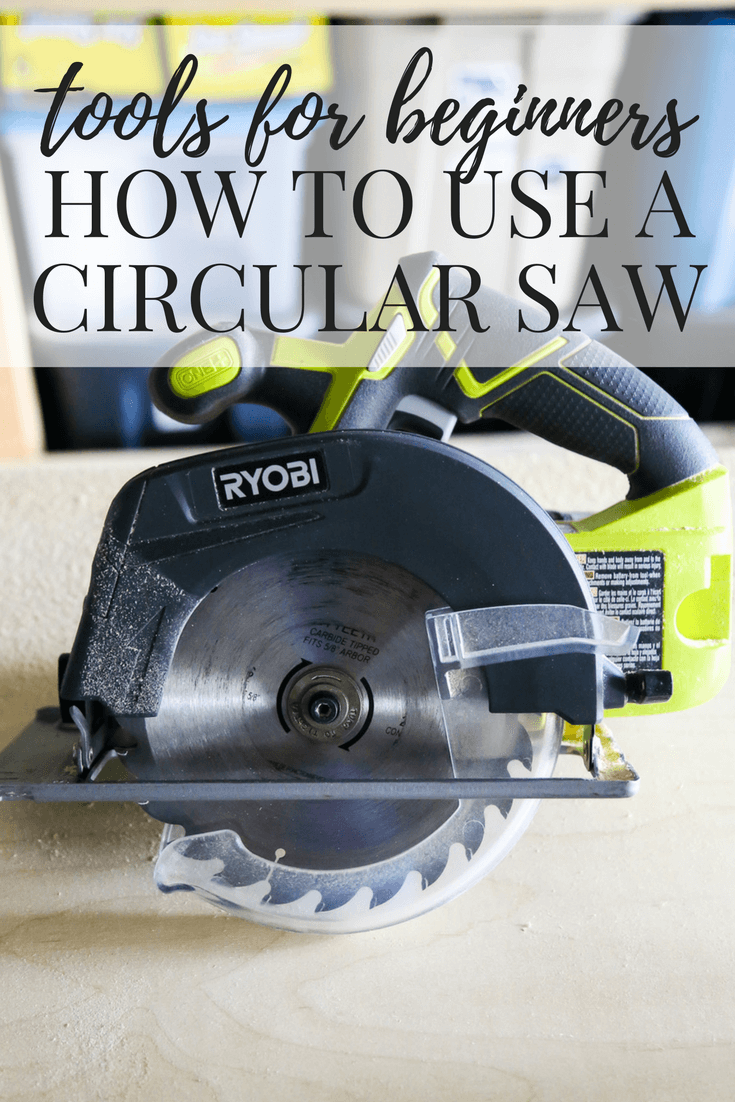
Parts of a Circular Saw
Let’s break down the basic components of a circular saw.
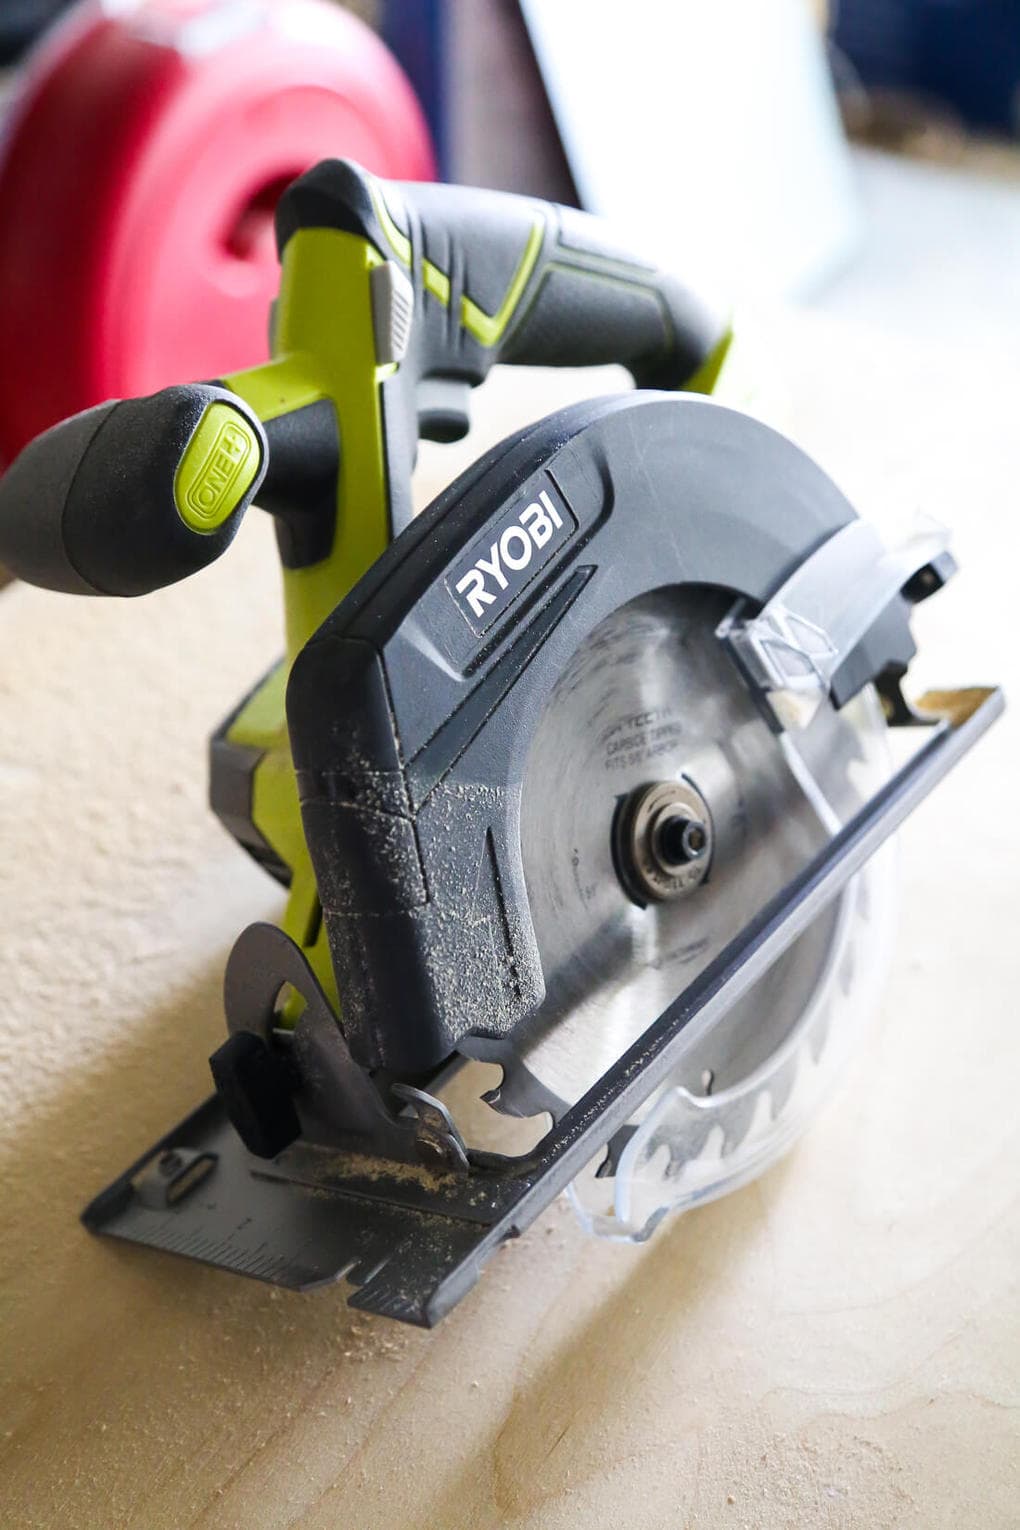
- Handle and Trigger: This is where you’ll hold the saw, and how you’ll power it!
- Trigger Lock Switch (aka: the safety): This is a switch you’ll need to hold as you work to make the saw blade spin. It’s the safety, and prevents the tool from turning on if you accidentally pull the trigger.
- Front Grip: This is a secondary handle towards the front of the saw that you can hold onto as you work to help guide the saw.
- Blade Guard: This is a retractible cover that helps prevent fingers from getting cut! It’s lifted via a tab on the side when your saw is lined up and ready to cut.
- Shoe/Base: The metal rectangle around the blade that rests on whatever material you’re cutting.
- Bevel Adjustment: This knob lets you adjust the angle of the blade to create bevel cuts.
- Depth Lock: This knob or lever lets you adjust the blade depth, for various thicknesses of wood.
- Power Source: We have a battery operated circular saw, others are corded!
- Blade: There are various different blades you can add to your circular saw, each with teeth of varying sizes and shapes. They’re measured in TPI, or teeth per inch. A higher TPI gives a smoother cut, and a lower TPI creates faster, rougher cuts.
Circular Saw Safety Tips
As with any power tool, safety is an important consideration when you’re working with a power tool! Here are some tips to keep in mind:
- Always wear a dust mask and wear safety glasses or goggles.
- Don’t wear loose clothing or jewelry.
- Tie back long hair.
- Always use the appropriate circular saw blade for your material, to avoid dangerous kickback.
- Do not attempt to turn the tool on when the blade is touching the material to be cut. Always turn it on first.
- Never force the saw when cutting.
- Keep the shoe flat against the cutting material as you work.
- Keep hands away from the moving blades!
- Make sure your work area is free of debris as you work.
How to Use a Circular Saw
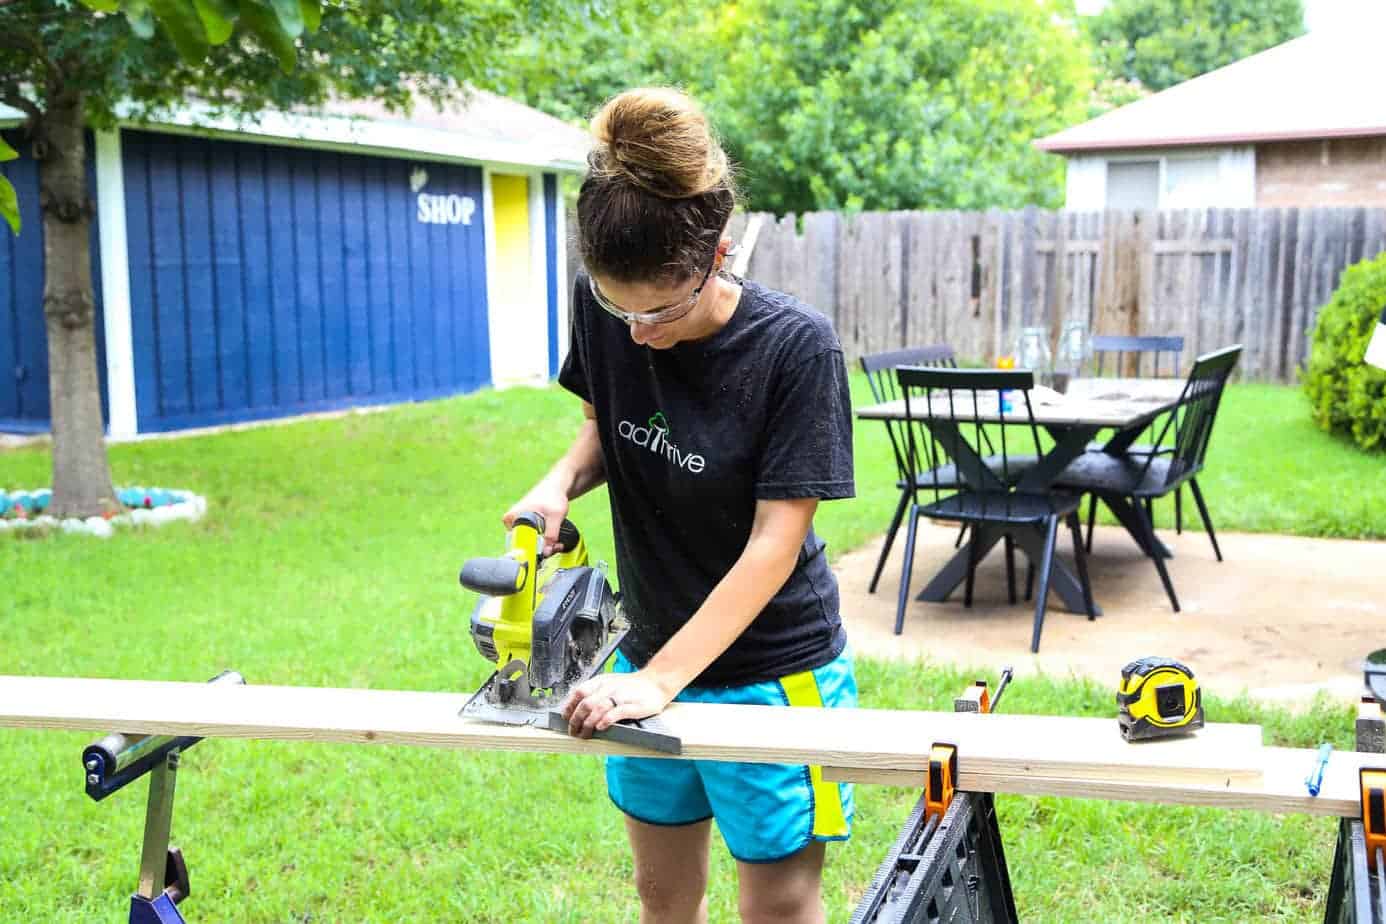
To make a basic cut with a circular saw, follow these steps:
- Measure and mark a cutting line on your material using a pencil. Use a framing square or a straight edge to help you draw a straight line.
- Clamp your material firmly to a workbench or sawhorse.
- Set up your circular saw with the appropriate blade and set the blade depth to about 1/4″ deeper than the material you’re cutting. Double check your bevel angle to make sure it’s appropriate.
- Rest the shoe of the circular saw against the edge of the material you want to cut, then slightly lift the blade guard.
- With the blade next to (but not touching!) the workpiece, press the lock switch and pull the trigger to turn on the saw and let it come to full speed.
- Keep the shoe firmly on the surface and ease the saw forward so it begins to cut.
- Let the saw do the work! Don’t push as it goes – it’ll pull forward as it cuts.
- At the end of your cut, release the trigger and marvel at the good job you did.
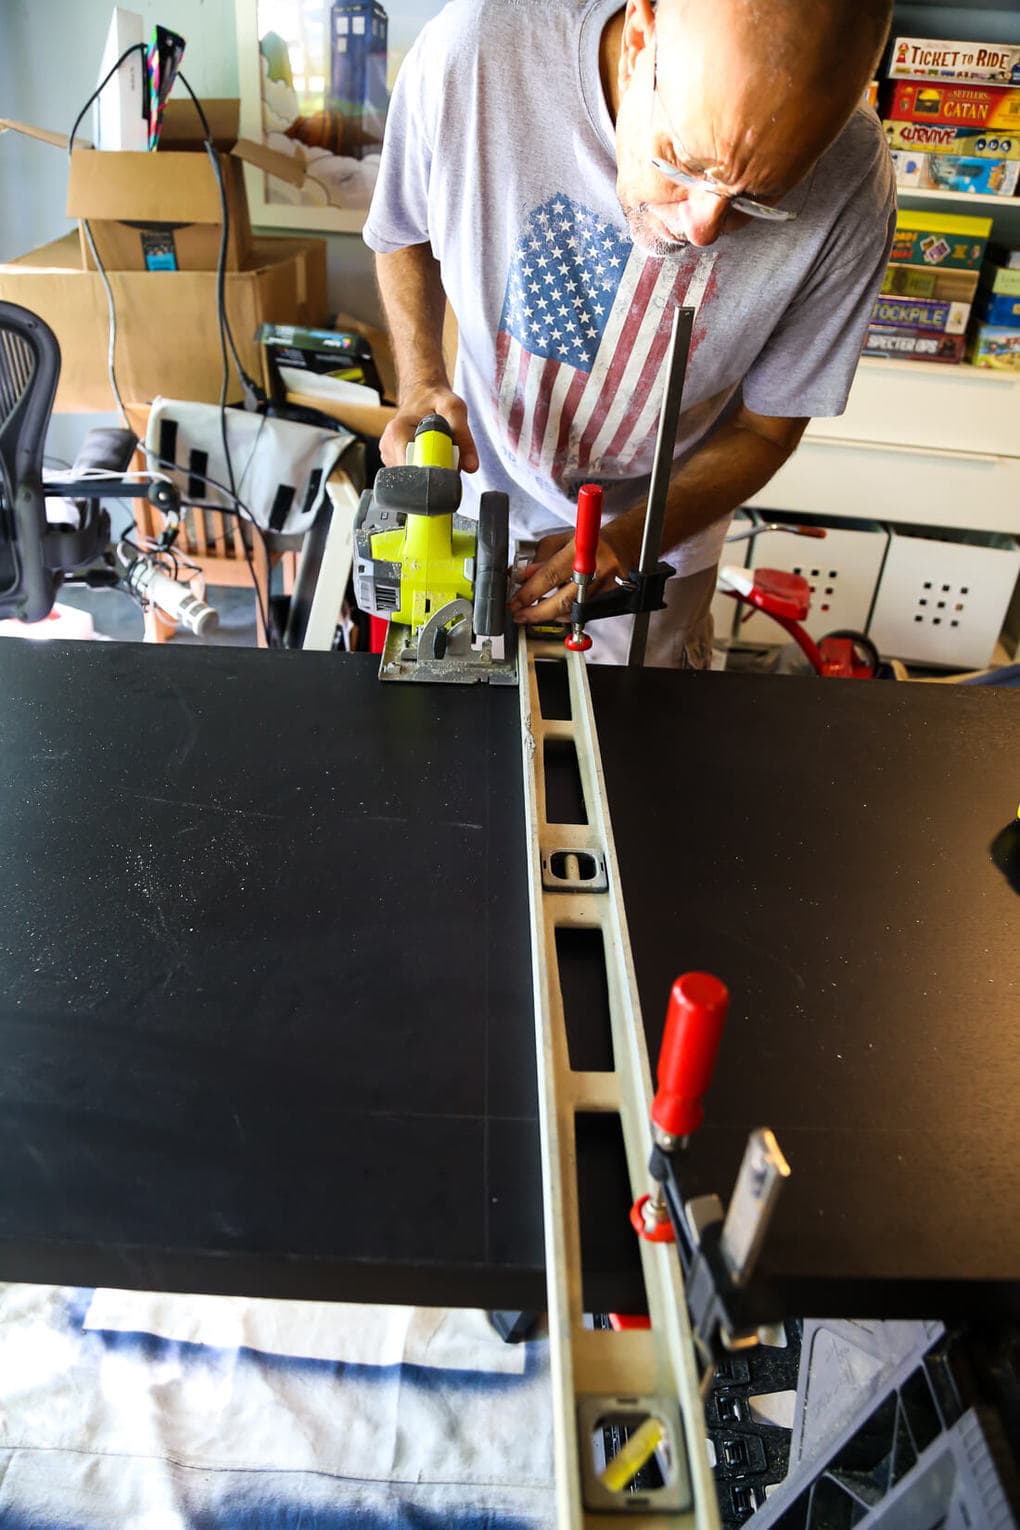
Making Straight Cuts
If you only rely on your steady hand, it can be tricky to get a perfectly straight line with a circular saw. Instead, you’ll want to have a straight edge clamped to your board to help you. All you have to do is use a tape measure to measure the distance from your blade to the end of the saw. Place your straight edge that distance from the line you need to cut on and clamp it into place.
I personally believe that if a beginning DIY-er has a circular saw, a drill/driver, and a jigsaw, they can accomplish just about any DIY projects they want to take on. The versatility that this tool provides is huge. It can be used for so many things.
Have you ever used a circular saw? Any requests for what we should tackle in the next few videos?!

Can you show how to use a nail gun??
You can find that post right here! https://www.loveandrenovations.com/how-to-use-nail-gun/
What makes it kickback and stop half way thru a job.
Generally this happens either because the wood isn’t being supported on both sides and the saw catches on one side or because you’re moving too fast. To prevent this, make sure that your wood stays level all the way across as you’re cutting, and always make sure to move slowly and let the saw do most of the work (you don’t need to push it very hard at all, it should cut through the wood pretty easily on its own).
Good post
Thank you for sharing this. I’ve been thinking about renovating some things in my house and this will be super useful =)