
How to Hang Pegboard
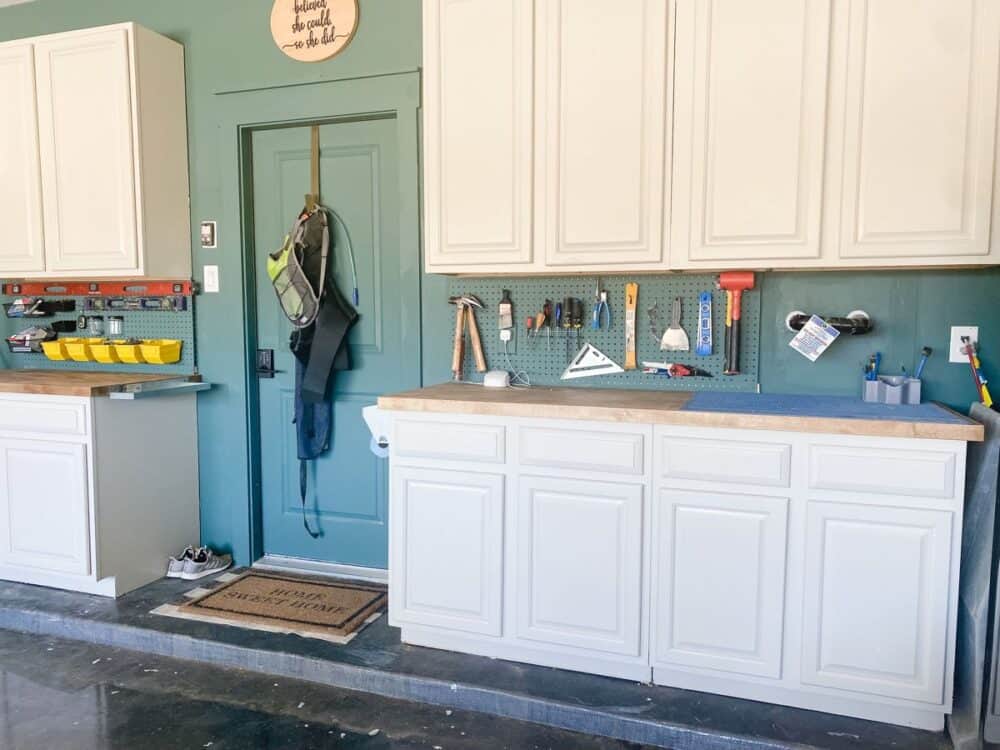
I’m wrapping up our big garage cleaning and organization project and one of my very favorite touches I’ve added so far are the pegboards I installed as a backsplash between my new cabinets. I had a few questions about how to hang pegboard as I was sharing the project on Instagram, so today I’m spilling every last detail of how to install pegboards.
I promise, it’s so, so easy. And you’ll get results that look like this!
How to Hang Pegboard
Materials Needed
- Pegboard
- Furring strips (you can use any narrow scrap wood, 1×2 is best!)
- Drill + wood screws
- Tape measure (see my tape measure tips here!)
- Stud finder
- Level
- Pegboard hooks + accessories
Measure and plan for the pegboard
Start by determining how large you want your pegboard to be and where you want it. Planning ahead a bit is key to making sure everything goes smoothly when it’s time to hang your pegboard.
If you have a large enough wall (and need enough pegboard space), you can just use a full sheet of pegboard – pegboard sheets come in 4’x8′ sheets, just like plywood. But, most of the time you’ll likely want to cut it down a bit to make it better fit your space. Measure to find the exact height and width you need, then you’re ready to cut!
Cut the pegboard and Furring Strips
Cut down your pegboard using a circular saw (see how to use one here). If you don’t have a circular saw, you can also have the hardware store cut it down for you. Most big box stores can make large cuts for you for free and it saves you a lot of work at home!
Note: If you have any outlets or light switches where you’re hanging your pegboards, you’ll need to use a jigsaw to cut out a hole for them. I had one outlet on the wall and it was really easy to cut the hole for it. I just measured where it needed to go, marked it out with a pencil on the back of the pegboard, and cut it out.
You’ll also want to cut your furring strips at this time – I used my miter saw for this (click here to learn how to use one).
But wait, what is a furring strip?!
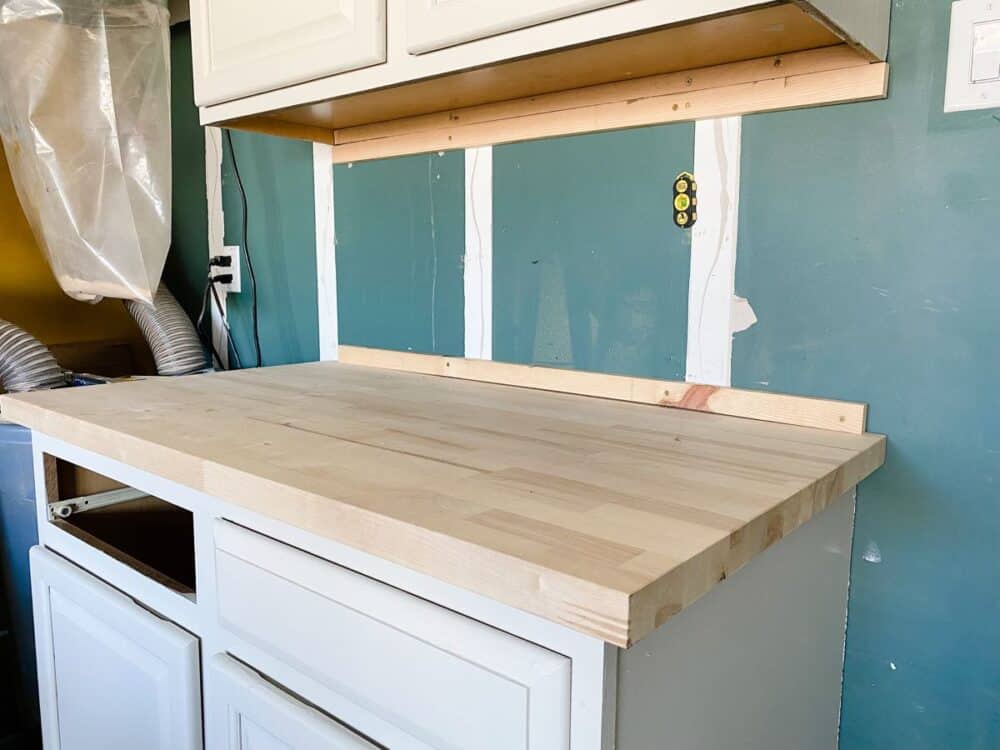
A furring strip is just a narrow piece of wood that’s attached to a wall to help create a level plane. They’re often used for cinderblock or concrete walls when you want to cover it up or attach drywall.
In this case, furring strips are used to create some dead space between the pegboard and the wall so the pegs or hooks can fit. You can’t install the pegboard hooks or hang anything on the pegboard if it’s sitting flush with the wall. So, you need to add something to push it out a bit.
You can use any scrap wood for your furring strips, but smaller strips of wood are the best choice. They’ll cover up fewer holes on your pegboard and will create a more polished look. I used some scrap 1×2 wood for my furring strips.
hang furring strips
Now, it’s time to hang everything!
Start by finding and marking the studs in your walls. You’ll want to be sure to drill your furring strips directly into the studs so that your pegboard is able to hold everything up without falling off the wall.
For your furring strips, you’ll generally want to have one run the full length of the pegboard at both the top and the bottom, and a vertical furring strip at each wall stud (it doesn’t have to run the full length of the pegboard, but it can).
Because my pegboards are so narrow, I only did horizontal furring strips and didn’t add any center supports – it’s super solid as-is, and a smaller pegboard will need less support. Anything wider will definitely need some extra vertical support, though, so take that into consideration when you’re working!
When hanging them, use a level to be sure that they go into the wall fully level. I like to use self-drilling screws so that I don’t have to drill pilot holes. But, if you aren’t using this type of screw you’ll want to drill a pilot hole in the furring strip where the studs are.
Hang the Pegboard
Finally, you’re ready to hang the pegboard!
If you’ve already cut it down to size, this is super simple. Just grab some 1″ or 1.5″ screws and drill through the holes of the pegboard and into the furring strips. I used one screw in each corner, plus a couple more along the top and bottom.
And just like that, you’ve got a pegboard!
add finishing touches
With everything hung, it’s time to make it look cute.
Some people like to add a frame around the pegboard. It’s really simple if you want to add that extra detail! I would just use some 1×2 wood and attach it to the outside edges of the furring strips using nails (with the short side of the board touching the wall and the long side touching the pegboard). Then, I’d add some cute trim inside the frame to make it look a little fancier and call it a day!
I didn’t want the extra detail on my pegboard, so I just painted it. You can also paint the pegboard prior to installing it if you prefer. It doesn’t make a huge difference which order you go in.
I do recommend using exterior paint for your pegboard. And, if you don’t purchase a pre-primed board you’ll want to use primer before painting for the best finish. The color I used on this wall is Meterological by Behr.
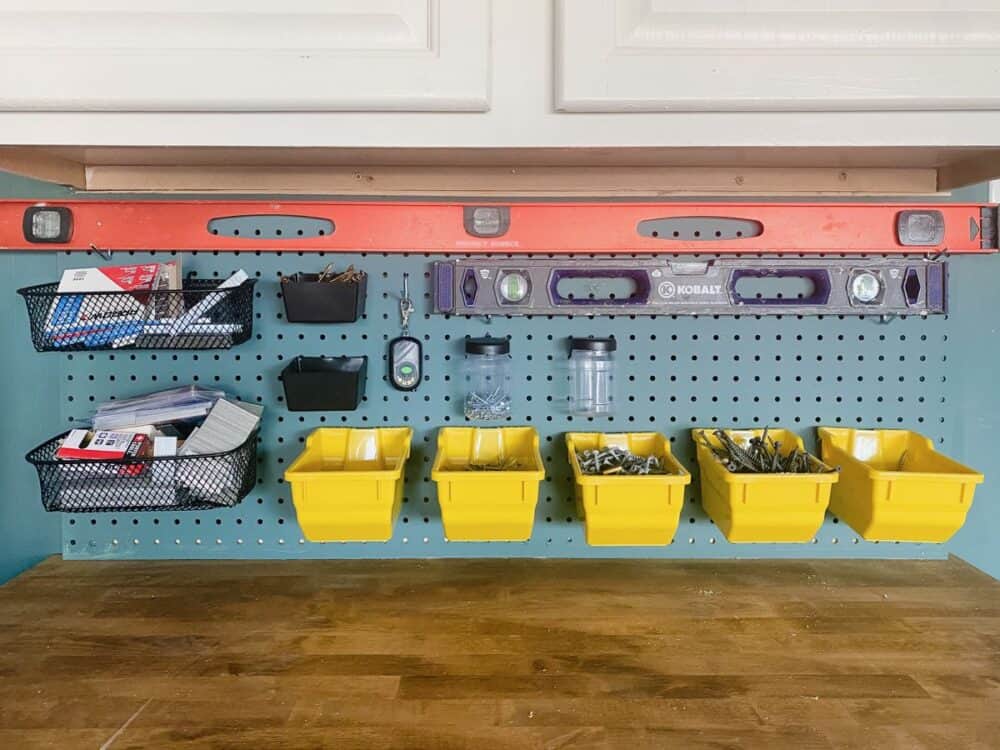
And once everything is painted and dry and cute, you get to fill it up! I recommend heading to your local hardware store and browsing the section where they keep pegboard accessories and bins. Grab more than you’ll need and return what you don’t use! I was really surprised at how much I was able to fit on this small section of pegboard, and I love how easy everything is to access now.

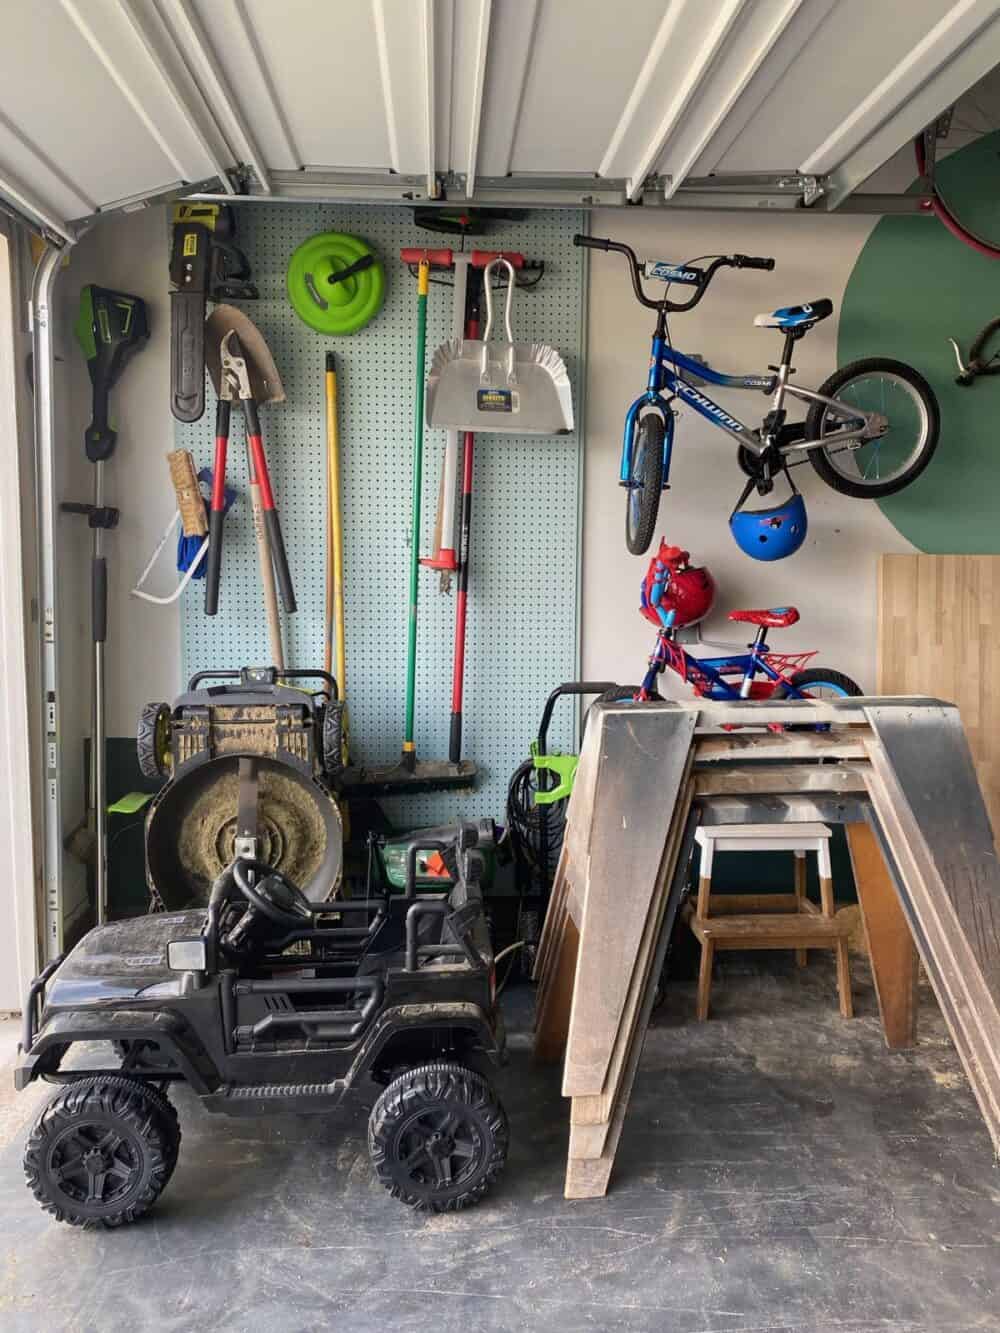
And that’s it, my friends! You can find all sorts of pegboard accessories that meet your needs and you’ll be amazed at how much storage it adds to your garage or workshop. We also have a larger (4×8) pegboard on another wall in our garage. It holds all of our lawn tools and equipment. It’s been a really helpful solution to an annoying storage problem, and I love that it takes something that could be a messy eyesore and makes it look actually kind of cute.
You might be wondering, how much weight can pegboard hooks hold? Can I actually hang heavy tools on a pegboard?
Typically, most pegboards can handle around 100 pounds. On our gardening tool wall, I’ve got a chainsaw, a leaf blower, and more on it without issue. So, yes, you can hang some pretty heavy stuff without a problem.
Pegboard installation is a really quick and easy project, and it’s affordable to boot (a pre-primed 4×8 panel is only about $30 at Home Depot).
This was the last big project I needed to tackle for our garage organization overhaul. I can’t tell you how good it feels to finally have all the chaos organized.
Stay tuned for the final reveal once we wrap things up!