
How to Turn a Dresser Into a DIY TV Stand
Last updated on June 2nd, 2024 at 01:50 pm
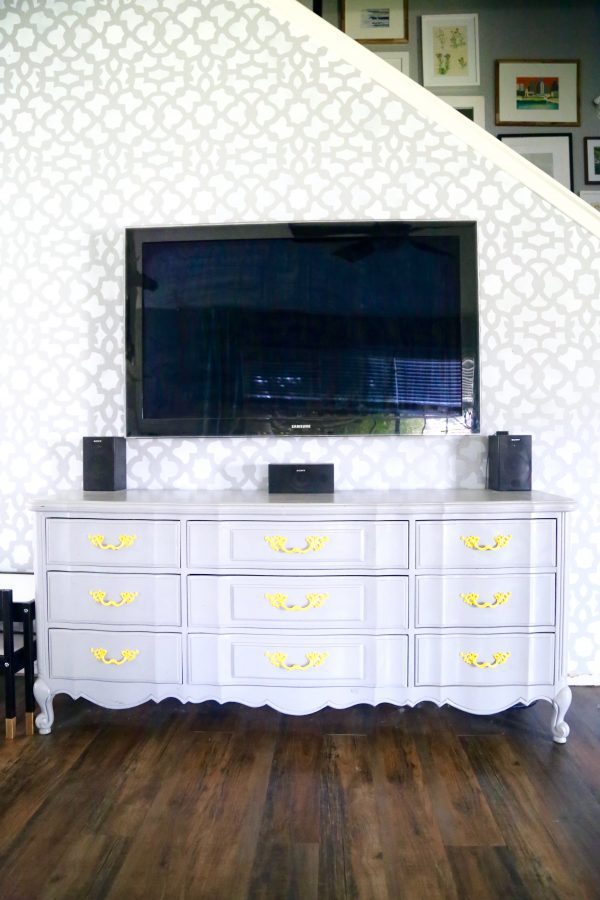
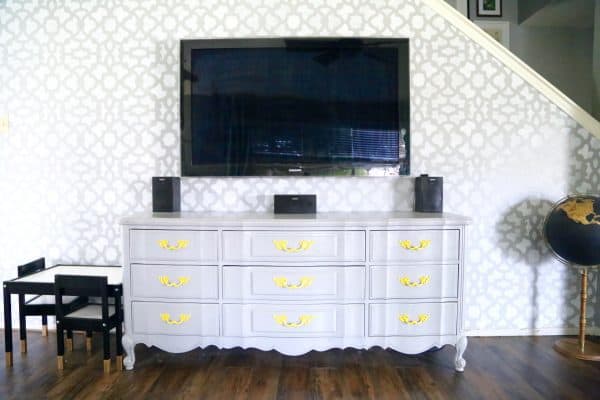
Have an old dresser in need of repurposing? It’s incredibly easy to turn a dresser into a DIY TV stand with just a few simple steps.
One type of furniture I’ve always disliked, just as a rule, is the entertainment center. You know, that big, clunky piece of furniture that houses your television and all of the other components? The one that is almost never actually good-looking in any way, shape or form?
Yeah, they’re not my favorite.
But alas, we have a television, and we have a ton of crap very important stuff that goes along with it, so we need somewhere to put it.
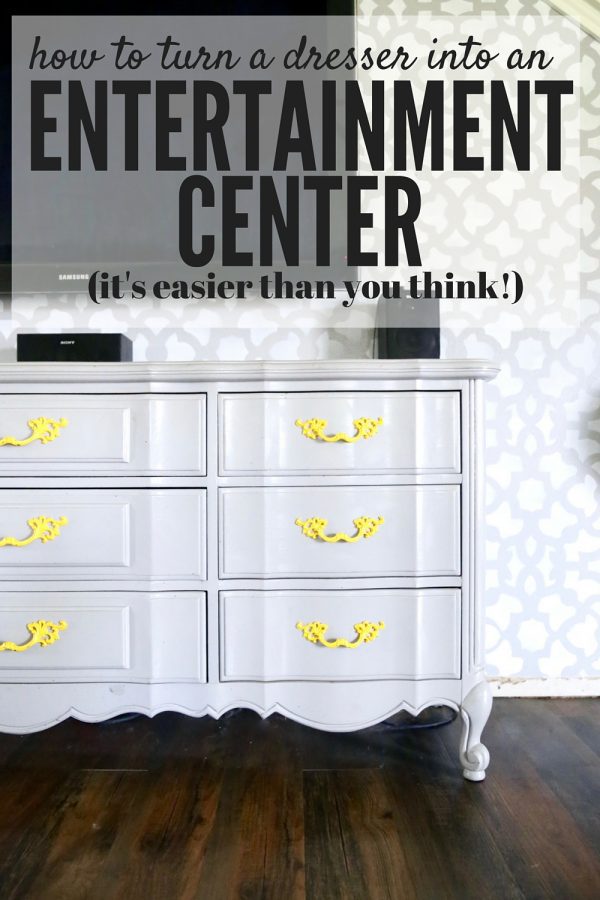
Thankfully, with some creativity and a little bit of effort, I can avoid adding a big, ugly piece of furniture to my living room and instead we turned a dresser into a DIY TV stand!
I’ll admit, when we first started out with the planning of how to turn a dresser that we found on Craigslist into an entertainment system, we were a bit overwhelmed. It’s a lot to think about!
We did our usual Googling, but this is one topic that we couldn’t find any help on. Most of the how-tos we found were teaching how to turn a dresser into a media console by removing the drawers and adding shelves or cabinets – basically, turning what we find beautiful about the dresser into exactly what we’re trying to avoid.
Let’s be honest – I wanted to hide all of the components and never have to look at them again. The drawers needed to stay.
So, we did what we always do: Corey grabbed a saw and went to work.
Turning a Dresser Into a DIY TV Stand
Step 1: Make a Plan
The first issue that we needed to address is how we would get the components to actually work if they’re hidden. Enter the IR repeater.
This little device acts like a messenger between your remotes and electronics. Basically, all that needs to be seen is a little black rectangle, which is the piece that you’ll point the remote at when you’re operating your television. All you have to do is attach the little circular pieces to the front of your electronics like so:

Then, just attach the receiver part anywhere you want. We choose to stick it to the front of our television since it is black and blends right in. It transmits the signal directly to the components, and can even go through walls (we have one set up that way in our bedroom). As long as you can run the wires, you can change the channel.
Step 2: Add Some Ventilation
So with that taken care of, the next concern Corey had was how we would let the components breathe. They tend to get pretty warm when they’re running, and if they get too hot, it can cause some serious damage. So, Corey cut out a hole in the backing of the dresser where each drawer would go (he was making holes back there anyways for the wires and plugs, he just made the holes larger than necessary to allow for extra air flow).
Once the holes were cut in the back, he also cut a panel out of each of the drawers that would be housing all the goods.

Now, here’s where he gets a little paranoid – this wasn’t enough for him.
He also decided to attach a fan that’s made for computer cases. It’s a temperature-sensitive fan, so it only turns on when it’s actually needed. You can’t hear it at all, so it doesn’t bother us in any way – it just keeps everything nice and cool back there. This step was probably completely unnecessary, but it never hurts to be extra cautious, right?
Once all was said and done, all we had left to do was put everything in the dresser and put it into place.
This whole project was incredibly simple, affordable, and the results are exactly what we wanted! We’ve since repeated the process one other time to create another dresser-turned-entertainment center in our garage, and we love it just as much as this one!
Let’s be real – I’m just grateful I don’t have to look at an ugly media console every time I want to watch television.
I love this remodel but I am curious how you get disks into the devices? If they are in the drawer do you need to pick them up to insert a movie/video game?
We kept the XBox scooted far enough back in the drawer that it would open without moving it! But, it’s also really easy to lift up the front of it for better access.
Do you have a picture of the back? I want to convert a mid century buffet and my husband is also worried about the “breathing issue.” Will definitely look into the fan as well.
Hey Abby –
I don’t think I have any photographs, but the fan worked very well! We actually did this project quite a number of years ago and don’t have the piece anymore, or else I’d snap a quick photo. But, what I can tell you is that we used this setup daily for probably close to 8 years without a single overheating issue! All we did was cut out a portion of the back of each drawer where we’d have electronics, then we added that fan in. It worked great!
Great update to this piece. I’m doing one myself soon and was wondering what colors/brands the paints are . I know this is an older post but if you recalled that would be so helpful!
Thank you so much for publishing your tutorial and hints. I just googled how to do this. Bought a 9 drawer dresser last night for $20 and can’t wait to rehab it! You saved me from a lot of cutting and measuring and found a handy gadget my hubby will love! Thanks so much!!
Love it, Amanda! I want that exact same dresser! Tell me if you see another one. 🙂
Thanks Corey! That’s a big help 🙂
Hi! I just found your blog and saw this post – my husband and I did the same thing! Instead of an IR repeater, we bought a Harmony remote that works using radio frequency so it works behind the doors as well.
Can you tell me what fan you bought? We don’t have one in there and I think it might be a good call.
Here’s a link to my project!
http://lifebeginsatthirtyright.blogspot.com/2010/02/craigslist-re-vamp-complete.html
We got this fan: http://www.amazon.com/Vantec-Thermoflow-TF12025-120x120x25mm-Temperature/dp/B000234W1I/ref=pd_ys_iyr1. But in hindsight I would have opted for a cheaper fan. This one is supposed to only run if the temperature gets to a certain point, but our home apparently is always at that point. So the benefit of being temperature controlled is rather lost.
You will need to purhcase one of these:
http://www.amazon.com/110v-4pin-molex-Power-Adapter/dp/B000MGG6SC/ref=pd_ys_iyr4
To power the fan. However, if you find that more fans might be needed you can run several off of this one.
I would have rather used an RF controller, but we already had a rather expensive IR only remote so I went with the cheaper option.
Wow! I came over to your blog from Weddingbee. I am a fellow lover of all things gray and yellow. I love all of your projects. But this one is by far my favorite!! It is awesome what a difference it made. I have to get one of those sensors. Our cable remote NEVER works.
Thanks! We absolutely love it, and the sensor works so much better than we ever expected it to!
Hello! I just stumbled across your blog, and love all the renovations. I really like that print near your TV “stronger than you know, braver than you think…” and was wondering where you got it or if you made it? I think it would be great for the nursery we’re planning! Thanks
Thanks! The print is from Etsy seller rawartletterpress. Hope that helps!
dude, that’s awesome! it looks sooo good! especially with the cute yellow drawer handles! Definitely bookmarking your idea for when we get around to replacing our $15 PLASTIC WALMART tv stand table. >.>”
Great job! Love the colors. So when you want to use your Xbox or DVD player, do you just like pull open the drawer, or slide it out and then leave it open while it’s in use?
If we have to replace the DVD or game, then we’ll open the drawer up, but while it’s in use we actually keep it closed! Because of the sensor on the tv, it works perfectly when the drawer is closed (better than it used to, really) and because of the vent holes and fan in the back nothing gets hot enough to risk overheating! 🙂
It looks AWESOME. I love the color and the pop of yellow
Wow!! I love the idea of using a dresser in a brand new way. It looks so great!!
Are you for hire? Seriously, you did an awesome job on that dresser!
Well I would rather do this than a lot of other things!
Wow! Y’all never fail to impress me with your handiness and creativity! Job extraordinarily done!
This looks great! I love the colors. Also, cute pups!
It looks great! What an amazing find!!
I love that piece!! What a fab craigslist find! You guys did an awesome job on it!
This is seriously awesome. Probably one of my favorite projects that you guys have done (so far)! Love the touch of yellow too 🙂