
How to Propagate Pothos Plants
Last updated on January 21st, 2024 at 02:31 pm
Ready to take the next step in plant parenthood and start propagating your plants?! I’ve got you covered – let’s learn how to propagate pothos plants today.
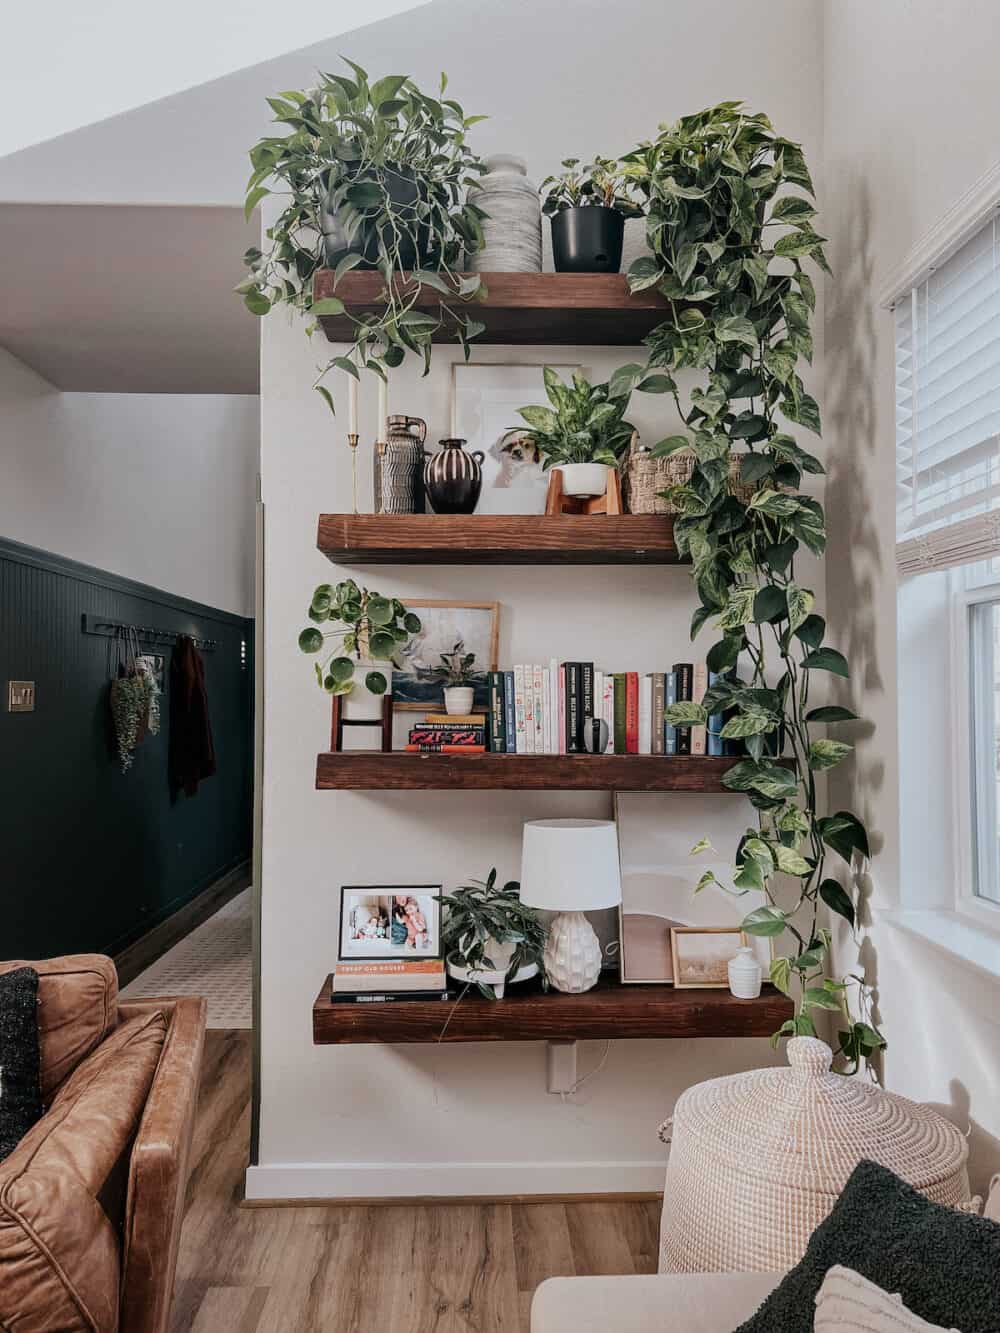
My pothos vines are easily one of my very favorite plants I own – it’s so satisfying to watch it grow, and it’s so easy to care for. It’s definitely a showstopper, and my living room shelving wouldn’t be the same without it!
When you’ve got a plant that has grown as long as mine has (I’d guesstimate it’s currently about 10′ long!), you’ll reach a point where you have to trim it. Also, as pothos plants grow longer, the area near the top can start to thin out. The reason for this is that all of the energy for the plant is being poured into producing new leaves. So, pothos propagation is a really great way to fill in the leggy areas near the top of an existing plant, or even just start some brand new pothos plants just because you can.
So, here’s your step-by-step guide to successful propagation of your Pothos plants! And the best part is, this method will work with most houseplants as well.
How to Propagate Pothos Plants
What You Need to Propagate Your Plants
Pruning shears are your friend when it comes to propagating any plant. But, if I’m being really honest I generally just prune my pothos using some plain ol’ scissors (just make sure they’re clean!).
You’ll also need a cup or a propagation station filled with water. You can propagate pothos in soil if you prefer, but I’ve had better luck using water. Plus, if you’re a newbie, it’s way more satisfying to be able to watch the roots grow!
You don’t need anything else to successfully propagate your pothos plant. They aren’t too picky about fertilization, sunlight, or water.
When to Propagate Pothos
The best time to propagate pothos is during their growing season – which is spring to late summer. That being said, as long as they get plenty of indirect sunlight while they’re growing and are planted in well-draining soil once they’ve rooted, they’ll do fine almost any time of year. So, don’t feel like you have to wait for the summer months to try this out!
Trimming Your Pothos
When you’re ready to try propagating your pothos, grab your scissors or pruning shears and cut off a length of the plant that’s about 4-6″ long. Cut at a 45-degree angle and do your best to get a nice clean cut. You can do longer, but I find this length is easiest to replant once roots start growing. Be sure the piece you cut contains at least 2 or 3 leaves or leaf nodes. Here’s a close up of what you’re looking for:
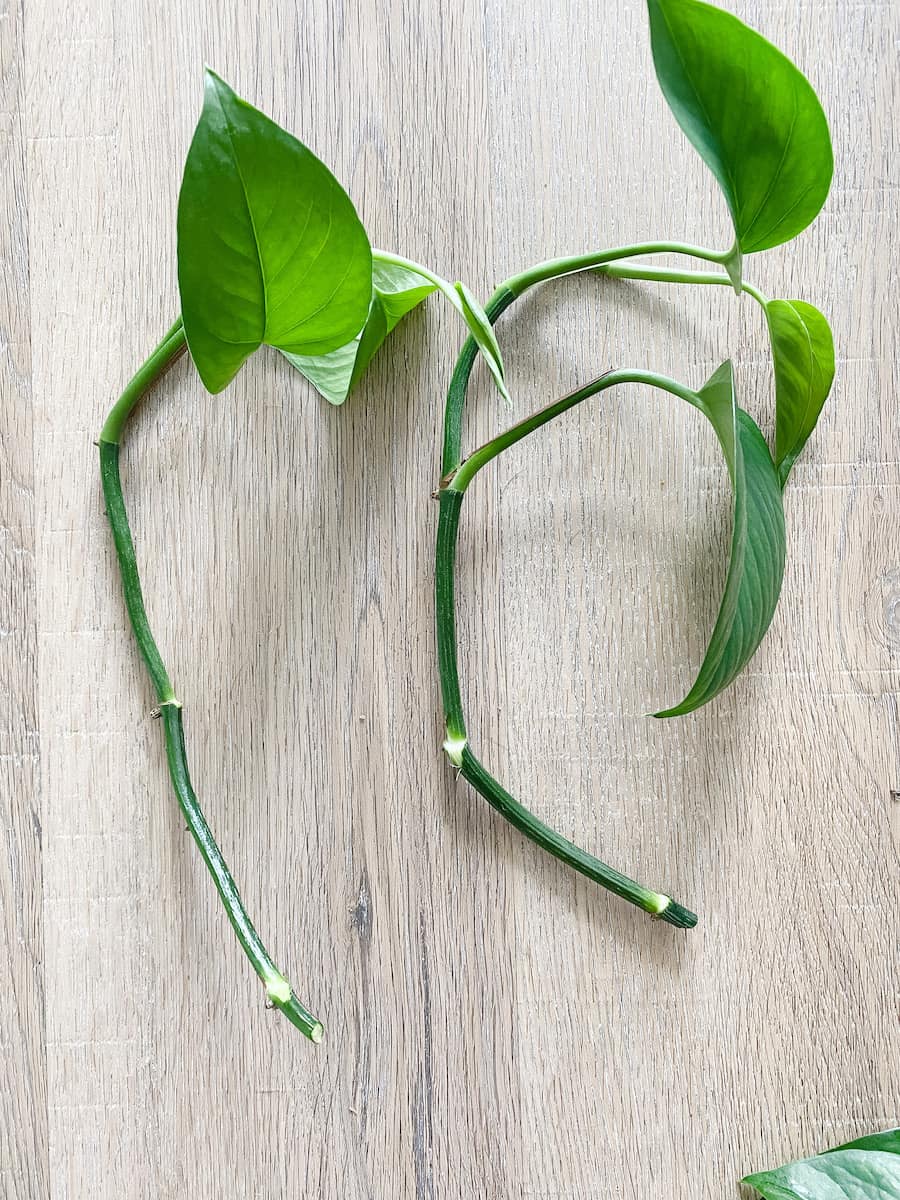
Make your cut about 1/4″ or so above a leaf node (those are the little bumps along the stems). Your plant should grow a new stem out of a node above where you cut, so don’t worry that it won’t recover!
Water Propagation
The most common method also happens to be the easiest – submerging your cuttings in water! This is how I typically propagate my Pothos plants, and it’s what I’d recommend for you, too. But, if you want to hear about other methods keep reading after this section and I’ll give you a rundown!
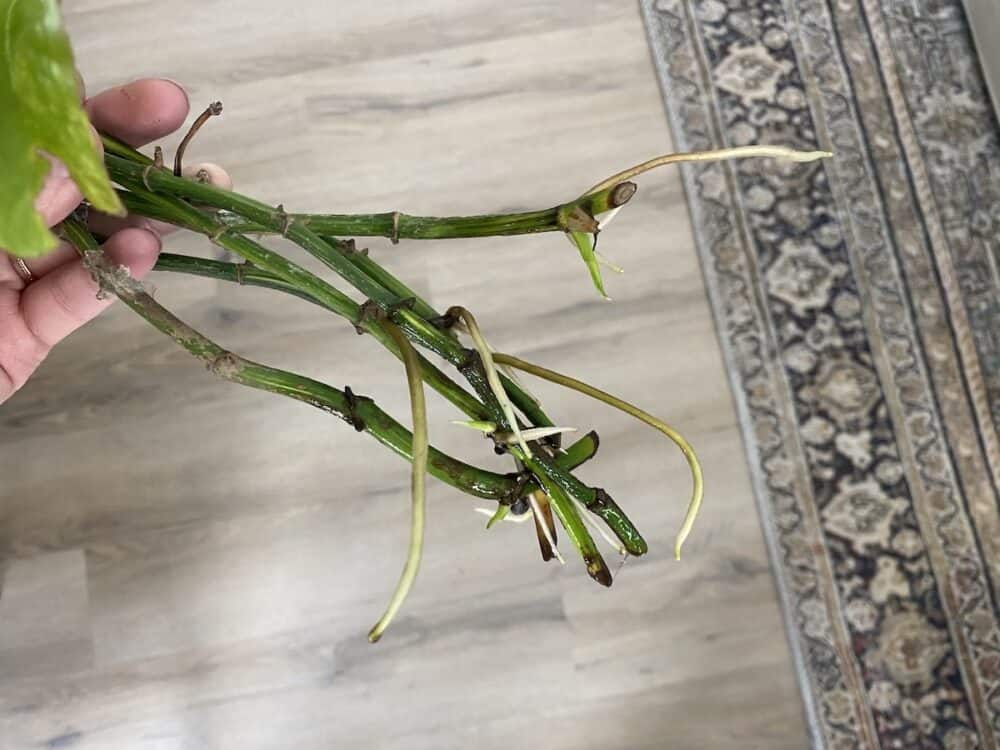
Once you’ve trimmed your pieces to propagate, pull the leaves off of the bottom part of the stem cuttings, so none will be submerged in water. Then, simply stick it in your propagation container. You’ll want to make sure the bottom leaf node (or two, if the cutting is long enough) is fully submerged in water at all times.
I’ve had really great luck just using a plain ol’ cup with water, but buying (or making) a propagation station is always fun. You can even put several cuttings together in one cup without issue! Some plants don’t like to be crowded, but pothos can be squished up just fine and they’ll still grow roots!
Once you’ve put your roots into water, all you have to do is place them in spot that gets plenty of indirect light and wait. They don’t love direct sunlight, so pay attention when you’re choosing a location. Add fresh water weekly (I’ll admit – I’m lazy with this and my cuttings grow just fine!), and in about a month, you’ll have new roots!
Other Propagation Methods
Soil Propagation
Another method to growing roots on your pothos cuttings is to bury them in soil. With this method, I’d definitely recommend using a rooting powder prior to planting them. Be sure to choose a growing medium that’s well-draining. Typically, a mix with half perlite and half peat moss is a good way to go!
Make sure you bury your cuttings so that the first node or two is buried, and keep the soil moist. Just like with the water method, place the plant in a place where it can get lots of indirect sunlight and wait a couple of weeks for the roots to start growing.
Propagating in Sphagnum Moss
And finally, you can also propagate pothos plants in sphagnum moss. This isn’t the method I’d recommend for the average plant parent as it’s not likely something you’ll already have on hand. But, if you happen to have some laying around, here’s how you do it:
- Soak the sphagnum moss in water for 20 to 30 minutes to rehydrate it.
- Wring out the excess water once it’s done and add some to a glass or plastic container. A mason jar works great!
- Place the cuttings in the moss – make sure the exposed notes are covered! Gently press the moss down so it’s touching the stem all around.
- Keep the sphagnum moss moist and in a place with good, indirect sunlight.
And that’s it!
Once your pothos cuttings have root shoots that are a couple of inches long, you can consider them officially propagated! Pull them out of the water and plant them in some fresh potting soil. I like to plant mine up at the top of my pothos plant to keep it looking full and lush. You can also just plant them in a fresh pot to start a brand new plant! A baby Pothos plant makes a great gift for plant lovers, and they’re the easiest houseplants to take care of, too!
And that’s all you need to know about how to propogate pothos plants. It’s that easy. Propagating my pothos and replanting the cuttings has made the biggest difference in how it looks. My plant seems healthier and happier, and there’s no more legginess up top!
How is your pothos not leggy in that picture?? I have some that get long and are lush and then all of a sudden they get leggy! What’s your secret!!
The longer they get, the more likely they are to get leggy! I replant cuttings up at the top of the plant to encourage a fuller look up top.