
DIY Indoor Plant Trellis
Last updated on March 5th, 2024 at 01:40 pm
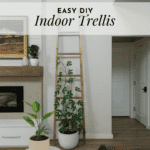
Need some help figuring out how to support climbing houseplants in your home? I’ve got you covered! Today we’re looking at how to build a simple DIY indoor plant trellis for a large houseplant.
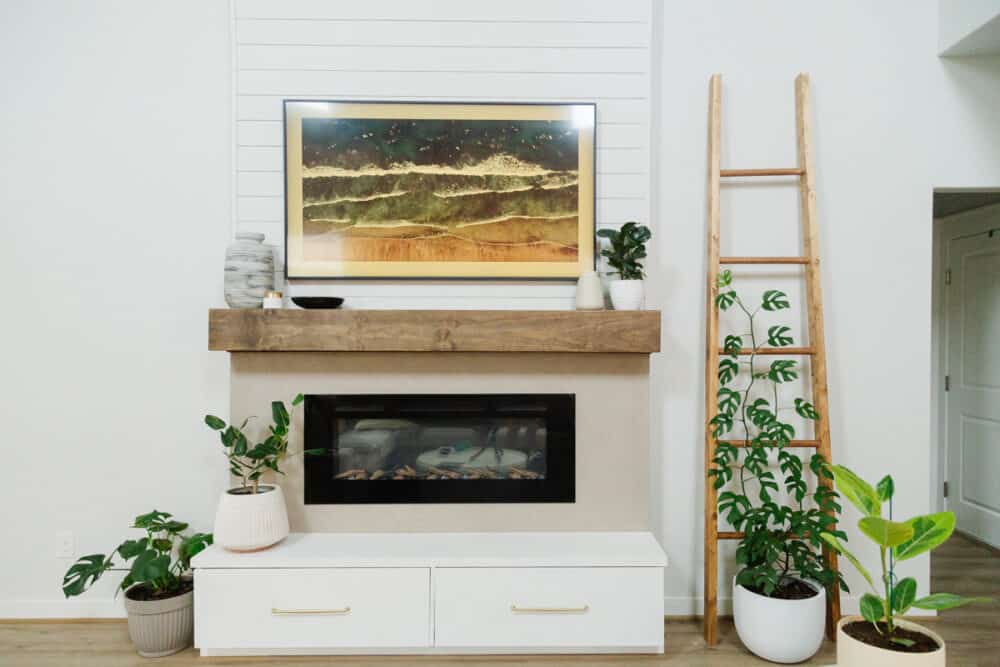
Earlier this week, I did a deep dive on my Rhaphidophora Tetrasperma – also known as my very favorite houseplant. Apparently, it’s this plant’s week to shine because today I’m back with a look at how I build a simple indoor plant trellis to help support it and keep it growing to its full potential!
I actually built a smaller DIY trellis back in Febraury but she’s fully outgrown it at this point and it was high time for something new. I built a simple ladder-style trellis that should give her plenty of room to thrive. Of course, I don’t even know what I’m going to do when she reaches the top of this. I guess I have a few months to figure it out!
How to Build an Indoor Plant Trellis
Video Tutorial
I put together a quick video tutorial of how I built this little trellis. It gives a really detailed look at exactly how it came together, so be sure to watch if you’re more of a visual learner!
If you prefer to read, continue on for all the details on this indoor plant trellis!
Materials Needed
Cut The Side Supports
First, decide how tall you want your trellis to be. For this particular trellis, I think it would look best at at least 4′ tall – for anything shorter, I’d build something with lattice boards like I did for the previous trellis this plant used.
I kept my boards at their full 8′ length because I want plenty of room for my plant to climb. However to help the trellis lean against the wall like a ladder, I cut the bottom of each board at a 5-degree angle using my miter saw. This is an optional step, but it definitely makes things look more polished!
If you’re building this for a blanket ladder, my recommendation would be to stick to 6′!
Cut Indoor Trellis Rungs
Once you’ve planned out the height of your trellis, it’s time to plan where you want the rungs of your trellis ladder to be. I put my first one about 18″ from the ground, and spaced the rest 17″ apart. If I was doing a shorter trellis, I would have spaced the rungs closer.
I also cut my rungs into increasingly shorter lengths as I went up the ladder for a tapered look. The lengths of each rung from top to bottom are:
- 18″
- 17″
- 16″
- 15″
- 14″
I measured for each rung as I went, knowing that I wanted to start at 18″ and end at 14″. However, for a similar taper and similar spacing, just reducing the length by 1″ for each rung is a safe bet!
Sand + Stain Your Boards
Before you begin assembling, I recommend taking the time to sand your side pieces and the rungs, then stain or paint them. It’ll be far easier to do this now than it will be once you’ve assembled it!
Take the time to thoroughly sand so the support pieces are smooth, then stain or paint it all and allow it to dry fully before moving on to the next step.
I chose to stain mine with Dark Walnut by Varathane (AKA my go-to stain for almost everything). If you want to learn how to stain wood, I’ve got a post for you! Of course, you can also paint it, or even do a two-tone look by painting half and staining half. Whatever fits your style and your home best will look great!
Drill Pilot Holes
Now you’re ready to start assembling! Mark a spot for each rung on your 2×3 boards, then pre-drill a hole at each point. Be sure to double check that your measurements are in the exact same spot on each of your 2x3s to ensure that your rungs are level!
Remember, I started at 18″ and did the remaining ones 17″ apart. For a 6′ trellis, I’d recommend starting at 18″ and doing 12″ for the rest of them!
You’ll also want to pre-drill pilot holes at the center point of each side of the trellis rungs. This will make the assembly process so much easier and faster!
Assemble
With the pilot holes drilled, you’re ready to assemble. Grab your screws and attach each rung to the trellis, starting with the longest rungs and working your way up to the shorter ones.
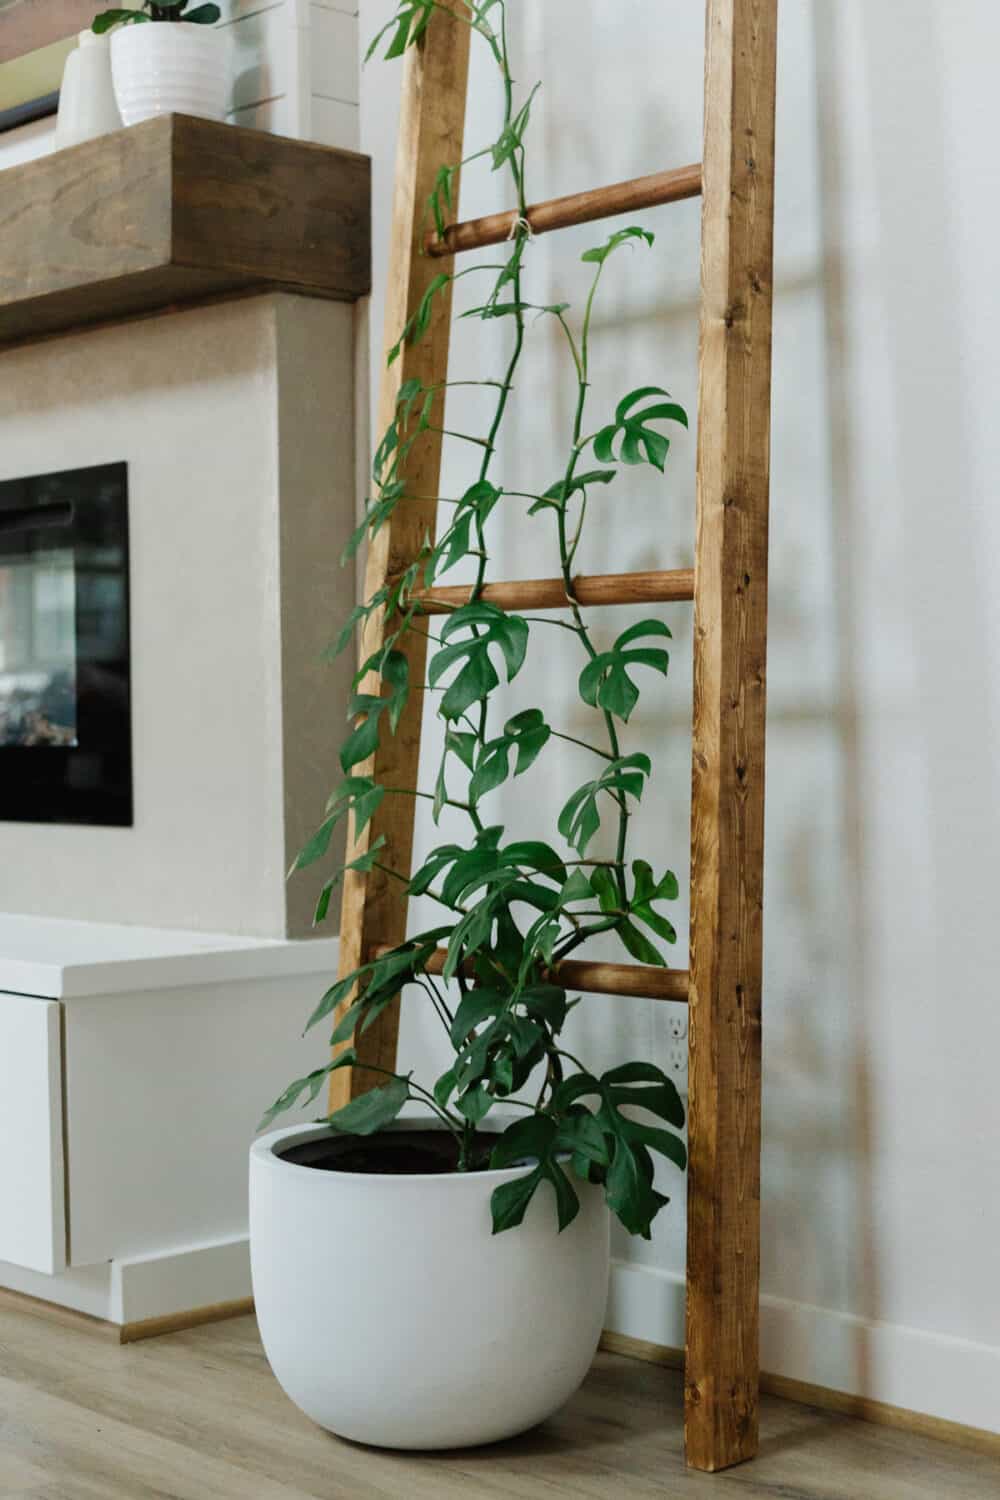
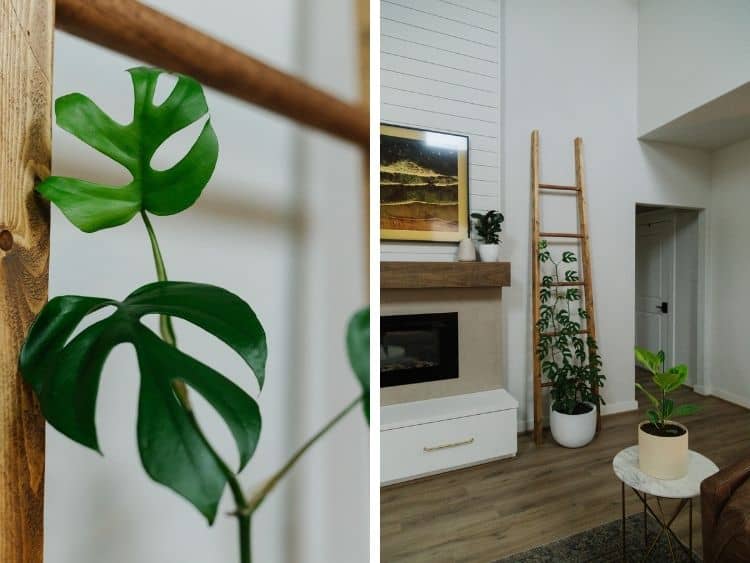
Once your trellis is complete, you’re ready to put it into place! Grab a pot that will give your plant some room to grow and plant your favorite climbing plant in it! I have a Rhaphidophora Tetrasperma in mine, but Pothos plants could be a great fit, as well as any ivy or vines!
A large indoor trellis like this is really great for any indoor houseplants that need a really solid support structure and do better upright. It provides great support for the plant and also looks beautiful! Vining plants are so fun to grow, and trellises are a great way to keep them happy and also add some visual interest to your home.
I just used some plain ol’ twine to attach my plant to the trellis, but some plants will naturally have aerial roots or tendrils that will grab onto it without any additional help. Just do whatever works best for your specific plant!
This method can easily be tweaked for a variety of looks and styles.
Here are a few ideas for how you could switch things up:
- Do all of the rungs the same width for a more modern and streamlined look
- Use 1x2s for the rungs instead of dowels
- Use thinner boards for the side pieces (a 1×3 would look super sleek and modern!)
- You could also do a more dramatic taper by increasing the difference in the widths of the rungs
Play around with different styles and see what works best for you! This indoor plant trellis could also be used as a blanket ladder, of course, if that’s more your style.
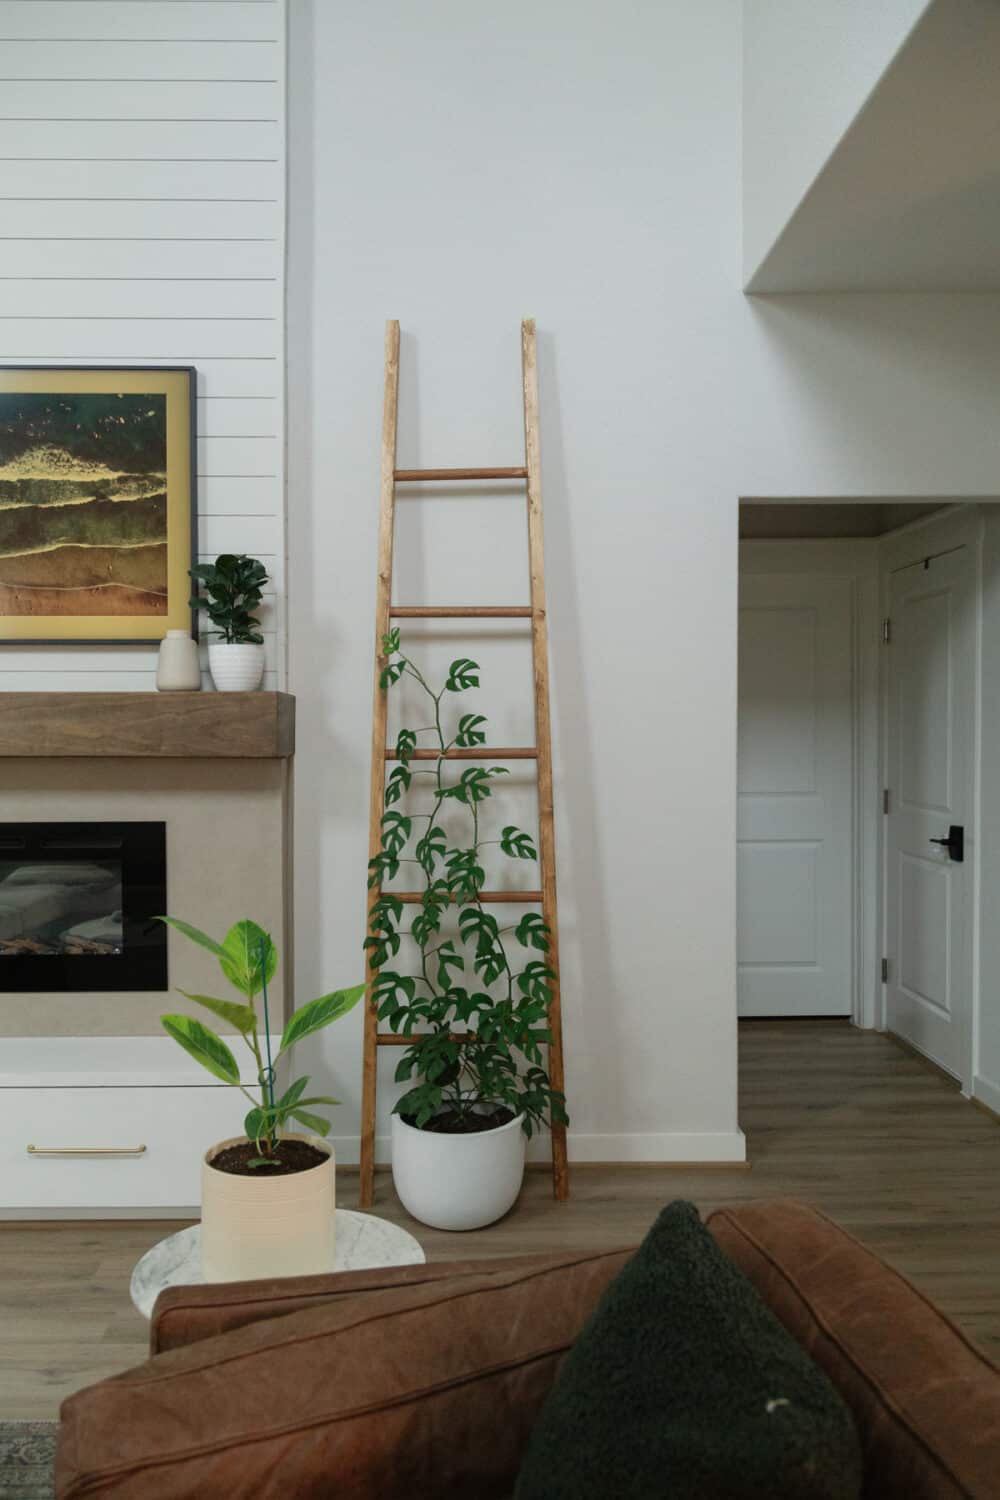
I’m excited to see how quickly my Rhaphidophora Tetrasperma fills up this new plant trellis. Once she reaches the top of this trellis I’ll be back to let you know how I end up deciding to continue to support her to reach her full potential – I hear they can grow up to 12′ tall, so that’s definitely what we’re aiming for here!
I came across you post the other day. I’m starting a plant collection and in love with the Mimi monstera. I was wondering what size pot the plant is in.
Hi! When I first got it, it was in a 6″ pot, but over time it has graduated to a 14″ pot.
Awesome idea it looks fabulous! How do you water it though?! It looks like it’s in a cache pot. How do you take that out without pulling on the trellised plant? Thanks!
Hi! It’s not in a cache pot, I just water directly in what it’s in.