The Simplest DIY Cabinet Door Organizer
One of the small things I take great joy in is organizing little spaces in my home. There’s almost nothing more satisfying than taking a spot that used to be a pain in the neck and turning it into a super organized and functional space.
One of the spots I’ve been meaning to tackle for a while is the area under the kitchen sink. Mine is a disaster at all times. But, I think with this little cabinet door organizer I just built, I’m one step closer to a fully organized area under the kitchen sink!
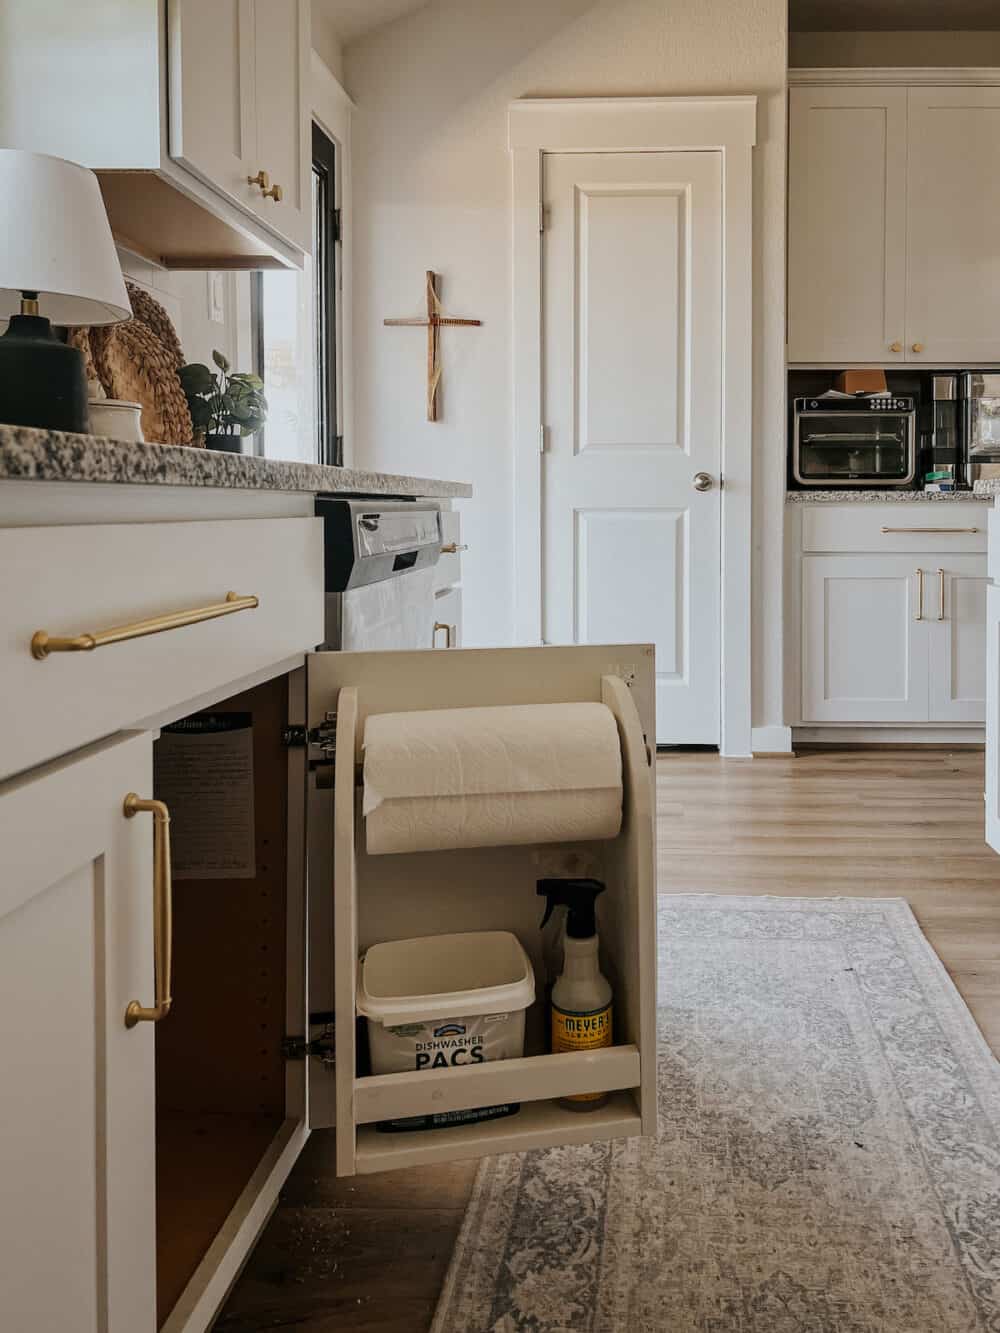
This was a very easy project. It just took three pieces of wood and an hour to build it. That’s it! So, if you’re also looking to build a cabinet door organizer to use on your under the kitchen sink cabinet, read on!
Of course, the rest of the area under my sink is still a bit of a disaster. But we’ll get to that soon. For now, let’s just enjoy some progress!
how to build a cabinet door organizer
*I was inspired by this project from Ana White. I saw it while browsing for organization inspiration and decided to make my own version!
Materials Needed
- (1) 4′ long 1×8 board
- (1) 4′ long 1×2 board
- (1) 36″ long 1″ dowel
- Miter saw (learn how to use one here)
- Jigsaw (learn how to use one here)
- Drill (learn how to use one here)
- 1″ spade bit
- Wood glue
- L-shaped brackets
Step one: make your cuts
First, you’ll need to make the cuts for your cabinet door organizer. Make sure to measure your specific cabinet door – I’m sharing the measurements I used for mine!
Here’s what you’ll need:
- (2) 19″ pieces of 1×8
- (1) 12″ piece of 1×8
- (1) 12″ piece of 1×2
- (1) 15″ piece of dowel rod
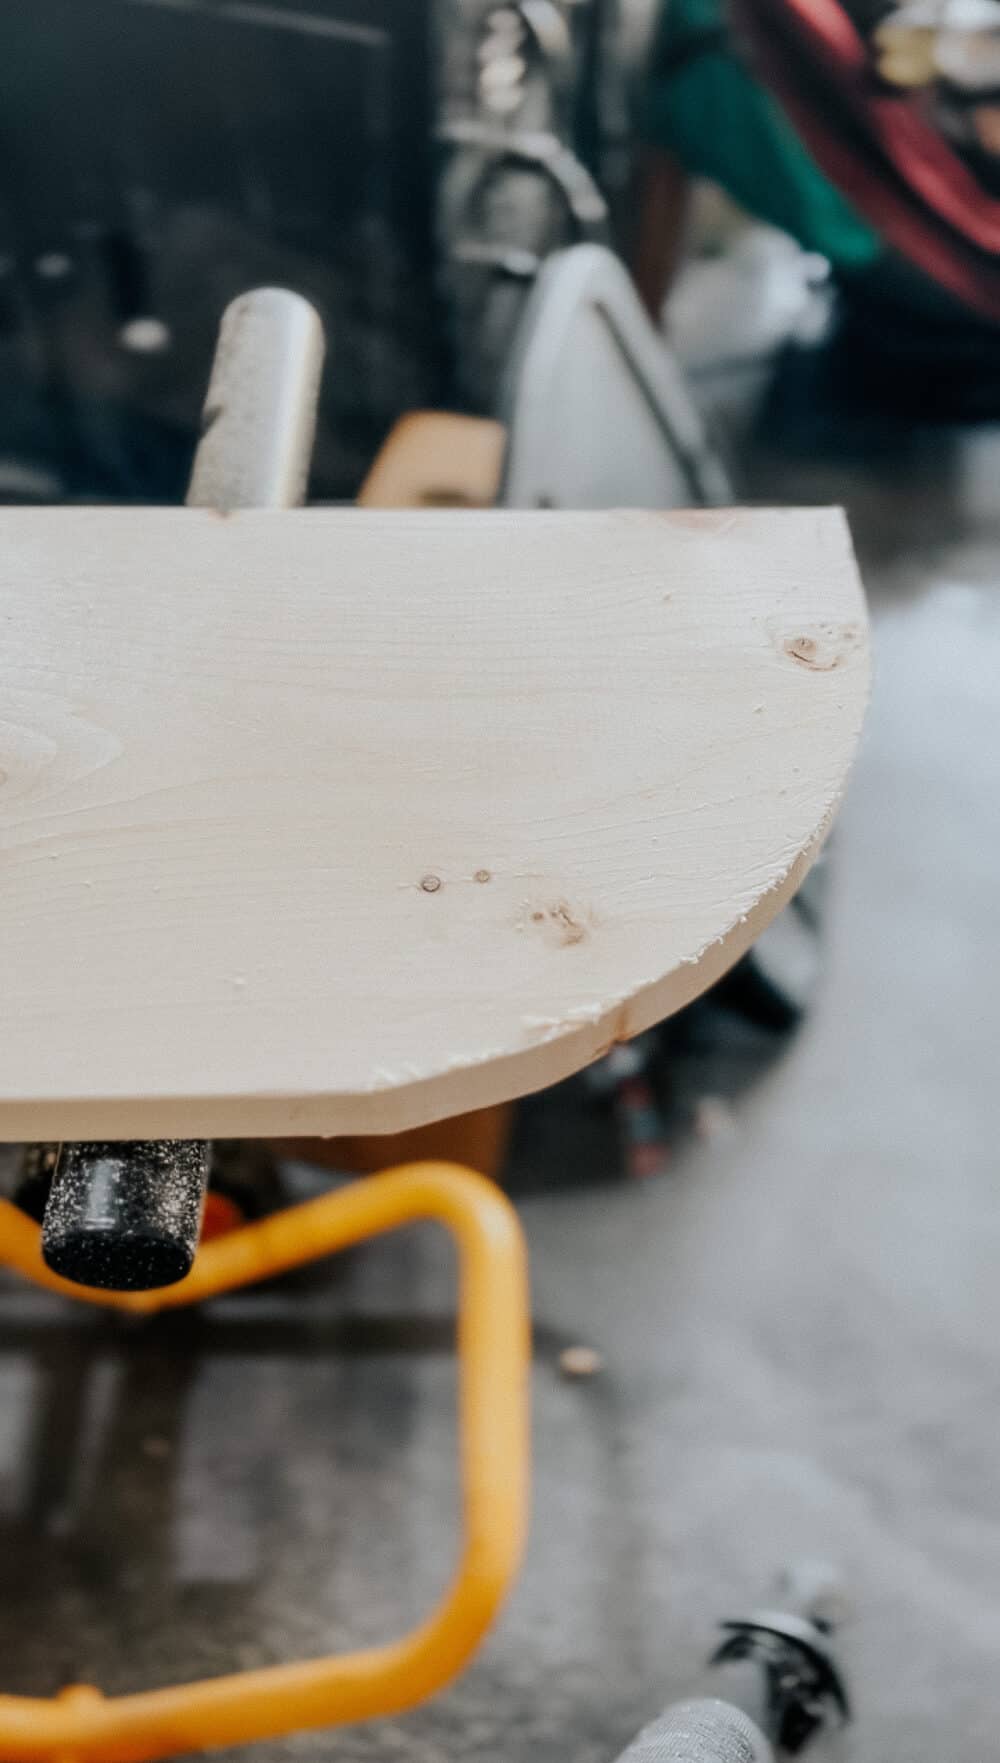
Once you’ve cut all of your pieces, you can add the curve to the side pieces. This is optional, but makes it a little easier to get your paper towels!
I just used a bucket I had laying around in the garage to trace a large curve on the end of each piece. Then, I used my jigsaw to cut it out, and sanded it thoroughly.
step two: drill holes for paper towel holder
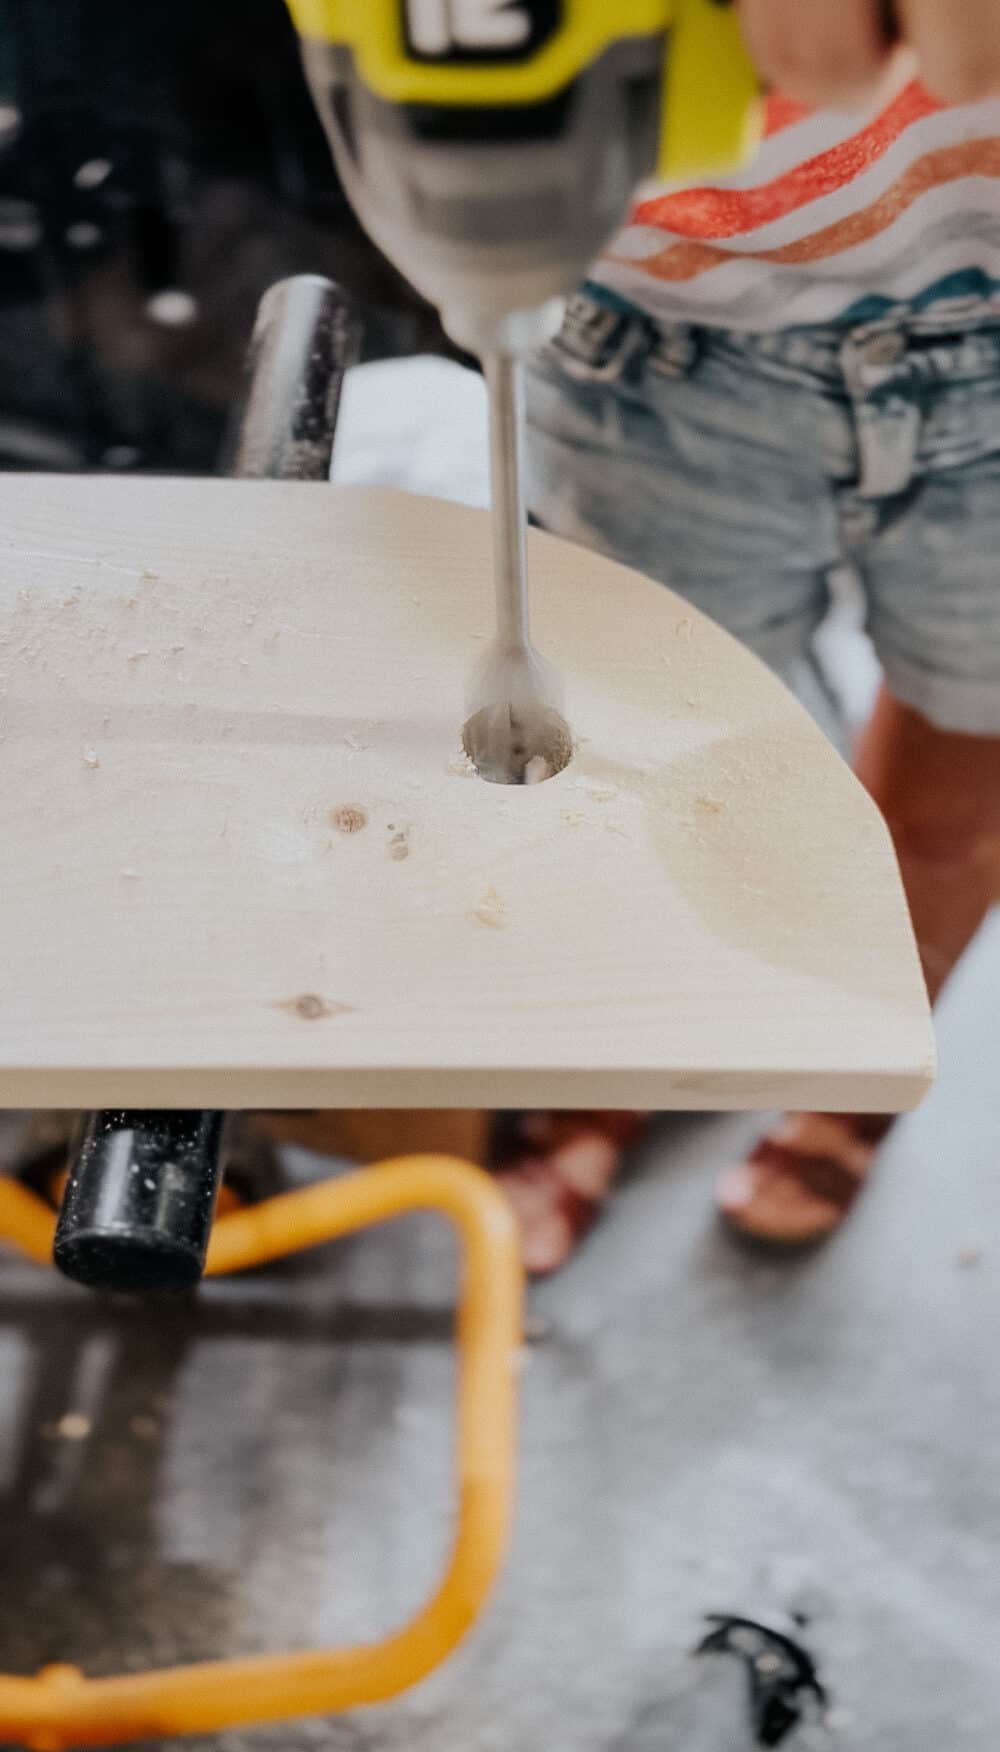
Next, you need to make the holes for your dowel rod. This is what will hold your paper towels! I used a spade bit to create the hole, but you can use a forstner bit as well!
Drill the holes approximately 3″ from the top of the side pieces, and right in the middle. I recommend drilling one hole, then lining the boards up and marking the second hole based on the first. That ensures they align even if you make a mistake in measuring the first one!
step three: Assemble cabinet door organizer
And now, you’re ready for assembly!
Use wood glue and screws to assemble the cabinet door organizer. Place the 12″ piece of 1×8 between the two larger pieces, lined up at the bottom. Drill into the sides of the board to attach.
Then, insert the 1×2 piece in and drill it into place. Place it about 3″-4″ from the bottom of the shelf. This is just to make sure nothing goes flying out when you open the door!
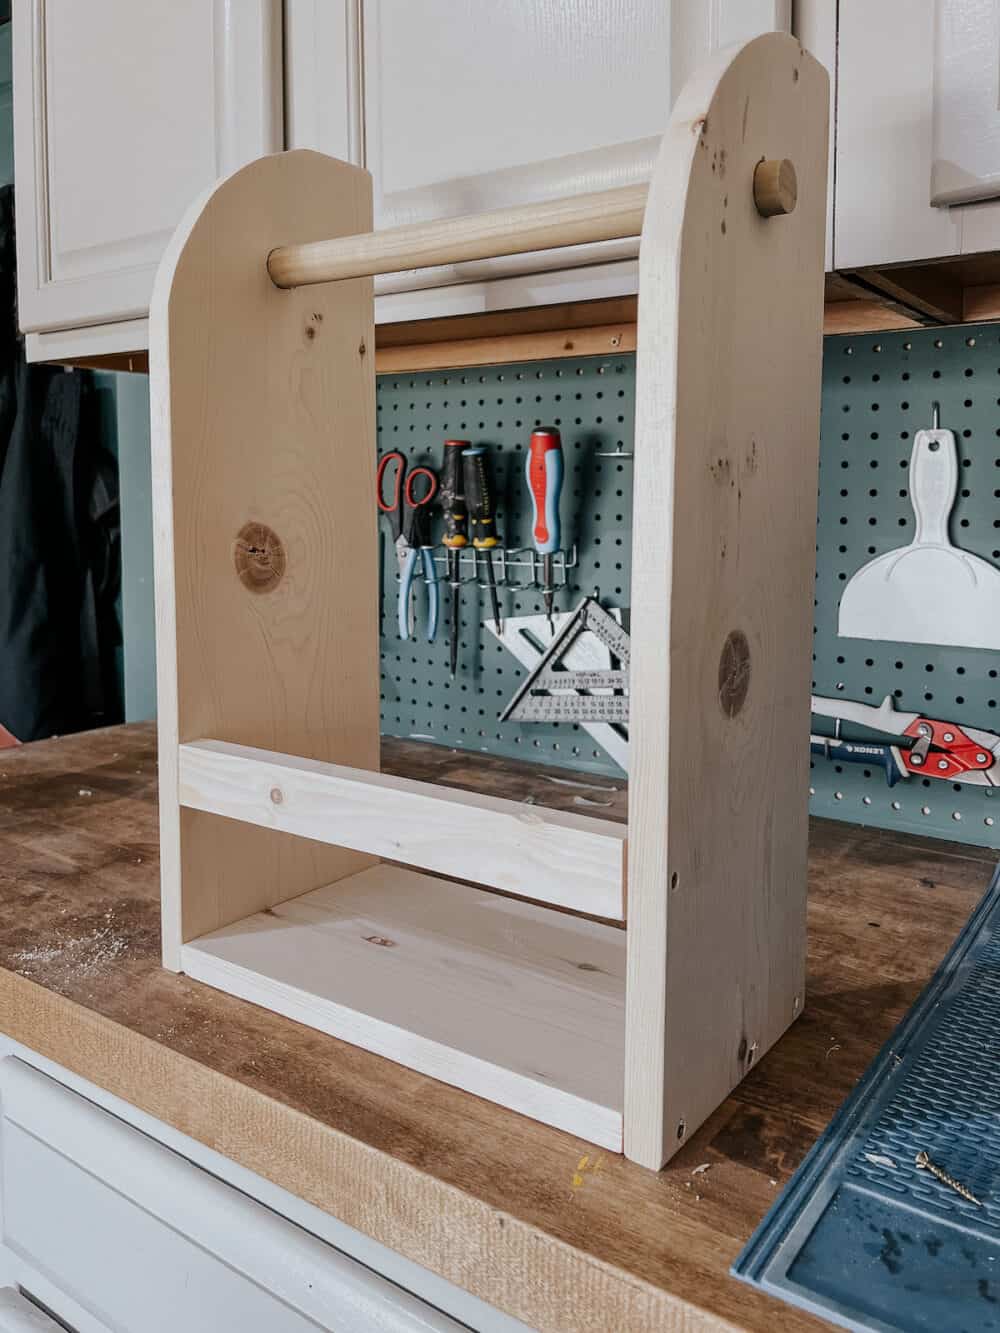
Once you’ve done that, you’re finished assembling! It’s that easy!
step four: paint or stain
After assembly, you can paint or stain it however you’d like. I chose to paint mine white to match the cabinet doors. I did the same thing on my pantry door organizer and I love the look!
I’ll note that I didn’t paint the dowel rod, I just stained it a darker color. I was worried it might stick a bit if it was painted, so I left it alone.
step five: hang it up & enjoy

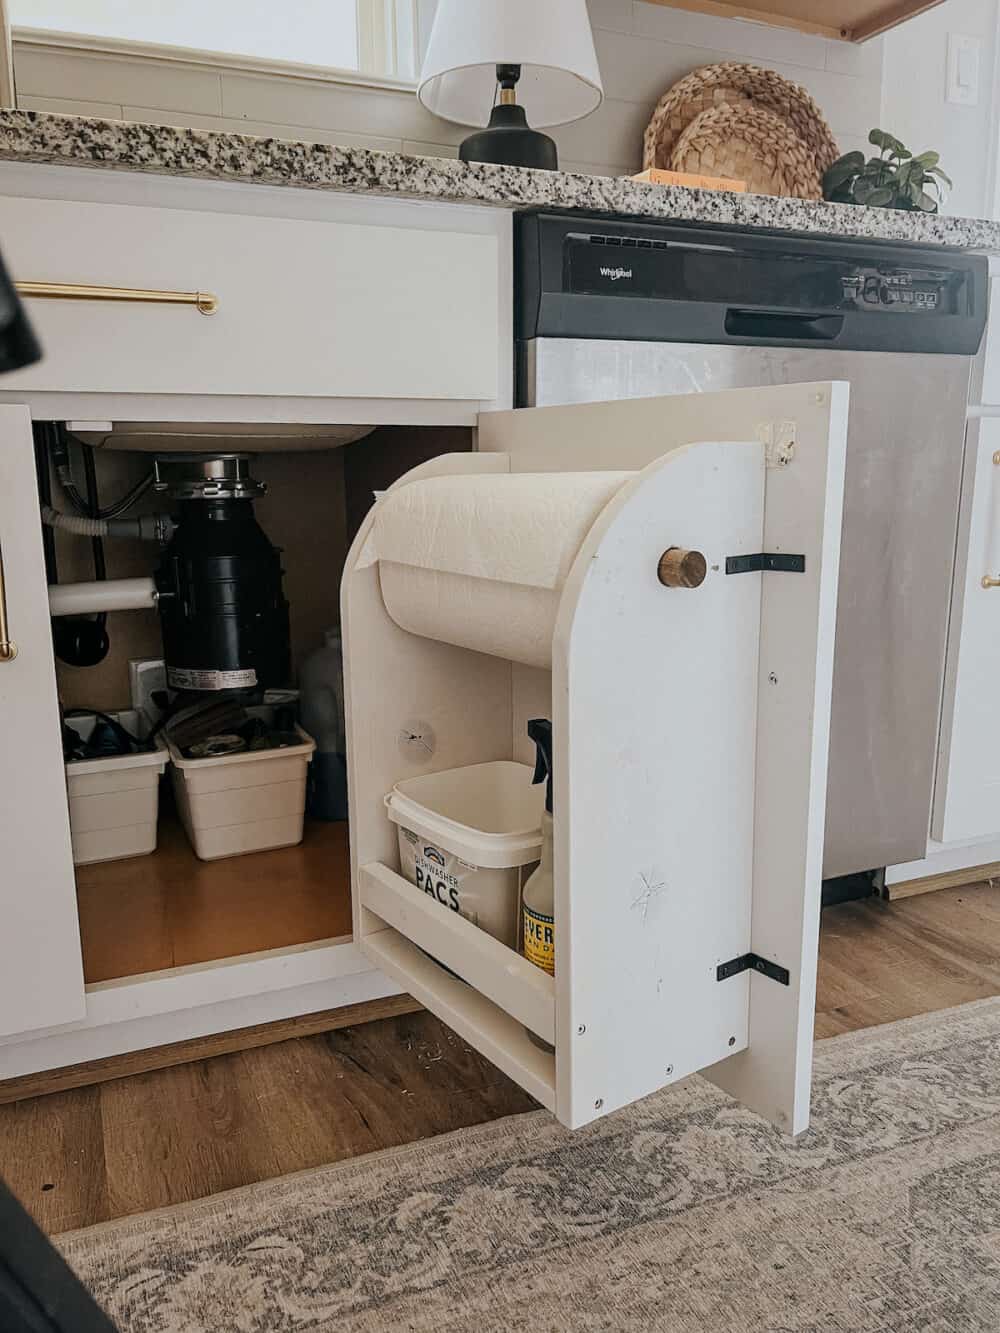
Once the paint is dry, it’s time to hang it. I decided to use these L-shaped brackets to secure it to the cabinet door. So far it feels really sturdy, and I think it’s going to work!
Just be sure to take your time, and measure to make sure it’s nice and level.
Then, fill it up! I placed my most-used cleaning supplies in the little shelf, and it’s already so nice to have them up front and center.
The area under my sink still has a long way to go, but I’ve been browsing options and gathering inspiration so stay tuned! Now that I’ve got it started, I’m determined to get it fully organized once and for all.
