
DIY Pull-Out Pot & Pan Organizer
Looking for a really great way to organize your pots and pans without breaking the bank? This DIY pot and pan organizer for your cabinets is a game-changer!
I collaborated with Kreg for this project!
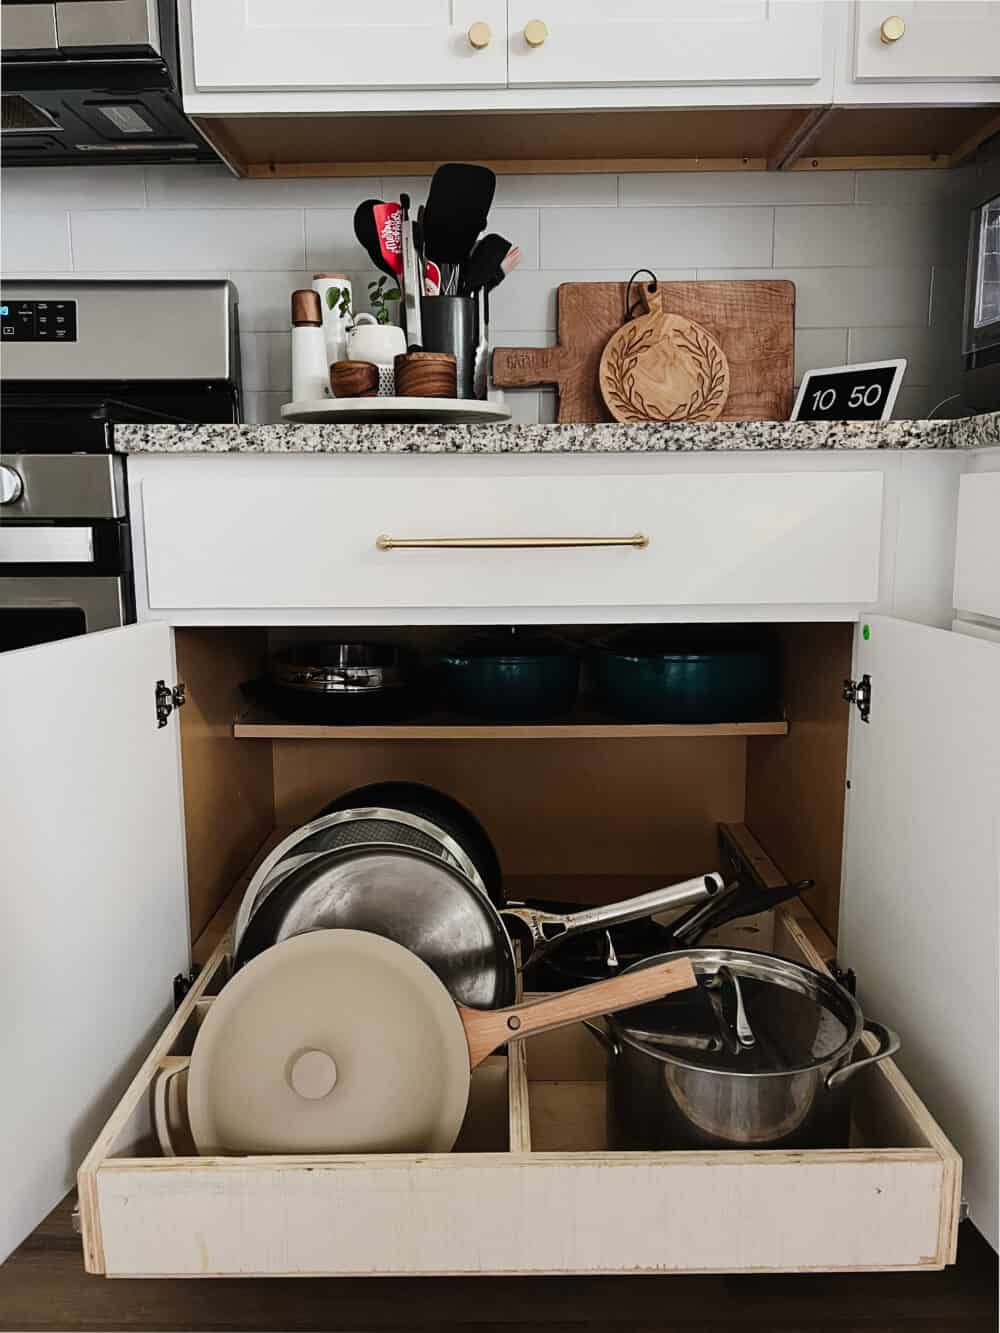
I don’t know how things are in your house, but historically, our pot and pan cabinet has always been a bit of a disaster. As in, it’s impossible to get anything out, everything is very precariously stacked, and if you make one wrong move everything might come crashing down on you.
But, I built a DIY pull-out pot and pan organizer for our kitchen a few years back and things have been so organized ever since. It holds all of my saucepans, my pots, the lids, and a few other things. And the best part? I built all of this using mostly scrap wood, and it only took a few hours from start to finish.
This project is very beginner-friendly, as long as you’ve got a little patience. You’ll feel like you’ve practically doubled your cabinet space, and it’ll give you easy access to exactly what you need when you need it. It doesn’t get much better than that. Here’s how I built it!
DIY Pull-Out Pot & Pan Organizer
Tools & Materials Needed
- Quarter sheet of 3/4″ (or 1/2″) plywood
- 1/4″ plywood project board (mine was 2’x4′)
- Drawer slides
- Circular saw (click here to learn how to use one)
- Kreg Jig + pocket hole screws (click here to learn how to use a pocket hole jig)
- Drill (click here to learn how to use a drill)
- Pin nailer (click here to learn how to use a pin nailer!)
- Wood glue
- Measuring tape (here are some tips & tricks!)
Step One: Measuring and Planning
The first thing you need to do is open your drawer slides and read the directions. It will tell you exactly how much clearance you need on either side of the drawer. I used side-mount slides because that’s what made the most sense for my project. Click here to learn about how to do the project with under-mount slides.
Now, here are a couple of other things to take into account:
- Check the instructions for your drawer slides to see how much clearance you need on each side. Mine said 1/2″.
- In order for the drawer to pull out past the hinges, you’ll need to measure from door hinge to door hinge rather than from side to side of the cabinet. If it fits inside the cabinet but gets caught on the hinges, your drawer won’t function!
- How will you mount it? I planned to add ledger boards on the side of my cabinet to attach my drawer slides to. When you’re measuring, you need to take the width of those into account as well! More on how I installed these below.
- Consider if you have shelves in your cabinet that will need to be removed!
So, here’s the formula I used to find the right width for my drawer:
Interior cabinet width – Size of ledger board (x2) – 1″ = drawer size
Once you’ve figured out the width of your drawer, it’s time for the depth. For most standard cabinets, a good drawer depth is 21″ or 22″. I went with 22″ here.
Step Two: Cut Wood for the Drawer

I made the sides of my drawer 4″ tall, so for my 30.5″ x 22″ drawer, I needed to use my circular saw to cut four pieces of plywood with the following measurements:
- Two pieces at 27.5″ x 4″
- Two pieces at 22″ x 4″
Why 27.5″ instead of 30.5? Because when you fit the drawer pieces together, the 22″ pieces will sit on the outside of the longer pieces, adding to the width of the board. So, you need to subtract the thickness of the plywood from your measurements!
After you cut those, grab your 1/4″ plywood and cut a piece that will exactly fit the bottom of your drawer.
Step Three: Drill Pocket Holes
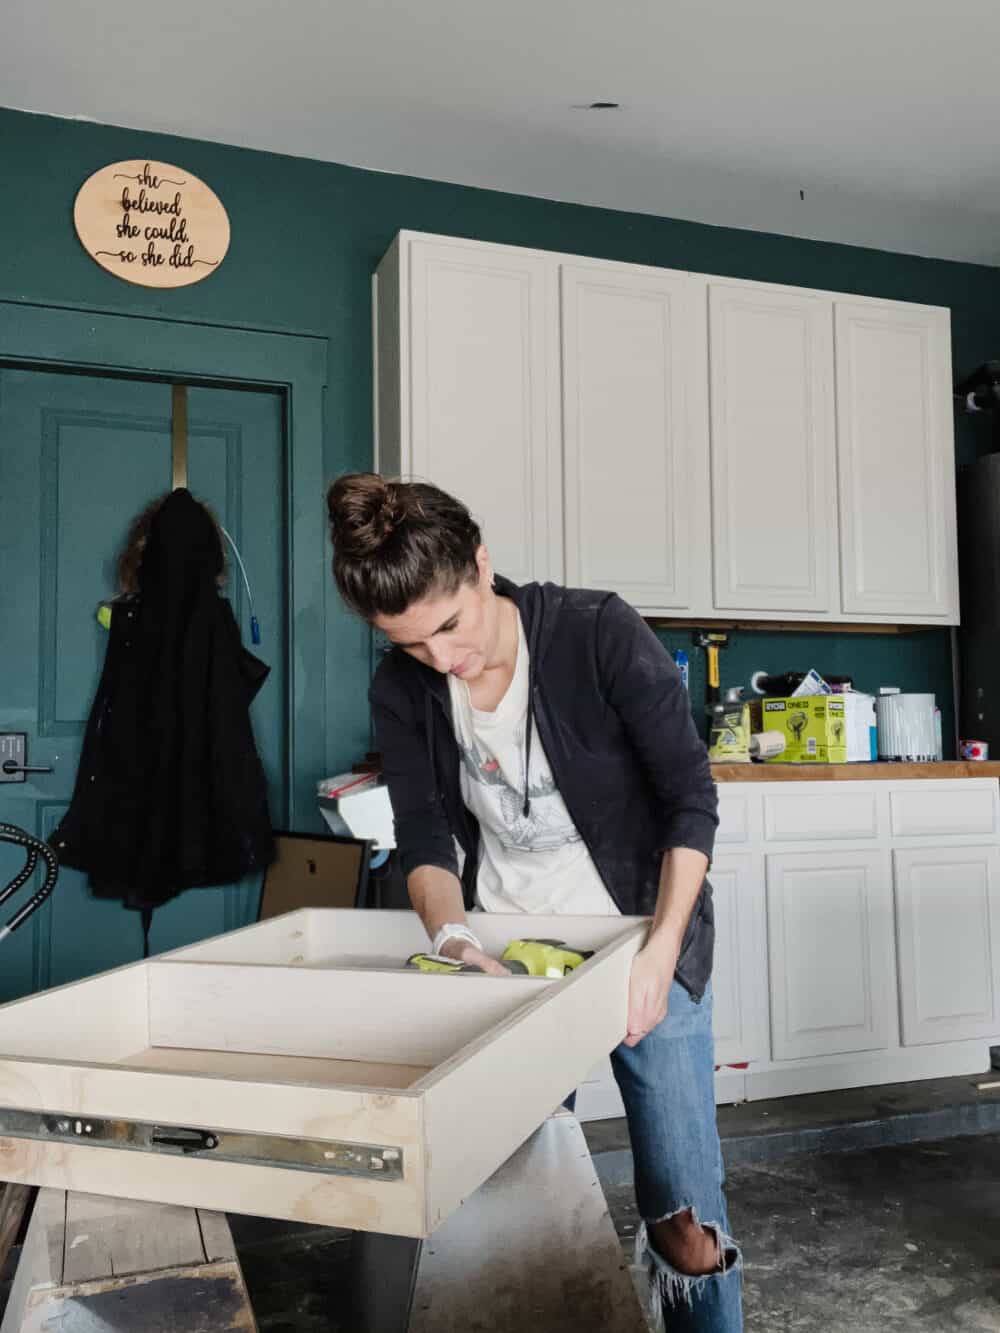
I’ve assembled drawers a few different ways before, and I can tell you with confidence that using a Kreg Jig to add some pocket holes is by far the easiest and fastest way I’ve tried! Simply drill two pocket holes on either end of your longer pieces, then add some wood glue and assemble a box!
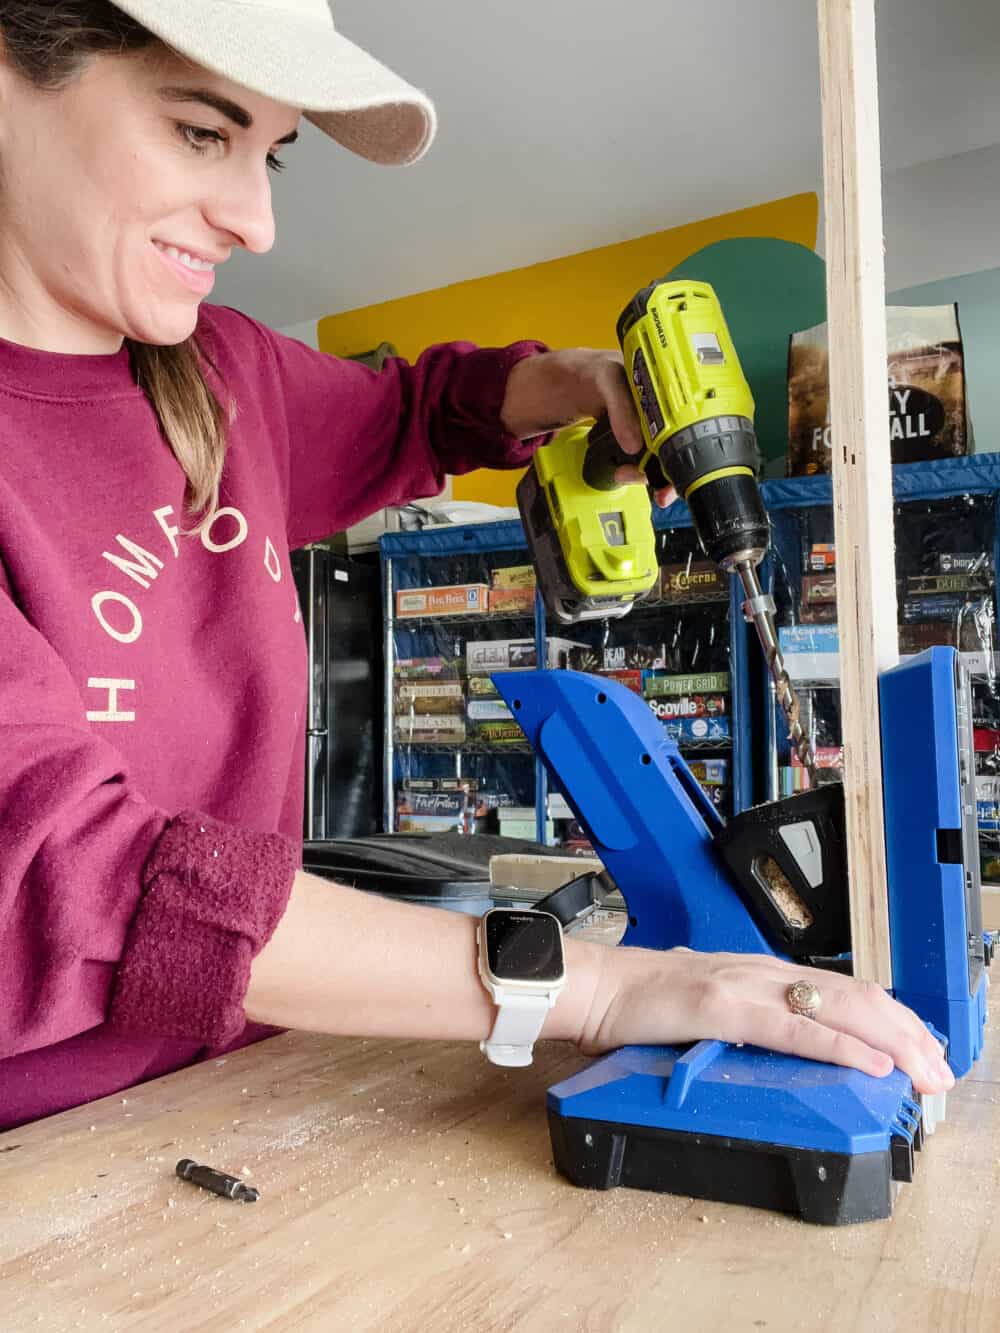
I recommend using some corner clamps (Kreg has these!) to help you hold things in place while you work. It makes it much easier to ensure everything is square!
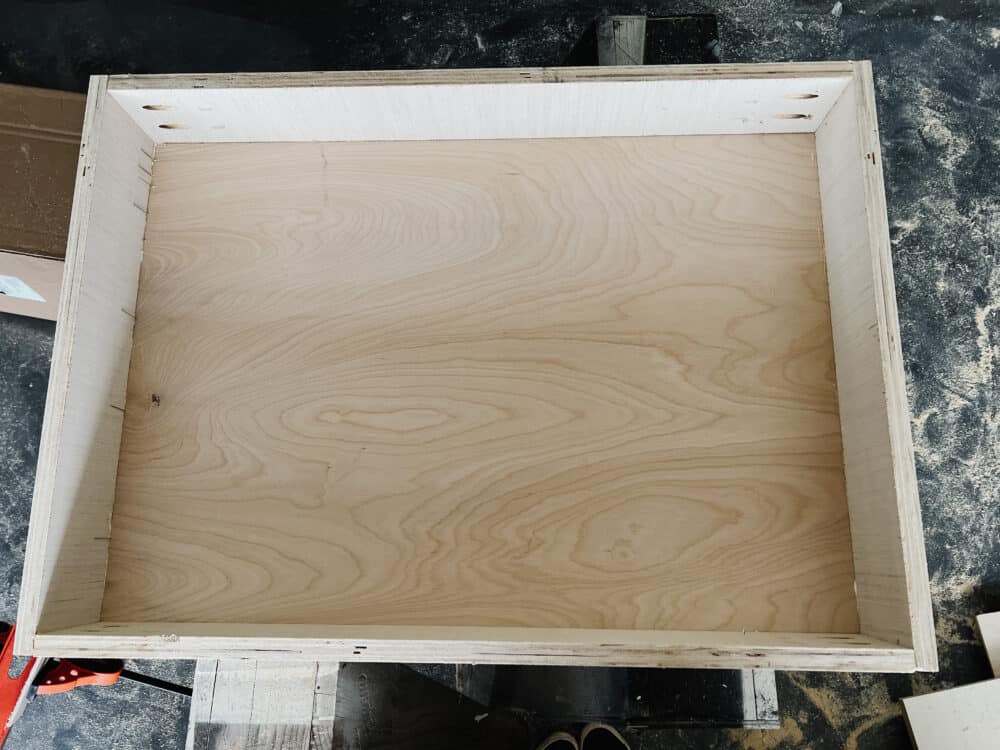
After you’ve added all of your pocket holes and screwed things into place, you should be left with an empty square of plywood. Grab your 1/4″ plywood, add glue around the perimeter of your box, and use a pin nailer to nail the bottom of the drawer into place.
Remember that with this method of drawer-building, the drawer isn’t going to be able to hold super heavy things – the bottom could eventually separate from the rest of the drawer. if you’re planning on putting larger and heavier things in your drawer, use the method outlined in this post instead! This would be something to consider if you want to put your cast iron skillets or dutch ovens in the drawer, as they’re heavy!
Once you’ve added the bottom, it should look a little something like this:
Step Four: Add Drawer Slides + Test Fit
With the drawer built, you’re ready to test the fit and make sure it’s going to work in your cabinet. I highly recommend you take the time to do this before you start adding the dividers to your drawer!
Because we have face-frame cabinets, I needed to add some ledger boards on either side of the cabinet to help push out the drawer slides.
I just grabbed some scrap 2×2 wood, cut it to the length of my drawer slides, and installed it about 3.5″ up from the bottom of my cabinet. Make sure the ledger boards are level on the side of the cabinet and that they’re level with each other!
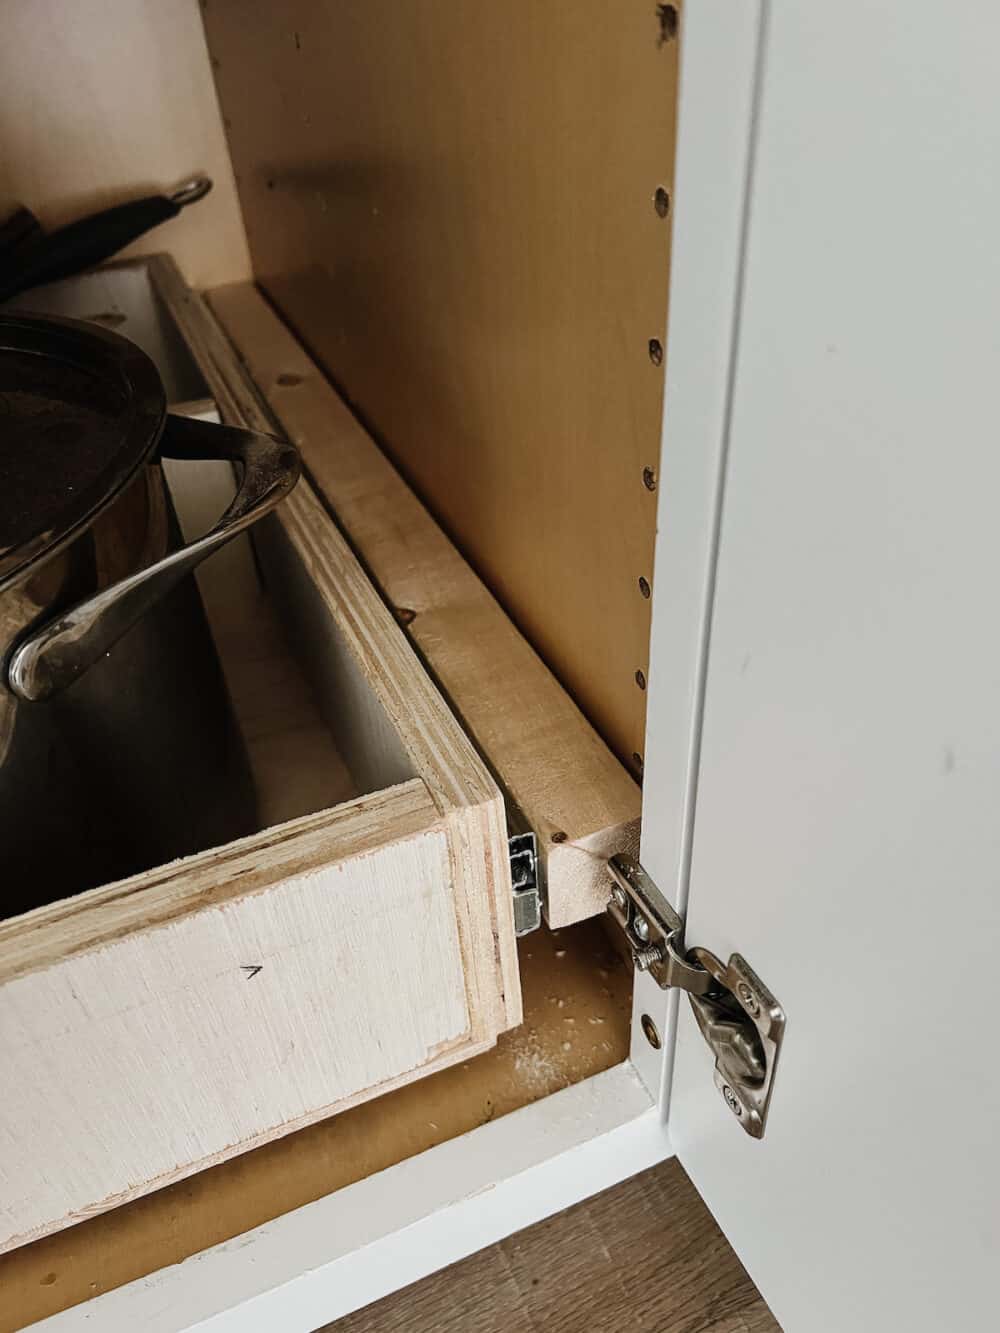
Once the ledger boards are in place, you can install the drawer slides right on top of them. Just follow any specific directions that came with your slides!
Add the drawer slides to your drawer as well at this time (I centered them on the sides of the drawer), then bring your drawer over to the cabinet and make sure it fits.
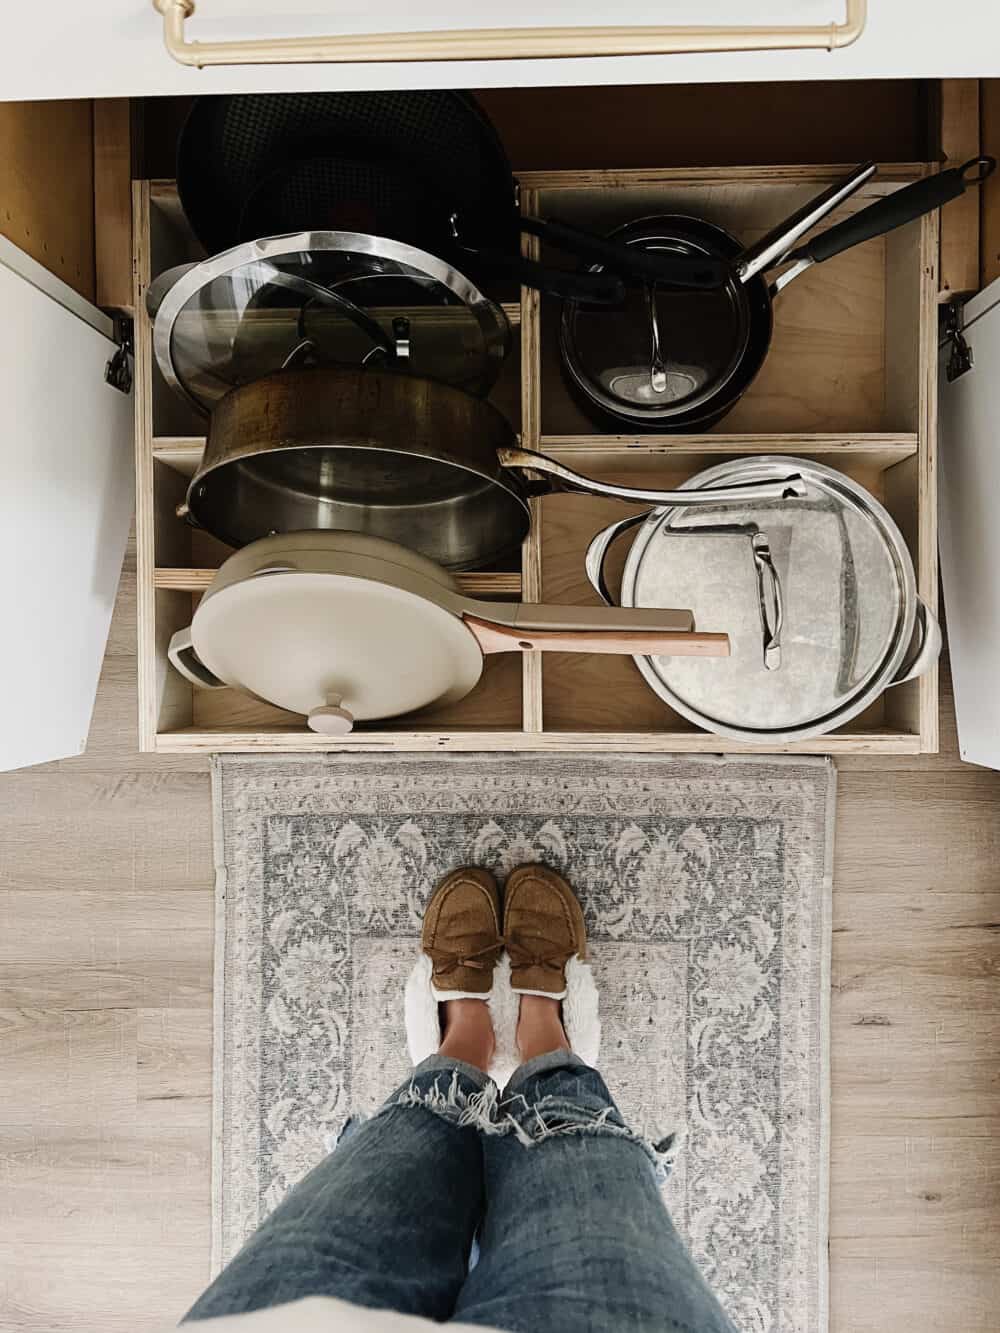
Step Five: Add Dividers to Drawer
If it all fits and slides the way you want it to, the fun can begin! Now, you get to plan out exactly how you want to organize all of your pots and pans to maximize your space and keep things organized.
I used some painter’s tape and brought all of our pots and pans out into the garage for this part of the process. I played around with a few different configurations and landed on having a divider down the middle, with one side dedicated to pans and lids (sitting on their side), and the other half dedicated to pots. You can, of course, plan however you want, though! You could even use something like this if you want adjustable dividers.
The dividers were really quick and simple to install. I just measured each opening and used my circular saw to cut down some plywood to fit. Then, I drilled pocket holes on each side of the divider and installed it where I wanted it!
Step Six: Enjoy!
Once the dividers were all in place, I gave everything a quick test fit! It fit exactly how I envisioned it in my head, so I put the drawer into place and called it a day.
And y’all. I’m so happy with how this quick DIY pull-out pot and pan organizer turned out.
Other Cabinet Organization Ideas
If you need some other organization tips for your kitchen, here are a few more ideas:
- This lid organizer would be great to add to the cabinet door for the pot lids.
- This game-changing Amazon find is so helpful for things like cookie sheets and muffin tins!
- If you don’t want to DIY it, I rounded up a ton of other pot racks, storage solutions, and cupboard organization tools right here in this Cabinet Organization list!
- Here’s how I organize my silverware drawer.
- I’ve also built some super simple (non-divided) DIY cabinet drawers.
- This DIY spice drawer organizer is so helpful!
How did you install the ledger boards?
I live in Austin as well. Could I pay you to teach me while I complete this project?
They’re drilled into the cabinets themselves! I don’t offer in-home help as of now – sorry!