
DIY Board and Batten Wall
Last updated on June 5th, 2024 at 09:20 am
We all love a good board and batten wall, right?
You’ve seen me do these walls before – I did a board & batten wall in Grant’s nursery at our last house, and I also did one in my own garage last year!
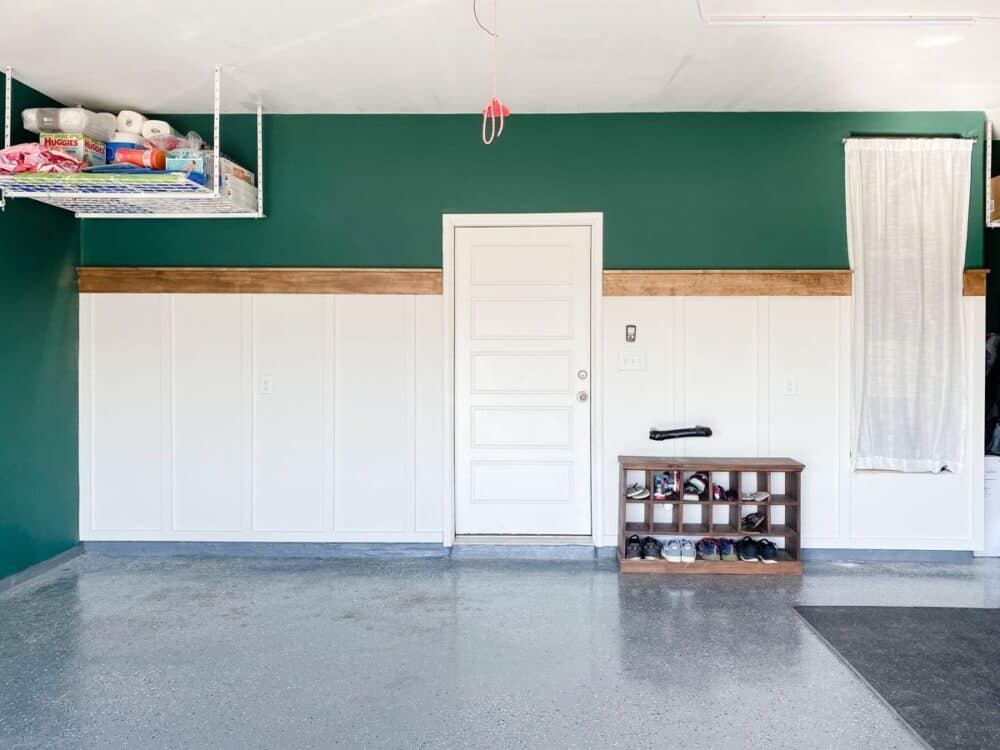
Well, this time I’m back in the garage (what? I think they make a good board & batten location, apparently) but this time it’s not my own. I just got finished installing a DIY board & batten wall in my best friend Parisa’s garage, and it looks so dang good, y’all!
This post is sponsored by Wagner.
Today I’m breaking down all of the details of how to create your own DIY board & batten wall – I promise it’s so simple and you can do this. This easy accent wall is a perfect project for someone who is new to DIY. Even if you’ve never picked up a power tool in your life, you can handle this.
I swear.
Let’s do it.
Board & Batten Wall Video Tutorial
Let’s kick it off with a quick video tutorial. I’ll break down all of the steps in more detail below, but if you like to see it play out in video form, just click play below and watch it all unfold!
Pssst: if you’re a video person, you can also click here to subscribe to my YouTube channel. I try to post at least once a week, and the videos don’t always make it to a blog post, so subscribing is the best way to be sure you don’t miss anything!
How to Install a DIY Board and Batten Wall
Materials
- 1×3 pre-primed wood or MDF boards (I needed nine 8′ pre-primed boards for this wall)
- 1×6 select pine boards (I needed two 8′ boards for this wall)
- 1×4 select pine (I needed two 8′ boards for this wall)
- Tape Measure
- Miter saw (Optional – you can have the store cut them down, too!)
- Brad nailer + Brad Nails
- Level
- Caulk
- Wood filler
- Orbital sander or sanding block
- Paint (I used Whisper White by Behr)
- Wagner SMART Sidekick Power Roller (or a paint roller and paint brush!)
Anatomy of a Board and Batten Wall
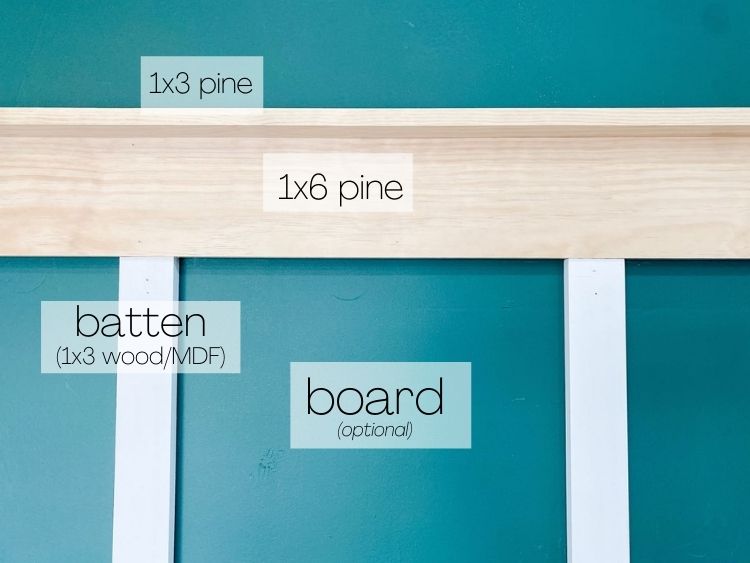
Before we dive in, I think it’s important to talk about the terminology here and learn exactly what we’re talking about.
A board and batten wall technically refers to a wall which has been covered by a thin piece of hardboard or plywood (aka: the “board” of board and batten) and then has thin wood strips, also called battens, in a grid pattern.
Typically when you see DIY board and batten wall treatments, they often just have the battens – no board. You can cover the wall first with a thin board, and this is more common if you have wall texture. But if you’ve been here for any length of time, you’ll know I’m all about embracing your home’s natural wall texture. I’m a big believer that you can do a board and batten wall treatment even with textured walls! I’m all about making my DIY projects as simple and accessible as possible, and this is a great way to do that.
Prep Work: Shopping For Wood
Your first step will be to go pick up the wood for your board and batten wall. I shared a ton of tips on picking out wood right here in this Instagram highlight, so I recommend starting there if you find the process intimidating.
To calculate how much wood you’ll need, simply measure the length of your wall, then divide by the spacing you want between your battens. I’d recommend anywhere from 12″-24″ depending on the look you want – my battens have a spacing of 18″ between them.
Now, keep in mind that the number you get will likely be more than you need – because it doesn’t take into account the width of the battens! But, it’s a good ballpark to tell you how much wood to grab, and I always prefer to purchase extra wood and then return some than have to go back to the store 7 times during a project.
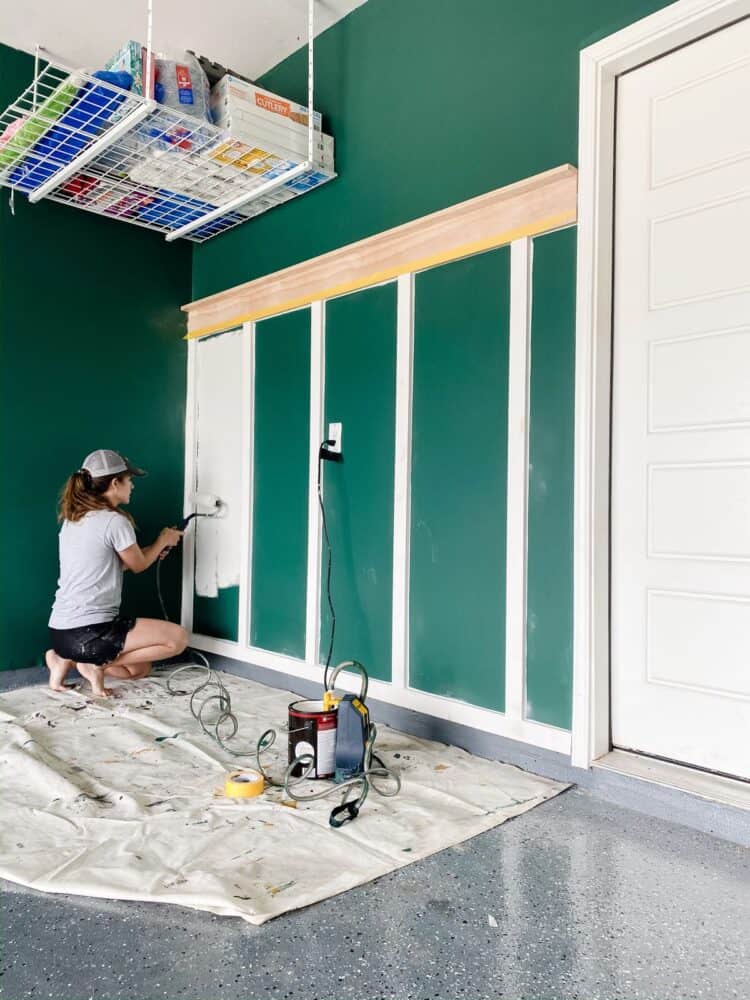
For this particular board and batten wall, I also added a larger, 1×6 piece of wood along the top, complete with a little picture ledge. You can just finish off your board and batten wall with another piece of 1×3 wood (that’s what I did in my garage!), but this is a really fun look that adds a special detail to the space.
As far as the height of your wall, you can do whatever you like! My battens are 5 feet tall – no particular reason other than that’s what felt right. You can cut the boards down yourself if you have a miter saw (learn how to use one right here!), or you can have them cut down for you at the hardware store before you even bring them home!
Prep Work: Plan Your Spacing
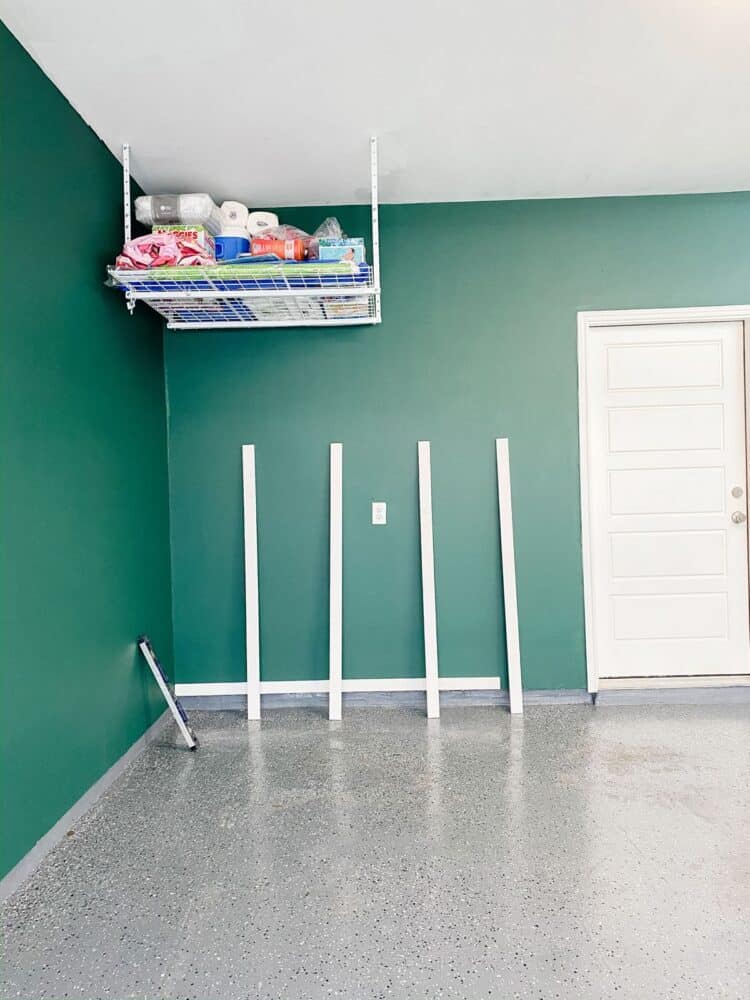
Once you’ve got the wood in your space, I recommend you lay it all out and do some planning for your batten spacing before you start.
This kind of wall treatment is really flexible, so with some minor adjustments it should be easy to make sure you don’t end up with weird spacing or a batten on top of a light switch or outlet.
First, decide if you want the wall to begin with a batten, or begin with open space. I decided to put a batten in the corner because it felt more polished that way. Then, I did 18″ spacing across the entire wall. My battens naturally managed to avoid hitting wall outlets or anything else, but if you find that one of your battens will sit in a spot you don’t like, simply adjust your spacing until you are happy with how it looks.
I’ll also note: if you’re doing an entire room of board and batten walls, plan the spacing out by wall – don’t try to make everything exactly the same. It’s a logistical nightmare and almost impossible to avoid hitting things. Instead, take each wall individually and plan it out and just try to get the spacing as close to the same as you can. It’s fine if it varies by an inch or two between walls – you will never notice if it doesn’t have exact spacing all the way around. But, you would notice if there were weird spaces left at the end of walls or battens that are cut off by electrical outlets!
Once you’re fully planned out, it’s time to start installation!
(Optional) Install Ledger Board
I started with a horizontal ledger board going across the bottom of my wall. This isn’t a required step at all, but since the garage doesn’t have an existing baseboard this helped things feel a little more polished. It also prevented me from having to worry about the bottom of the drywall not being straight – I just made sure the ledger board was level and then I could rest all of the battens on top of this.
I skipped this step when I did a board and batten wall in Grant’s nursery (which had baseboards), so it’s 100% optional.
Install battens
Now you’re ready for the battens!
You have two options when it comes to installing the vertical batten boards:
- Use nails only (easier to remove down the line without drywall damage)
- Use a construction adhesive like Liquid Nails and nails (much more permanent)
I chose to skip the construction adhesive out here because I want Parisa to easily be able to change this if she wants. However, in the past I have used construction adhesive on board & batten walls – so it’s up to you and how much you’re ready to commit to! It helps if you can check for studs – you won’t hit one on every board, but definitely try to when you can!
I will say that, generally speaking, the wall will hold up really well without construction adhesive! I recommend using at least 2″ long 18-gauge nails, and on each board have a few nails that cross in the back (angle one downward, then add one right below it angled upward). This helps the entire thing feel more sturdy and ensures the boards won’t pull away from the wall over time.
Don’t know much about how to use a nail gun? Click here to learn how!
Use a level on each board as you work to ensure that it’s plumb (straight up and down), and double-check your spacing regularly to ensure you don’t get off as you go down the wall!
Install Top Horizontal Board + Picture Ledge
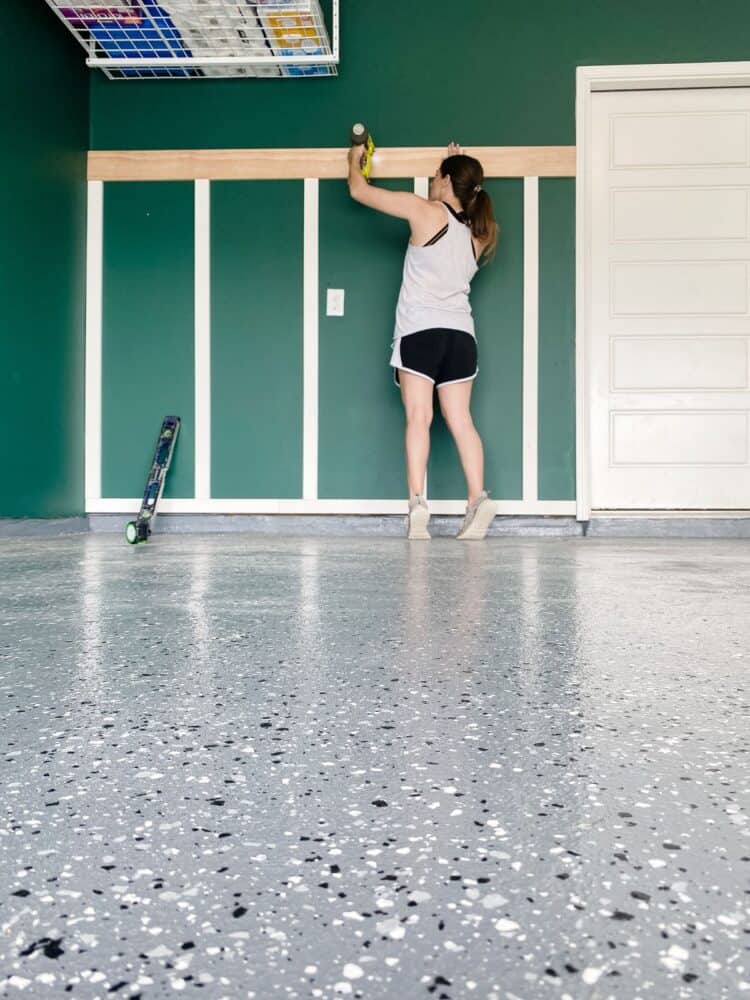
After all of the battens are installed, you can place the 1×6 board across the top and nail into place.
Finally, lay the unprimed 1×3 board flat on the 1×6 so that it hangs over a bit like a shelf. I’d recommend using construction adhesive here to help hold the top ledge in place – especially if you plan to rest anything on this board!
And with that, the installation is done!
From start to finish this entire wall took me less than two hours to install – I’ve done this a time or two so I work pretty fast, but even a total newbie could easily tackle this in an afternoon!
Finishing: Add Caulk and Wood Filler

Next up, you’ll want to calk around all of the places where the boards meet the wall to help hide gaps. Even the most well-constructed home will have a wavy wall or two, so you will absolutely have some gapping between your boards and the wall. Caulk helps cover all of that up and makes everything look much more polished.
If you aren’t familiar with how to use caulk, this post should give you a ton of information!
You’ll also want to use wood filler or spackle on the nail holes and seams – this helps everything look much more polished and seamless. It’s very easy to apply (I literally just used my finger), just be sure to overfill it a little and then sand it down so that the hole is fully covered.
Once everything is dry, use a power sander or a sanding block to sand down the wood filler and make everything nice and smooth. Be sure to be really thorough with your sanding on any areas that will be stained!
Paint and Stain
And finally, you’re ready for paint!
For this accent wall, I went with Whisper White by Behr, and I painted it using my trusty Wagner SMART Sidekick Power Roller. You’ll probably know by now that it is hands-down my very favorite painting tool and I use it for all of my larger painting projects. It makes things so much easier, and I’m not exaggerating when I say that it generally cuts my painting time in half. Of course, you can use foam rollers or even regular rollers to paint your wall, too.
You can click here to learn more about the SMART Sidekick and how to use it (and, more importantly, how to clean it – I promise it’s not that hard!). It’s the best little tool for painting rooms and I honestly don’t think I’ve painted a full room without it since I first discovered it!
The hardest part of painting the wall is, of course, cutting in along aaaaall of the edges and corners, but it didn’t take too terribly long.
A quick note: You absolutely can paint everything before installing the boards. I did that with the picture molding I did in my bedroom! Just know you’ll have to go back and touch up after caulking.
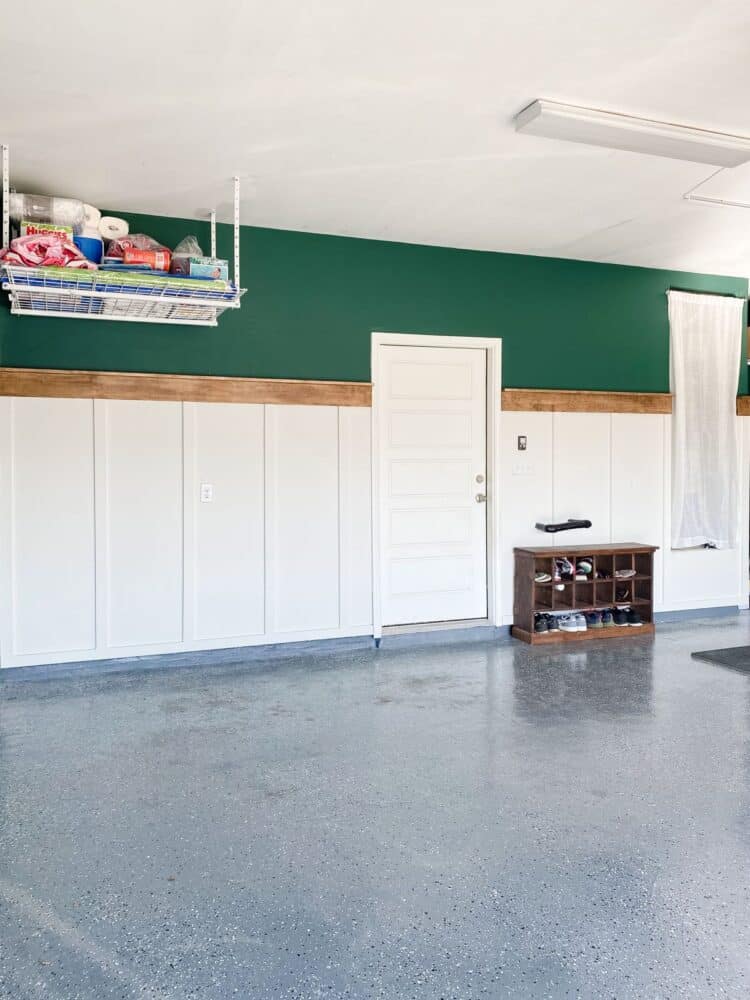
After painting, I stained the top boards (note to self: it would have been wiser to stain the boards before installing them!), and just like that the wall was DONE!
SOURCES:
- Wall Color: Rainforest by Behr
- Board & Batten Color: Whisper White by Behr
- Stain color: Dark Walnut by Varathane
- Ceiling storage
- Shoe cubbies
- Floor tutorial
I’m so, so excited about how it turned out. It was an easy DIY and it really helps add some visual interest and makes the garage feel more like a room than a garage.
I’m already trying to convince Parisa we need to bring the board and batten into the little hallway right off the garage to help things feel even more cohesive – you know I’ll update you if we do!