How to Frame a Bathroom Mirror
With all the effort I’ve been putting into the boys’ bathroom lately, one thing I really didn’t want to neglect was the mirror. It’s a large, builder-grade mirror that doesn’t really feel special at all, and I knew with some love it could easily look a lot better.
I considered replacing it, but I kept getting hung up on the off-center faucet, the price of a large mirror, and a million other logistics. So, I decided that instead of continuing to try to make it work when it just didn’t feel right, I’d pivot!
Framing out a builder-grade mirror is a really easy DIY project that you can knock out from start to finish in a day. It doesn’t cost much (I spent about $50 on the wood, adhesive, and hardware I needed at Home Depot), and you only need a very basic understanding of DIY to make it happen.
So, let’s learn how to frame a bathroom mirror, shall we?!
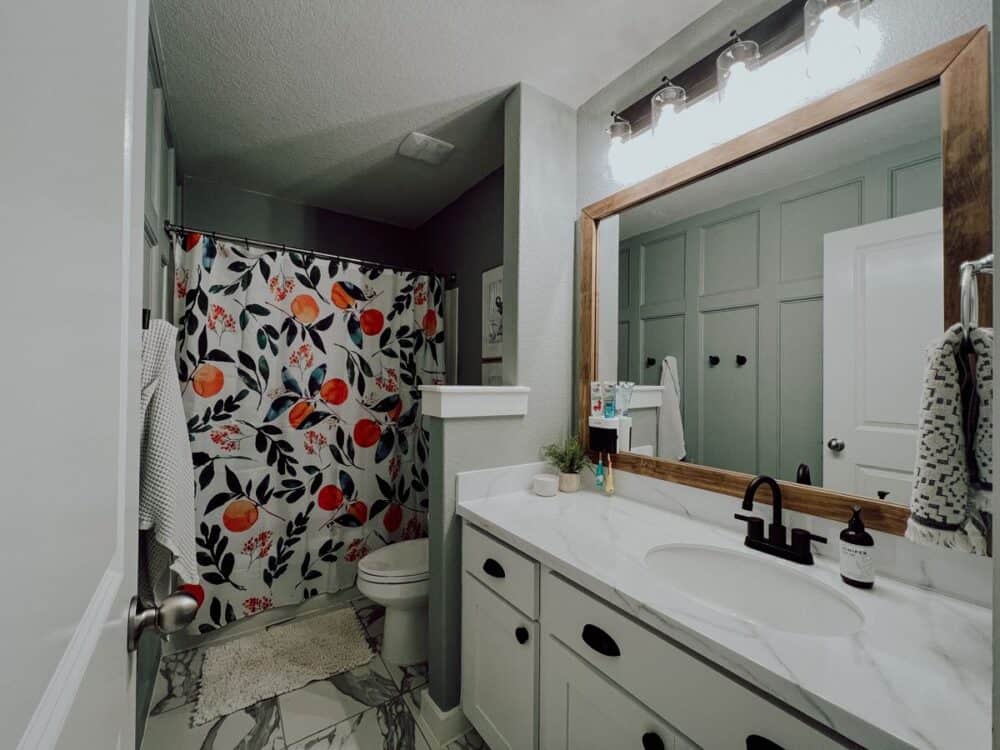
materials needed
Keep in mind that the materials list below is for my specific mirror and the specific design I used. You can use thicker wood or thinner wood. You can use a different type of wood, like trim with more detail, or something like oak instead. Or, you can paint your wood! You can turn the wood on its side! Your mirror might not have clips, mine does.
There are a ton of little factors like this that will affect every project – so feel free to switch things up and get creative with it. This is a basic blueprint that you can easily change around to fit your needs.
i used…
- 1×3 pine wood
- Gorilla Glue construction adhesive (make sure the label says it’s good for mirrors!)
- Caulk gun (you’ll need this for the adhesive)
- 1/4″ washers (only necessary if you have mirror clips)
- Varathane Dark Walnut stain
- Painter’s tape
I’ll note – you can also purchase a mirror frame kit that is far easier to put together and install. However, the cost is notably higher – for a mirror this size, one of those kits would cost about $193 versus the $50 I spent.
how to frame a bathroom mirror
step one: cut & stain wood
Start by measuring your mirror and cutting your wood pieces for the frame.
I placed my frame on top of my mirror. This is what worked best for how my mirror was positioned (since it rested on top of the counter). If you have enough space around your mirror to have the frame go on the outside, go for it!
I measured the mirror exactly and noted the dimensions. Then, I cut my pine pieces to fit on top of the mirror.
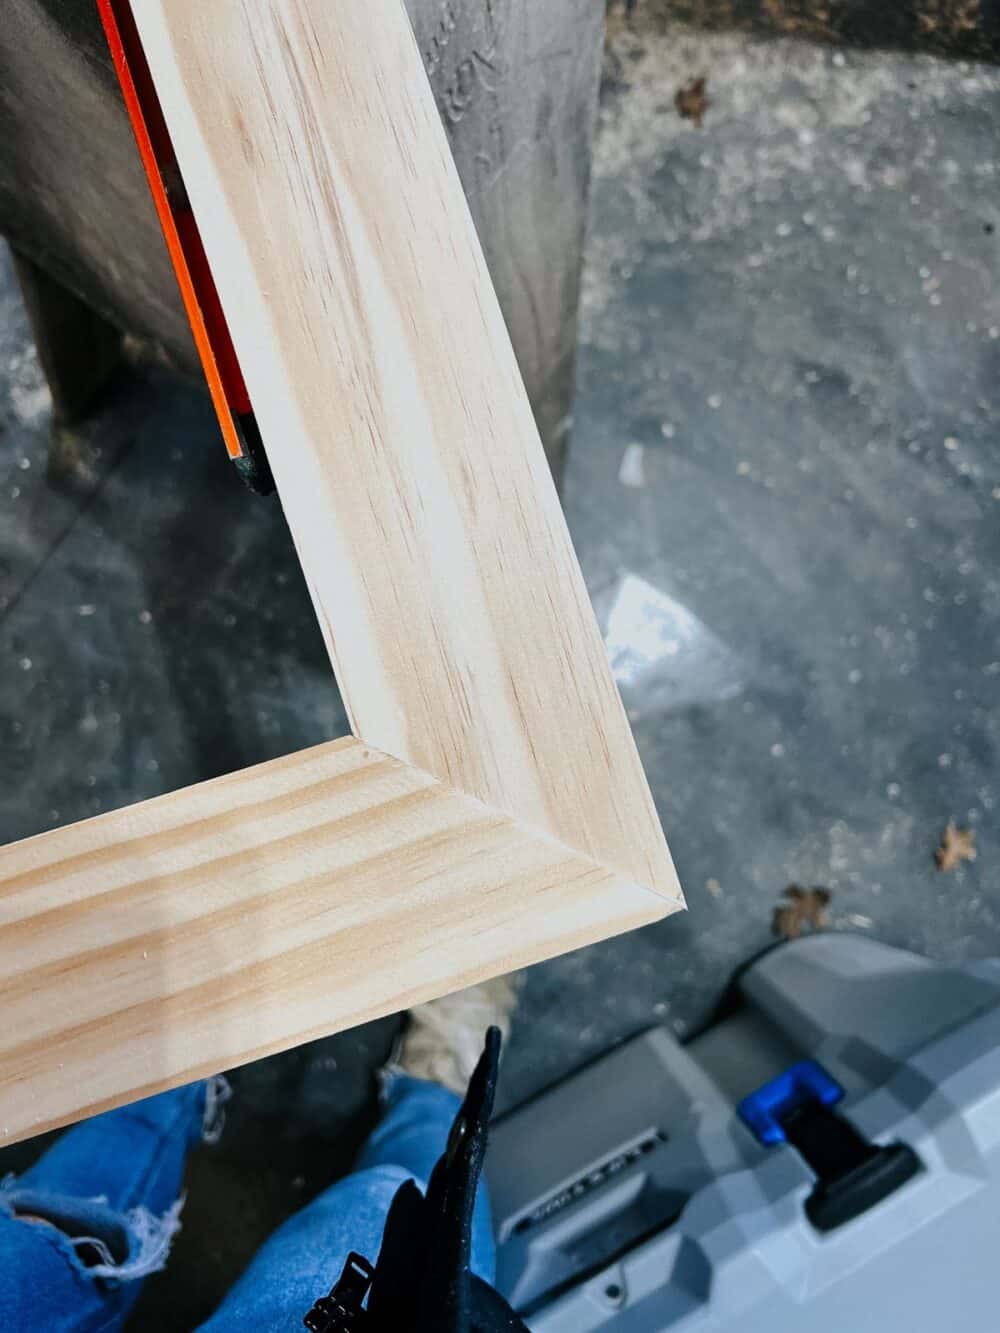
I chose to do a mitered corner for my framed mirror. This means that the corners of the frame meet each other at a 45-degree angle (as pictured above). This isn’t totally necessary – you can easily just make a straight cut and butt the sides of the wood against each other. You’ll get a slightly more rustic look this way. But, I prefer a mitered edge and it’s not that much harder! Here’s the step by step:
Making Mitered Cuts
- Measure one side of the mirror. Let’s say it’s 36″.
- Cut one end of your wood at a 45-degree angle.
- Measure and mark 36″. Be sure to measure the longest part of the board, not the shortest!
- Instead of marking in the center of the board widthwise, mark towards one side of the board. You want the tip of your angled cut to be 36″ – not the middle of it!
- Adjust your miter saw so that it’s making a 45-degree cut. Click here to learn more about miter saws and how to use them.
- Align your wood so that the blade will hit the mark you made. Make sure that you line the blade up on the outside of your line. If you line the blade up on your line or on the inside of your line, you’ll remove more than you intended. Your saw blade is about 1/8″ thick, so if you don’t line it up properly, you could remove an extra 1/8″ from your measurement.
- Repeat for all of the other sides.
And that’s it! Mitered corners can take a little bit of practice, but they’re really simple and look so polished! You may find you struggle to get perfect seams the first few times you do this (heck, I still do sometimes!) but just keep practicing and you’ll get it!
Once you’ve cut the wood, you can stain or paint it to the finish you want. I chose to stain mine with Varathane’s Dark Walnut. It’s my go-to for a darker finish, and I think it looks good in basically every space! If you need help with staining, click here to learn how!
Step Two: Replace clips with washers
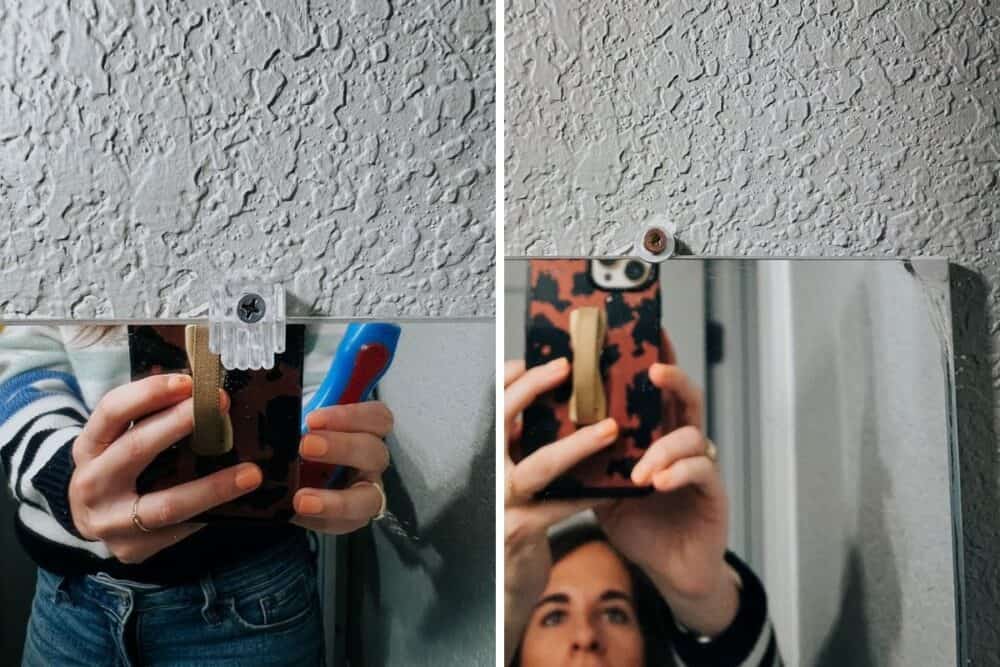
A lot of times when people want to frame a bathroom mirror, they get tripped up by the mirror clips. These are the things that help hold the mirror in place and they can be a bit bulky.
One option is to leave them there and simply notch out the back of the wood so that it slips over the clips. You could use a Dremel or a hand tool to carve it out. That’s a fine strategy, but it’s a bit of a pain to notch the wood out.
Instead, here’s what I do:
Remove each clip (do this one at a time, or the mirror might fall!) and replace it with a small washer!
The washer holds the mirror in place just as effectively as the clip does, and it takes up much less space. With this simple, two-minute swap, I was able to place my wood right on top of the washers and it didn’t cause any problems at all.
step three: attach frame to mirror
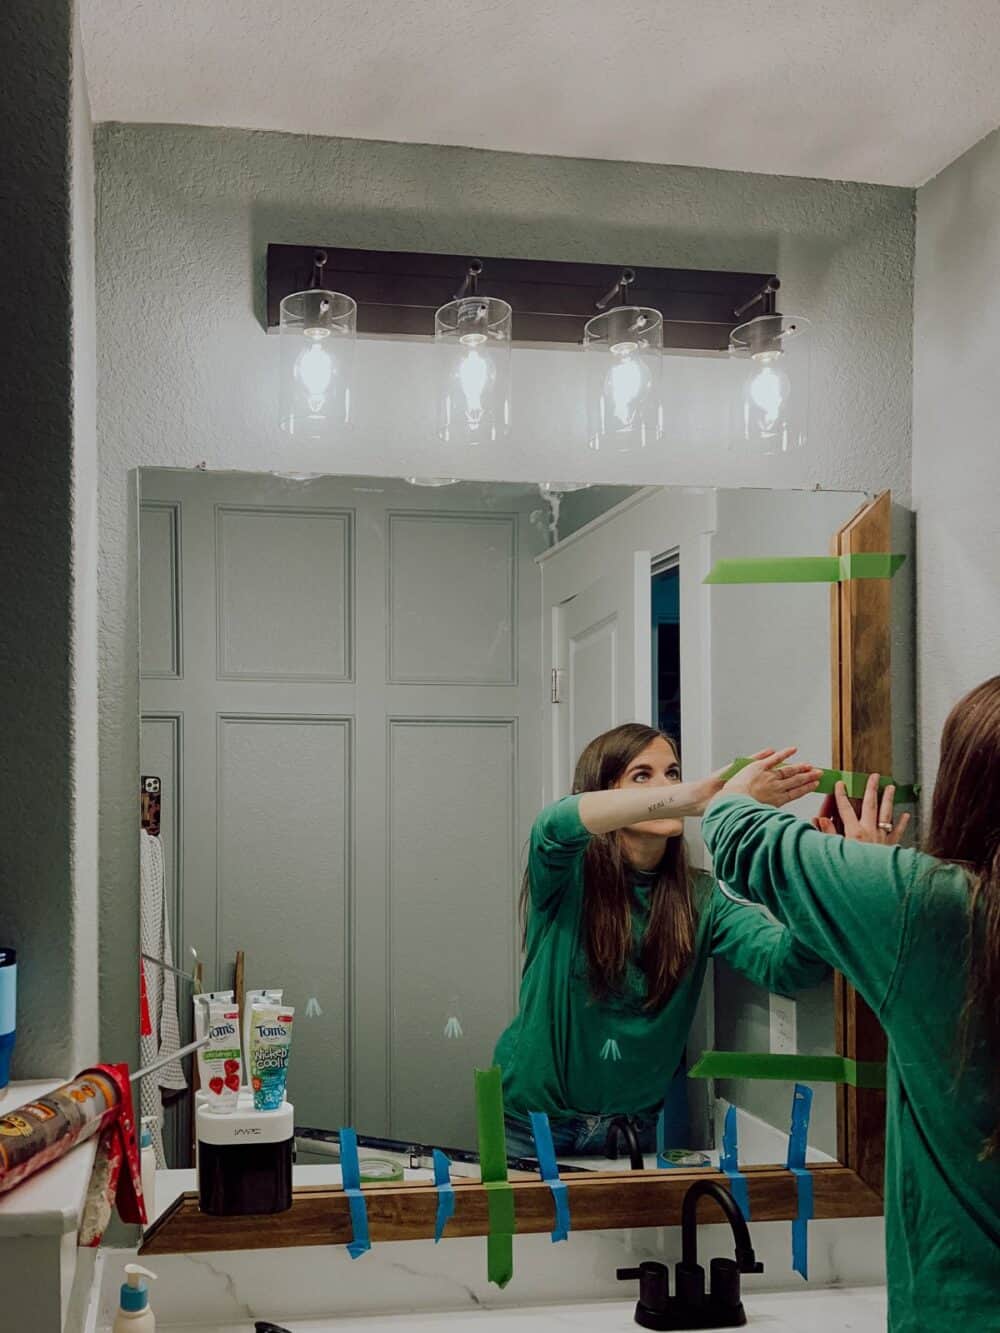
You’re almost done!
Now, you just need to apply some of your adhesive directly to the mirror (or to the back of the board). Don’t apply it too high, or you’ll be able to see a slight reflection of it when you place the wood on top. Gently press the wood into place, then use painters tape to help hold it still while it dries.
Be sure to make any slight adjustments you need to in the first few minutes. As the glue starts to set you want to be sure to leave it completely alone!
Follow the directions for dry time on your adhesive – to be safe, I left the tape on for 24 hours. Once it’s fully dry, remove the tape and enjoy your newly framed mirror!
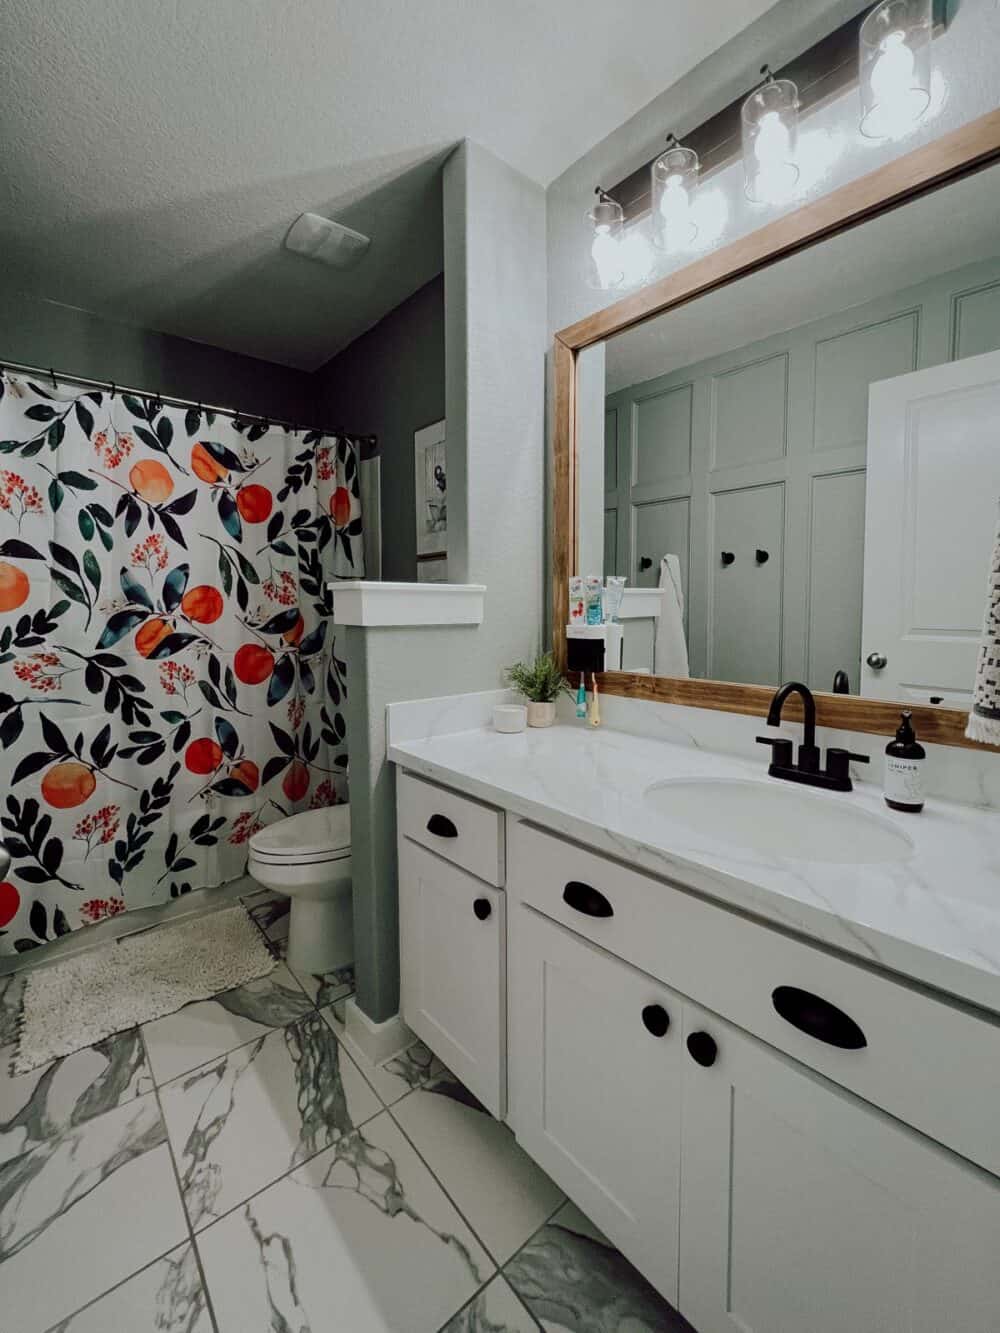
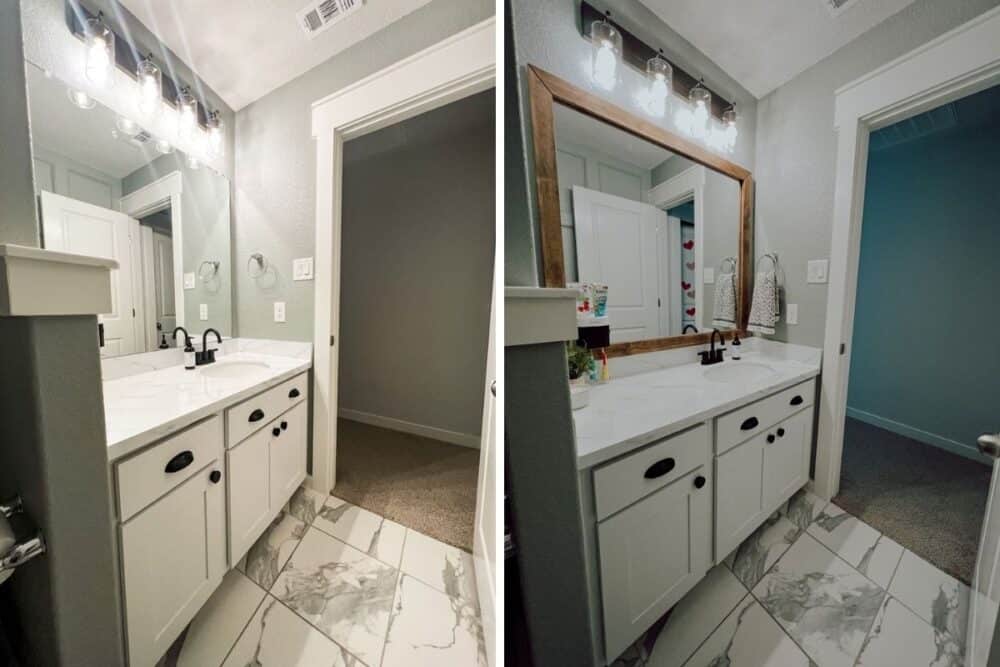
I’m so glad I took the time to frame this little mirror out! Replacing a builder-grade mirror with a new one always makes a huge difference in any bathroom, but that can get so expensive. And, for a space like this where the only people using it are my children, this is a perfect alternative!
If you want to see some related projects or need more info, click around below for more inspiration!
Related & Helpful Posts
- Here’s a post showing how to frame a bathroom mirror with a different style
- And here’s the post all about our primary bathroom, where we chose to replace the mirror.
- Here’s that tutorial for how to use a miter saw, if you’re unfamiliar.
- And, here’s the tutorial for how to stain wood.
- If you need some help using your tape measure, click here for tons of tips.

I love this so much! I really put off this kind of project because of the clips. Quick question, though: if I ever want to replace the mirror, how would I unscrew from the wall? Would it be a pain to remove the frame to get rid of the mirror?
Thanks!
Oh my goodness THANK YOU FOR THE WASHER TIP!!!!
I have wasted years with builder grade bathroom mirrors because of those darn clips!