
My $200 Weekend(ish) Patio Makeover
I gave our patio an entire overhaul in just a few days with (almost) nothing but paint! Today, I’m showing you how to refresh your patio on a budget, and the three simple projects that made the biggest difference.
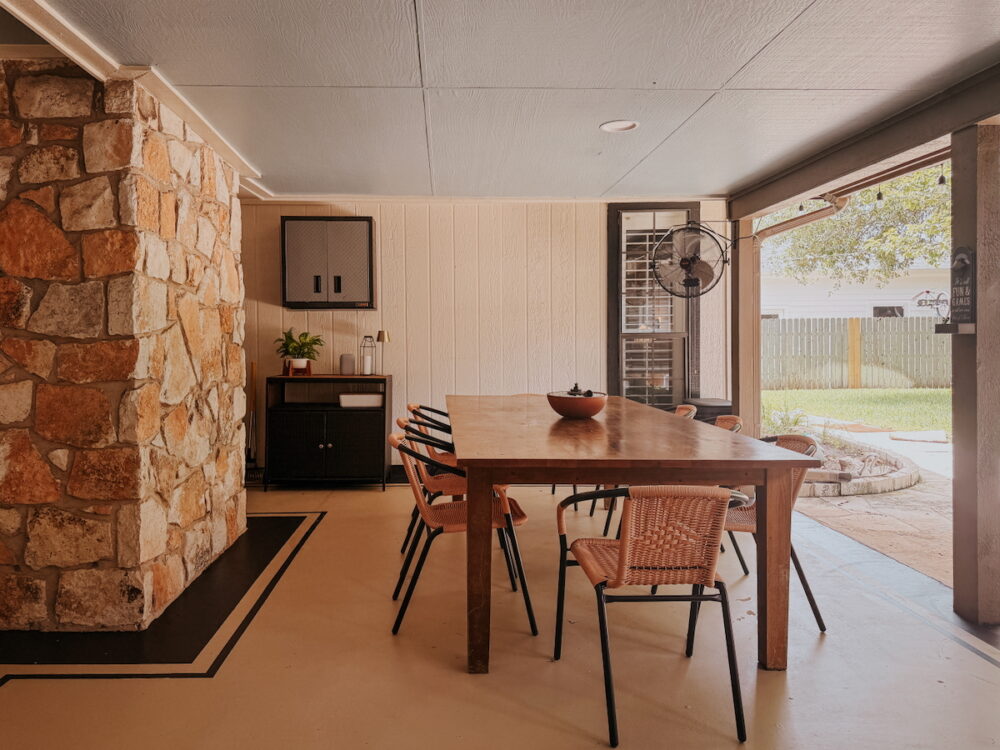
If you followed along on my mini patio refresh last month, you’ll know that it’s also been on my radar to tackle our big patio. I’ve been sitting on tons of ideas for how to make it a lot cozier, and I knew it would be worth the effort. I decided that instead of dragging it out, I’d just stuff it all into one weekend and knock it out in one fell swoop. It ended up taking a little longer than expected thanks to some summer storms (gotta love that unpredictable Texas weather), but it’s done and I’m thrilled with how it turned out!
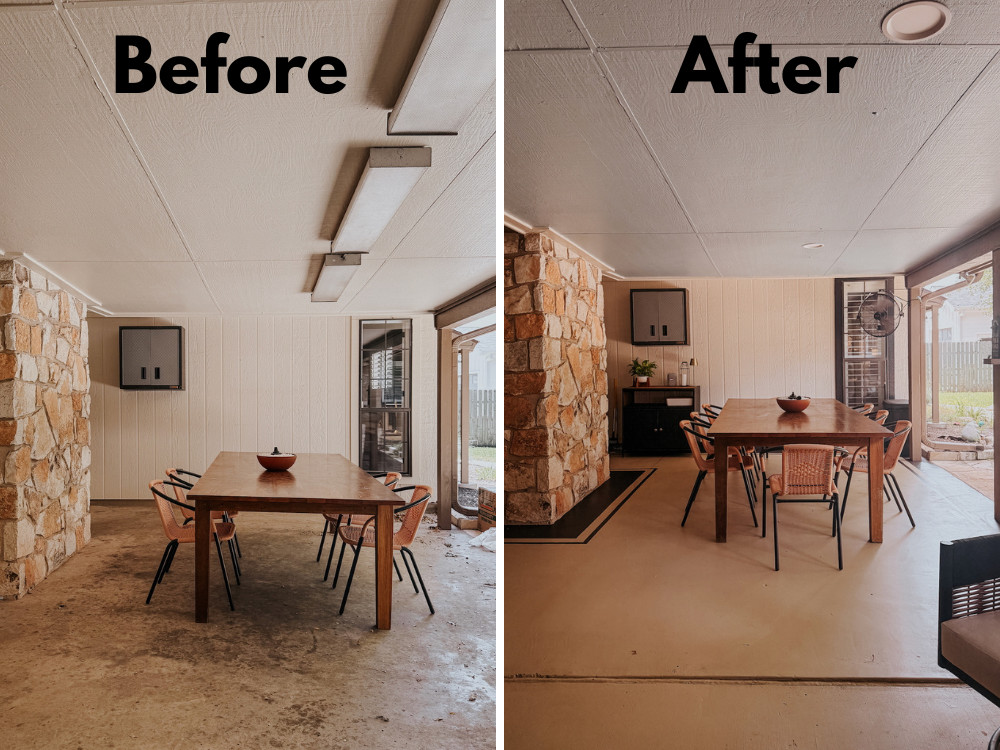
Our patio was a huge plus of this house when we were house hunting, but we haven’t used the patio as much as we thought we would. Between the low ceiling making it feel like a cave and the stained concrete that never felt clean, it was hard to relax and enjoy it. I was always mentally redesigning it the moment we stepped outside.
Thankfully, I knew it could be a lot better. I tackled three pretty large projects over the course of a few days, and they made a massive difference. Read on to see the three projects and how they completely transformed my space. The best part? There’s no new furniture, no major structural changes – just a few cans of paint and a little elbow grease!
Patio Refresh Vlog
Let’s kick things off with a little video recap – I documented the entire journey from start to finish in video form. So, if you want to see how it all came together, just hit play below!
Project One: Painting the Ceiling
I’ve said it before and I’ll continue to say it – painting your patio ceiling makes a massive difference in how the space looks and feels. We have a really low ceiling here (it’s about 7′), and I knew that painting it light blue would make it feel a lot taller. Painting a ceiling is always a bit of an annoying project, but it’s absolutely worth the effort.
I painted the patio ceiling Languid Blue by Sherwin Williams (the same color I used on my other patio), and it was pretty shocking how much of an instant difference it made. Obviously this is never going to feel like a soaring ceiling, but there’s something about that light blue that really does make it feel so much more expansive!
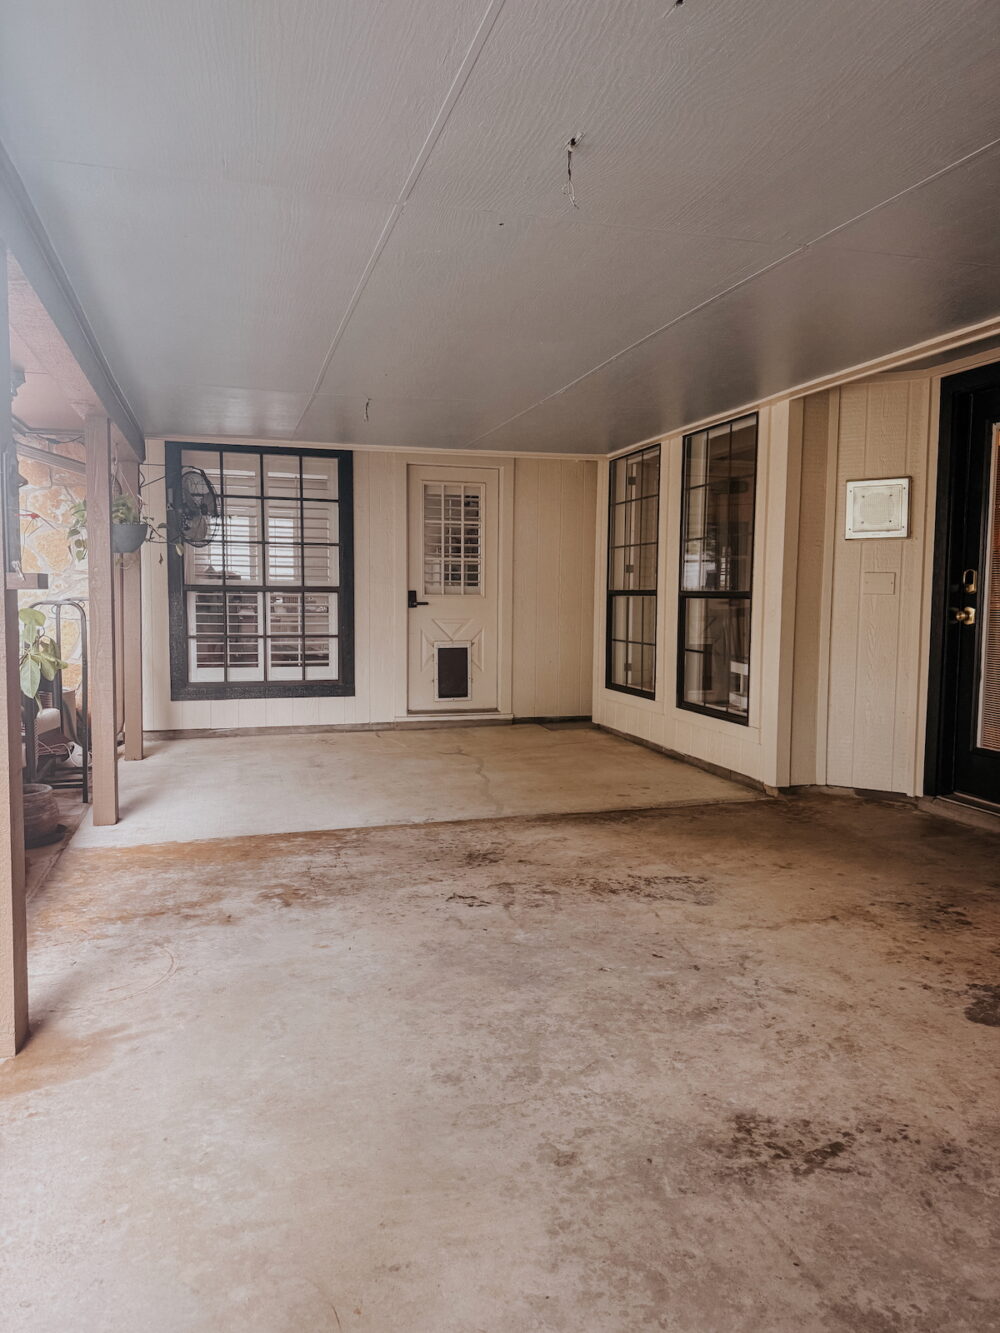
I also pulled down the ugly florescent lights and swapped them for some super simple can lights. If the ceiling was higher (or if the lights were in a less random spot), I would have done a cute flush-mount instead. But they aren’t really centered on either sitting area, and the ceiling is super low. So, I wanted to keep them as streamlined as I could.
I started with this project because generally speaking, it’s best to work top-down in a space like this. If I dripped ceiling paint on the floor it wasn’t a big deal because I hadn’t painted it yet! But, it would have been really annoying if the floor was already done and I had to be super careful not to mess it up.
Once the ceiling was done, it was time to move onto project number two…
Project Two: Painting the Trim
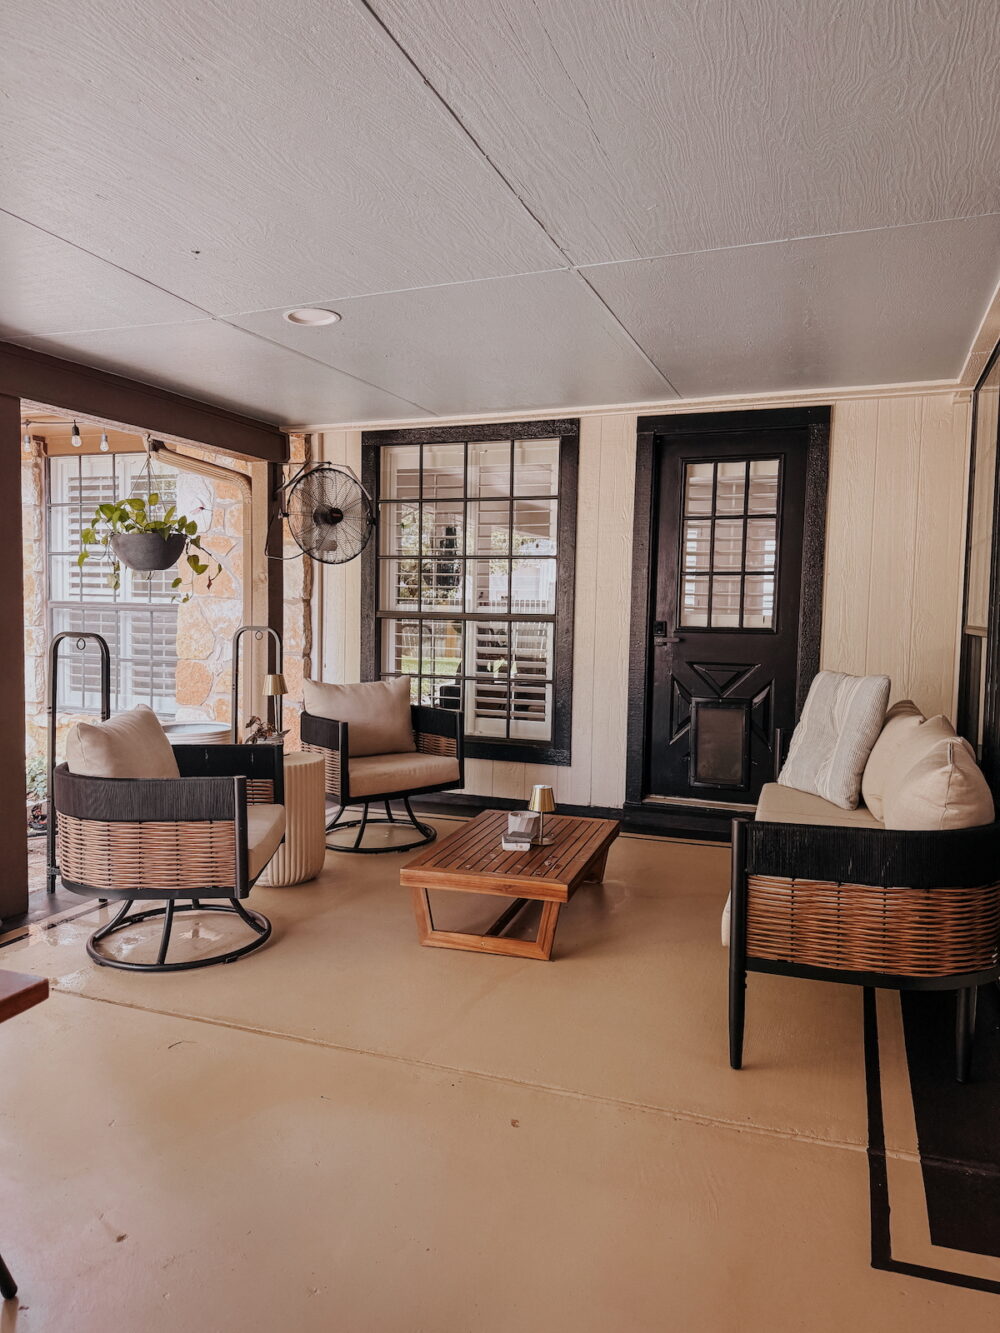
Next up, we’ve got another project that I also did on my small patio – painting the trim black! There was no contrast in the siding and trim over on this area, it was all just a cream color. I knew some contrast would help tie it into the other patio and would make it feel more layered and interesting. So, I grabbed my can of Sherwin Williams Tricorn Black and got to work.
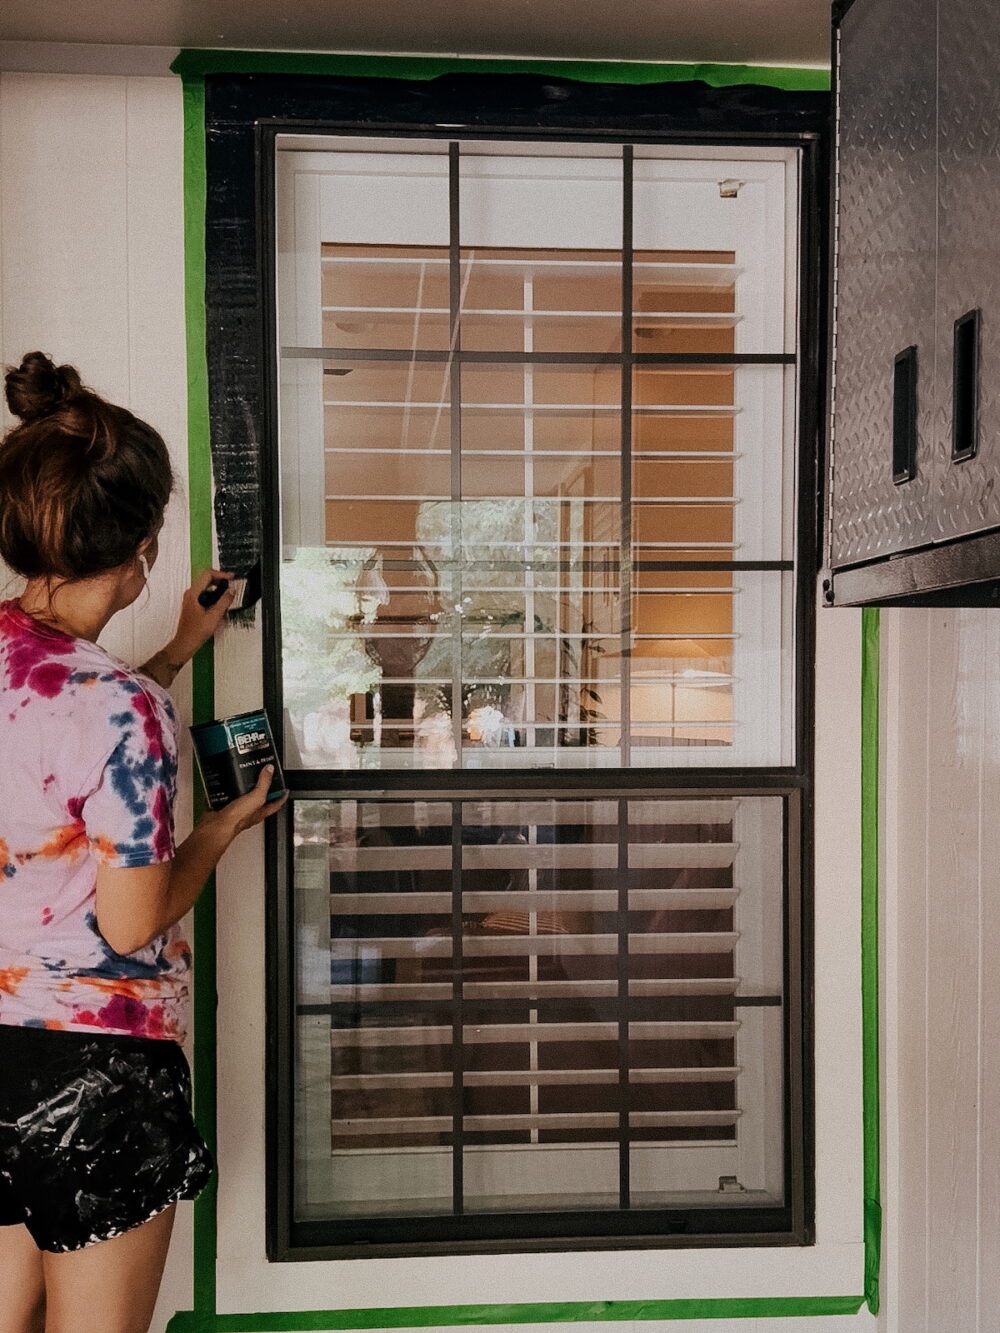
Painting the doors and trim on this patio made it feel so much more updated and clean. I’m always amazed an what an hour or so of painting can do! Now, the key is to not let myself forget about this project and actually finish painting the rest of the trim around the house. Hold me accountable on this one, okay?!
I had five windows with trim to paint, along with two exterior doors. It felt like a really big undertaking but it went by really quickly! Honestly, just these two projects already had the patio feeling like it had so much more personality. But, I knew the final project was the one that would really bring things together. It’s one of those projects that almost disappears as soon as you finish because it just looks like it was always meant to be that way. And that’s the sign of a good design decision!
Project Three: Painting the Concrete Patio Floor
This is a project I tackled at our last house, and I’ve been debating for the last year if I wanted to do it here or not. Originally I had not planned on painting this patio flooring. For some reason, I was convinced that a white-focused checkerboard pattern (like I did at our last house) was the only way to paint a patio. I found that white patio paint is so hard to keep clean and I didn’t want to get things feeling great only for it to be super high-maintenance. I thought about staining the patio instead, but there were so many stains on the concrete that I worried they would bleed right through and it would just look worse.
But then it hit me – who says the patio has to be white? Or checkerboard, for that matter? It’s just what I did last time and it’s what everyone else seems to do. But, that doesn’t mean I have to! Once I started to mentally branch out, I realized painting it was the perfect solution. I landed on doing a neutral light tan color on the entire patio, with a dark brown border. It’s simple and classic, will never feel trendy, and (most importantly) will hide the dirt way better than white would!
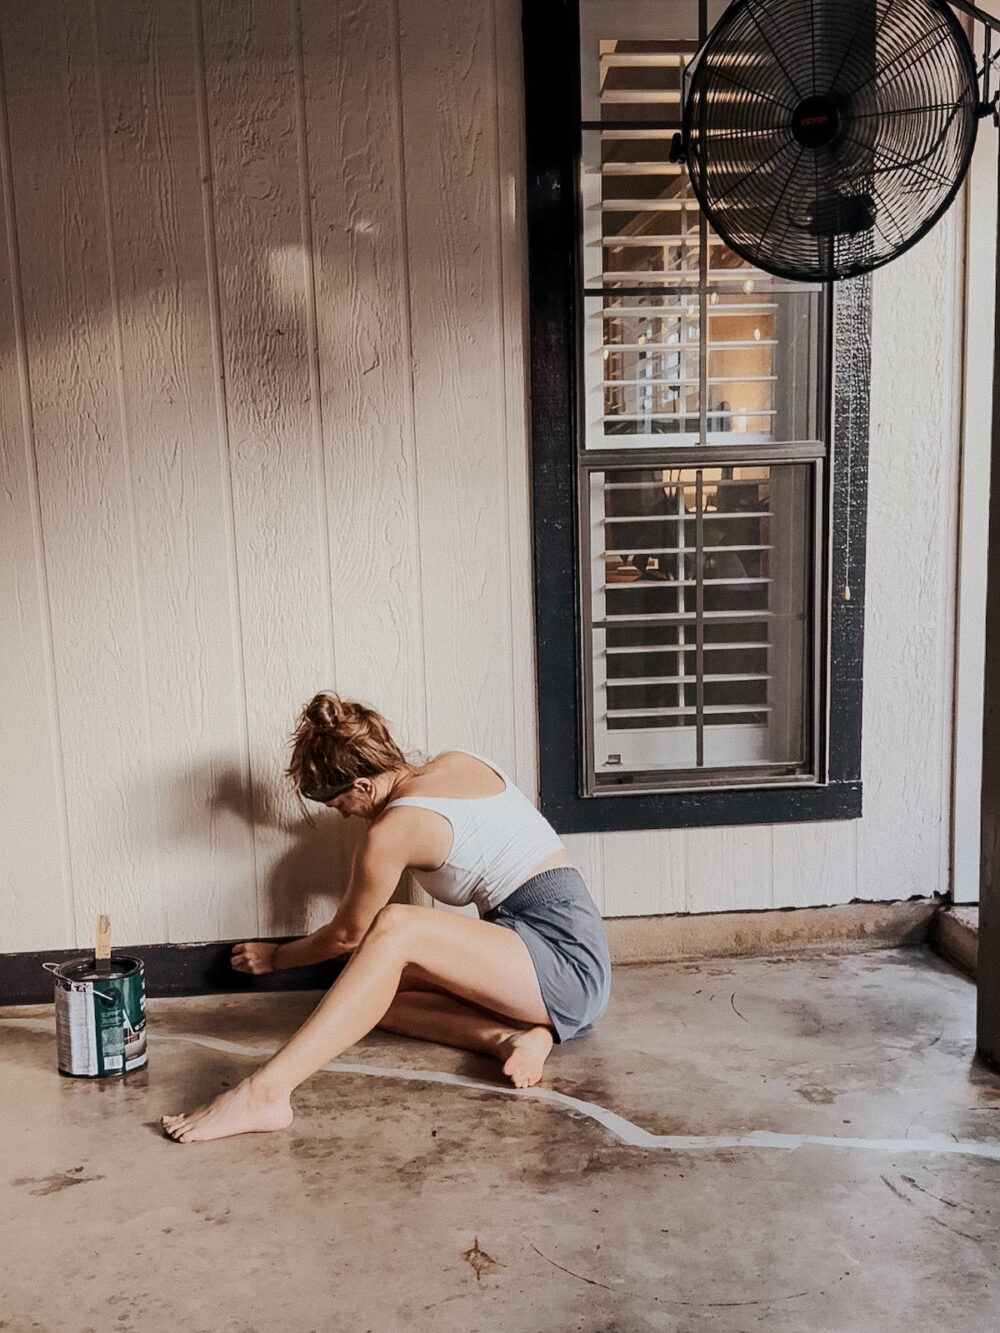
I’ve got a separate blog post coming with all the details on this project, but it’s very straightforward (if a bit time-consuming). My biggest tip is to make sure that you’ve got clear weather for at least a few days before you get started. We had lots of rain and I didn’t plan properly for it. So, I ended up having to wait almost a week in-between starting and finishing. It would have been a lot simpler to just wait for clear weather!
The Finished Patio
And that brings us to the big reveal! It’s honestly kind of wild to see the before and after here because it is so dramatic. And, it only took about $200 in paint! This project is a great reminder that a little paint can go a lonnnnnnnng way. Eventually this patio will probably get an entire overhaul with a fresh covering and maybe some tile. But, this is going to be a fantastic solution for the next few years until we’re ready for that.
Will I keep tweaking this space? Absolutely! I plan to add plants, swap out rugs, collect accessories, and probably change my mind about a dozen little things along the way. But that’s kind of my favorite way to decorate. I don’t think our homes have to be “finished” to be enjoyed, and this patio is ready to be ENJOYED!
Right now, this patio finally feels like somewhere we want to hang out in the mornings, eat a lingering dinner, or stay outside just a little longer after the sun goes down. And for about $200 worth of paint, I’d call that a pretty incredible return on investment.
Budget Breakdown
So, how much did it cost to tackle this whole thing? Let’s do a little breakdown – I didn’t save receipts so these numbers aren’t exact but they’re close!
- Ceiling Paint: $40 (but I already had some leftover from painting the ceiling on the other patio)
- Trim Paint: $20 (I used a quart)
- Primer: $30
- Patio Paint: $40 per gallon (so, $80 total)
- Paint Rollers + Brush: $15
Total: $185
I already had everything else on hand from previous projects, but if you need to purchase the etching solution, sealer, etc., it might add another $50-$60.
Assuming you need to buy everything for all three projects, you could easily knock it out for under $300, which is pretty amazing!
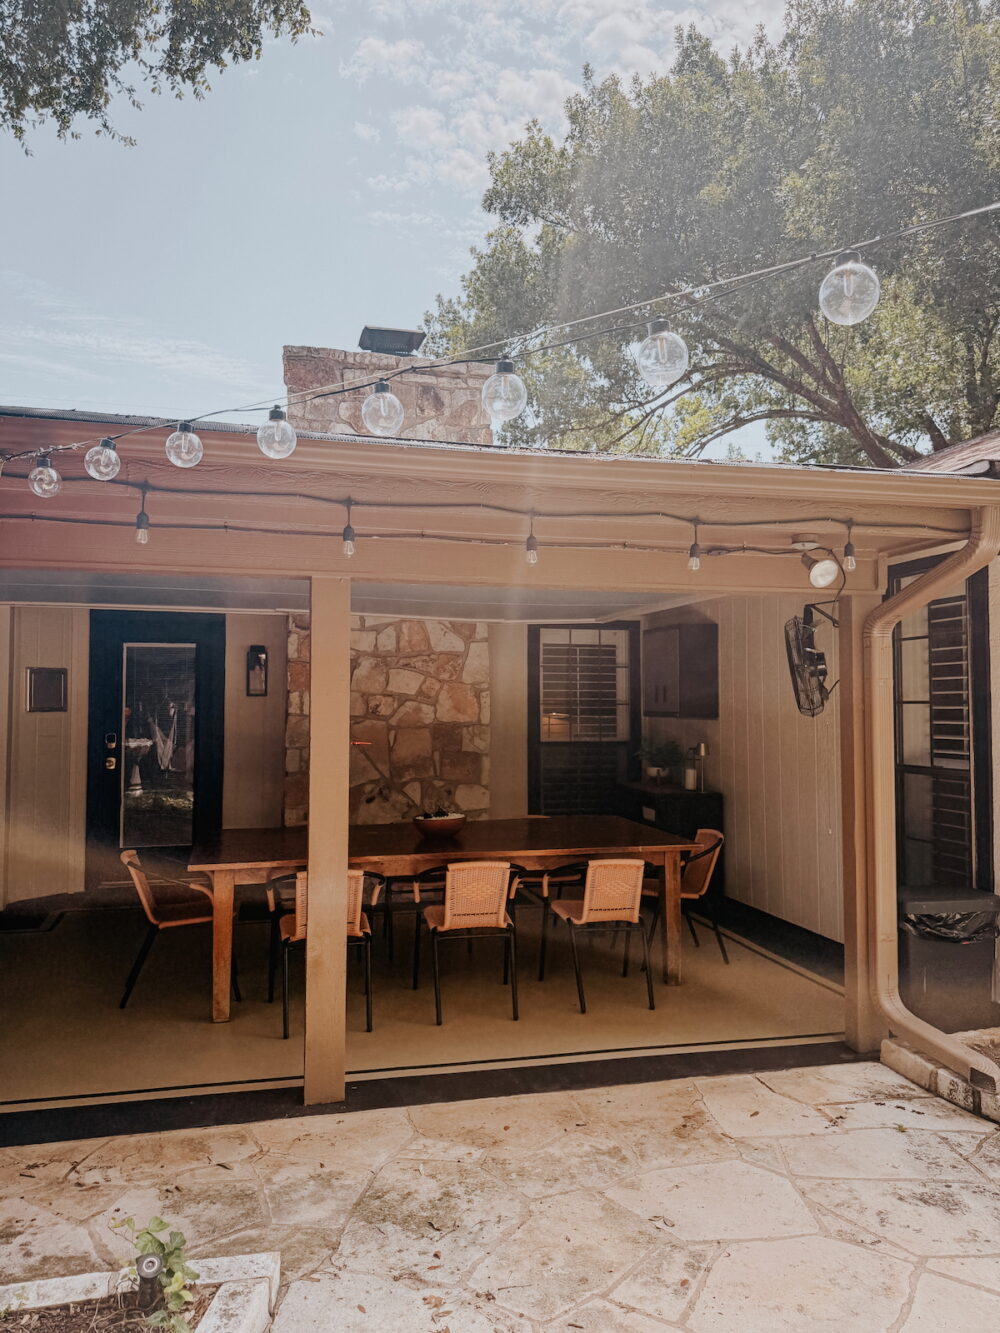
I’m so glad I decided to give this project a shot. It’s one that I really wasn’t sure if I wanted to take on, but in the end it was one of the best things I’ve done for our house in the last year! This space feels so much more usable now, and I’m feeling really inspired to make it even cozier with a few more little projects.
This house and all of the projects I’ve done so far have been a great example of how a “phase one” project can be such a great option for a dated home. It might feel like you have to wait until you can do the project exactly how you want it. But, for about $200, I’ve got a space that I can actually love until a larger makeover is more feasible!