
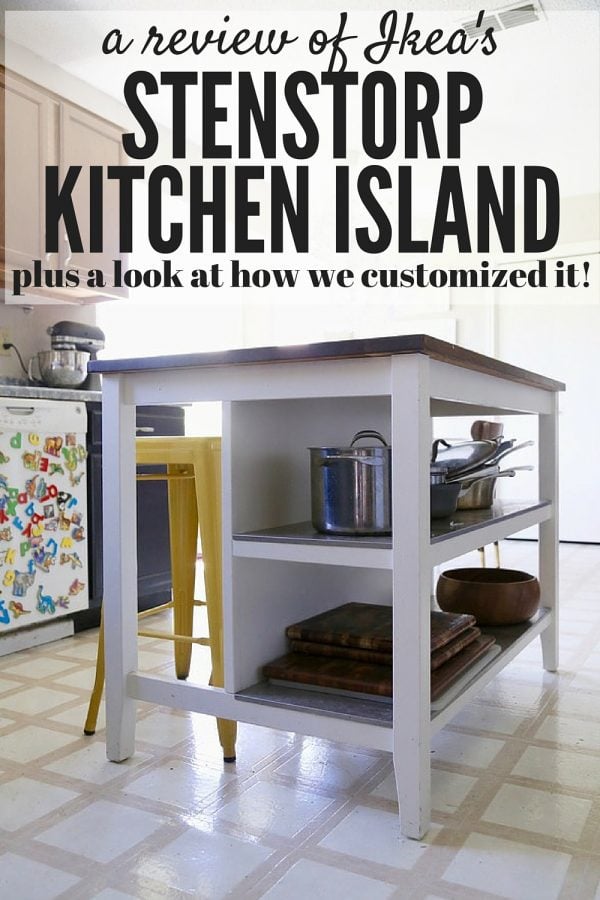
IKEA Hack: Stenstorp Kitchen Island
Last updated on September 20th, 2019 at 03:32 pm
Kitchen islands are one of my favorite elements in any kitchen, ever. Growing up I was always so jealous of my friends who had islands in their kitchens, and as soon as I was old enough to start planning for my own future home I knew that the kitchen had to be big enough for a beautiful island in the center.
Yes, I’m aware that I was a strange child.
Corey and I have been thinking for a while about getting an island for our kitchen – it’s just the right size and shape, but there isn’t one built in. I’ve posted before about how we were considering getting an island for the kitchen, and we even went as far as to make a pretend one to put in there and see how we liked it.
Well, we loved it. A lot. And we knew that we just had to have a real one.
So, we decided to bite the bullet and bought a STENSTORP kitchen island from IKEA.

This post contains affiliate links. Click here to read my full disclosure policy.
Doesn’t it look nice?
Just kidding. We had to spend about a week with the top off of the table because we just can’t seem to allow ourselves to put something from IKEA in our house as-is – we always end up finding a way to hack it!
For this project, we decided to stain the island top to make the color fit in a bit more with the look of our kitchen – the light wood is beautiful, but I’m a fan of richer wood tones, and we knew that the dark wood would look great with the white island. We gave the island top a quick sanding to rough it up a bit, and then we applied Minwax stain in dark walnut.


Corey was a bit unsure about staining it at first, but once we got it back in the room he agreed that it looked absolutely perfect.
We couldn’t wait to test it out, and that first night that we cooked dinner using it was absolutely amazing – this thing adds so much functionality to the room and I can’t gush enough about how much I love it.

My favorite part? Corey and I can stand on opposite ends of the island to prep for dinner and each have more than enough room to work. It’s amazing.
Plus, it’s already passed the ultimate test for durability: Christmas cookie baking. This poor island was completely covered in flour, sugar, cookie crumbs, and about a million other things for three days straight while I was prepping for Christmas and it held up like a champ. I think it’s a keeper!
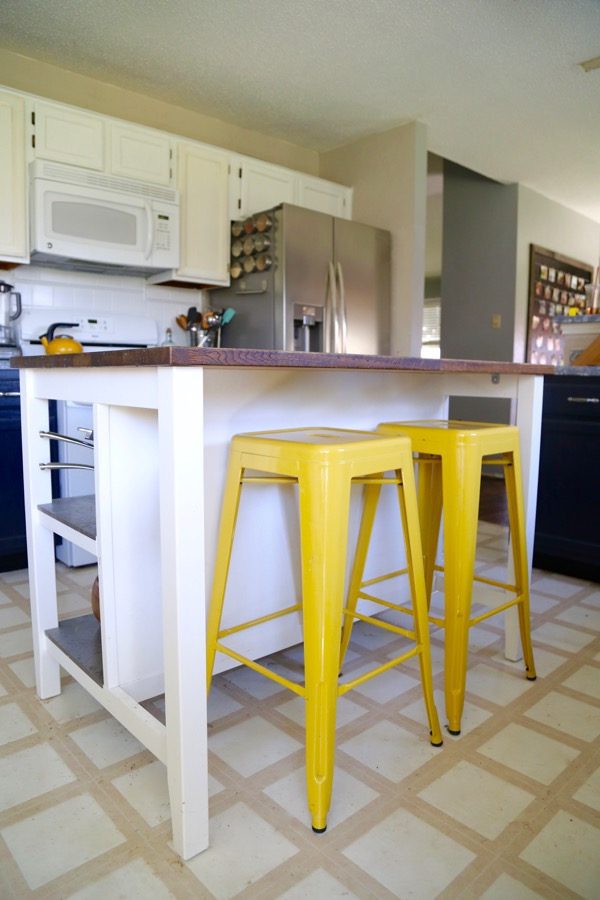
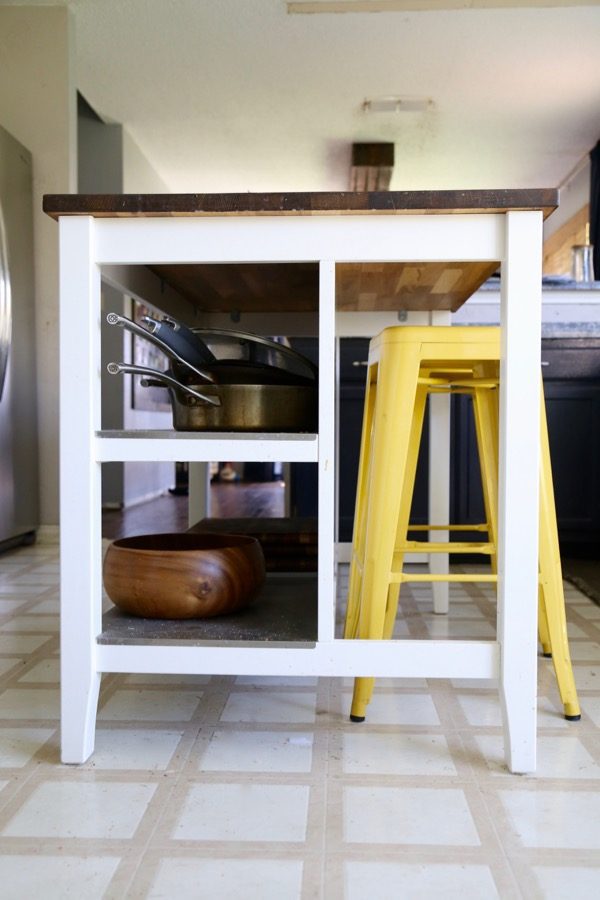
I absolutely adore the stainless steel shelving and the overhang on the other side with room for stools. Speaking of stools, if you’re looking for some, here are a few of my very favorite options! We frequently hang out in the kitchen together while we’re cooking, and when we have people over we all tend to congregate in the kitchen (doesn’t everyone?) so it will be so nice to have some extra seating in there! I’m still in a little bit of shock over how much extra counter space and storage it adds to the room (those shelves are amazing!) and it makes cooking in our kitchen so much easier.
Wanna try it yourself? Here’s all you’ll need to make it happen:
- Orbital sander (or just a sanding block if you wanna get arms like the Hulk)
- Stain (we used this color)
- Butcher block oil
We’re so excited to finally have this island in the room, and it makes us that much more excited for getting the rest of this kitchen done. Of course, we’ll have to be patient for that one. But the time will come eventually!
What have you done in your kitchen to make it more functional for your family?
Want to see the other changes we’ve made in our kitchen?
Hi! They don’t sell these islands anymore and I was wondering how much it cost to buy from IKEA when you got it? Just a rough estimate would be extremely helpful if you don’t remember.
Hi! I definitely can’t remember but I’d guess somewhere in the range of $250 to $300?
Beautiful! How did you sand the edges? By hand or also with the sander? Thanks so much!
with a sander!
Hi, how do you clean the stainless steel shelves of this kitchen island?
I just use stainless cleaner or regular all-purpose cleaner!
What are the dimensions of the shelves themselves (how deep and how high) and the actual length of the shelving area? Trying to decide if the baskets I already have would fit! I have looked everywhere online and can’t find anywhere what those dimensions are. Thanks!
Hi, Erin! Unfortunately, I don’t have this island anymore (we moved to a new house and didn’t have the space for it), but I can tell you that the shelving area runs the full length of the island, and I’d guesstimate the shelves are about 10-12″ deep! Hope that helps!
These are all great information. I love the idea of refinishing the butcher block. I’m trying to find barstools to go with it. Can you tell me how much high is the perfect for this? and which sanding method is perfect for this project? thanks in advance for giving me clarification and sharing all of these great information.
Hi Ralph – our stools were 29.5 inches tall. We used an orbital sander and multiple different sandpaper grits to get a smooth finish!
Hi,
I realized this same project, i sanded with the round sander with 120-220 and I put two layers if oil to wood. For the moment it still very sticky! What do you do exactly? Thank you !
Sounds like maybe you didn’t remove all of the original finish when you sanded. It required a LOT of sanding for us, and if you’re getting a sticky finish I’d imagine it needs to be re-sanded to ensure all of the original finish is removed.
Looks great! I love that island? Would you think there is enough room for 3 stools underneath if pushed close together?
Hi Jodi – I don’t think 3 people could comfortably sit here. It’s definitely just made for 2!
Hi! Thanks for all the information! I’m looking to get this same Island to replace a slightly smaller one. One question for you- do you think it would be possible to get three stools at the island? I have three little kids and they all want a set at the island! I have been looking at narrow stools and using the demensions as a guide, but I only ever see it pictured with two stools.
Thanks- Emily 😁
Hey Emily! I don’t think 3 stools would fit at this island – two fit pretty perfectly, so even if they’re narrow I can’t imagine that 3 would work.
Hi! I know you don’t live here any more but any chance you have the approximate dimensions for that kitchen space? I really want the Stenstorp but I’m not sure we quite have enough room for it. Thanks so much!
Hi Kat – it was a pretty large kitchen… off the top of my head, I’d guess about 15X15ish? My recommendation would be to use painter’s tape to tape off the size of the island in your kitchen so you can get a visual of what it’ll be like!
Hi there! I love the idea of refinishing the butcher block! I recently acquired the same IKEA island, and I’m trying to find barstools to go with it. I’m deciding between 24 inch and 29.5 inch high ones. How tall are yours? Thanks so much!
Hi, Aly! I used 29.5″ stools!
Hi! I really like this island, and I’m wondering if its possible to assemble it without the middle shelf? I have a tiny studio and would like to put a tv on the low shelf, opposite the chairs. Thanks!
Hi, Laura! I don’t see why you couldn’t – there would be holes where the shelf should attach, but I imagine that could easily be filled in. It’s been years since I put it together so I can’t remember for sure, but looking at it I don’t see why it wouldn’t work.
Hello – so which sanding method did you use? The orbital sander or the sanding block?
Hi! We used an orbital sander to get most of it off, and finished up with a sanding block in some places that needed extra help.
Ive tried this with mine but the stain did not take. Any suggestions? What sanding grit did you use?
Hi, Samm! We had to sand very thoroughly to remove all of the finish from the store. It’s been a few years since I did this project, but if I remember right, we probably started with 60 grit to get the bulk of the original finish off, then increased to a finer grit to smooth it out.
Thanks!
Hi,
Thanks for the nice review. This island is gorgeous. I’m getting mine next week and it is reassuring to read you are so happy with yours.
My question: Are those stools comfortable to be seated at the table? The ones I really like from IKEA (Bosse I think they are called, are that same hight, 74 cm), but IKEA recommends the shorter ones (63cm) for this table. I prefer the taller ones, like yours, but wanted to make sure they are comfortable when using the table to have a coffee, eat something, etc.
Many thanks!
We sit at them all the time – I think they’re perfect!
Hi, we’re going to do the same thing. Any chance you can give us the process of sanding/staining/oiling the top please? Thanks!
Hi Adam! It’s a pretty simple process – we used our power sander to sand the top down until the finish was removed (it didn’t take much, it was a very light finish), and then applied the stain with a lint-free cloth. Use long strokes when you apply and let it sit for 5-10 minutes before removing the excess. I believe I ended up doing two coats of stain. Then, we used some butcher block oil on the top and you’re good to go! We re-apply the oil every few months to keep it looking fresh. 🙂
Can you tell me the depth of the overhang on the seating side? I’m hoping at least 14 inches but the IKEA description doesn’t give depth of overhang or of shelves.
I was thinking of staining the top darker as well so love seeing how yours turned out, so pretty!
Hi Annette – So sorry it took me so long to get back to you! I kept forgetting to go measure for you! 🙂 The overhang is 13.5″.
I love how your island turned out! It’s fabulous. My daughter is thinking of buying an ikea island for her new apartment so I’ll have to show her this idea. Thanks for the tips. Marie:-)
Thanks! I definitely recommend it!
Where do I purchase this kitchen island. I can’t seem to locate it.
Hi Camille – it’s from IKEA! It’s the Stenstorp island. You can also buy it on Amazon
Great! Thank you! I order this island and should get it soon! I just need to start looking for seatings now! 🙂
It looks great! May I ask how high are your island stools? 24” or 30”? Thank you! 🙂
Hi Stephanie – they’re these from Target. They’re 29.5″! http://rstyle.me/n/b8cntzb5wb7
Hi! I am purchasing this same island on Friday and want to stain it as well. Did you use the oil per Ikea’s recommendation as well? If so, did you oil it after you stained it? Did you just apply one coat of stain?
Hi Jordan – it’s been a while since we did it, but if I remember right we did two coats of stain, and I know we oiled it. We still oil it every few months to keep it looking fresh and clean! 🙂
Hi
I am thinking about getting one of these,
I really like the look and size of these Island benches,
How sturdy (solid) are they,
Ours is very sturdy – we’ve had it for a few years now and haven’t had any issues! They’re usually sitting out and set up at Ikea stores, if you want to go check it out in person!
I can not find one place that mentions the highth. Ikea only provides length and width. Can you help me out on this?
Hey! Sorry for taking so long to get back to you – it’s about 35″ tall.
Hi, love the idea of staining it, I’m going to try it too! One question — do you continue to treat it with the wood oil as recommended by Ikea? Or is that point moot once it’s stained? Thanks so much!
Hi there
Sorry to bother you. Could you tell me how high is each shelf?
Thanks
John
The bottom one is 12″ and the top one is 13″ – they both have about a 1″ lip on the edge, though, so if you have anything taller than the lip, you’d have to tilt it to get it on the shelf. Hope that helps!
I am always drawn to your folding doors on your closet. I have one exactly like that. But not for long. When I go home for R&R I am meeting with a carpenter. He will convert it into my dream built in china cabinet to house my tea pot collection from all over the world. Fingers crossed it goes well.
That’s awesome! I bet it will look fabulous! I am so sick of our folding doors, and I can’t wait to get rid of them in favor of something a little prettier! 🙂
Love your kitchen island. It’s gorgeous! I wish I had enough room in my kitchen for one!
I love the island! I wish we had room for something similar in our house, but right now there just isn’t room. It’s definitely something I’d love to have in our next home though.
OMG. It’s so cute. I love it!!! I love the shelving on it, too! What a bonus! Great idea to stain it! It looks great!
You guys have so much more counter space now–it looks great!
Plus, I’m a sucker for walnut stains, so I’m drooling over the top of your new island!
I am glad ya’ll got the island of your dreams! The stained top looks so good too.
Love this! I love the idea of getting two backless stools to tuck underneath do they’re not sticking out 🙂 Something industrial and metal would be awesome!
I love the new island and the color stain you all picked! I can’t get over the shelving either. I really love it. I don’t think it looks cluttered at all, I think it looks so great!
Ohh, nice. I could definitely use that kind of counter space but our kitchen is narrow and tiny. Love the stain you used..so much richer than the original color!
I love it – good call on the stain! I so wish we could have an island, but our kitchen is too tiny. Yours is fantastic!
The newly stained top is a nice touch! It looks great
The island is perfect! Good call on the stain.
Wow, I think the staining was just what the island needed!! I love it!! Now I only wish I had a place to put an island in my kitchen! And jelly of your Gelpro as well! Sorry for all the exclamation points, just excited for you! 🙂
The island looks great! I think the dark stain was absolutely the right choice.
The island looks great! The added storage and prep area is such a bonus in a kitchen.
Nice job on the staining! It looks great. I’ve mentioned before that I also have the Stenstorp — it’s pretty much one of the best purchases I ever made, so I know how you feel!
It looks fantastic!! I love the personal touch. Someday soon I have to figure out this whole sanding and staining thing… thanks for the inspiration 🙂