Our DIY Concrete Front Porch Steps
Learn how I added some DIY front porch steps to our home in just a few days. This is a relatively easy project that made a HUGE difference in our curb appeal!
Lately, I’ve been spending some time thinking about the projects we’ve done in this house that have had the biggest impact. I’ve had a ton of fun working on our home over the last 5 years, but there are a few projects that really stand out to me as ones that I can’t imagine our house without.
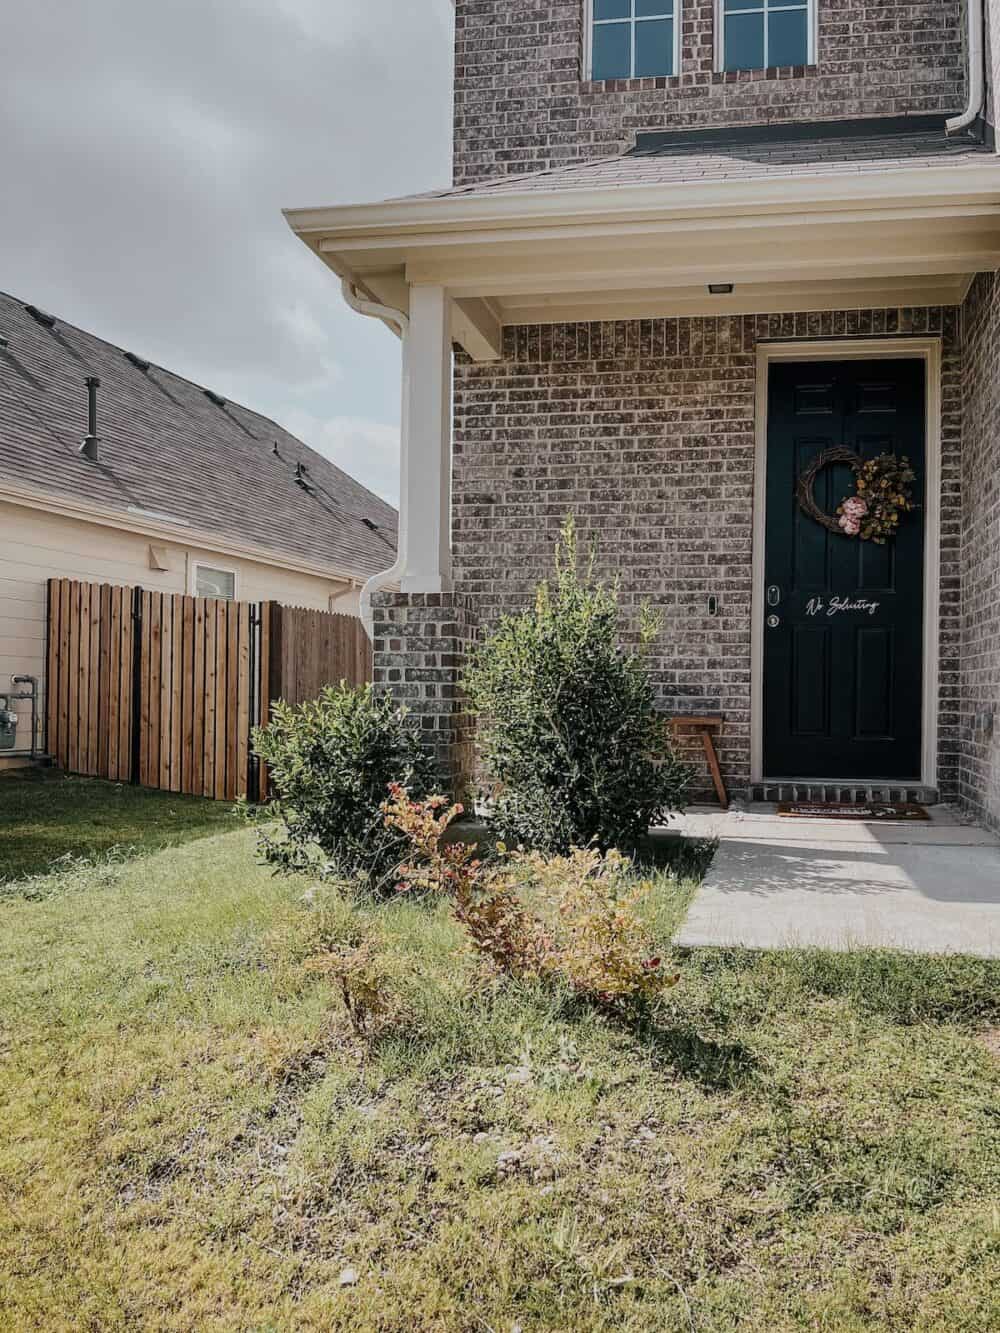
These DIY concrete front porch steps are right up near the top of the list. In fact, I think the only projects that might beat them are the DIY fireplace, our bedroom trim, and the island makeover. Right after those three, I’d say this was the project that had the biggest impact and gave off the most “it always should have been like that” vibes.
I dreamed of this project for three years before we tackled it, and as soon as it was done I knew it was the right move. Two and a half years later, I still adore our front steps and they’ve held up beautifully. So, let’s take a little look back at this project and how it came to be!
Our DIY Concrete Front Porch Steps
First, let me note: I’m absolutely not a professional, and this was my first time doing anything like this. But, I wanted to give you a rundown of the process we followed to build these steps. A pro might do some things differently, but this worked out great for us and I’m thrilled with the finished product.
Video: Renovation Log
If you enjoy watching these things come together on video, you’re in luck! I shared a ton of video in Instagram stories as I was working on this project, and I’ve compiled all of that right here for you. Keep in mind, this video isn’t intended to be a full tutorial – it’s just an overview of the process! For more a more detailed tutorial, keep reading this post!
Step One: Determine Sizing of Your Front Steps
As with any project, the first step is planning! Unfortunately, I can’t give you a ton of detailed calculations for how to determine the riser height, along with the width and depth of each step because, to be honest, we kind of winged it!
Our front hard sits on a slope, so we knew it wouldn’t be too hard (or take too much digging) to make this work. A few things I tried to keep in mind:
- I wanted the width of my steps to run the full length of the existing concrete
- I wanted both steps to come out to about where the flower bed used to be
- We made our steps as deep as our wood frame – 4″ tall. If you start with the height you want, you can dig and adjust to make it work!
Obviously, this is going to work best on a yard like ours where there is already an existing slope, or where you have decking or a raised porch by your front door.
Step Two: Dig and Build Frame
One you know the area you’ll need to prep for your steps, it’s time to start digging!
Make sure you don’t have any sprinkler lines or anything in your way. We did some exploratory digging before we started and we had one sprinkler head to deal with. We simply cut it off and capped it using a sprinkler line cap. This will vary based on what your system is, so just check out what you’ve got and go from there.
We dug down the depth of the stairs throughout the entire surface area where the first step would be. Then, we built a frame to pour the concrete into.
When you’re pouring new concrete next to old concrete, you should always have some sort of gap. The easiest way to do this for a non-pro is to use a piece of pressure-treated 1×4 wood. So, when we were building our frame we used 1x4s on the two sides that would touch the old concrete, and 2x4s on the other two sides. The 2x4s will be removed once the concrete dries!
Here’s what it looked like with the first step dug and framed in:
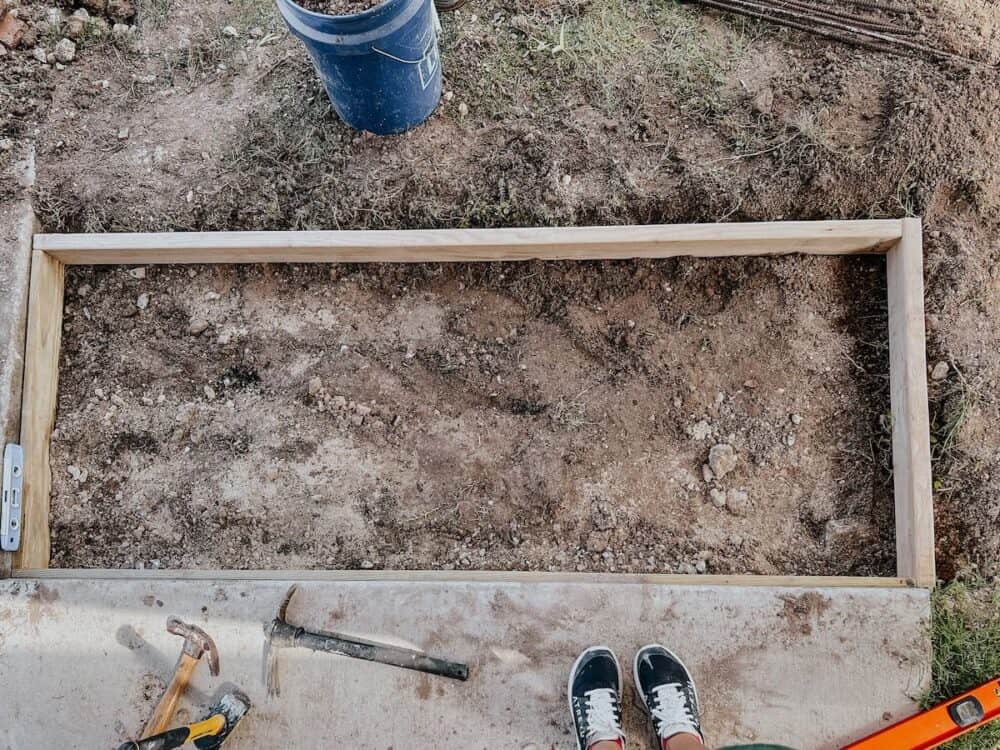
Make sure as you’re digging and laying the frame that it’s level going across the step! As far as the depth of the step, you actually want it to tilt slightly downward. If not, rainwater can gather on the step and cause issues.
Step Three: Prep for Concrete
Now, it’s time to prep to pour the concrete!
You’ll want to start by laying a thin base of sand and tamping it down. This gives a really sturdy foundation for your step and helps make sure it’ll stay in place for the long haul. We used about 1.5 bags of sand per step. Pour it in place, spread it out a bit, and then dampen it a bit with your hose. Use a tamper tool to press it down and create a compact surface.
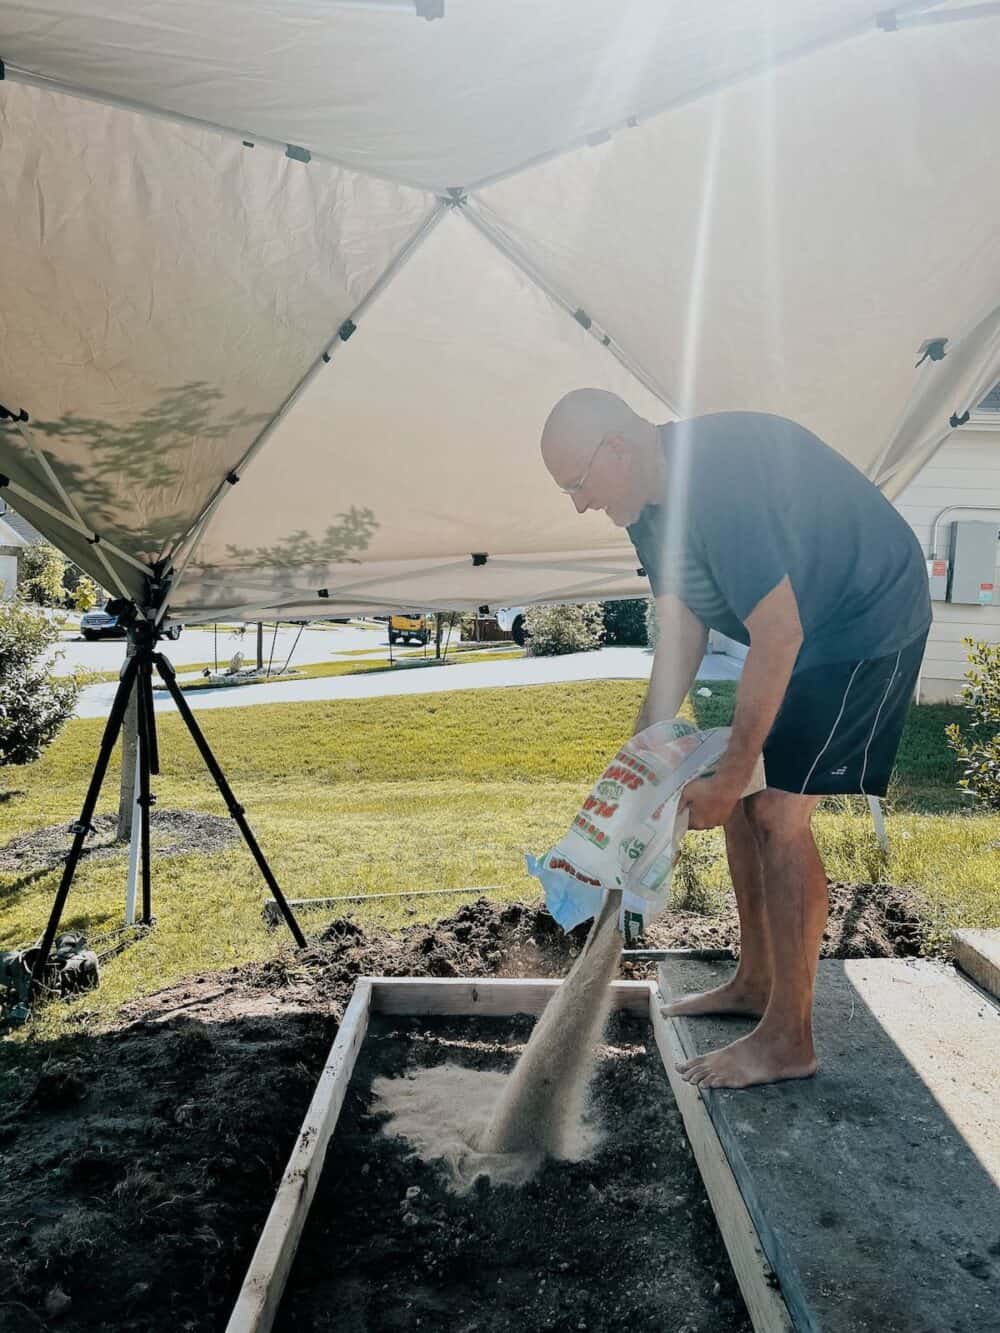
At this point, you’ll also want to prep some metal to use as bracing in the concrete. This will help keep things really sturdy for the long haul. We used a remesh sheet cut down to size, along with a few pieces of rebar.
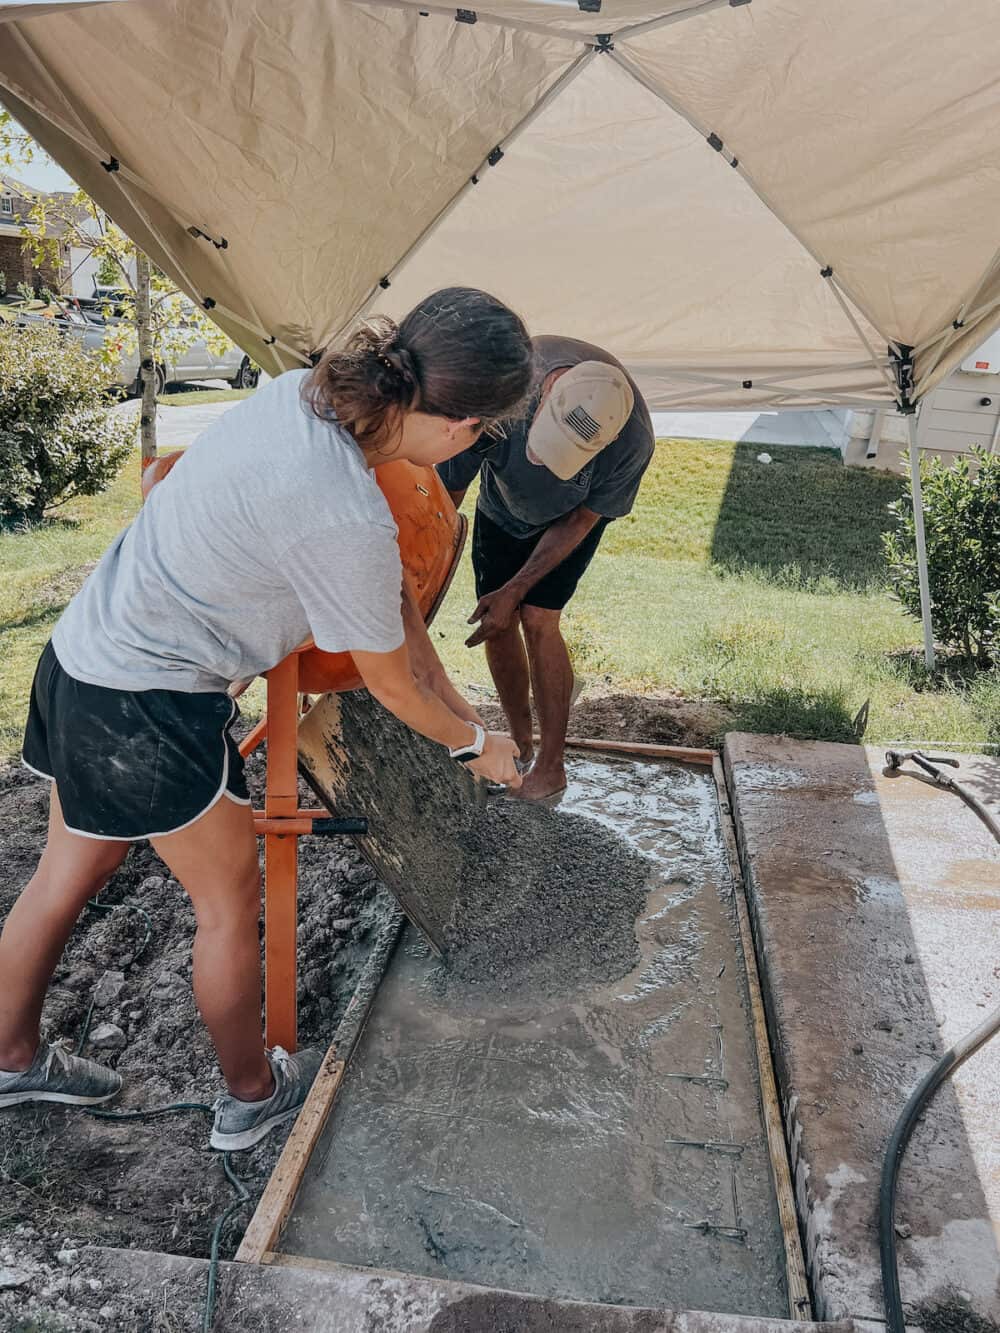
Step Four: Pour Concrete!
Now, it’s go time!
My dad grabbed a small concrete mixer to use for this project. He does concrete work fairly regularly, so he knew he’d use it again. If you don’t want to commit to that, you can always rent one! You can absolutely mix the concrete by hand, but for a project this large, I don’t recommend it.
All you need to do to prep the concrete is mix it with some water until it’s about pancake batter consistency. We used the concrete mixer for this, but if you’re working in a bucket or a wheelbarrow, you can use a shovel to mix or grab one of these handheld mixers.
Once it’s all mixed up, simply pour it into your form and spread it out until it’s smooth. We did a layer of about 1-2″ of concrete, then added in our metal pieces, and then we finished it off.
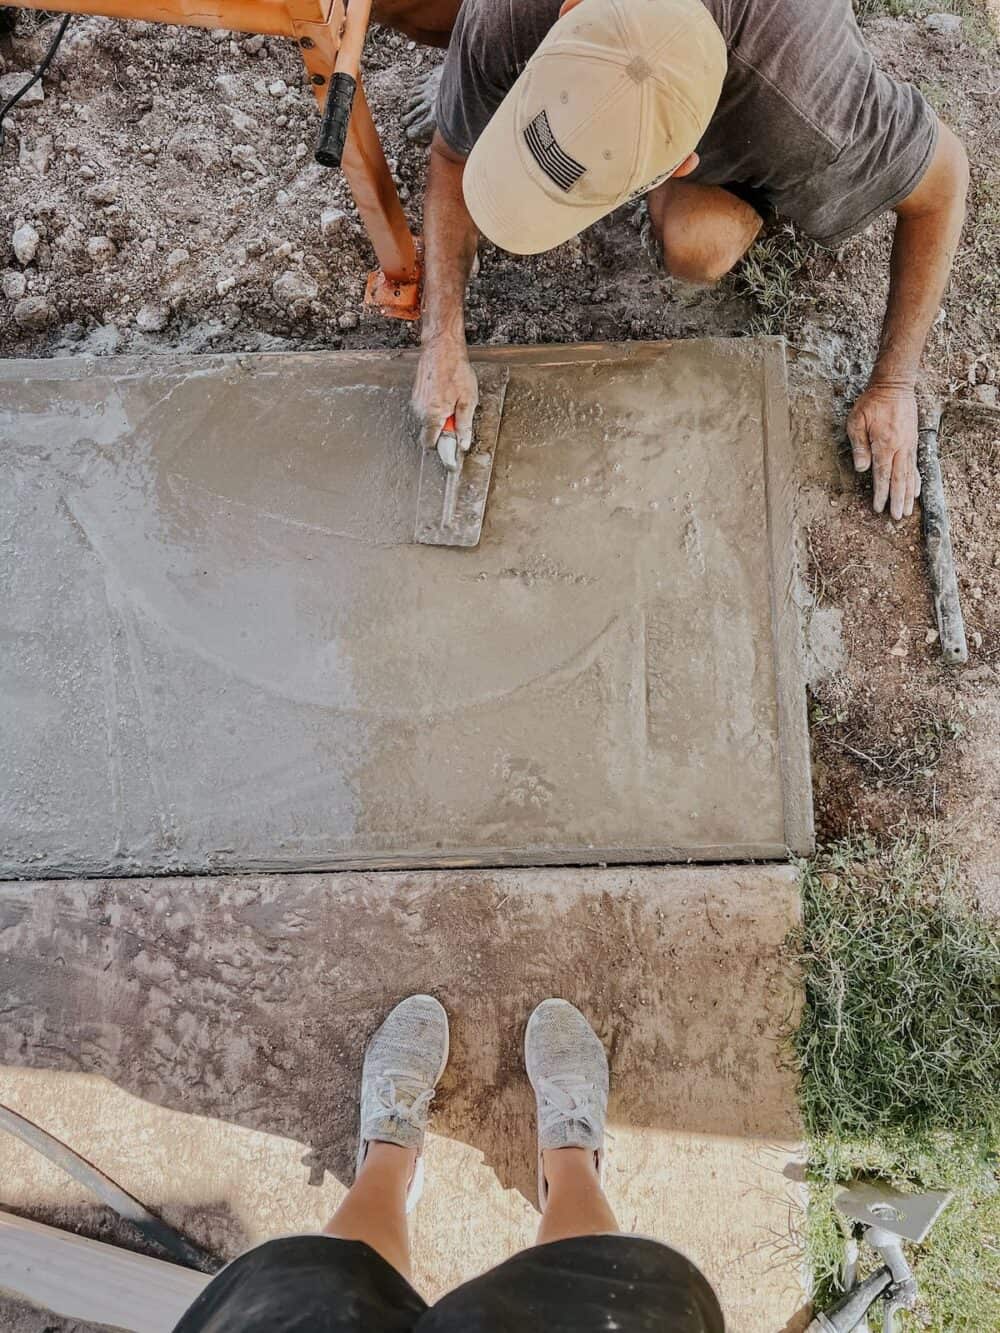
Step Five: Level and Dry Brush
Once you’ve fully filled your form and you’re positive you have plenty of concrete, it’s time to level things off! Grab a piece of scrap wood that’s at least as long as the depth of your stairs. Run it along the top of the form to scrape off any excess concrete. We used a shovel to scoop up anything that came off so it didn’t dry in the grass! This process is called “screeding” and it helps make sure you’ve got a level surface with no dips or bumps.
This is also a good way to make sure your forms are full enough. The first time we tried to screed, we had some low spots that we hadn’t noticed!
After you’ve finished screeding, you’re ready to let it dry. After it has had about 30 minutes to an hour to set, you can use a concrete brush to gently run along the top of each step. This applies a little bit of grip and texture and helps ensure that your concrete won’t be slick when wet.
Step Six: Finishing Touches
Allow your concrete to dry for about 24 hours before removing the forms. It’s a good idea to mist it with water every few hours throughout the drying process (I wet it about 3-4 times over the course of the 24 hours). You’ll want to do it more if it’s really hot where you’re working!
Once it’s fully dry, you can remove the concrete forms. Just remove the visible screws, then use a pickaxe or hammer to tap on the wood and pry it away from the concrete. It should come off pretty easily!
Finally, you may have some spots where the steps meet one another or where they meet the old concrete that has some gapping. We simply mixed up a small batch of mortar for this and used it to fill in all the gaps. Once it dries, it’s basically invisible!
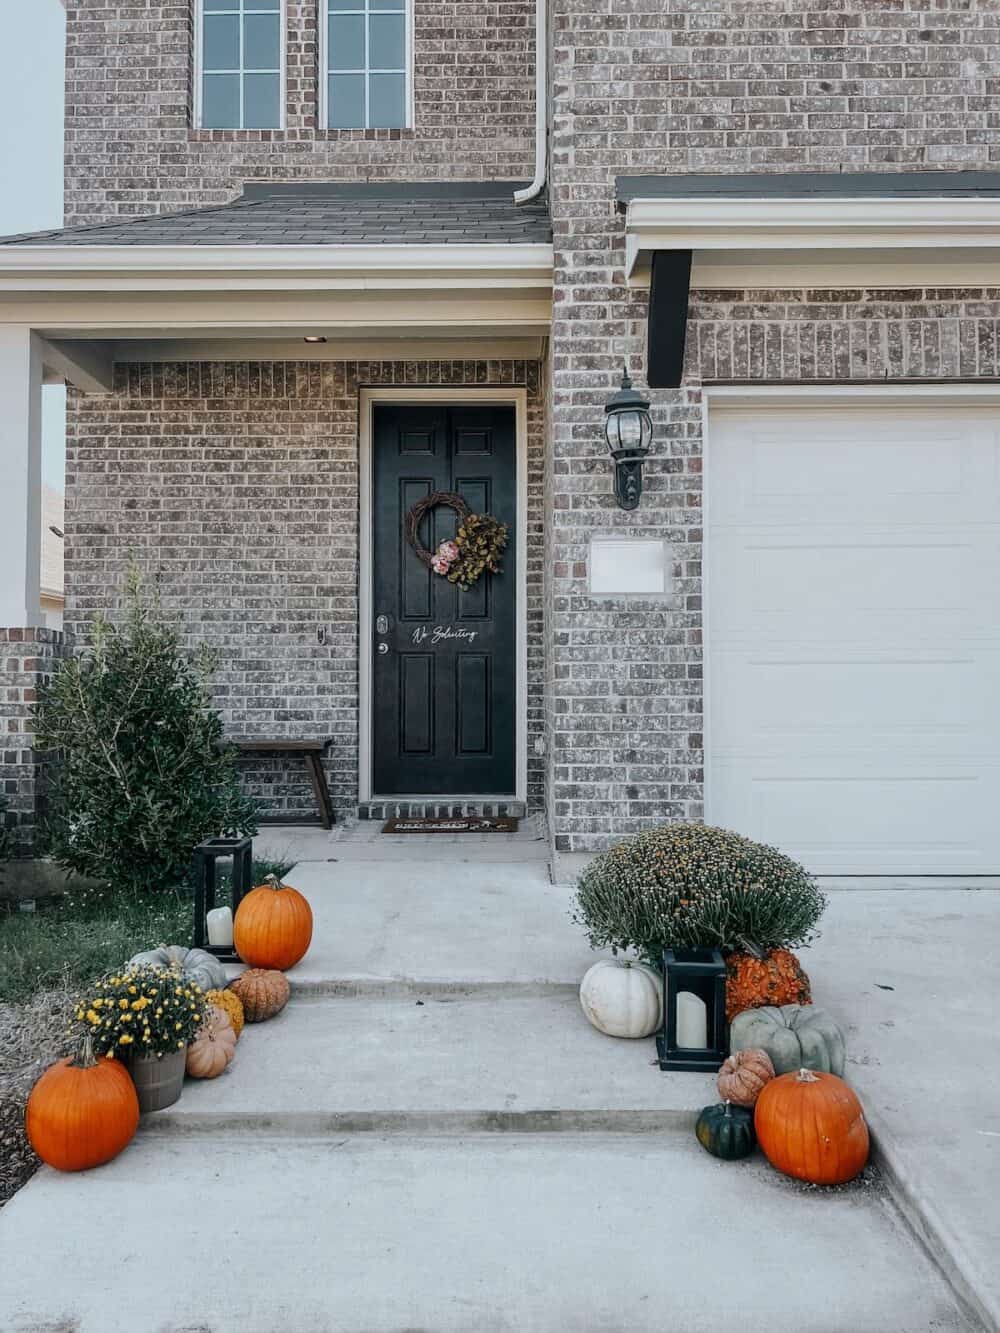
And, let me just say, OH BOY are these steps fun to decorate for the holidays!


Optional Additions
If you want to take it a step further after pouring the concrete front porch steps, you could always do something like…
- Adding thin bricks on top for some classic red brick steps
- Creating stone steps with some stone veneer
- Choosing a fun paint color and adding a pattern to the steps
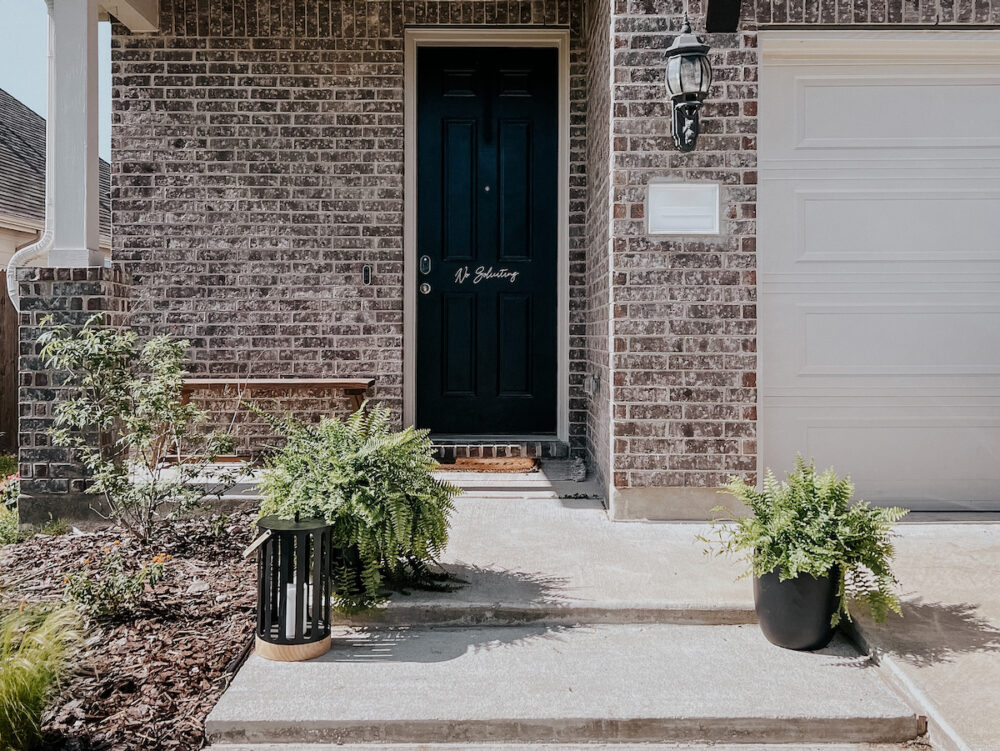
Of course, once you’re done with your steps, you have to add some fun decor to really create an inviting entry. I (obviously) love using pumpkins in the fall, but the rest of the year I have some greenery in planters scattered along the steps. I like to add some lanterns with solar-powered candles, too!
The Budget
In total, this project cost us under $200 (not including the concrete mixer). It took about 3.5 days of work. Had we hired it out, it would have cost at least a couple thousand dollars, so I’m glad we saved the money!
I mean, you can’t get much better than this kind of before and after: