Easy DIY Modern Geometric Accent Wall
You know I love me a good accent wall. They’re such a fun and simple way to add a little bit of drama and excitement to a room without taking up too much time or budget. They’re a great way to dip your toes in the water of a trend you’re curious about without having to fully commit, and because it’s just one wall you can have a little more fun with it than you might in the entire room.
And that’s why when my friend Michelle asked if I’d be willing to help her out with a geometric accent wall in her bedroom, I jumped at the chance to take it on!
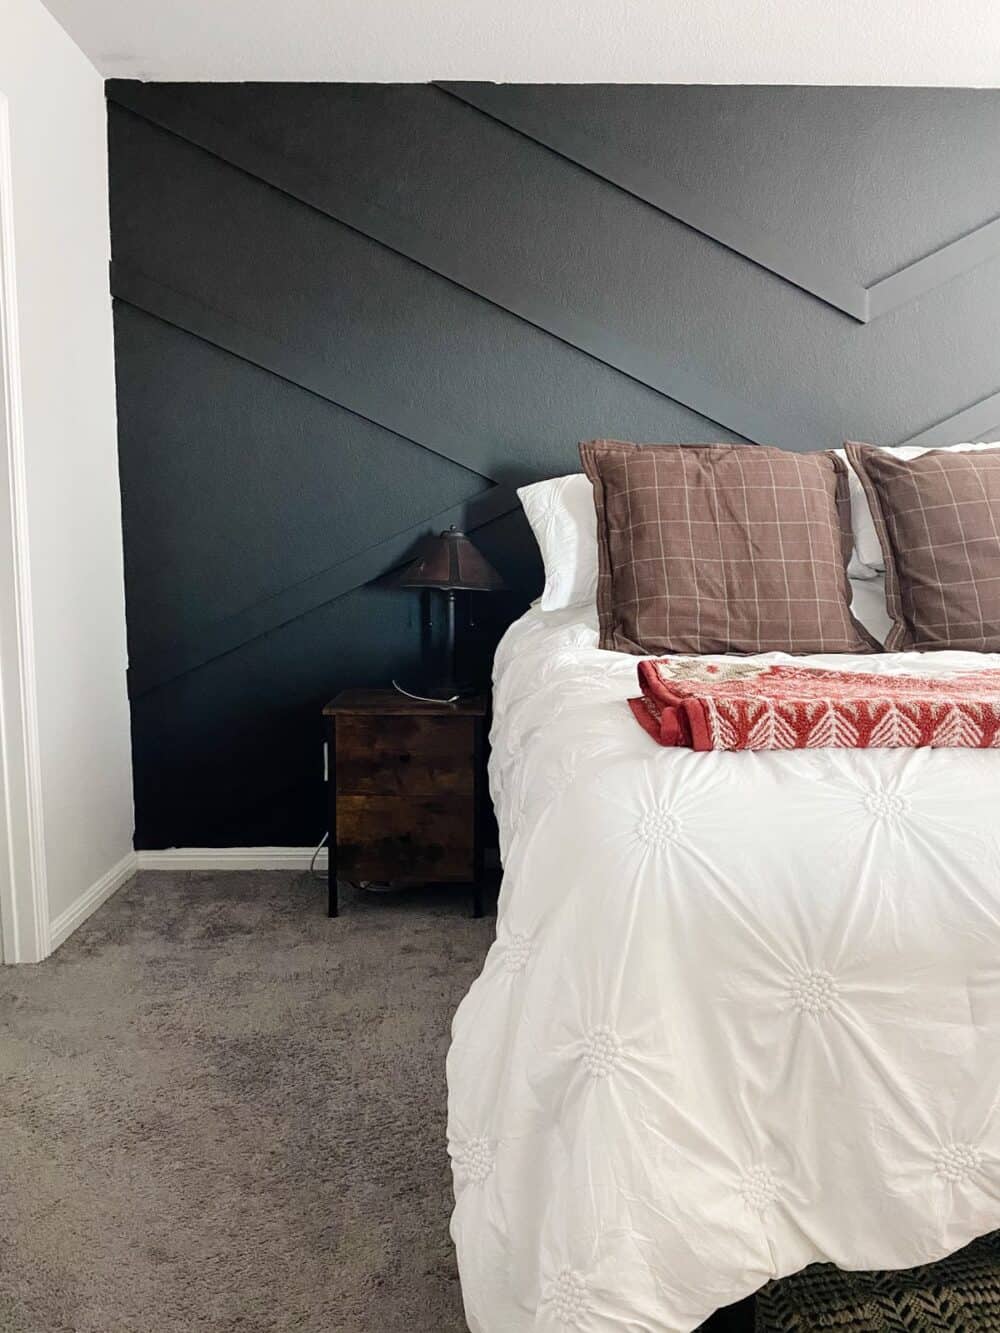
Are you kidding meeeee?!
I’ll be honest – this geometric accent wall was a lot more intense than I realized it would be when I first signed on, but Corey and I have worked out all (most?) of the kinks, so if you want to take this project on yourself you should find it much simpler than we did!
For this project, I’m working with my friends at DAP.
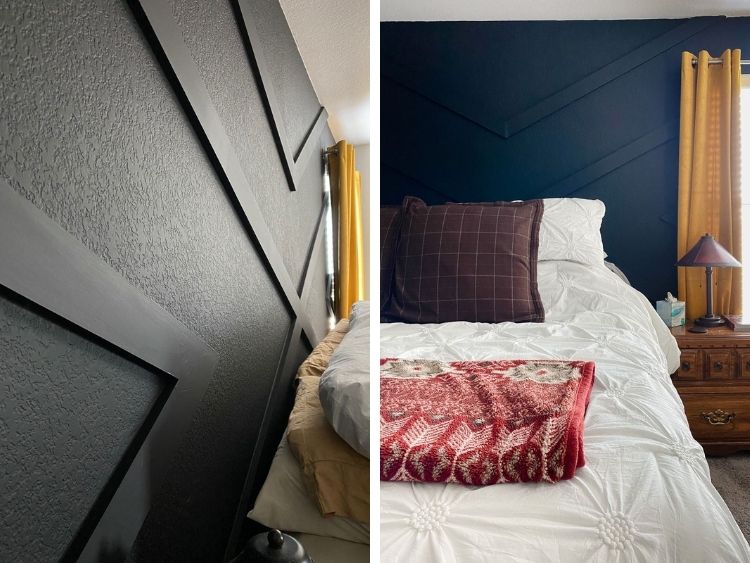
Are you ready to learn how to re-create this wall at home? Let’s do it!
Geometric Accent Wall: The Video
Below, you can watch how this unfolded on Instagram stories. It’s a really honest look at some of the challenges we ran into, and how we pushed through to end up with a beautiful finished product!
How to Install a Unique DIY Geometric Accent Wall
Tools you’ll need
This is a great place to list items used in your recipe and use an affiliate link to amazon for the items. This little box is a great space to disclose that the below links are affiliate links.
Measure + Plan
I recommend starting by fully planning our your accent wall – if you aren’t positive what geometric design or pattern you want, you can use painter’s tape to map out the pattern before starting. I’ll detail the design I did below, but you can swap things up however you want!
You’ll need to do some planning before you dive in. The first thing you’ll want to do is figure out the angles you’ll need to cut for your large X across the wall. If you cut at an incorrect angle, you won’t hit the other corner and it will create a major headache for you. Some planning here will go a looong way towards making things less painful for you later.
How to Plan Your Angles:
- Start by measuring your wall and finding the exact center of it (both width- and height-wise).
- Tie a small piece of string around a screw and screw it into the wall at the center point.
- Pull the other end of the string taut and tie it around another screw, which you’ll drill into the very corner of the wall. Get it as far into the corner as you can.
- Now, grab your angle finder and find the angles on either side of the string. You’re going to use those angles to cut the end of your first piece of wood, and this will be what ensures it sits at the appropriate angle so it goes all the way across to the other wall.
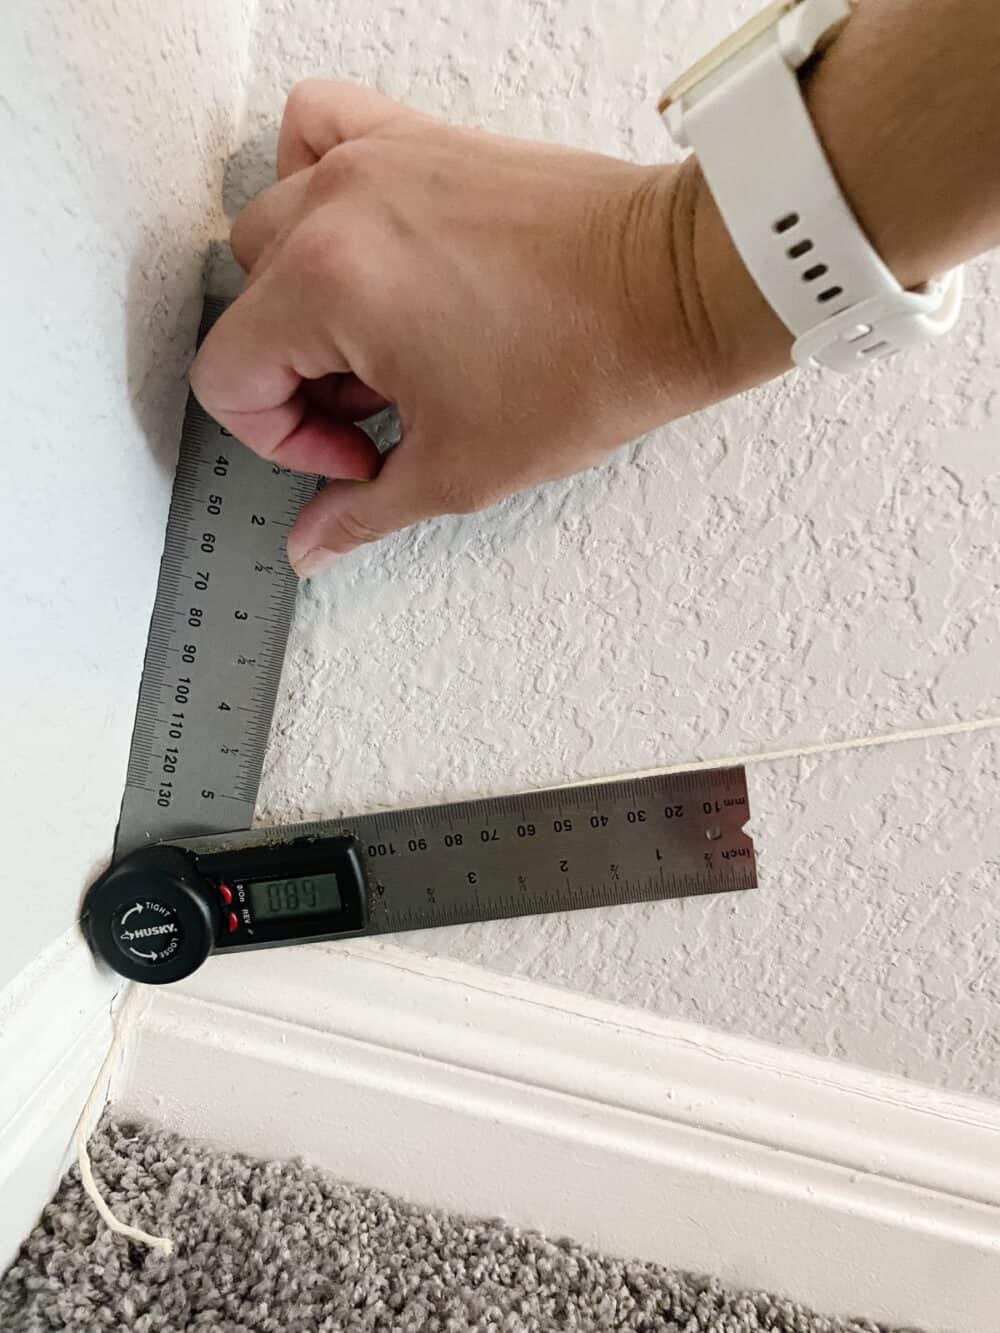
Once you’ve got the angles written down, head to your jigsaw and trace the angles onto the end of your piece of wood. Remember that you want the two angles you’re cutting to add up to 90 degrees. But, unless your wall is perfectly square (which, it isn’t), it won’t be split perfectly! You’ll have different angles on each side of the board.
For example, our angles were 64-degrees on one side and 26-degrees on the other side. It looked a little something like this:
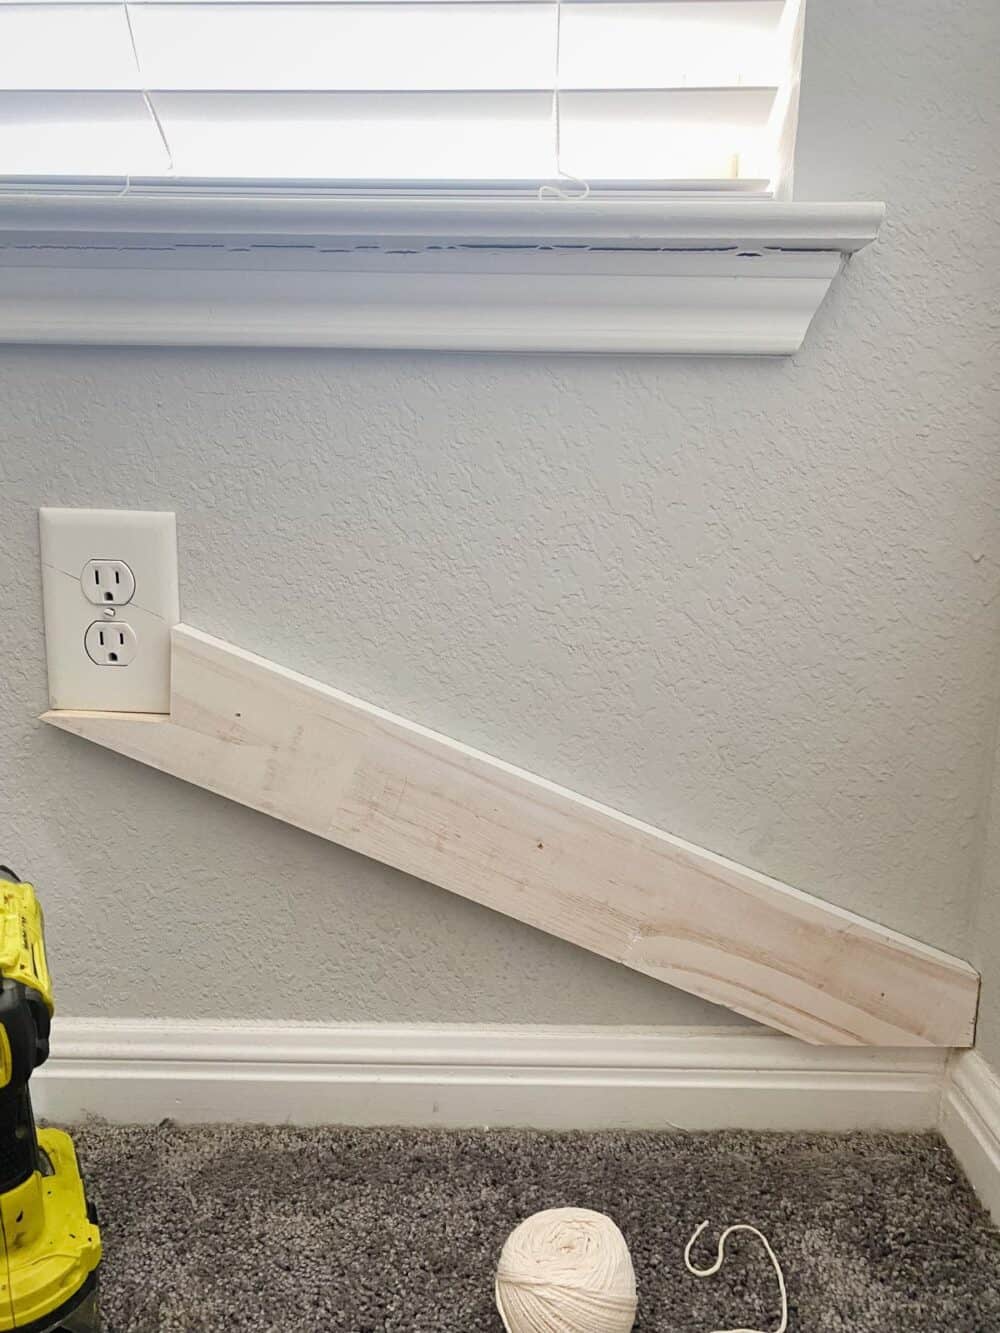
As you can see, we also had some outlets to deal with. I’ll address that in a minute, for now let’s just take it step by step!
Cut & Install First Piece
Once you’ve got your angles figured out, the large X should be relatively straightforward. The angles should be the same for all four corners, so from here you’ll just install the pieces of the X.
Start with the first piece that will go all the way across to the other corner. You’ll likely need to use two pieces to get all the way across the wall (we did), and that honestly makes it easier since you won’t have to cut angles onto both sides of the piece.
Use your brad nailer to install the first piece, with the angles fitting perfectly in the corner. Bonus points if you can confirm that the piece will cross right over the center point of your wall – that’s how you know you’ve got your angles right!
You don’t have to stress about nailing directly into studs – just slightly angle the nails as you put them in the board, it will help hold them in place and prevent them from pulling away from the wall. Of course, if you keep a stud finder nearby as you work, you can check for studs to try and hit with each board!
Repeat this process to fill any remaining space going across the first diagonal line.
If you’d like to use glue to help hold the boards in place, you absolutely can – I don’t find that construction adhesive is 100% necessary for this type of trim work (and it will damage the drywall if you ever remove it), but it doesn’t hurt!
Complete the Large X
Now, create the same angles in another piece of wood and install it starting in one of the opposite corners. This time, instead of going all the way across the wall it will meet the first piece you installed right at the center of the wall.
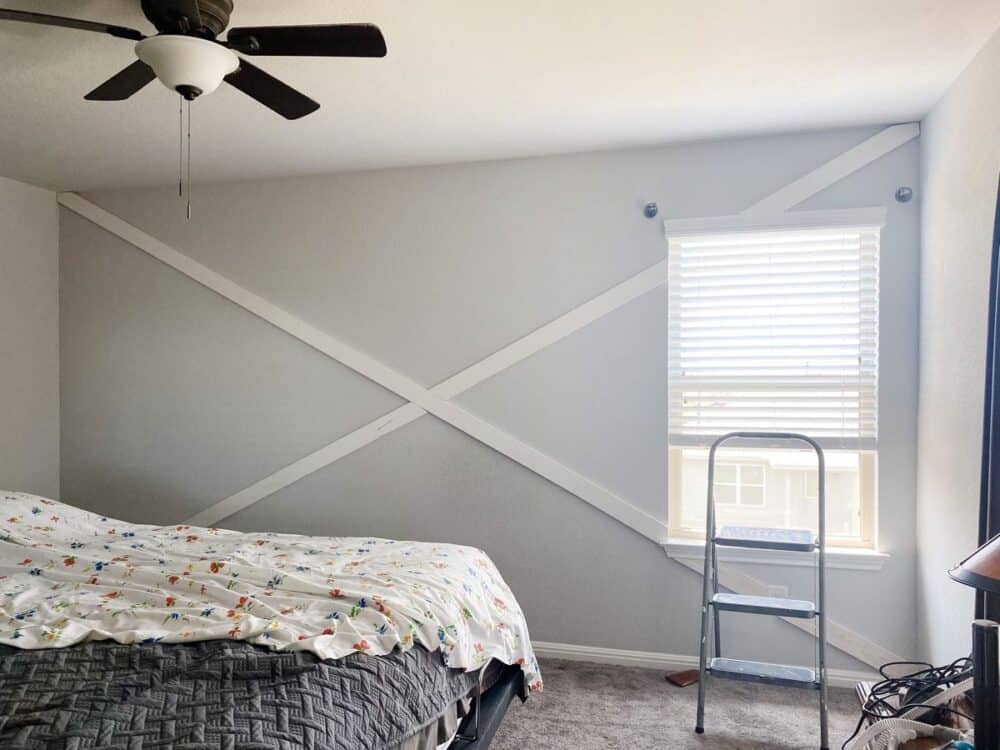
Repeat this a final time to go across to the opposite corner and you’ll have a completed X!
For us, this process was drastically complicated by the window and two outlets that just so happened to intersect the large X at every possible point. I’d recommend choosing a wall with no windows (and preferably even no outlets you’d run into!) to make things easier.
Add Smaller V’s
With the big X completed, you’re ready to add the smaller accent pieces. This will also require a fair amount of planning, but should move a lot faster than the X did!
Decide how far up from the main X you want the smaller V’s to be, and mark it on the wall. We went with a 15″ gap and we drew a line on the wall where the center of the V should be (in the middle of the wall).
Then, plan your angle. You want to mimic the lines of the existing X on the wall, so the angle you use to hit the wall should match the angle that’s on the side of the large X on the same wall. For example, if the large X hits the ceiling at a 64-degree angle, then these pieces will also hit the ceiling at a 64-degree angle.
The boards will then meet each other at the angle on the other wall. So, in the example above, you would cut the other angle to 26-degrees.
Clear as mud?
To determine how long your boards need to be, I found the easiest method was to simply hold a board up to the wall and mark it where the mid-line was. Then, I took it outside to cut at the appropriate angle.
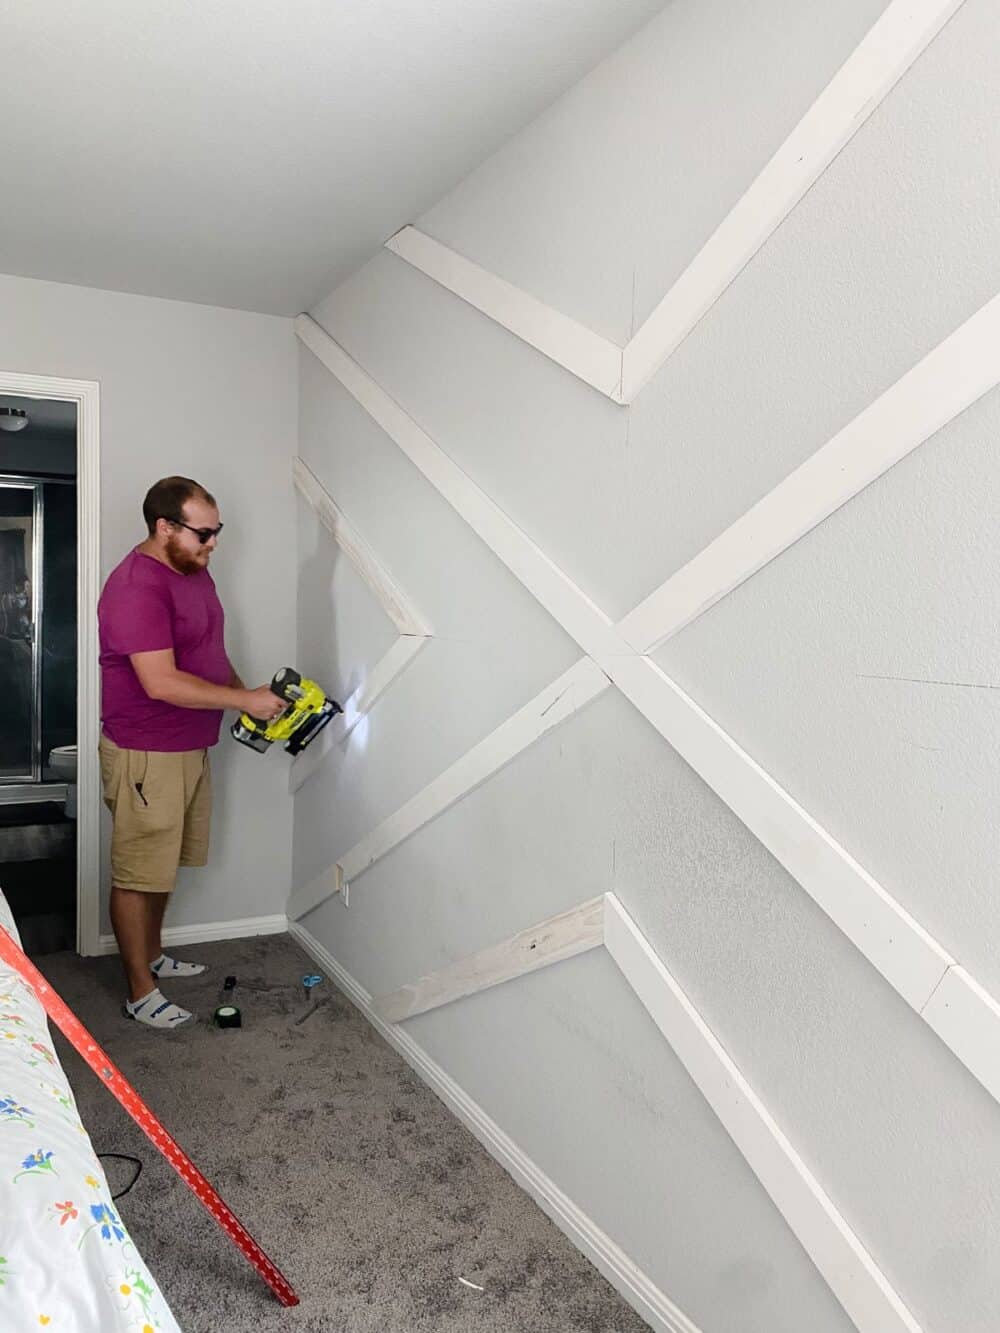
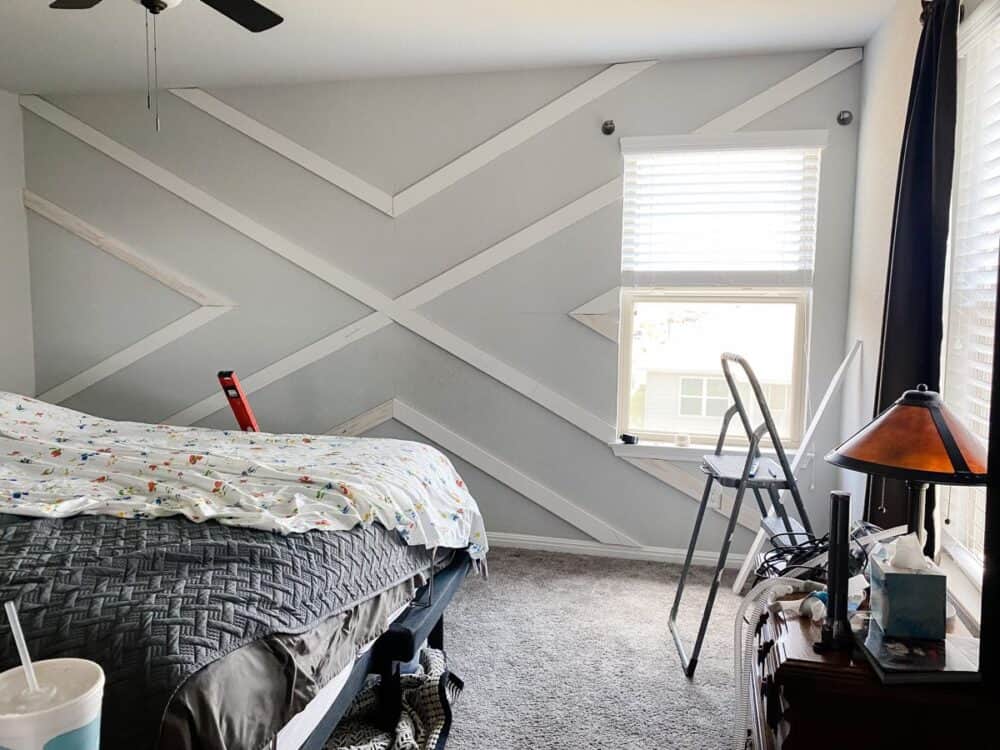
Install these boards the same way you installed the large X, and repeat the process for all four sides!
Add Wood Putty + Caulk
With all the wood installed, the FUN part can begin!
This is where your accent wall will start to look complete, professional, and polished. This is a vital step, and your wall will not be complete without it.
I used DAP Premium Wood Filler on the face of all of the boards to hide all of the joints and nail holes. You can apply it with a putty knife, just be sure to slightly overfill it so that you can sand it down to be level with the boards.
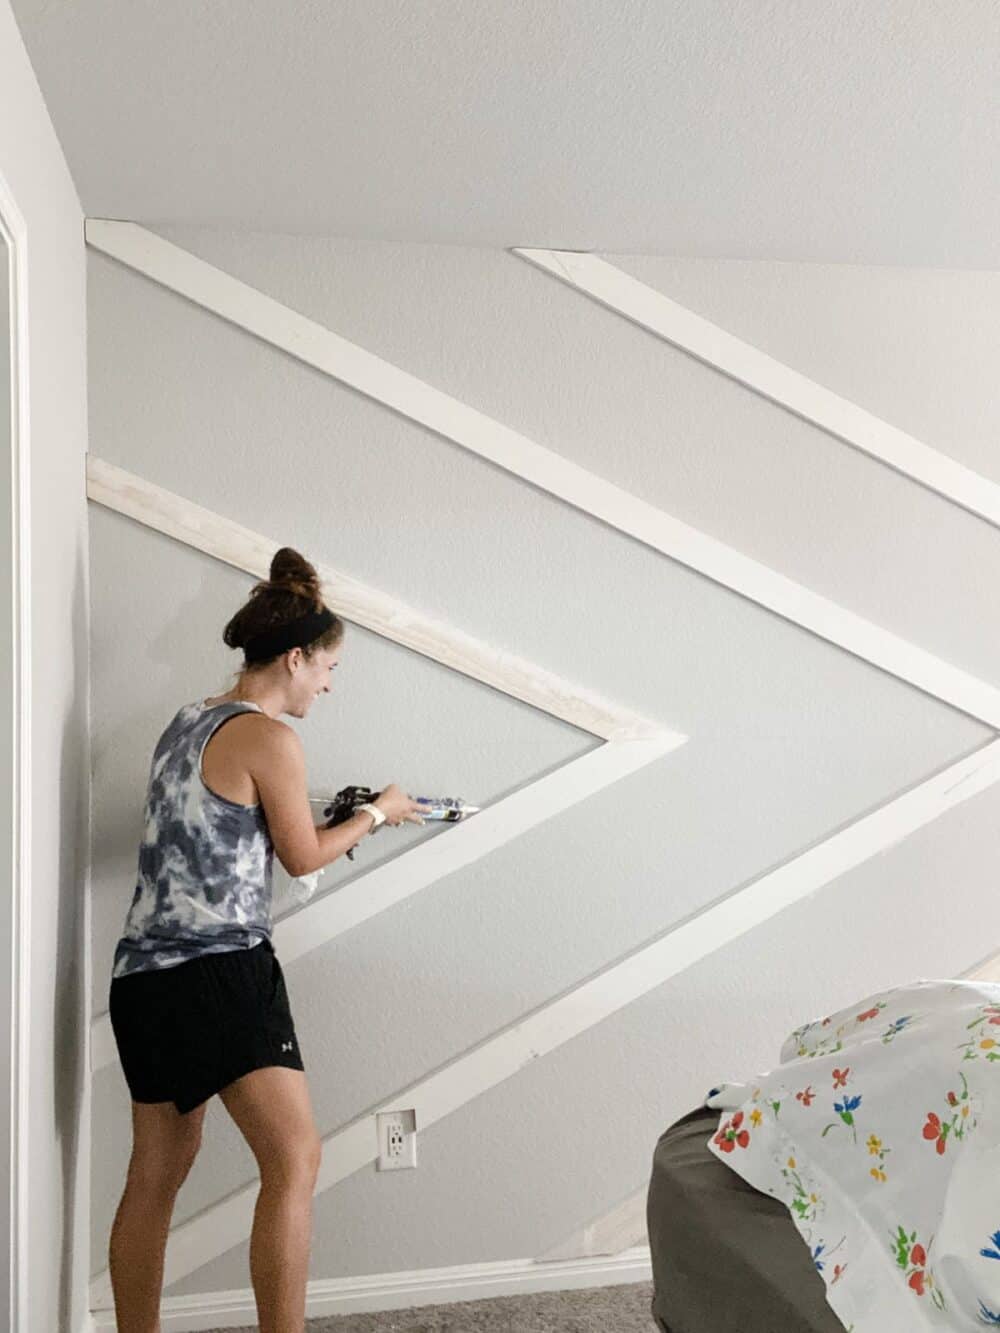
After adding wood filler, it’s time for caulk. I used Alex Flex caulk on all of the seams where the wood meets the wall – it helps fill it any gaps where the wood doesn’t fully touch (which will always happen because walls aren’t flat!) and really helps it look more polished.
Here’s a before and after for you:
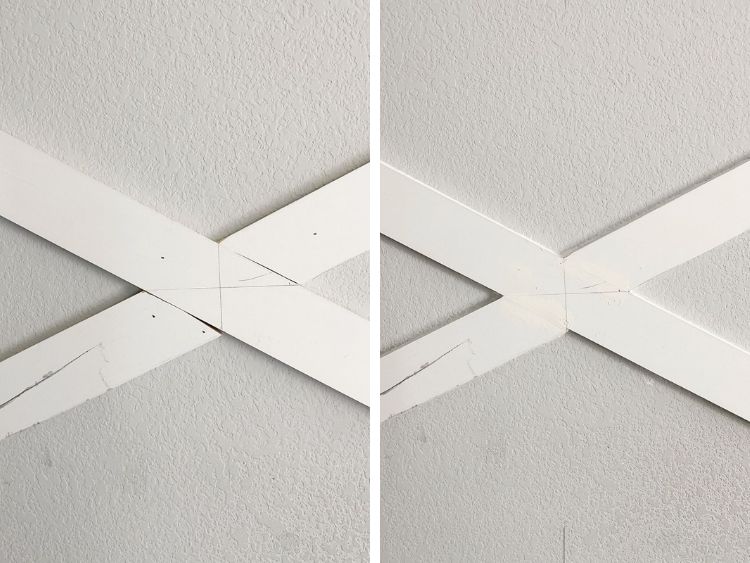
So good!
Once you’ve allowed it to dry for the time listed on the package, you can come back in with a sander to sand down the wood filler. Don’t sand the parts you’ve caulked! I used a piece of sandpaper and just hand sanded the face of all of the boards until they were smooth and flat to the touch.
And then? Time for paint!
How to Paint Your Geometric Accent Wall
Once everything is dry and sanded, you’re ready for paint!
Many people would recommend painting the wall before installing the boards – however, since we were painting the wall black I decided to wait. I wanted to be able to mark on the wall as needed (which we did, a lot!), and I knew if I pre-painted it, it would be a lot harder to do that. So, I painted the wall by hand once everything was done, and it moved really quickly, so it was no big deal to wait!
A few options for painting your wall:
- Pre-paint the wall + boards, then do touch ups afterwards
- Paint by hand once everything is done
- Paint with a sprayer once everything is done
It’s all a matter of personal preference and what works best for you!
The wall color we went with for this geometric wood accent wall is Limousine Leather by Behr – I think it’s the perfect, rich black!
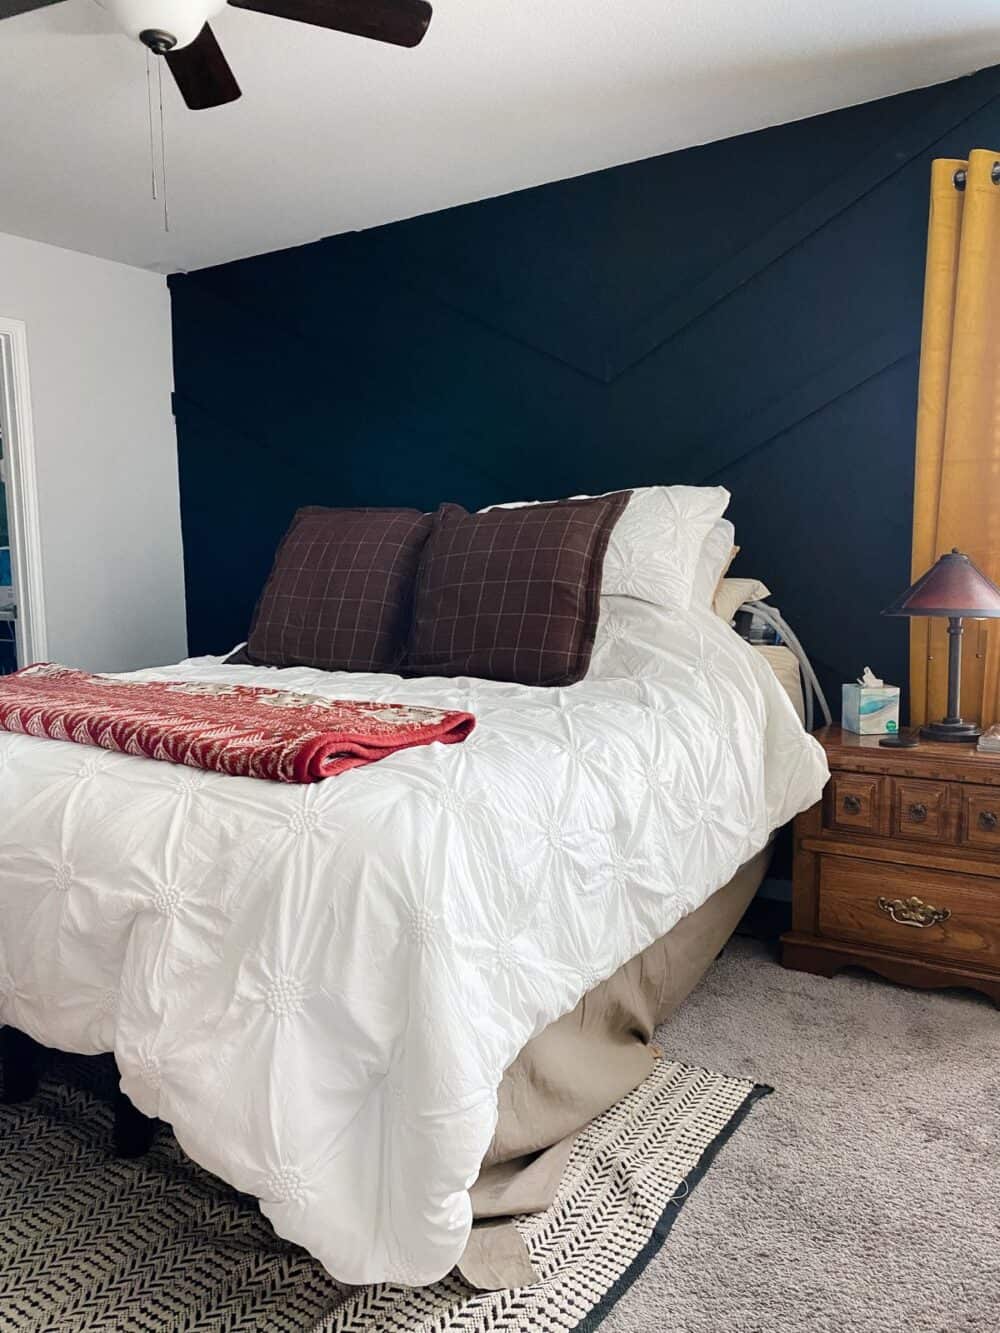
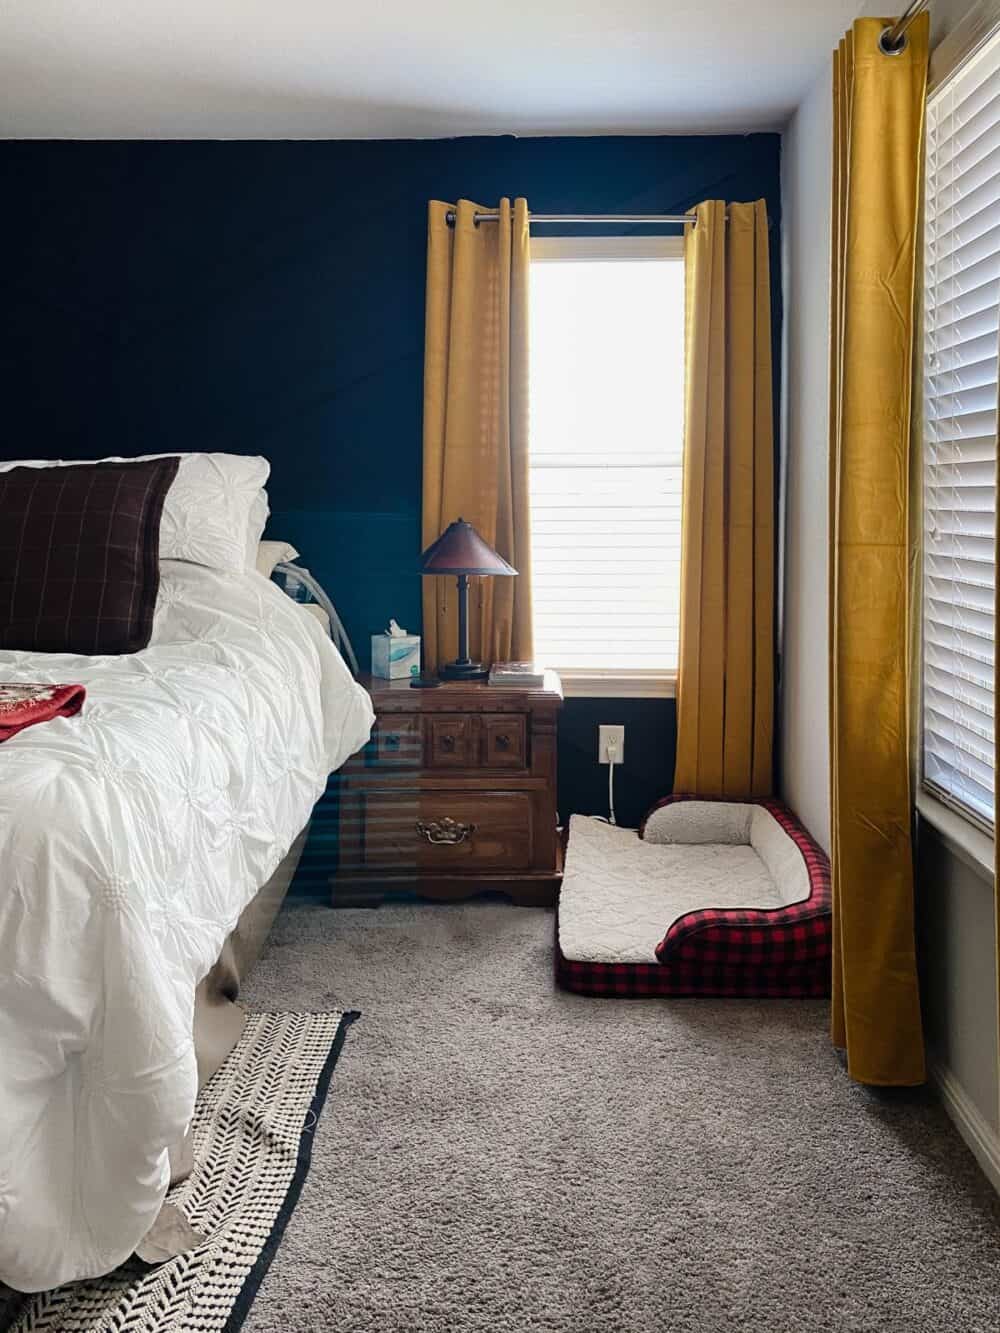
And that’s it! It’s always so fun to take on a project that’s a little outside of my normal design choices and get to stretch my creativity a bit, and this geometric accent wall was no exception – I love how it turned out!
This was definitely the most challenging accent wall I’ve taken on so far, but man, the end result is pretty awesome, no?!
