
The New Wallpaper in the Entry
Last updated on March 1st, 2023 at 05:49 pm
Since the beginning of the year, I’ve been talking about giving our entryway a bit of a refresh. I first tackled it back in 2020, and I loved the changes I made but it was missing a little something. So far on this little phase 2 refresh, we’ve…
- Painted the baseboards and trim
- Re-painted the front door
- Replaced the doorknob on the powder room door
Just those three little tweaks made a huge difference already. But, I’m not done! The next step was to replace the wallpaper under the stairwell. We previously had this peel & stick wallpaper from Magnolia Home. I loved the look of it, but the peel and stick wallpaper was just not working on our textured walls. It was bubbling up in places and peeling away at the edges. It just wasn’t looking as good as I knew it could.
I also felt like I could probably achieve a more muted and calming feel in here – which is what I was going for all along with this refresh! You can see basically our entire house right when you walk in the door. It can be overwhelming. So, I’m trying to visually tone down the entry, and I knew some new wallpaper would help.
And boy, did it ever!

Here’s a link to the new wallpaper. It’s from Home Depot, and I don’t think it could possibly be more perfect for the space.
Since I installed it last week, both Corey and I have exclaimed at least three times a day about how much better it looks! We loved the old wallpaper, but this one truly sings in this space. It layers right into the room in the best possible way, it acts as the perfect supporting character, and it is such a calming presence when you walk in the door.
I’ve written a few posts on installing wallpaper, so I wont go into the details – instead, I’ll just point you to those to help you out if you need it!
- Here’s a tutorial from the first time I installed wallpaper. It gives you a look at everything I learned, and the step by step process.
- And here’s a post all about what I learned the second time around – I got a little bit better at it and learned a few tips and tricks that made a big difference!
I only needed one roll of wallpaper to complete this little wall, and I have a bit leftover. Installing wallpaper on textured walls can be a bit of a frustrating process (I find you need extra wallpaper paste on hand!), but it’s so worth it. I adore the finished product, and it only took me an afternoon to swap it out.
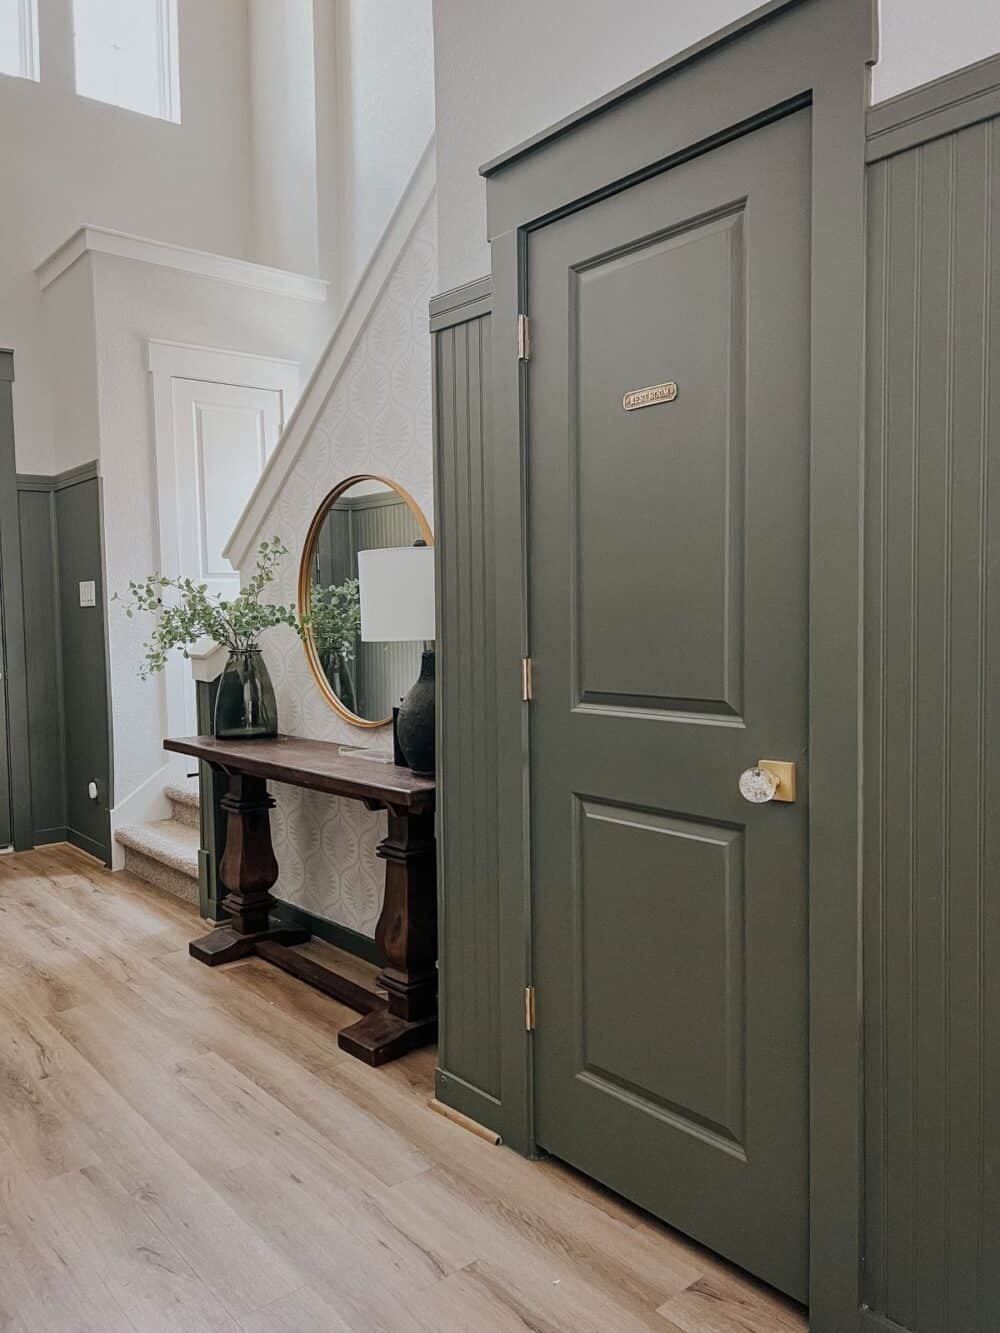
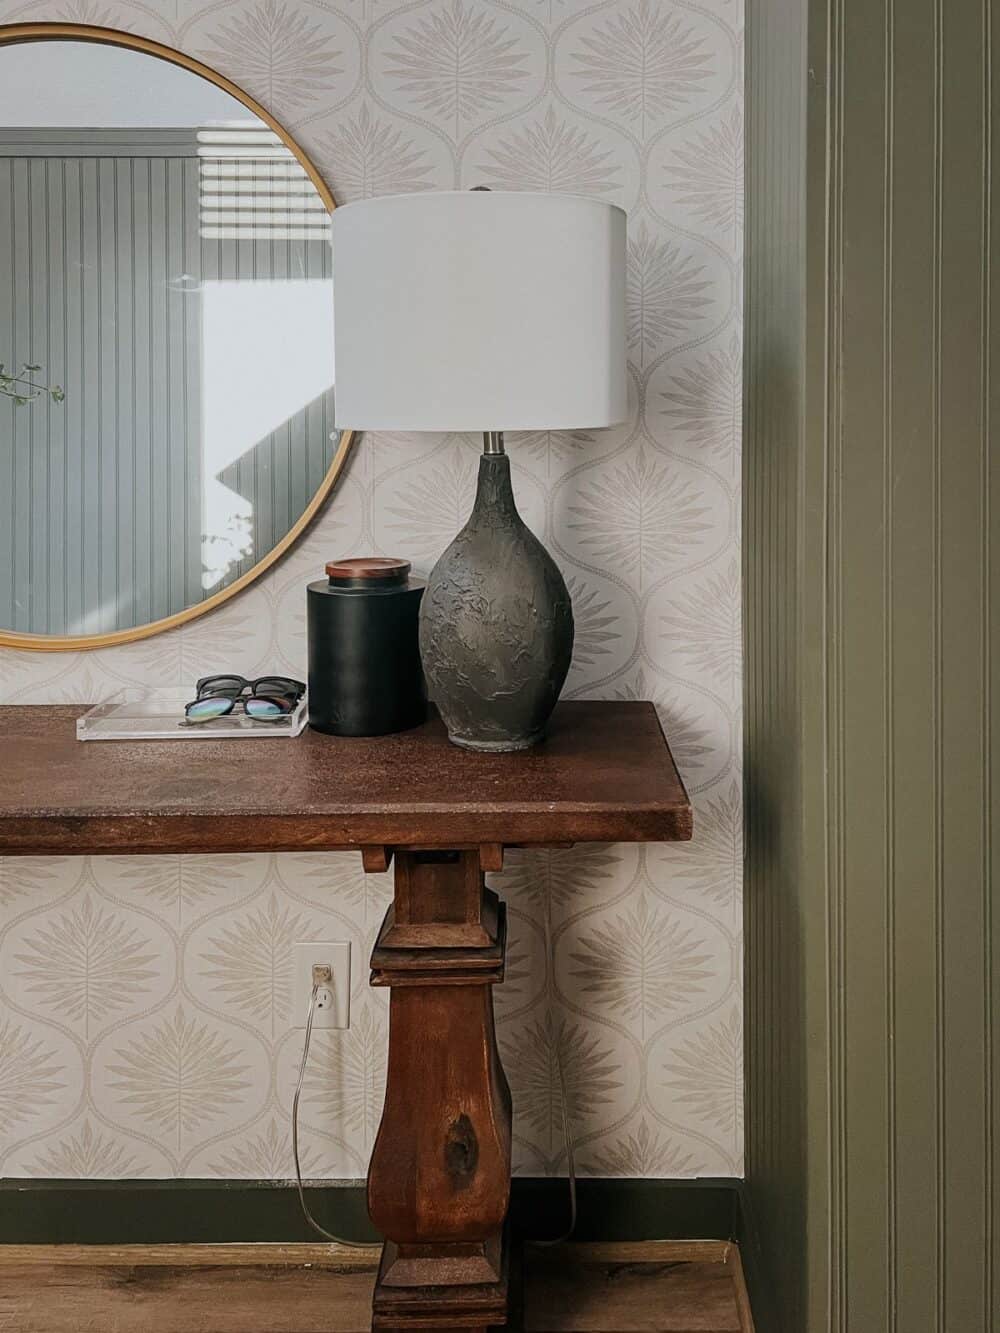
The other big change that I made on this wall was hanging a new mirror. We previously had this mirror on the wall, and I loved the look of it, but it was too small. This one is a whopping 10″ larger, and it fits the space much better. I love how much light it bounces around in the space, and it just feels right.
Every time I share an in-the-middle project like this, there’s a piece of me that wants to clarify some things. The entry table isn’t properly styled! I’ve ordered a runner! It’s not done yet!
But, I’m trying to celebrate the middle steps. The tiny little progress. We often spend so much time thinking about the end product that we don’t celebrate all of the little steps along the way.
So, we’re not going to qualify or apologize for any undone pieces of this room. But, I DO know many of you are wondering what’s left. And that’s fair!
I’ve still got a list of (small) to-dos in this space. Here’s a rundown:
- Add a runner (I’ve ordered one, just waiting for it to arrive)
- Replace all of the light switches (I’m eyeing these switches and these plates)
- Re-style the entry table with a fresh lamp and a few other new accessories
- Replace the large photos above the staircase with a black & white gallery wall
- Add a peg rail to the big, blank wall opposite this
- Eventually I’d love to replace the front door hardware with gold, but that’s lower on my to-do list since our smart lock is still new and in great condition
Despite the laundry list of things that haven’t been completed yet, I’m really pleased with how this little entry refresh is shaping up!
And that’s where we’re at right now. Still plenty to do, but I’m seriously celebrating the process we’ve made so far. I think it deserves a little side-by-side before and after action.
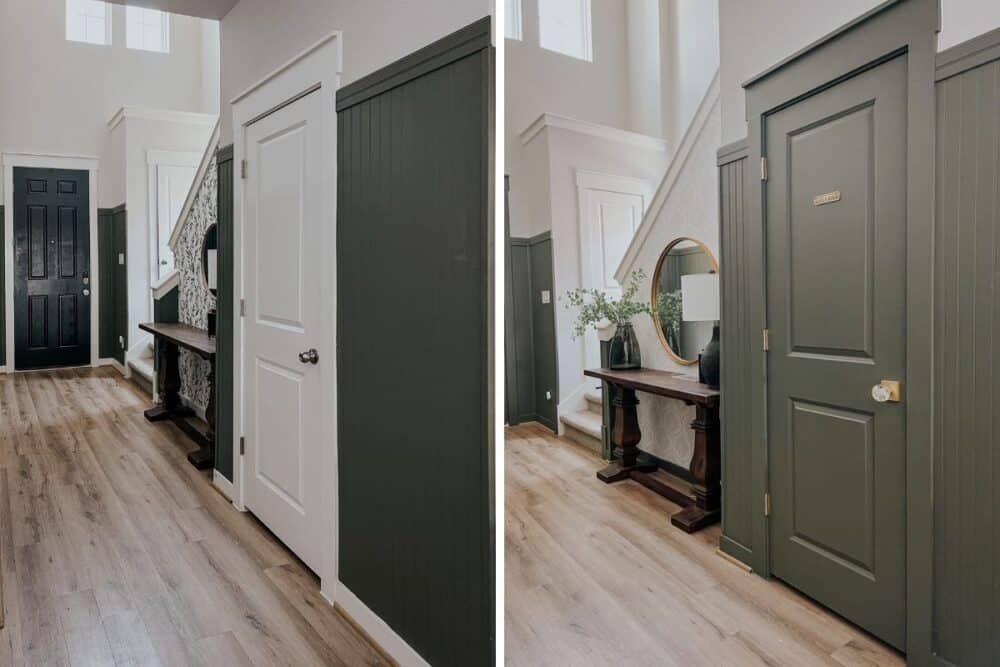
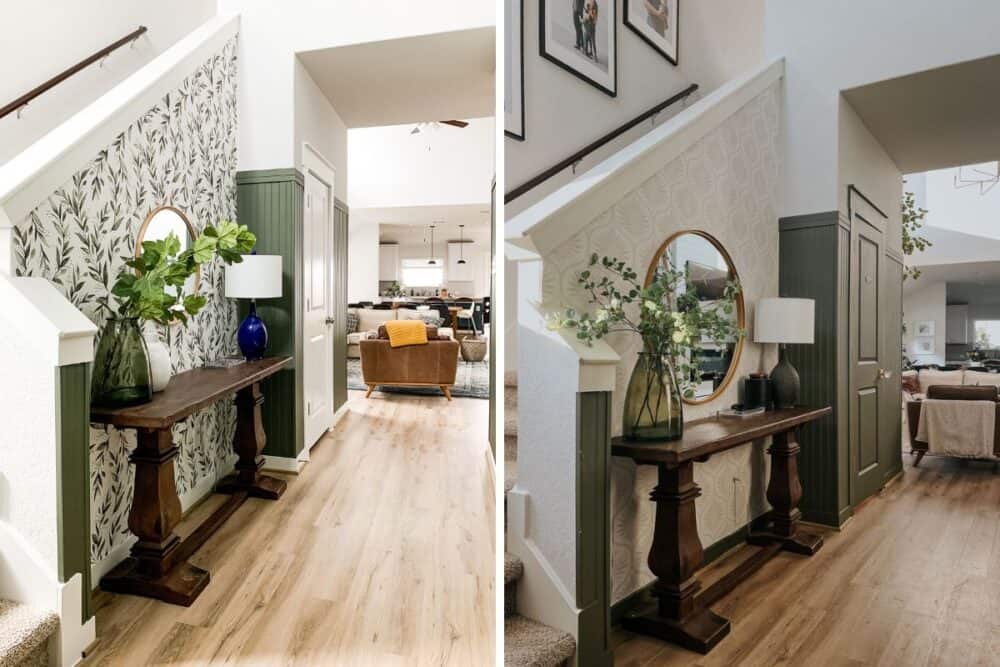
I mean…it’s a big difference! I’m in love with the changes, and can’t wait to take it the rest of the way!
Entryway Sources
- Paint Color: Bonsai Trunk by Behr
- Wallpaper
- Console Table
- Mirror
- Lamp (Here’s how I updated it)
- Similar vases
- Acrylic Tray