
Getting Our Paint Organized
We’re working on organizing our garage to turn it into a functional and gorgeous workshop. After adding our dust collection system, the next step was to organize our paint supplies!
After Corey and I got our dust collection system up and running, we were feeling really motivated to keep working on the garage and make it look even better. Our to-do list for this space is still long and rambling, but it’s just one of those things that you have to take on in bite-sized chunks, you know?
So last week, in the midst of prepping for a quick weekend vacation, I decided to paint one of the walls in the garage and whip my paint and painting supplies into shape.
And, oh my goodness, it feels good to have an organized garage – well, corner of my garage.
Organizing Paint Supplies: Tips & Tricks
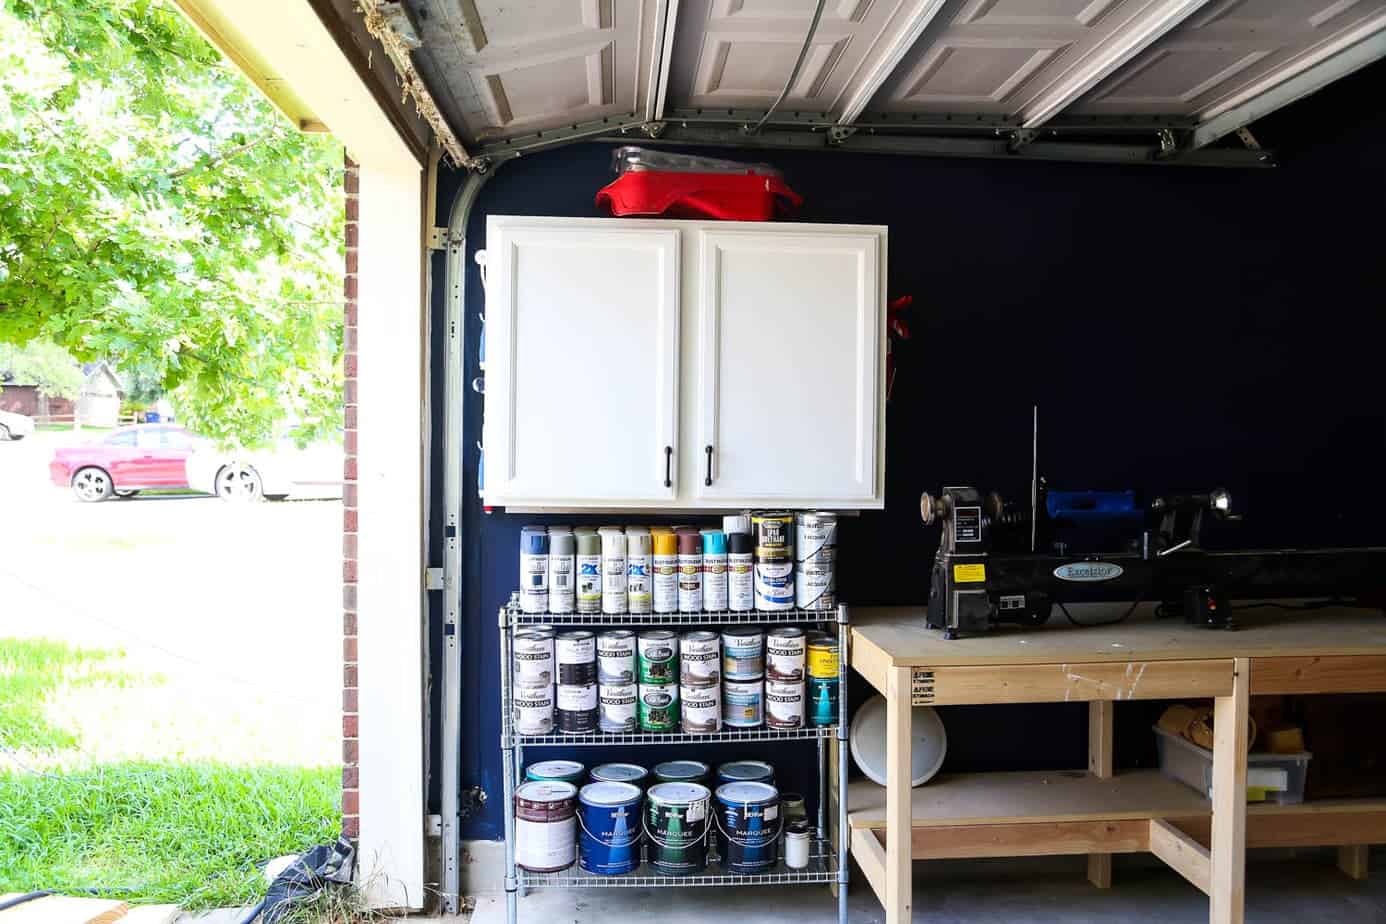
I started off my painting this entire wall with some leftover paint from painting the workshop in the old house. The color is Night Flight by Behr and the deep navy blue is making me all sorts of happy (you’ll see more of it soon once we get the pegboard up). I don’t intend to paint the entire garage this color, but I love a good accent wall (and we had the paint), so I figured why not?! We’ll probably use some leftover paint from having our old house painted to do the rest of the walls once we get there.
Leftover paint just might be my favorite thing in the entire world.
Notice how I’m talking about using exterior paint in the garage? I think that’s something worth noting – I did a bit of research and everything I read indicated that even though your garage is technically an indoor space, you should always use exterior paint because when the garage door is open it’s much more exposed to the elements than a regular room would be. And, since we always have the door open when we’re working in there, it only made sense to stick with exterior paint.
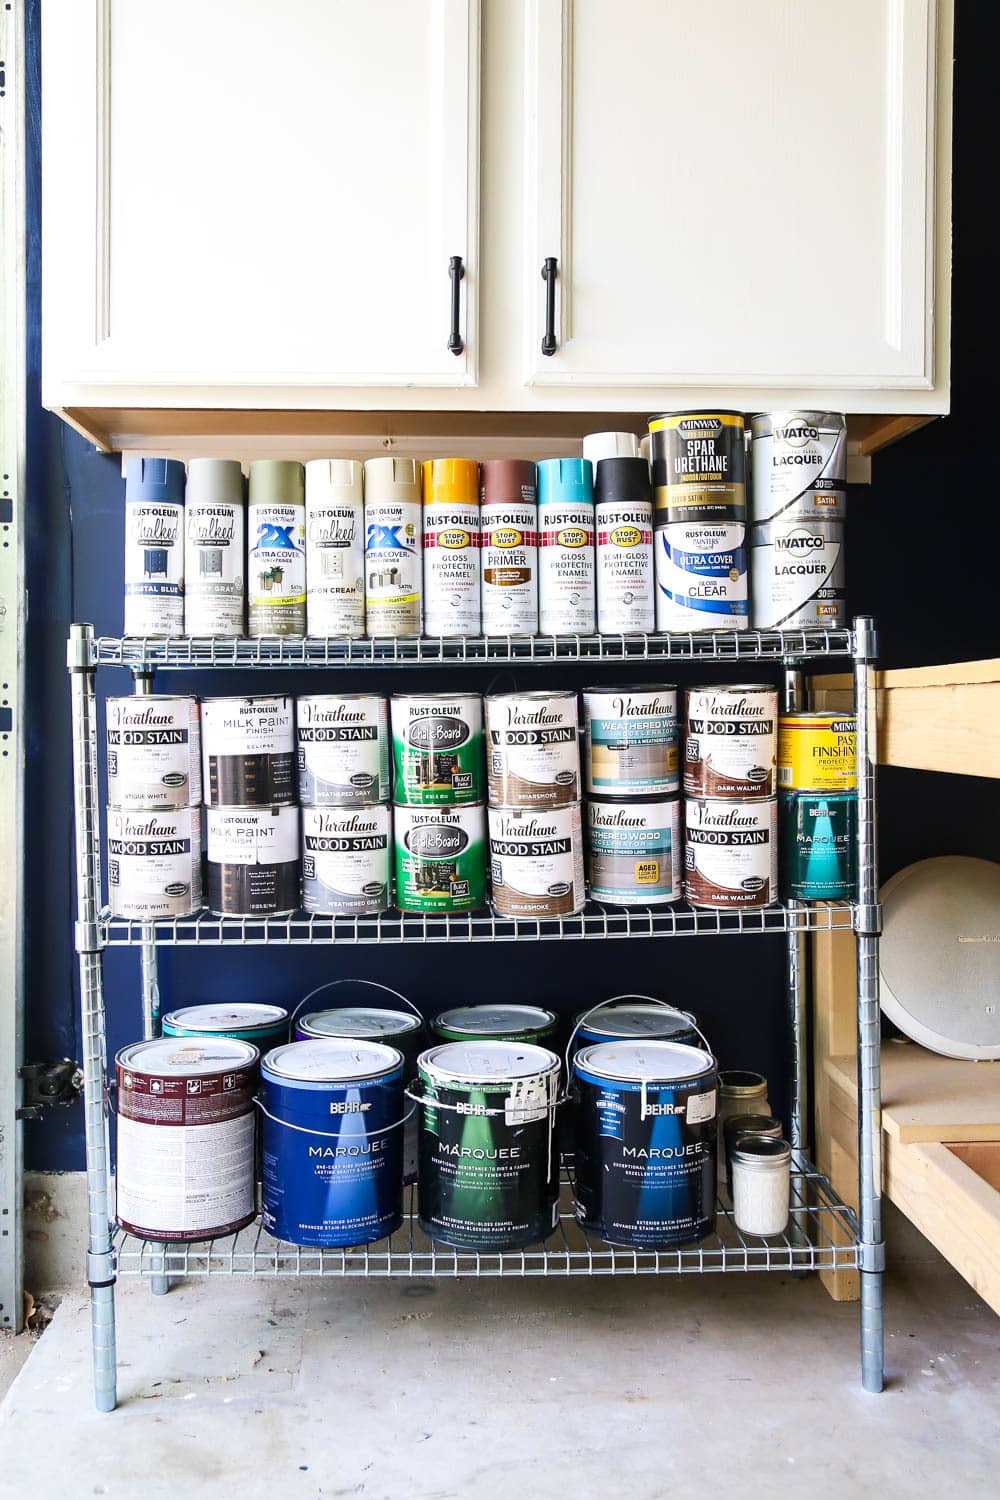
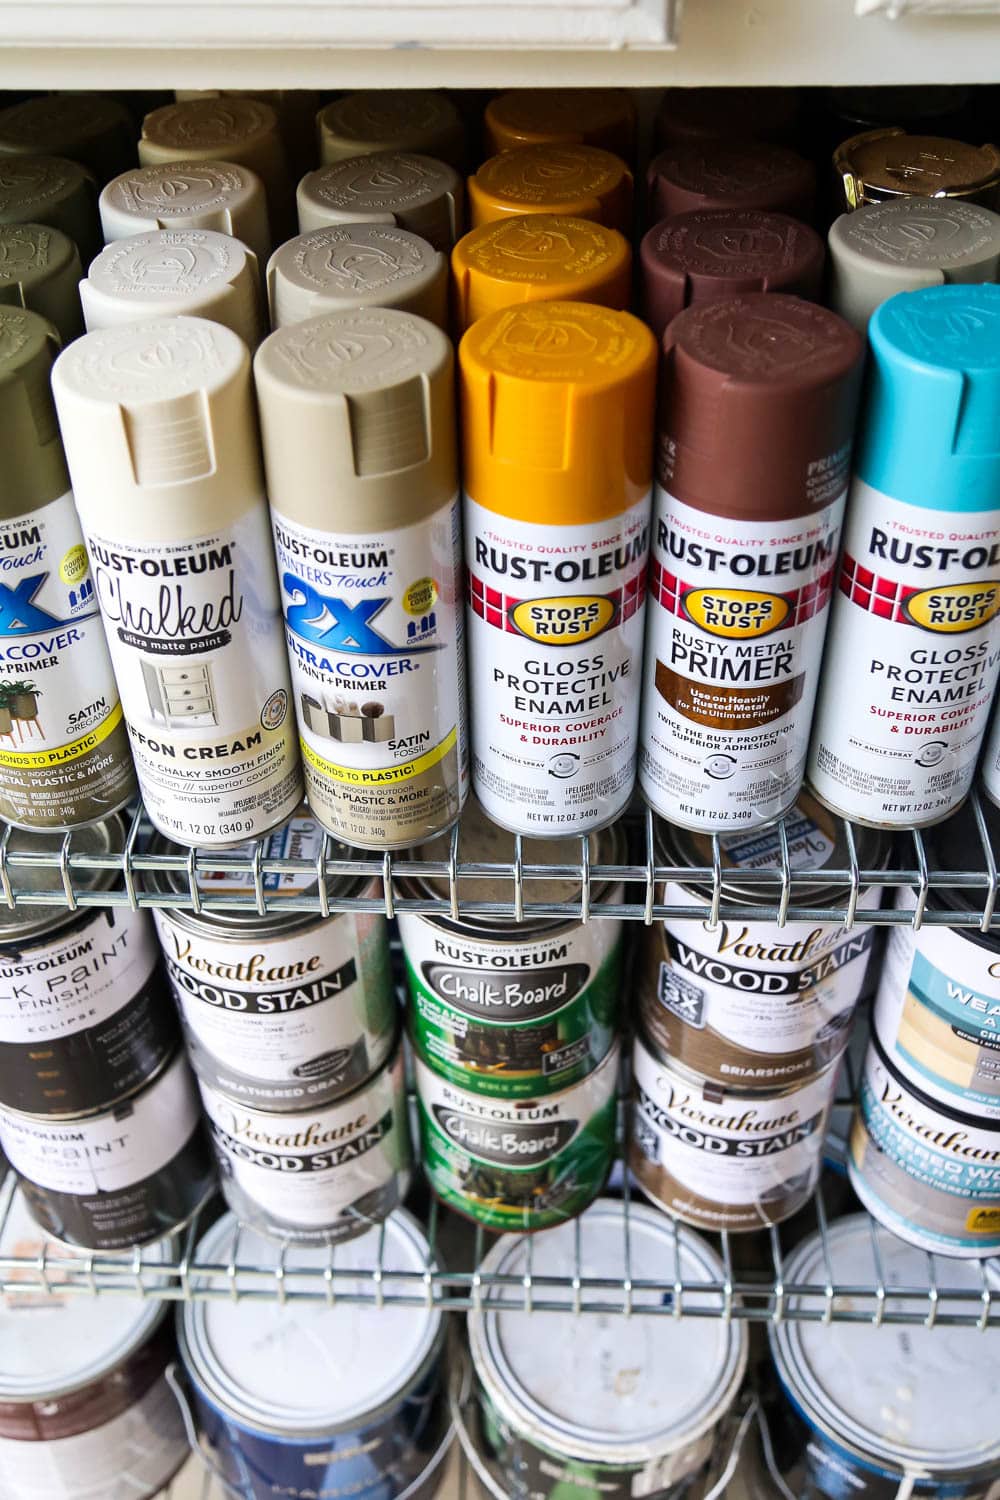
After the wall was painted, I touched up the cabinet (this is the cabinet we stole from our dining room to make way for open shelving!) with some (leftover) white exterior paint and brought over a shelf we had elsewhere in the room. I can’t remember exactly where we got this shelf, but this is basically the exact same thing. We had two of these shorter shelves stacked on top of each other holding all of my paint stuff in a (very) disorganized fashion, so I purged all of the paint that I didn’t need (which was a lot) and brought just one of the pieces over here to hold the rest.
Doesn’t that just make your heart happy?
I’m a bit of a paint hoarder, so please know that I recognize it’s not normal to have this much paint (especially considering this is my pared down collection). I don’t have a ton of great tips for keeping it super organized because, um, it’s paint, but here are a few tricks I use for storing it, deciding what to keep, and organizing it:
Paint Organization Tips
- Anything with about a quarter of a gallon or less left over gets transferred to a small mason jar for touch ups and the rest gets disposed of. Generally speaking, you can’t do much with less than about half a gallon of paint, so I’ll keep a bit of it in case the need comes up and toss the rest. I find that paint stores better in a mason jar than in the metal cans (that often don’t get closed properly) so this not only takes up less space but it also keeps the paint fresher.
- Unless I have a plan for it, I try not to keep it. There was a time when I had literally 30+ gallons of paint floating around just waiting for some grand purpose that was never going to come. I’ve learned that’s not functional at all so now I only keep leftover paint if I know I’ll use it in the future.
- You can donate old paint to your local Habitat for Humanity Re-Store, or if you just want to get rid of it, dump some kitty litter in there and stir it up. Wait for it to fully dry out, then you can just toss it in the trash can.
- Label cans with the rooms they belong to (or, if you’re like me and know the names of all the paint around your home, at least make sure the name of the paint is on the can). If you have enough paint left over to save a certain color that you used somewhere in your house, use a Sharpie to label where the color was used. Then, you’ll know where it is if you need touch-ups in that room, and it’ll also give you a better idea of what the color looks like if you want to use it somewhere else!

Organizing Paint Tools & Supplies
Once my paint was all organized, it was time to tackle the tools and supplies. I dedicated the entire upper cabinet to all of my painting paraphernalia. Things like my paint sprayer(s), power roller, HANDy Paint Pails, and regular rollers had no real place before – I wanted to make sure they were all easy to access, in a spot where they would be kept safe, and (most importantly) out of the way.
I started by designating the middle shelf for my Sidekick Power Roller (read more about that here) and one of my paint sprayers. Yes, I said “one of”. I have multiple paint sprayers because I’m a crazy person, but the other ones have their own carrying cases and are tucked under the workbench on the tool shelf.
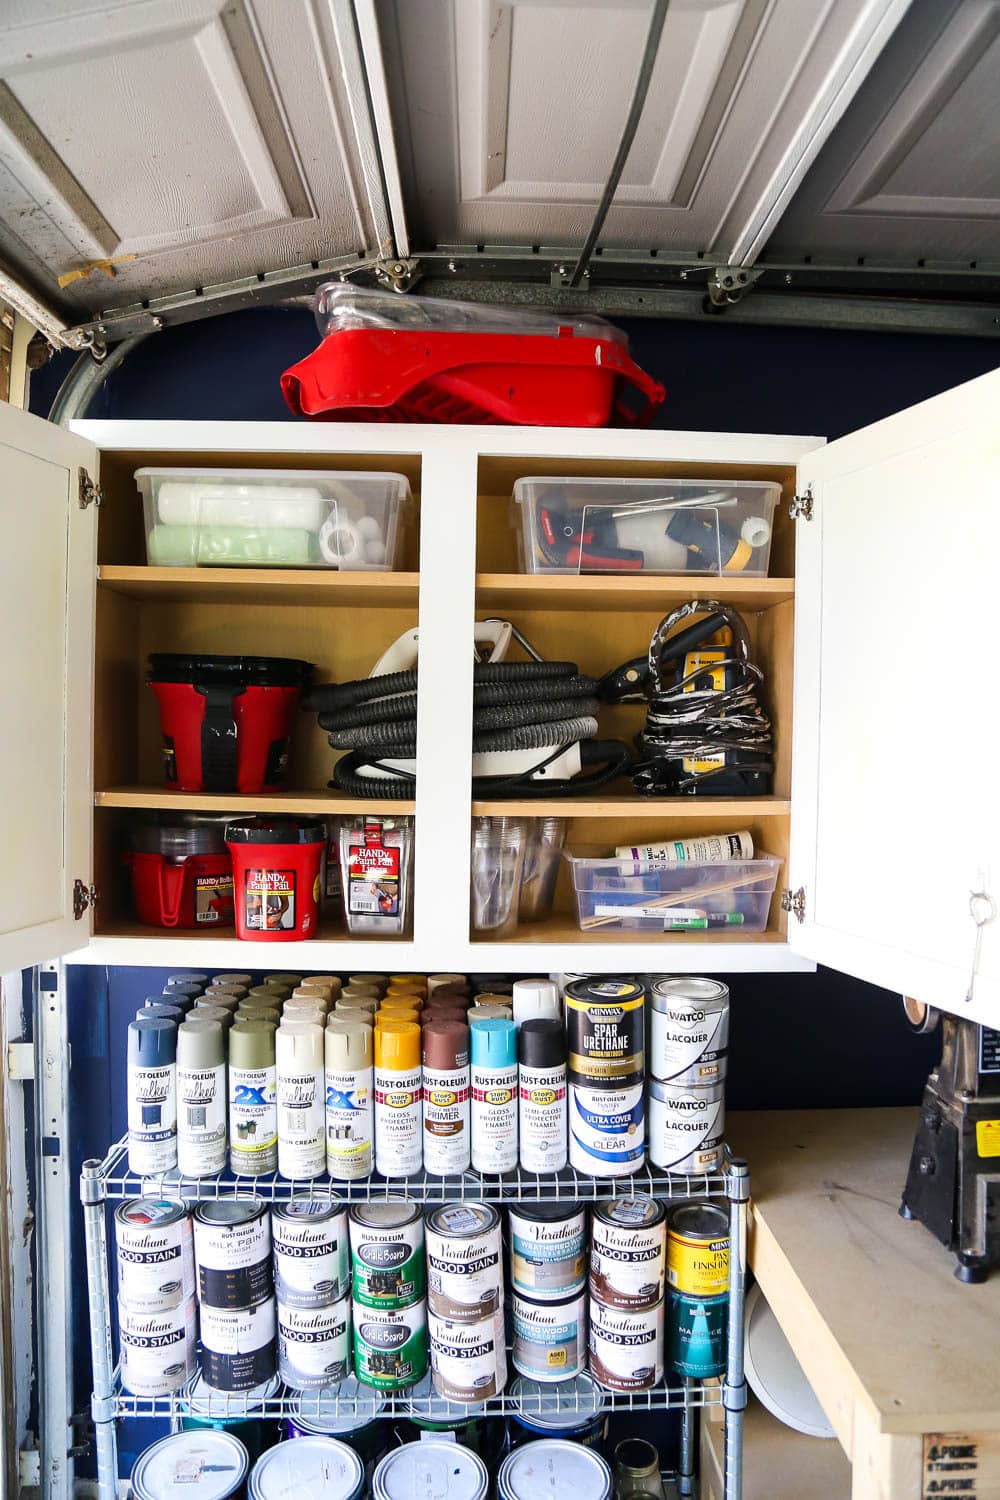
Next up, I organized my HANDy Paint Pails (read more about those here!). Again, you may be laughing at how many different variations of it I own, but I assure you I use each and every one of them. They’ve all got a different purpose and I (literally) don’t tackle a painting project without one, so I wanted to make sure both the pails and the liners were easy to find and grab.
Finally, I designated a few different (clear!) boxes for the random other painting supplies that tend to float around the garage and get in the way. One of them has parts that go along with the paint sprayer and power roller, one of them contains roller covers, and the last one has an assortment of small things like painter’s tape, paint stir sticks, and extra caulk.
I love that the boxes keep all of this random stuff organized but it’s still super easy to access. And, perhaps most importantly, it’s an easy system for me to maintain! After I finish a big painting project, the last thing I want to do is spend a ton of time on clean-up – this makes it as easy as possible.
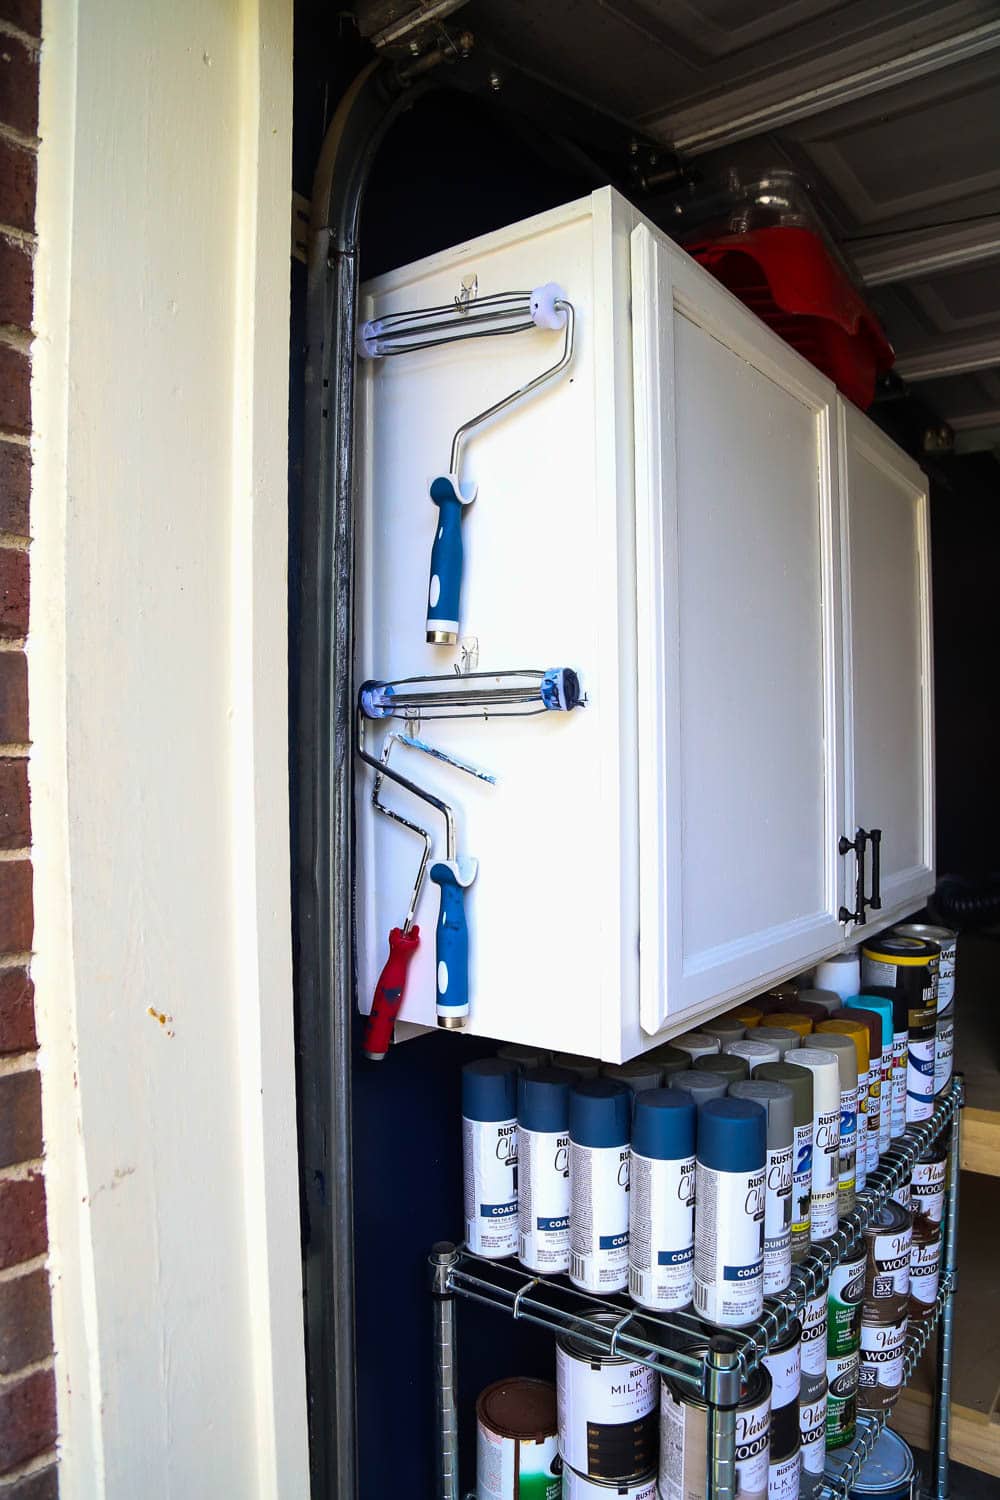
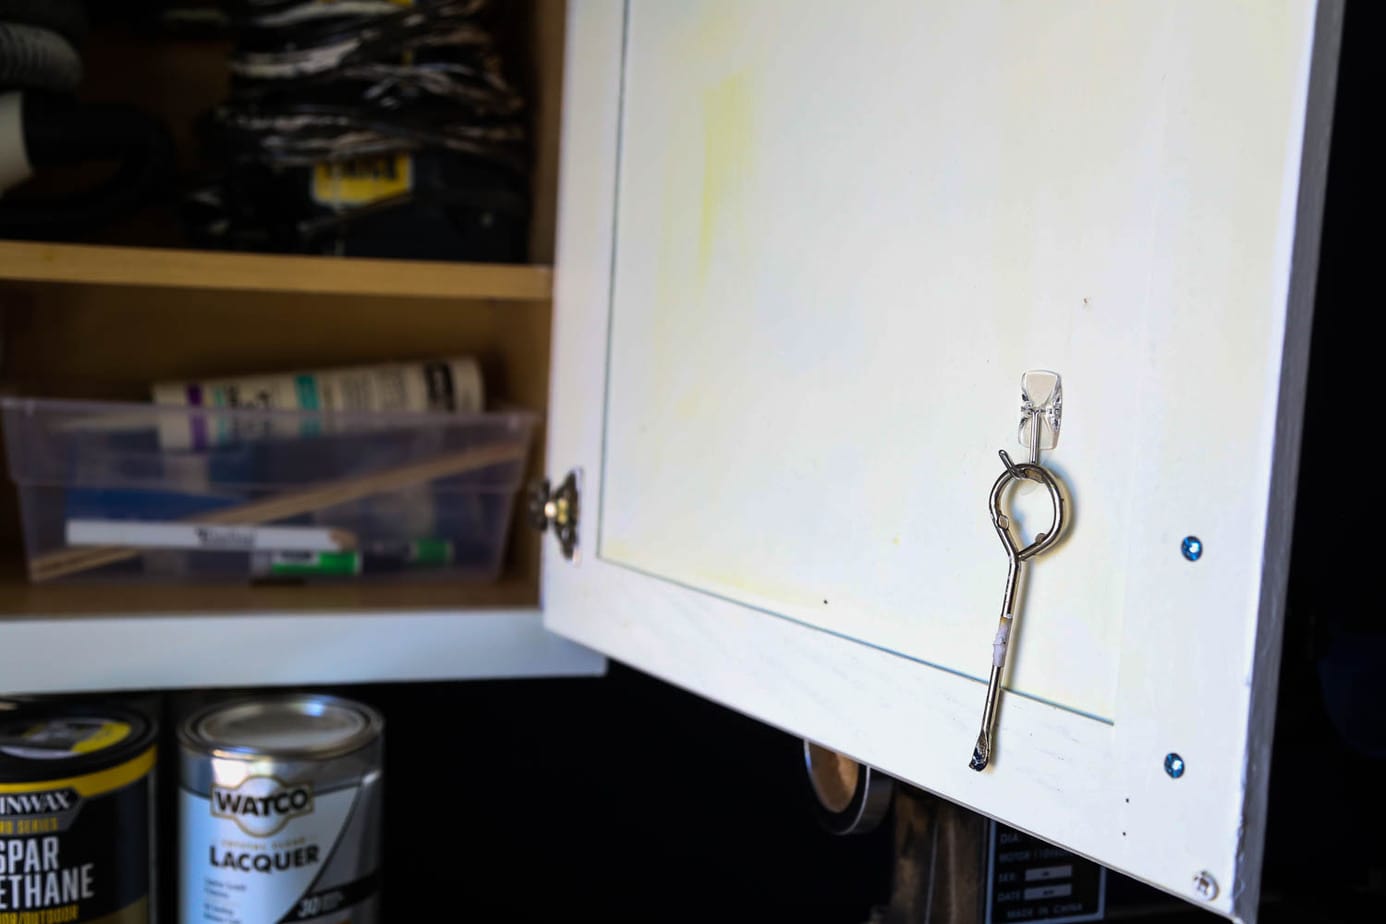
Oh, and one final tip! I grabbed a few Command Hooks and added them to the sides of the cabinet (and one inside the door) to hold a few oddly-shaped tools that would just take up a ton of room inside the cabinet. I’ve got all of my rollers, my caulk gun, and my paint can opener all within easy reach – not only do these things take up space in a cabinet, they’re also some of the tools I reach for most often, so it’s nice to have them in a super easily accessed spot.
And that, my friends, is how I spent a couple of hours last week and got all of my paint and supplies organized! I’m still a little amazed that I managed to go from overflowing two of these metal shelves (seriously – the floor in front of the shelves was covered in painting junk) all the way down to just this! I think I’ll definitely be able to keep this system organized without an issue – at least, I hope so!
Next up in here? We need to install a pegboard above the workbenches, which will (hopefully) hold the majority of our tools! We’ve decided to take this whole garage renovation one wall at a time, so we’ll focus on getting this area totally organized and clean before we move on to the rest. Wish us luck!
What are your best tips for organizing paint?!
Does your paint freeze in the winter? That’s my worry about the garage.,but my only other option would be the basement.
I live in Texas, so it doesn’t get all that cold here. But, when we’ve had freezes, it’s never been an issue.
Fantastic 💖👍 .
Sweet. Too bad we live in a stare where paint cannot be stored in the garage due to freezing temps in Winter.
That’s a good idea to put the last little bit of paint into a mason jar to use for touch-ups later. That would be good to use since my wife wants to repaint the house and there will likely be a bit of paint left over. I’ll have to make sure that I store it correctly so that it doesn’t dry out and we can still use it later.