
How to Install a Cedar Ceiling
Last updated on January 28th, 2026 at 12:10 pm
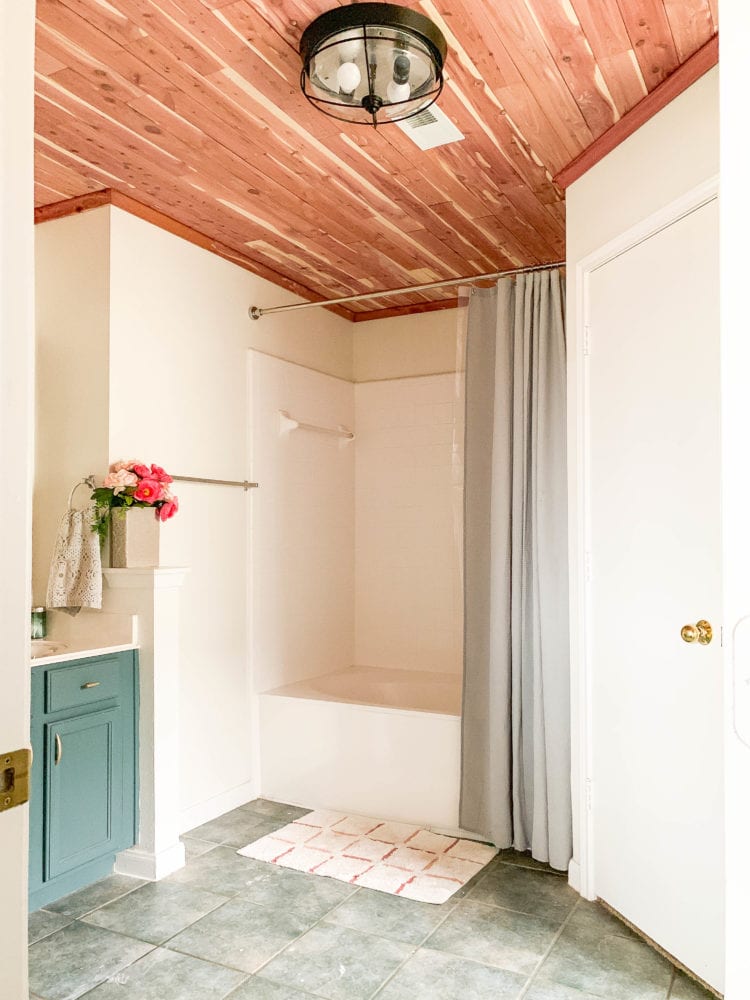
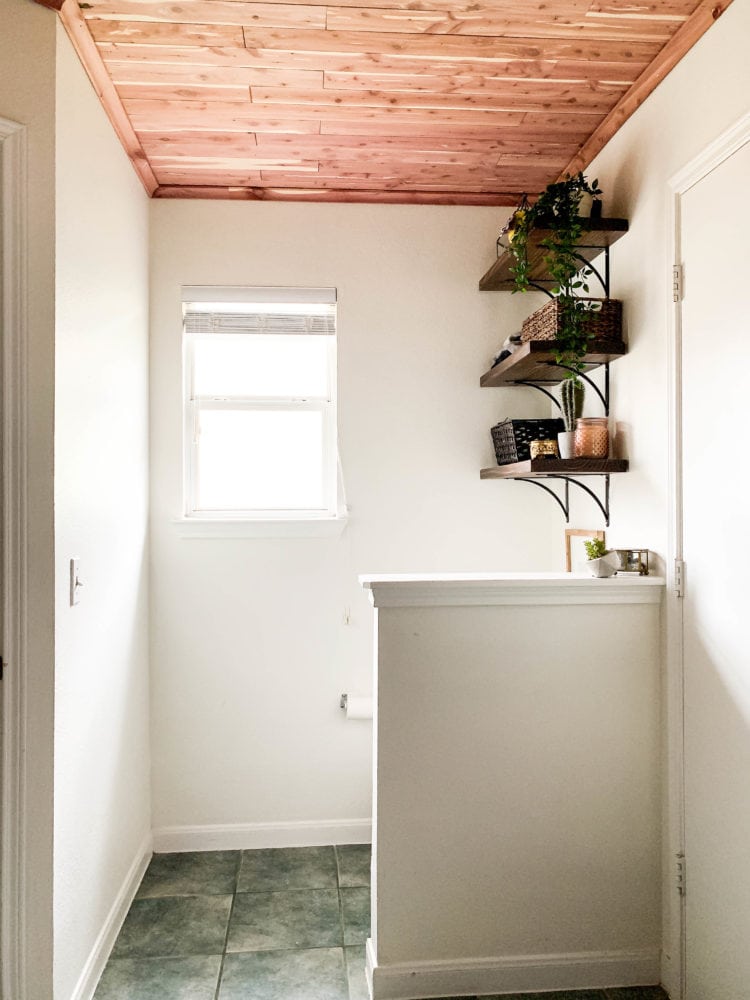
We installed a DIY cedar ceiling in our bathroom – twice now – and it’s one of the most gorgeous projects around. And, it’s super easy! Learn how to do it here.
Over the last few months, Corey and I have been working on slowly transforming our bathroom one small project at a time.
We’ve still got a few projects up our sleeve (including the one that will be the most transformative – painting the floor!), but we have other things on the horizon so that’ll probably wait until summer. However, last week I did manage to squeeze in some work in here and added something that makes my heart skip a beat every time I walk in the room.
Is it awkward to call our new cedar-lined ceiling yummy? Sexy? I don’t know what the right word is, but it’s working for me and I’m loving it.
Why A Cedar Planked Ceiling?
If you’ve been around for a while, you’ll know that this actually isn’t the first time we’ve lined a ceiling with cedar planks. In our old house, we did the exact same thing when we were renovating our master bathroom. I loved it so much that once we started on this bathroom I knew we had to try it again.
The ceiling is often the most neglected part of any room, but with a little creativity you can do something amazing that’ll really be show-stopping. So, let me teach you how to install cedar planking on your ceiling for a huge impact on a pretty small budget.
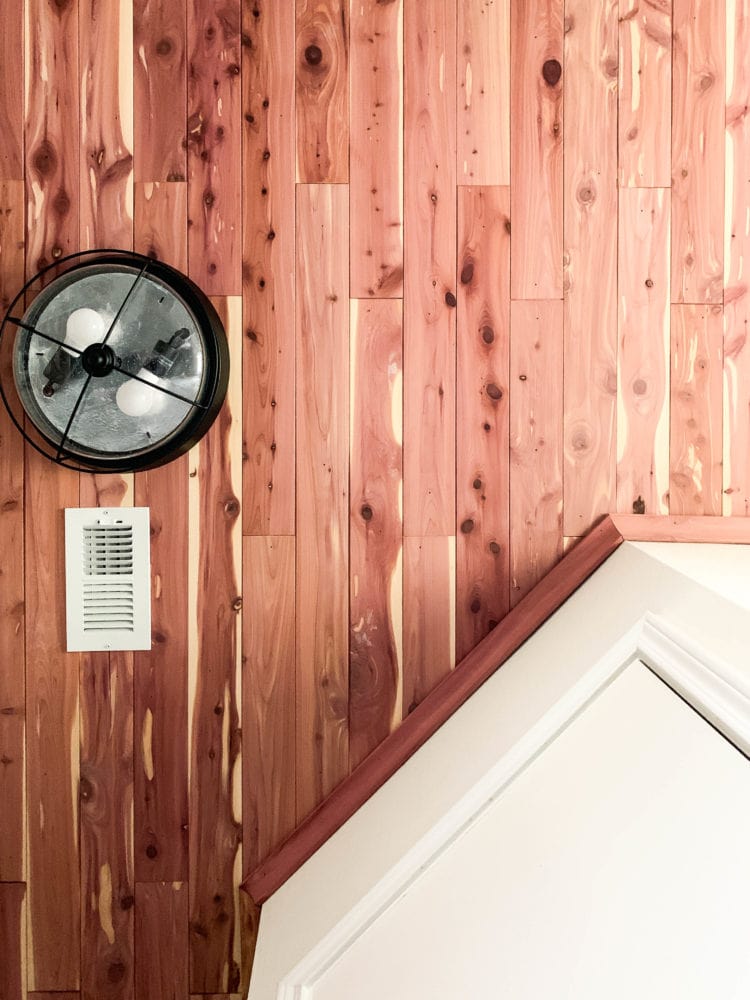
I love a cedar ceiling because of the depth, texture, and warmth it adds to a space. Cedar planking is traditionally used in closets to help manage insects, and you’ll often see cedar used for outdoor projects. But, cedar is great for interior projects as well! A cedar plank ceiling is my personal favorite way to add some life to a room. The durability of cedar is really great so it’ll stand the test of time, and cedar wood ceilings are just so dang stunning.

How to Install a Cedar Ceiling
Materials
- Cedar Tongue and Groove Wall Planks
- Cove Molding (or any other trim)
- Nail Gun
- 2-inch nails
- Saw to cut boards – I used my miter saw, you can also use a miter box!
Determine Square Footage
The first thing you’ll want to do is measure your room to determine how much you’ll need. Just in case you need a refresh on your 4th grade math (no shame! It happens!), to determine your square footage, just measure how long the room is and how wide the room is (in inches), then multiply them together and divide the whole thing by 144.
For example:
- Let’s say your room is 127 inches wide by 149 inches long.
- Multiply them by each other – that’ll get you 18,923
- Divide that by 144 (which is how many inches are in a square foot), and that’ll get you 131.4
- Always round up (extra is better than not enough!), so you’ll need a minimum of 132 square feet.
- When ordering supplies for a project like this, you always want to account for mistakes, weird cuts, or broken boards. Order about 15% more than your measurement. So, your total square footage needs would be somewhere around 152 square feet.
Make sense?
Once you’ve measured your room and gathered your supplies, you’re ready to get started!
Installing Your Cedar Planks
Just like with laying floors, you’ll want to create a staggered pattern in your ceiling. I like to start with a full board, then a short length, then the medium. No rhyme or reason, and there’s no wrong pattern! I used my miter saw to make all of my cuts. If you don’t know how to use yours, I’ve got a tutorial for you!
Line your first board up in the starting corner. These are tongue and groove planks, so they fit together without you having to worry about spacing. I like to work with the tongue side facing out and the groove side up against the wall. Use your nailer to attach it to the ceiling. Continue until you need to cut a board – hold it up in place against the wall and mark where it meets the already-installed board. This is the easiest way to get your cuts planned without busting out the measuring tape! Be sure to flip the board around when you cut so that when you install it, the cut side is against the wall and not the other board.
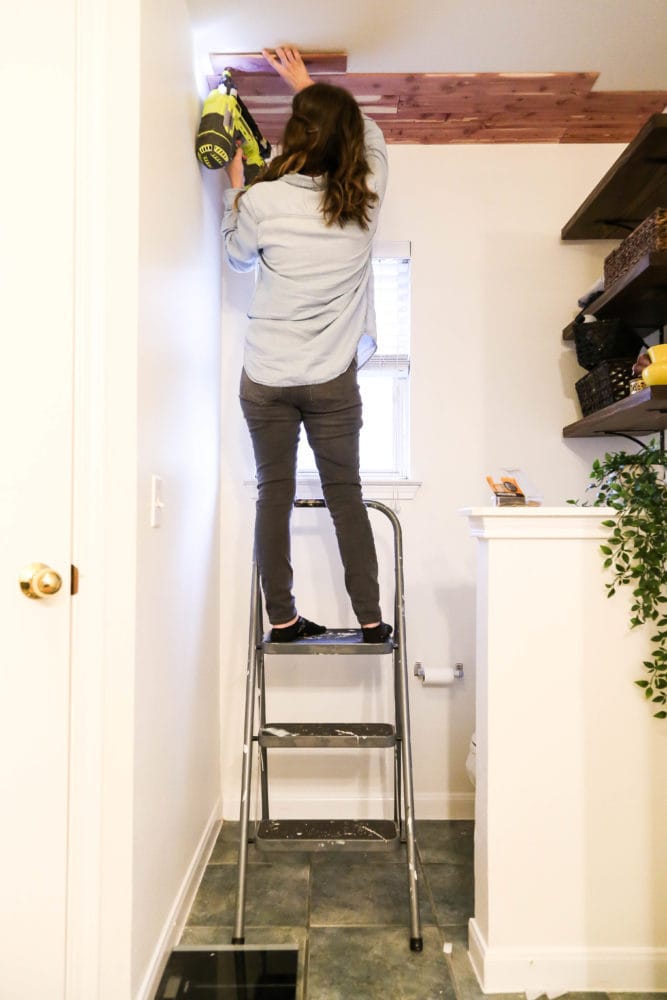
After that initial row, it’s all about just continuing along until you reach the other side of the room. You’ll quickly get into a groove and find a pattern, and the whole thing goes much faster than you’d think!
Note that these boards allow some room for errors and a cedar ceiling is very forgiving. It’s supposed to look a little rustic, so don’t sweat any minor errors too much.
Trim It Out (Optional, But Recommended!)
Once you’ve lined the entire ceiling, it’s time to add trim. If you’ve made perfect cuts along all the edges, this isn’t required, but I’d argue that it makes things feel much more polished! I went with cove molding, but you can do any kind of trim you want. The goal is just to cover up any rough edges.
Once the trim was installed, we used some of this cedar-colored caulk to fill in any gaps in the corners and help it all look completely polished.
Do I Need to Seal My Cedar Ceiling?
This is the number one question I got about the ceiling in our old bathroom, and I imagine you’re wondering too. The official recommendation from most cedar brands is no, you should not seal your cedar ceiling. Sealing it can cause the wood to warp, and is never recommended.
But what about the steam? Does it cause mildew?
With the proper precautions, no it doesn’t. We had a cedar ceiling in our old home for over a year with zero issues, and I anticipate there won’t be any here. Here are a few simple steps you can take to care for your ceiling:
- If your room has a vent, use it! After you’ve showered, turn it on for a few minutes to help pull the excess steam out of the room.
- If your room doesn’t have a vent (ours doesn’t!), just don’t allow the steam to become trapped. After we shower, we always leave the bathroom door open for a few minutes so the steam doesn’t stay in the room.
- You could also open the window for a bit if you want to be extra cautious! That being said, it’s not something we ever really worried about in the old house, and we had no problems at all!
Can I Stain My Cedar Ceiling?
Yes, you can! If you want your cedar to maintain a consistent color, it’s fine to stain it. As cedar is exposed to the air, the color can change over time. You’ll notice that our ceilings are pretty red right now – but in a few weeks, they’ll turn a really rich, honey-colored brown (go read the post from our old bathroom to see the difference!).
Personally, I love the natural patina of cedar and wouldn’t dream of staining it. I love watching it slowly change over time, and the color it eventually settles into is pretty perfect if you ask me! But, feel free to stain yours if it’s not your style. I’d just recommend doing it before you install it to make things easier!
I really love how this turned out, and I think it’s going to make a huge difference in the finished look of the bathroom!
Related Posts
Here’s a quick recap of what we’ve done so far in this bathroom:
- First, I shared the plans and all of the befores of the bathroom (it’s come so far already!)
- Then, we painted the vanity using the easiest method ever – no sanding required!
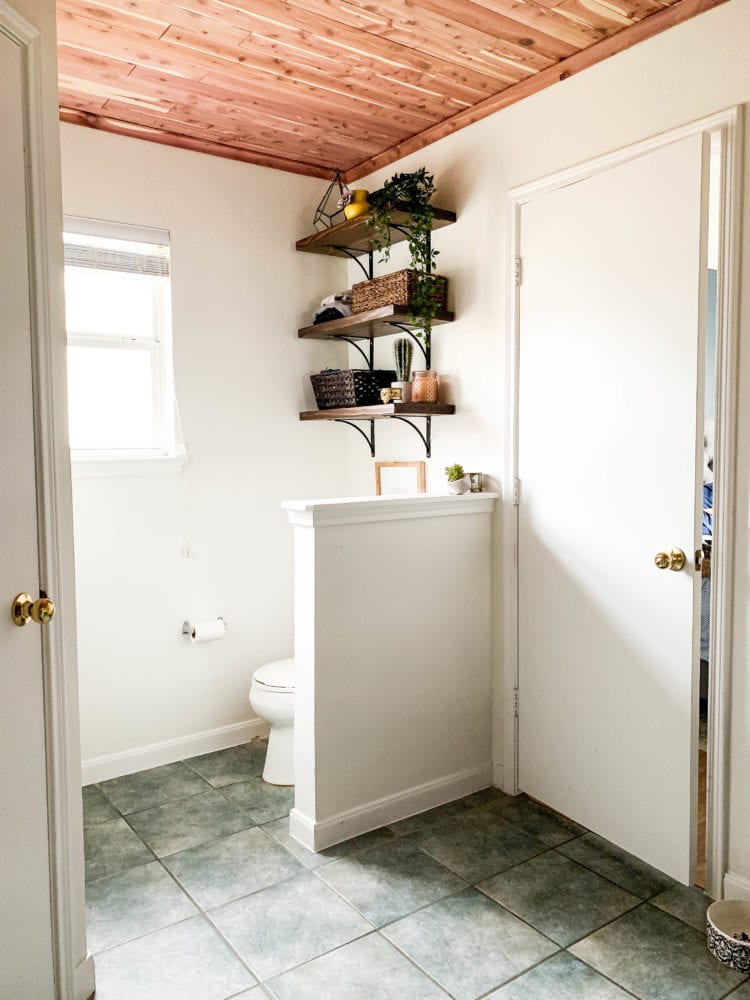
- Next, we added a few shelves above the toilet to replace the old cabinet. It looks much better, and has been way more functional for us!
- And, most recently, we painted our bathtub and the tile around it to give it a complete overhaul. It looks so much cleaner now, and I still can’t believe we hadn’t ever tried it before.
- **UPDATE** See the painted tile floor here and the full bathroom reveal here!
I really appreciate this information. Thank you for taking the time to share with us. Did I interpret that correctly in that you do not need a vapour barrier above the cedar?
I don’t feel confident saying you absolutely don’t need one. I have done this twice and didn’t use one either time, without issue. I also have spoken with Cedar Safe and they have said my method should be fine. But, it absolutely wouldn’t hurt to install one!
Hi- I’m trying to find cedar moulding but I can’t! I used your links but it doesn’t seem to be available. Any ideas? Thank you!! Love this idea, I’m loving how it looks in our bathroom so far!
Lowe’s and Home Depot both carry it!
It looks great! What are you attaching to, just the drywall or are you making sure your nails go into wood? I have a mildew stained ceiling and a lack of attic insulation above. Do you think I could remove the drywall and install the cedar over a layer of thermax or rockwool insulation?
Just the drywall! These boards are super lightweight, and they interlock, so as long as some of them hit studs (which they naturally will), it won’t go anywhere. And I would imagine your plan would work great!
I love the way your bathroom ceiling turned out. I would like to do something similar. My guest bathroom is Seafoam green so not sure if that color would look good against the cedar. What do you think a soft gray against the Cedar would look like?
Thanks! I think it would look gorgeous – I think the cedar color can really be considered a neutral – it blends with almost anything.
I love this idea! We have a couple cedar lined closets we use for out of season wear, it is super for keeping bugs, moths, spiders, etc out of my clothes. I also sand it lightly to allow that fresh smell to keep the intruders out. That being said, do you need to sand the ceilings?
Never would have imagined doing ceilings this way…ingenious!!!
You don’t have to – it’s definitely something you can do if you want to refresh the smell a bit, but since it’s mostly just decorative it’s not necessary!
It’s looks gorgeous
Thank you so much, Diana!
Hey Amanda! The celling complements the all white bathroom beautifully. To think of you DIYing it to perfection — that’s a truly spectacular!