DIY Neon Sign
Last updated on January 13th, 2022 at 09:51 am
Learn how to make a simple DIY neon sign – this method can be applied to a ton of different patterns and techniques! This project is sponsored by Inventables
Neon signs are kind of a big deal right now. It seems that lately they’re all over the place, and for good reason. They’re really adorable, they’re a ton of fun, and they’re a really happy addition to any space and we could all use some happy right now, you know?!
The only problem with neon signs is they can be expensive. Like, really expensive. Especially if you want something custom and unique for your space. But, thankfully, DIY neon signs are incredibly easy to make – and they’re so affordable too. I made one this week for my best friend’s home gym, and it was such a quick and easy project and it turned out so dang cute.
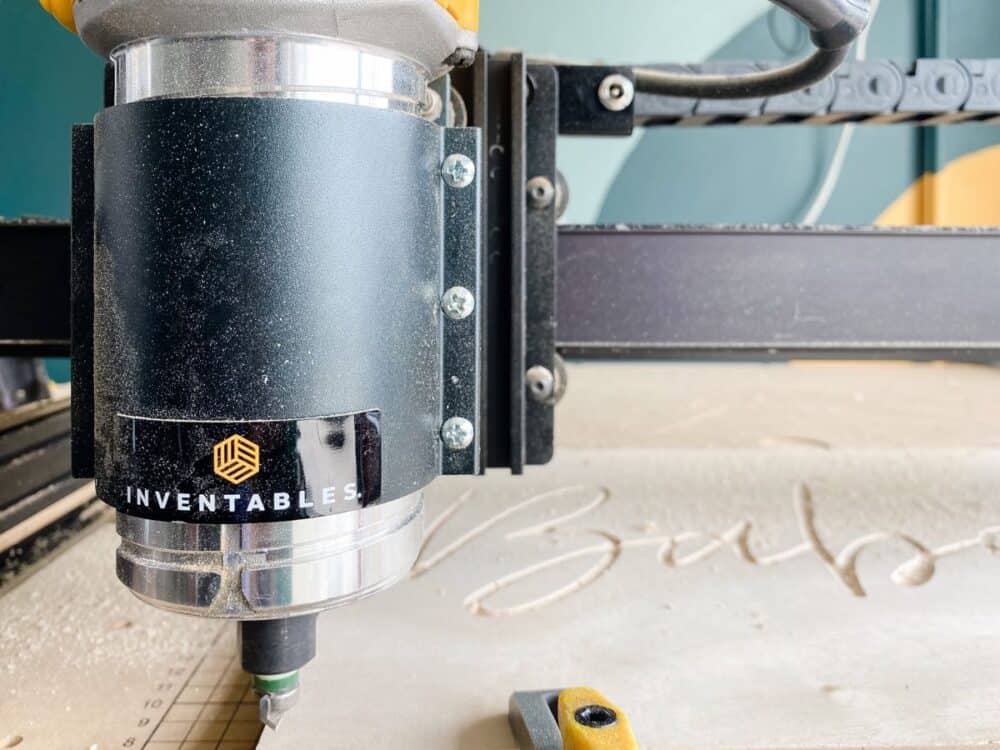
I used my Inventables X-Carve 3D Carver to help me make my sign stand out even more. It’s basically my favorite tool for this sort of thing because it’s so easy to use and it makes everything look so ridiculously professional. It’s also one of the most versatile tools in my entire garage – I’ve made signs and cutting boards and kids’ toys and all sorts of other things!
If you want to learn more about the X-Carve, what it does, and how to use it, just click here. And, if you want to see some of my past X-Carve projects, I’ll link them all at the end of this post!
But first, let’s dive into how to make a DIY neon sign so you can make your own – all it takes is some scrap wood and some EL wire (which costs about $9 on Amazon)!
how to make a diy neon sign
materials
- Inventables X-Carve 3D Carver
- 90-degree V-Bit
- “Babe Cave” SVG file
- Scrap wood in desired size for sign (I used some 3/4″ plywood, but anything will do!)
- EL Wire
- DAP RapidFuse Adhesive
Step One: Design + Carve
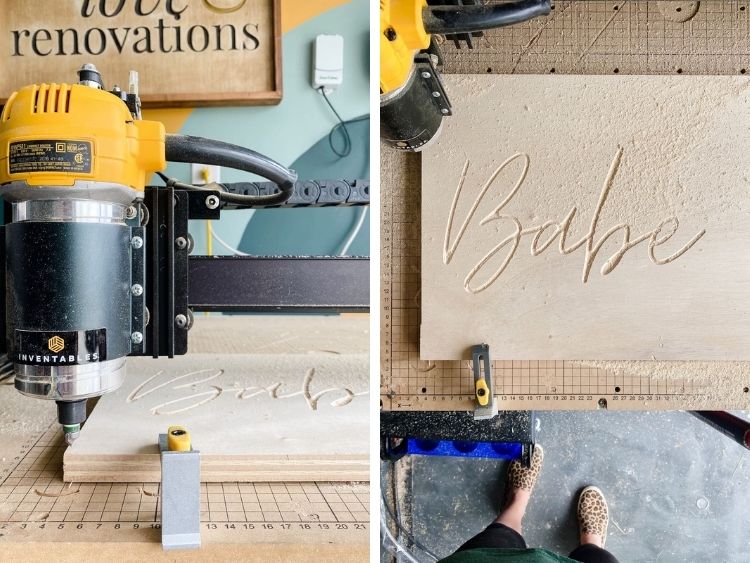
Your first step is to determine what you want your DIY neon sign to say, and prep your wood for it. I designed my using Inventable’s free design software, Easel. It’s really intuitive and use-friendly, and I use it for all of my carves! If you want to do a more complex design than it allows, or use fonts that aren’t available, you can even import SVG files from Photoshop or Illustrator, which makes it even more versatile.
I carved a 1/8″ deep channel in my wood for the EL wire to sit in. If you don’t have an X-Carve and you still reeeeeally want to make a DIY neon sign, you can always just trace the shape on your wood and then attach the wire following what you’ve traced, but this adds such a professional and unique look!
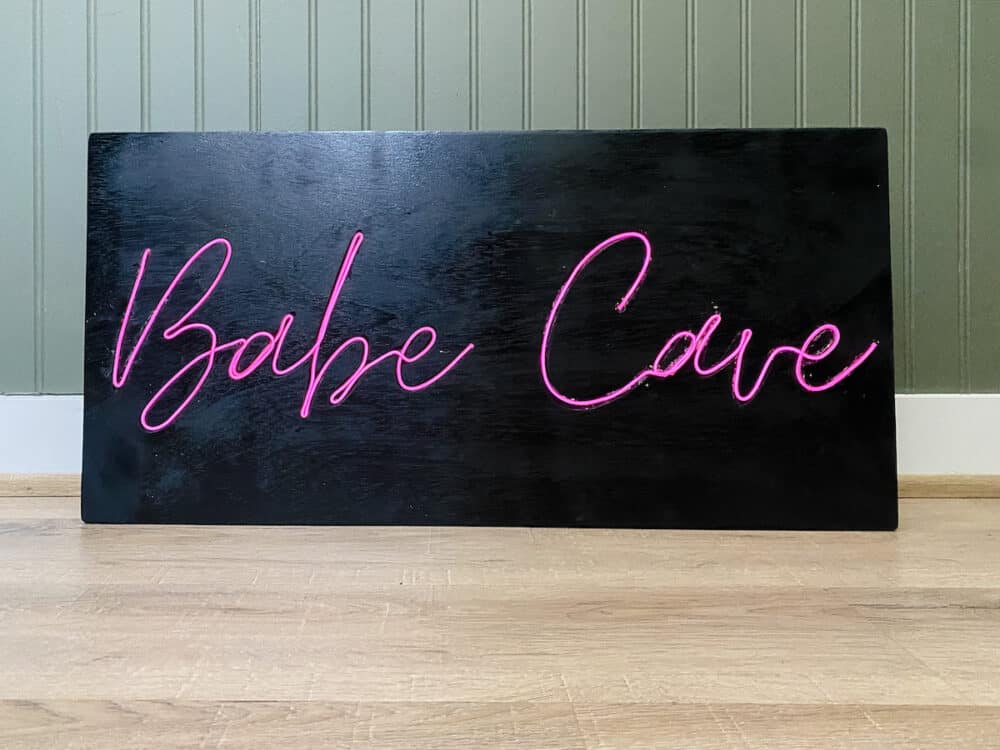
You can do a word or phrase, a picture, or a pattern – literally anything you dream up! I chose to make mine say “Babe Cave” – it’s what Parisa affectionately calls her garage and it’s the final touch to the garage makeover we’ve been working on in there for a while now!
Step Two: Paint the sign
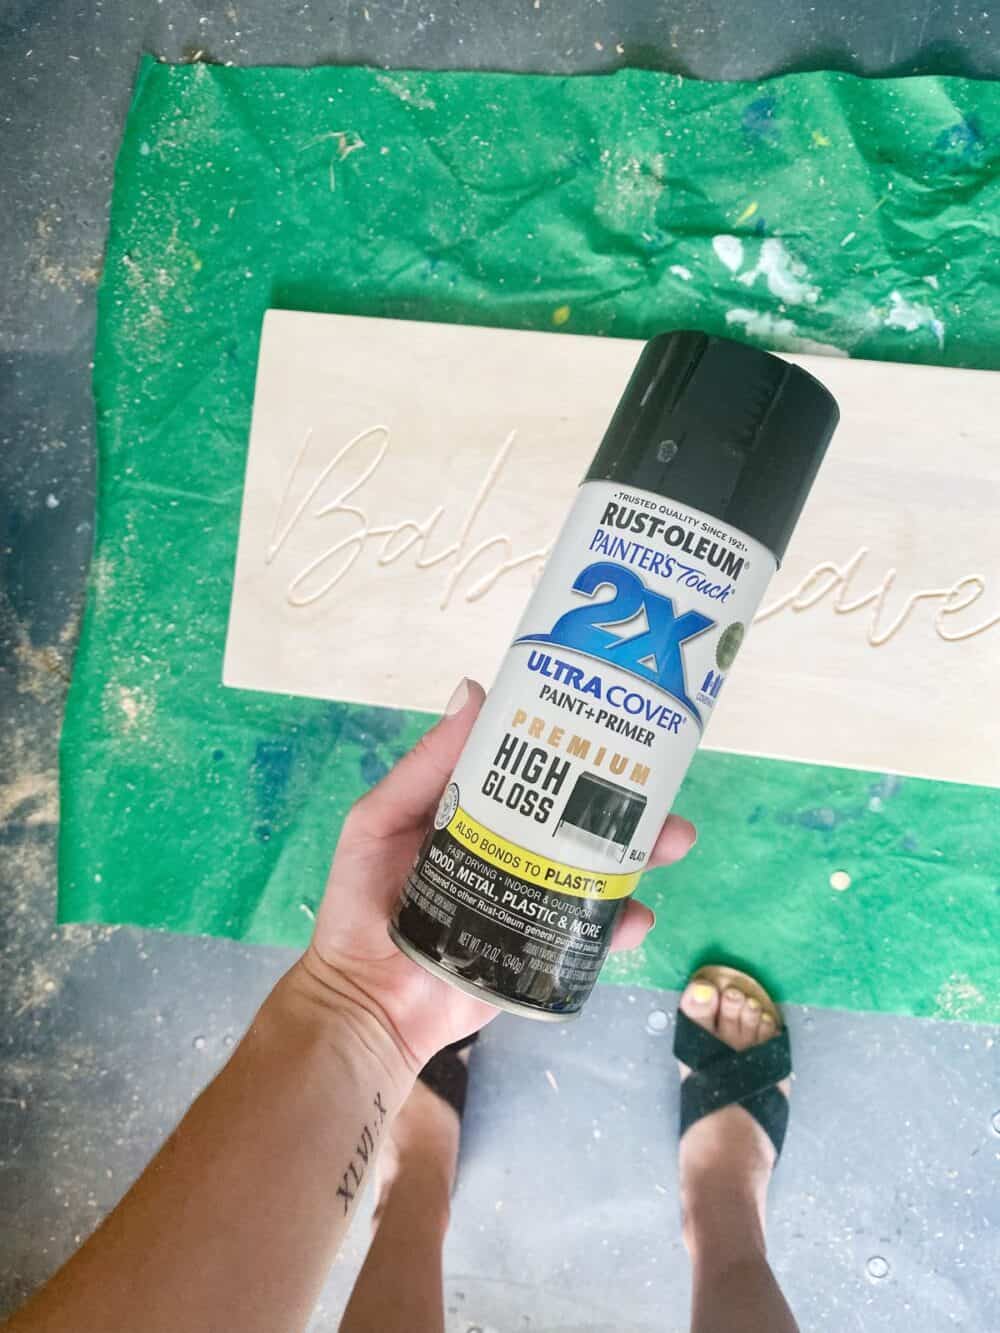
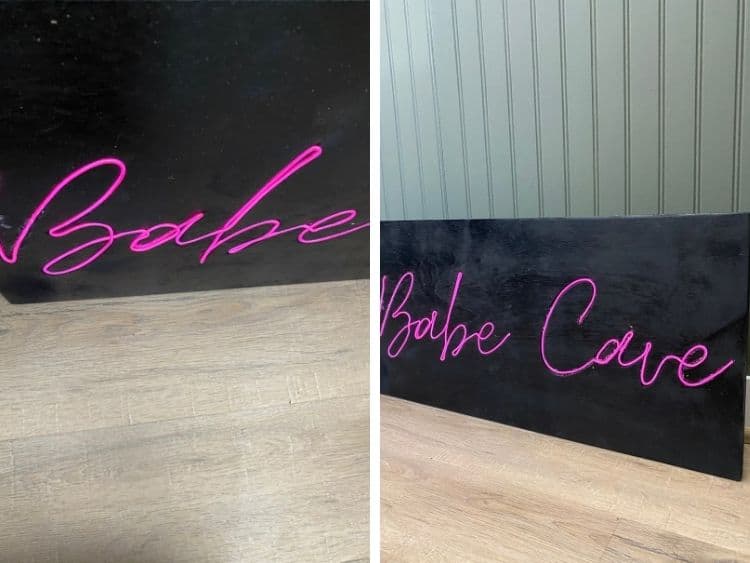
Once I had used my X-Carve to create a channel for my EL wire to sit in, I decided to paint the entire sign black. This is obviously an optional step, and you can paint or stain it whatever color you want.
We went with black, because Parisa really wanted the pink EL wire to pop against the wall. I think it would also look gorgeous stained, painted white, or even painted the same color as the wall. You really can’t go wrong, here!
Step three: drill entry + exit holes
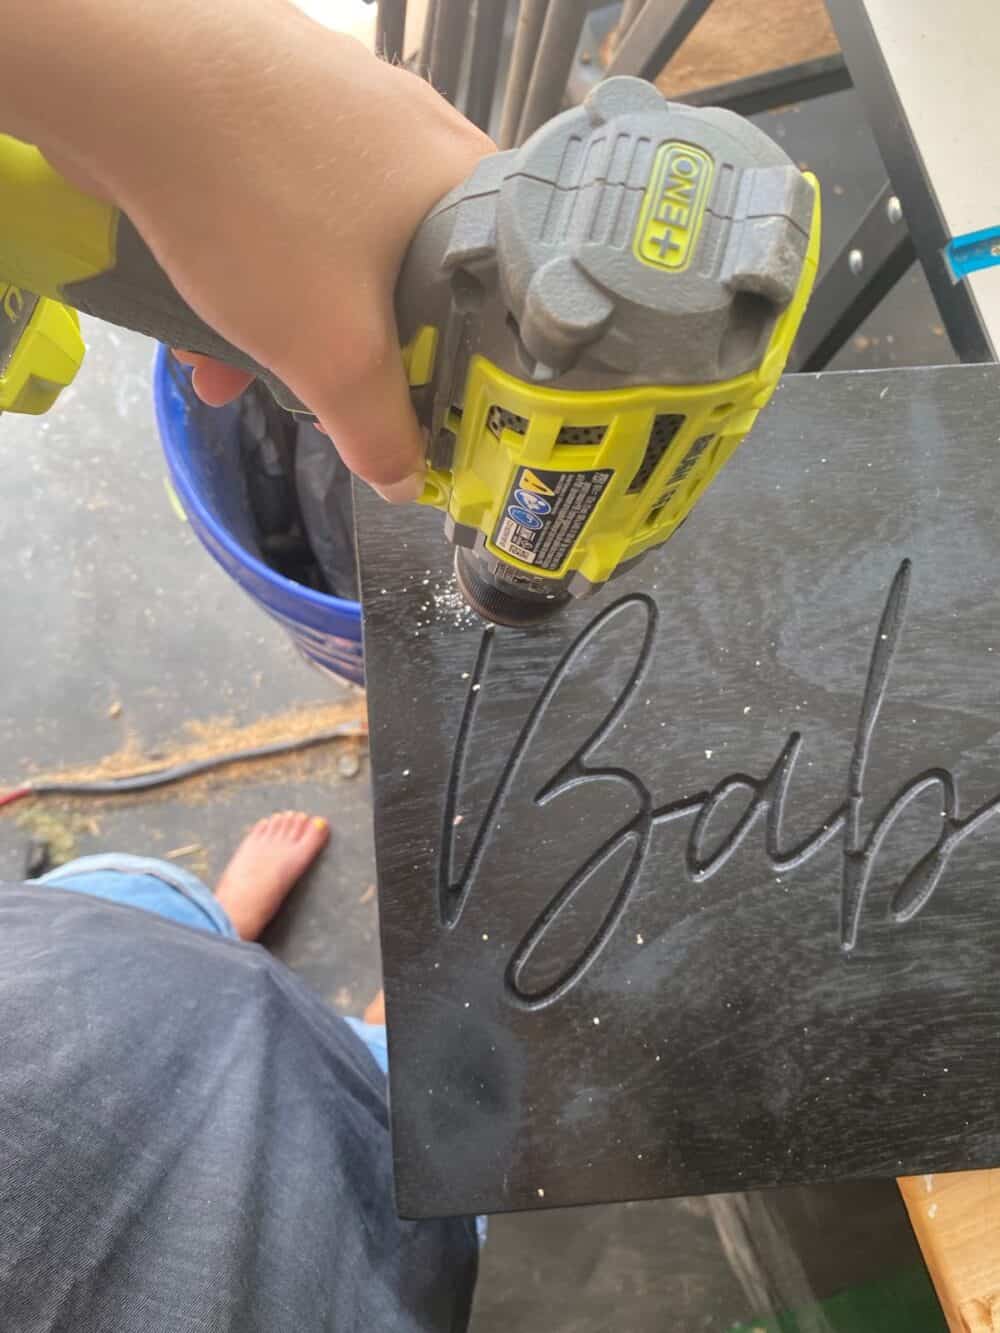
Grab your drill and a drill bit that’s about the same size as your wire, and drill holes at the beginning and end of each word. Plan ahead to think about how your wire will flow from one word to the next, and what point in the word makes the most sense for entry and exit points.
I did a hole at the top of the B and at the end of the E in “Babe”, then I did a hole at the top of the C and the end of the E in “Cave”.
Step Four: Attach EL Wire
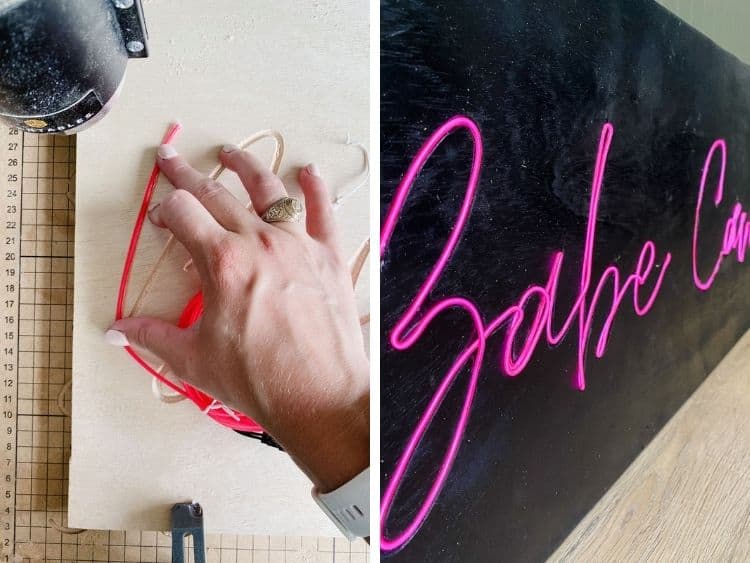
Here’s where it all comes together – it’s time to attach the wire to your sign and make it actually look like a neon sign!
I attempted to attach my EL wire using hot glue at first and it just made a big mess. I highly recommend using this glue instead – it left zero mess and was so much easier to work with. I just did a thin line of glue in the channel and held the wire in place for about 30 seconds while it dried. Work in about 2-3″ sections at a time for the best results. I didn’t wear gloves while I was working, but you probably should – this stuff is seriously sticky.
If you do end up getting glue on your fingers, nail polish remover is really helpful for getting it out.
Ask me how I know.
Remember to plan your path when you’re attaching the wire – for example, if you want the battery pack to be at the end of your sign (which I did), you’ll want to work backwards. I started by stringing my entire EL wire through the LAST hole in my sign, then I slowly attached it to the words working from the last letter to the first.
Once you reach the end, thread the end of your wire through the hole at the beginning of the letter, cut off the excess, and you’re ready to hang your sign!
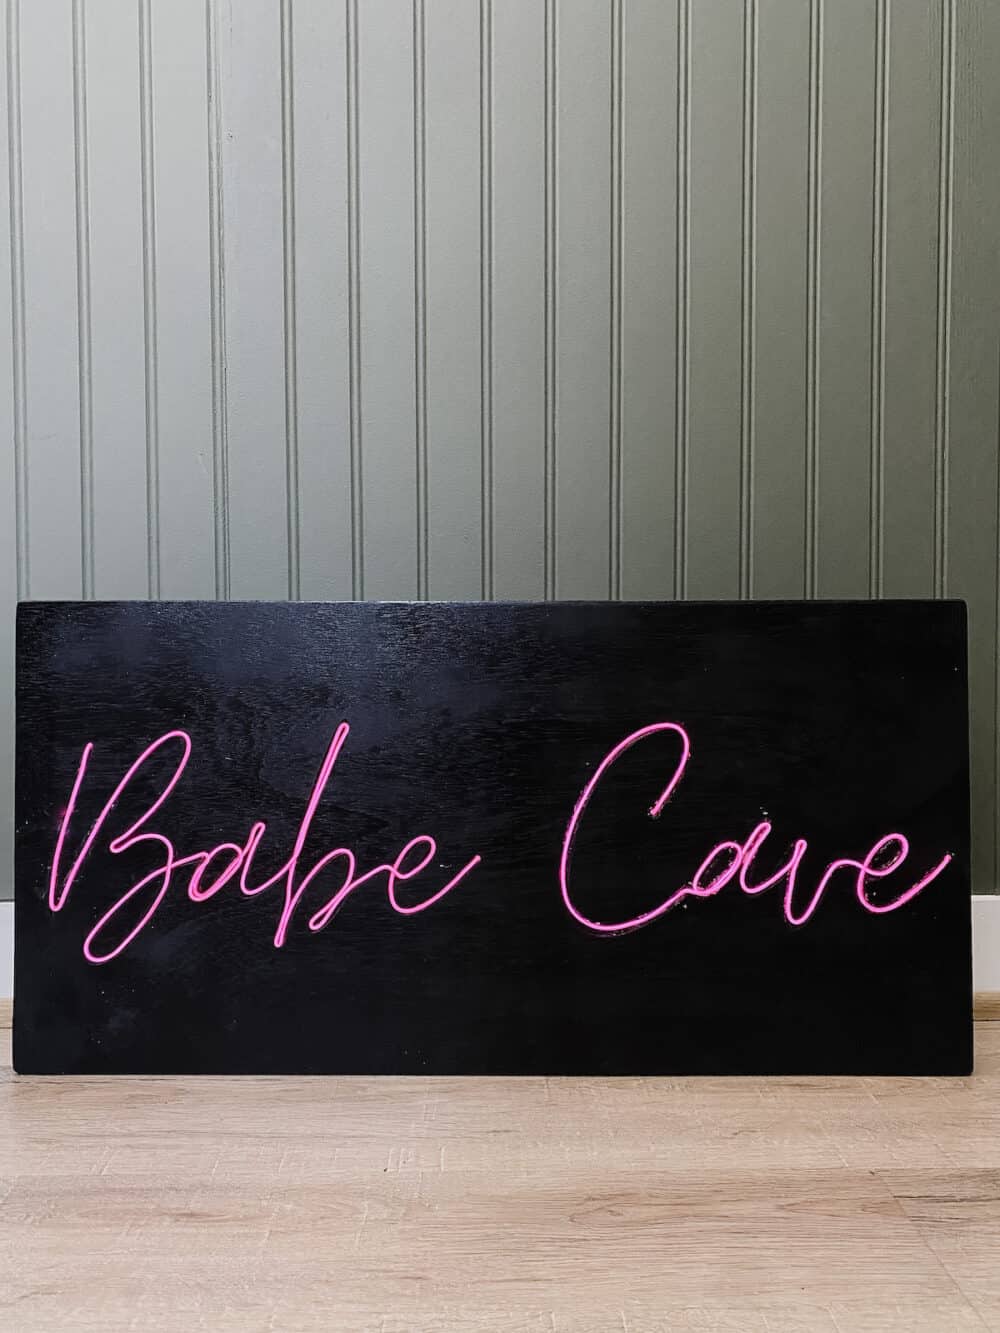
I’m so dang happy with how this little DIY neon sign turned out, and it was so much cheaper than buying a custom one would have been.
The EL wire is not quite as bright as a real neon sign would be, but it gives off a pretty good glow, and even has a couple of different settings, so you can make it blink (either slowly or quickly) or stay on all the time.
If you want to learn more about the X-Carve and what all it can do, click here to head over to Inventables’ website! Or, keep reading for all of the other projects I’ve completed with this incredible tool.