
How to Trim a Window
Last updated on February 17th, 2026 at 02:13 pm
If you want to add some simple window trim to your interior windows, this post is for you! Learn how to use 1×3 boards to trim a window and add some visual interest to your home.
One of the best ways to add a little bit of personality to your home is with trim. Many builder-grade homes don’t have things like window trim around the interior windows, and it’s a really easy addition that makes a big difference.
The best part of this project is that it’s incredibly affordable and doesn’t take long to do. So, let’s jump right in and learn how to trim a window in your home!
How To Trim a Window: The Full Installation Process
This is a project that’s great for beginners and more advanced DIYers alike. Here’s a rundown of how it is done.
Tools + Materials Needed
- (2) 1×8 pre-primed boards
- (2) 1×4 pre-primed boards
- (1) 1×3 pre-primed board
- Nail Gun
- Miter Saw
- Construction Adhesive
- Caulk
- Wood Filler
- Paint
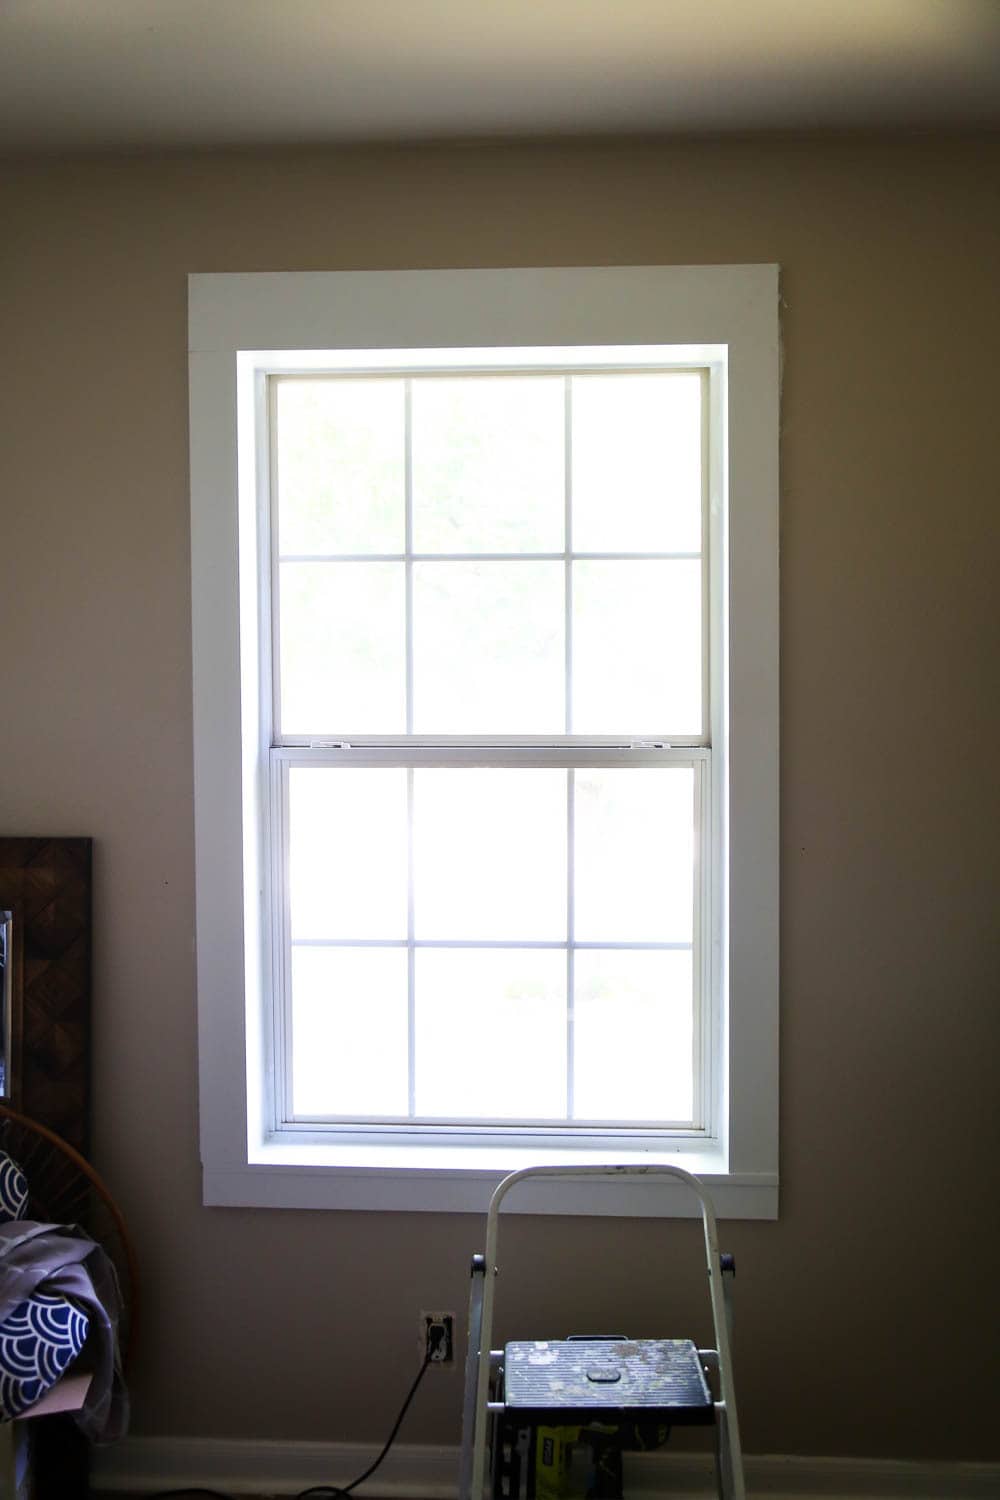
Prep + Removing Your Old Windowsill
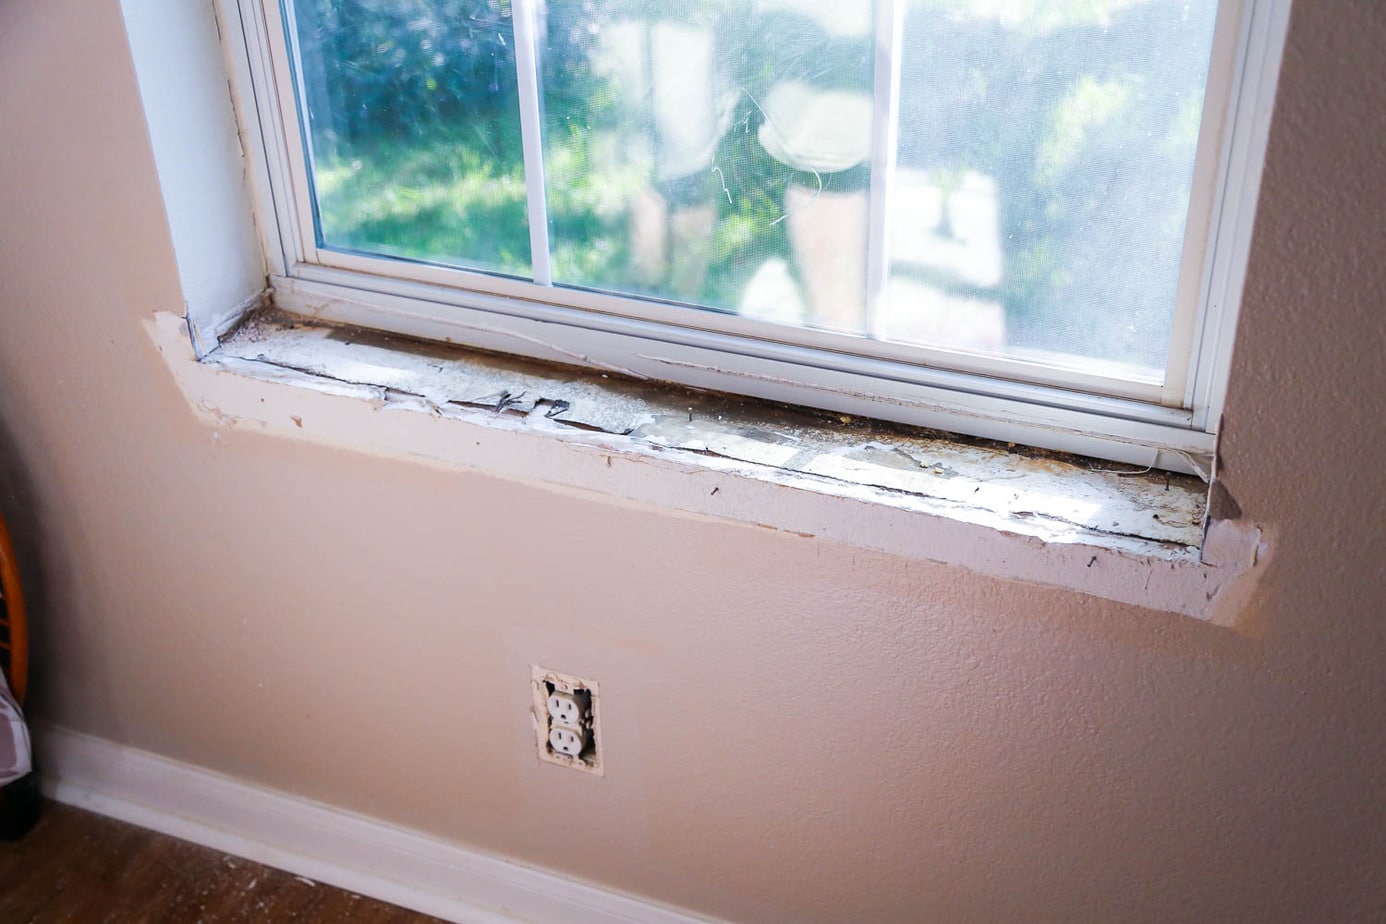
The first step is to remove the old windowsill so you can ensure everything matches. If you have a really simple windowsill and you want to match it, you totally can! But, It might look a little more cohesive if you start fresh like we did. We just used a sharp blade to score all the way around, then used a small pry bar and hammer to peel it right up. If you can, try to keep the entire windowsill intact so that you can use it as a template to cut your new one!
We decided to go for a really minimal (and shallow) windowsill. If you want to keep yours the same, then you can re-use the sill or just cut a new one the same size!
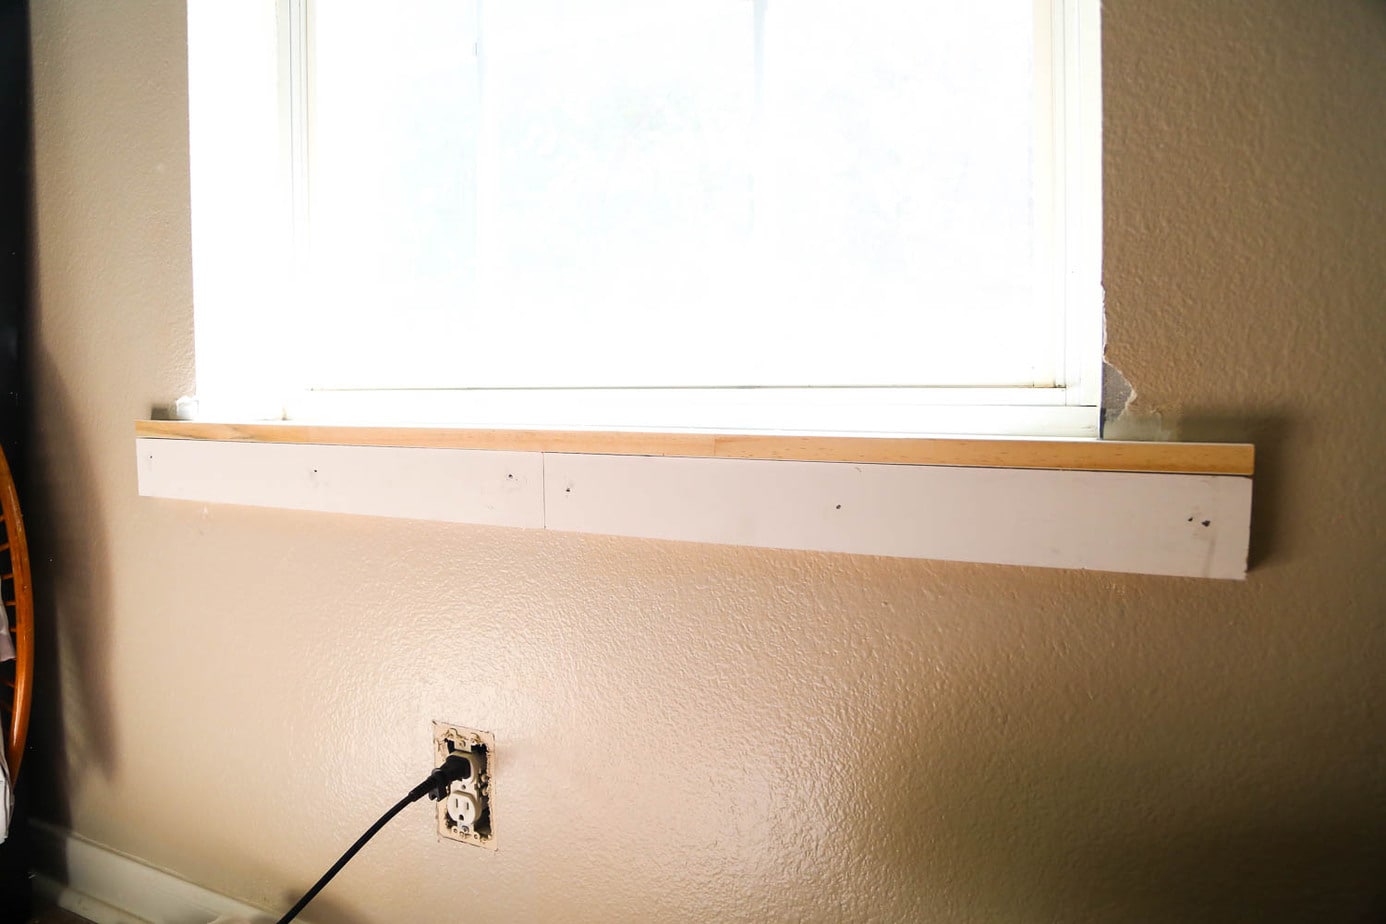
Cut and Install New Windowsill
You’ll want the new windowsill to be the first thing you install. We used the old one as a template but we cut it a bit shallower. We used our table saw to cut the 1×8 board down – you could also use a circular saw. Then, use a jigsaw to cut out the part that will overhang the window on either side. You’ll note that we cut it wide enough so that the side trim would rest on the sill. This is why re-using your old windowsill may not work – the trim would overhang it and look funny!
Once you’ve got it cut (and you’ve made sure it fits), simply add some construction adhesive to the back, slide it into place, and add a couple of nails for good measure. Allow the glue to dry a bit before moving on to the next section.
Next up, you’ll cut a 1X3 piece for the apron underneath the windowsill. Use a combo of construction adhesives and your handy dandy nail gun to install it. If you don’t have a long enough piece (as you can see, we didn’t) it’s fine to use two. You won’t be able to tell the difference once you caulk and paint!
Install Side Trim Pieces
With the windowsill and bottom apron piece installed, it’s time to move onto the sides. I worked with plain 1×3 wood pieces for this, but if you want a more intricate trim, you can use whatever you like! This is one of those projects where you can really have fun with it. Get creative with your trim styles if you’d like. There’s no right or wrong way to do it.
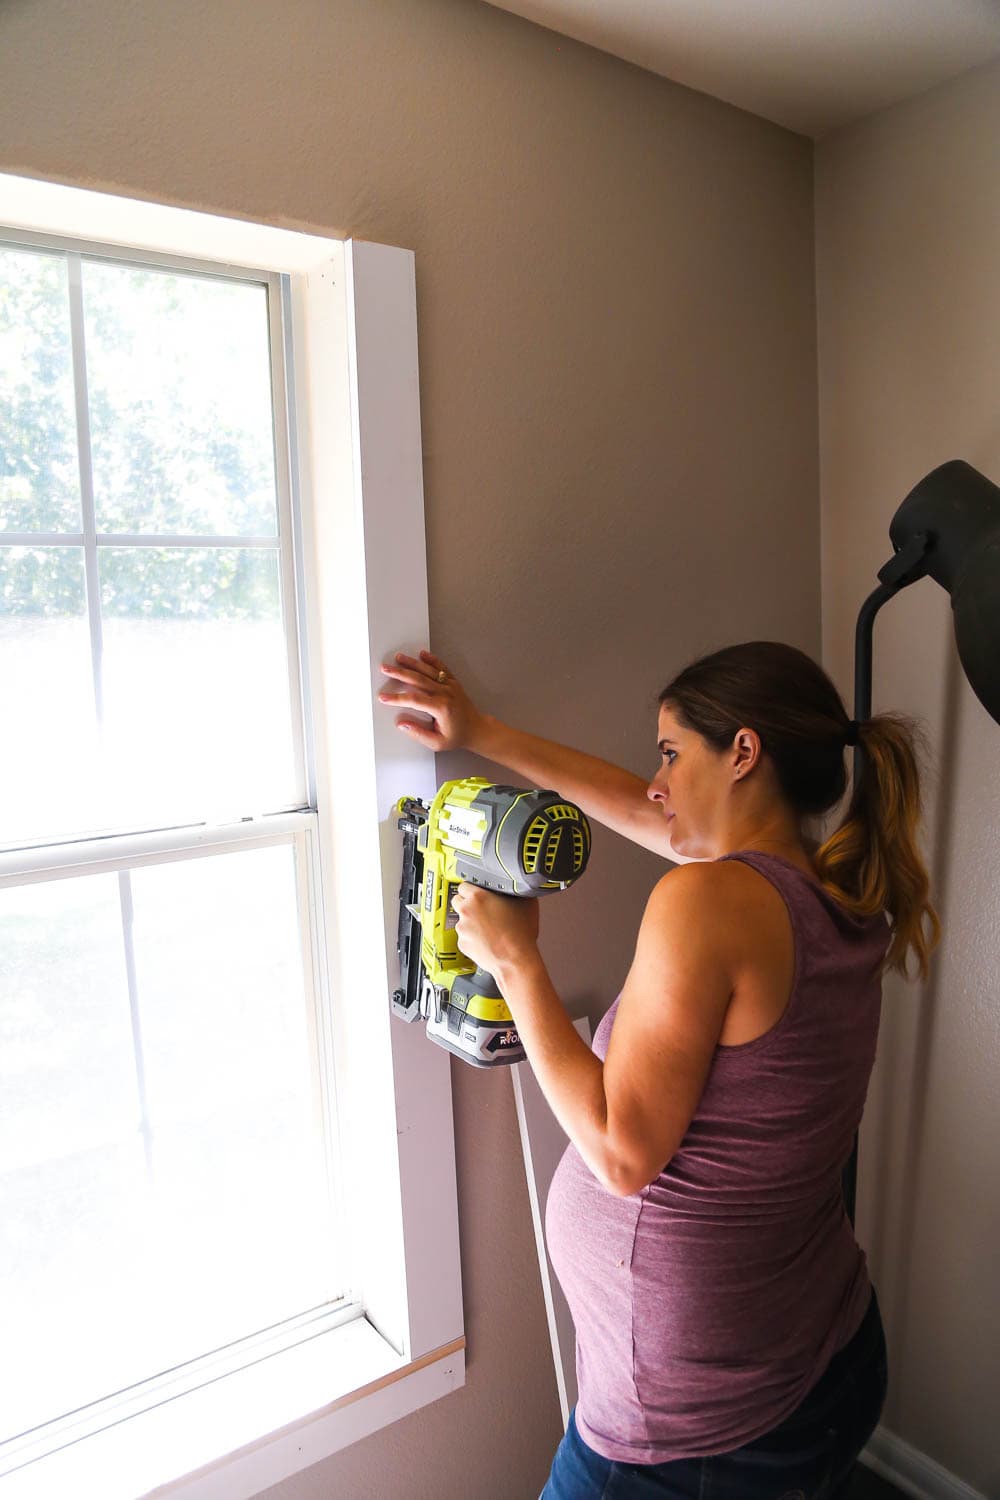
Grab your 1×4 boards and cut two pieces to the height of your window (go only to the top of the window). Use the same method as before to install them. Optionally, you can also install some boards on the inside of the window box to cover up the drywall. We simply lined our boards up with the edge and then painted the drywall next to the windows to match. It saves some material and once it’s all painted you can barely tell the difference!
Install Top Trim Piece
Lastly, you’ll want to cut your other 1×8 board to span the top of the window (plus the width of the side boards) and install it! I’ll note here that there are a ton of different ways you could set this up. some people install a small 1×2 piece underneath (or on top of) this board to add some extra depth. Other people use different sizes of wood for a chunkier look. You can really do whatever you want here! We went for a very simple look with no extra flourishes or details. But, there’s tons of inspiration out there for fancy window trim if you want to get creative with it.
Caulk and Paint
And finally, the most satisfying part of any woodworking project – the finishing touches! Add caulk and wood filler, let it dry for an hour or so, then paint the whole thing!
This is always the step that makes the biggest difference. Even if you feel like things are looking a little crazy, I can almost guarantee this will fix that. If you need a little help….
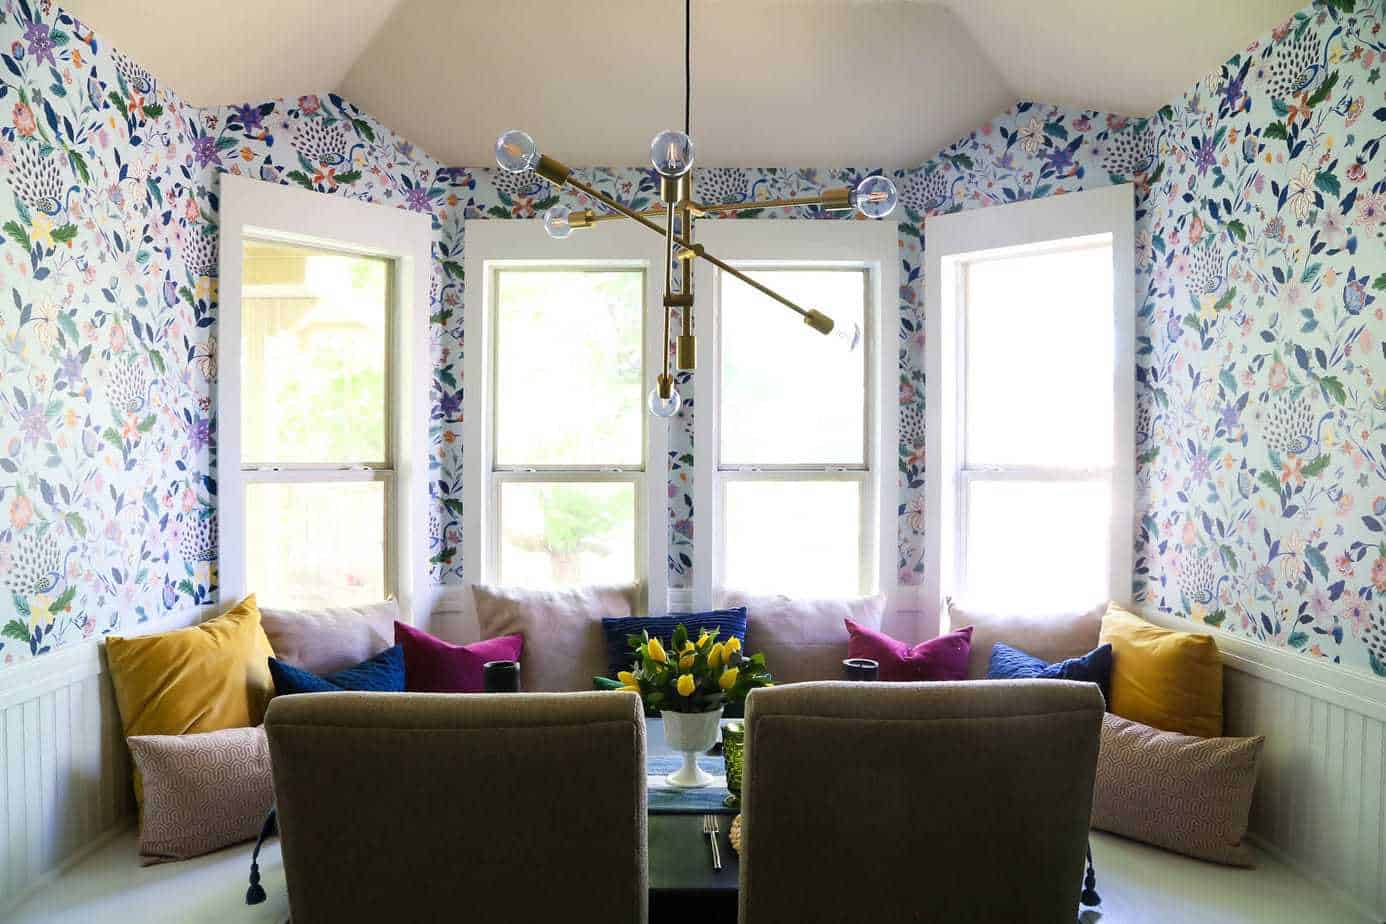
Once we were finished with the trim, it was time to add our new window treatments. Since we left the windows in our dining room bare, I was really curious how the trim would look when blinds and curtains were added in.
The answer? Fantastic. It looks fantastic.
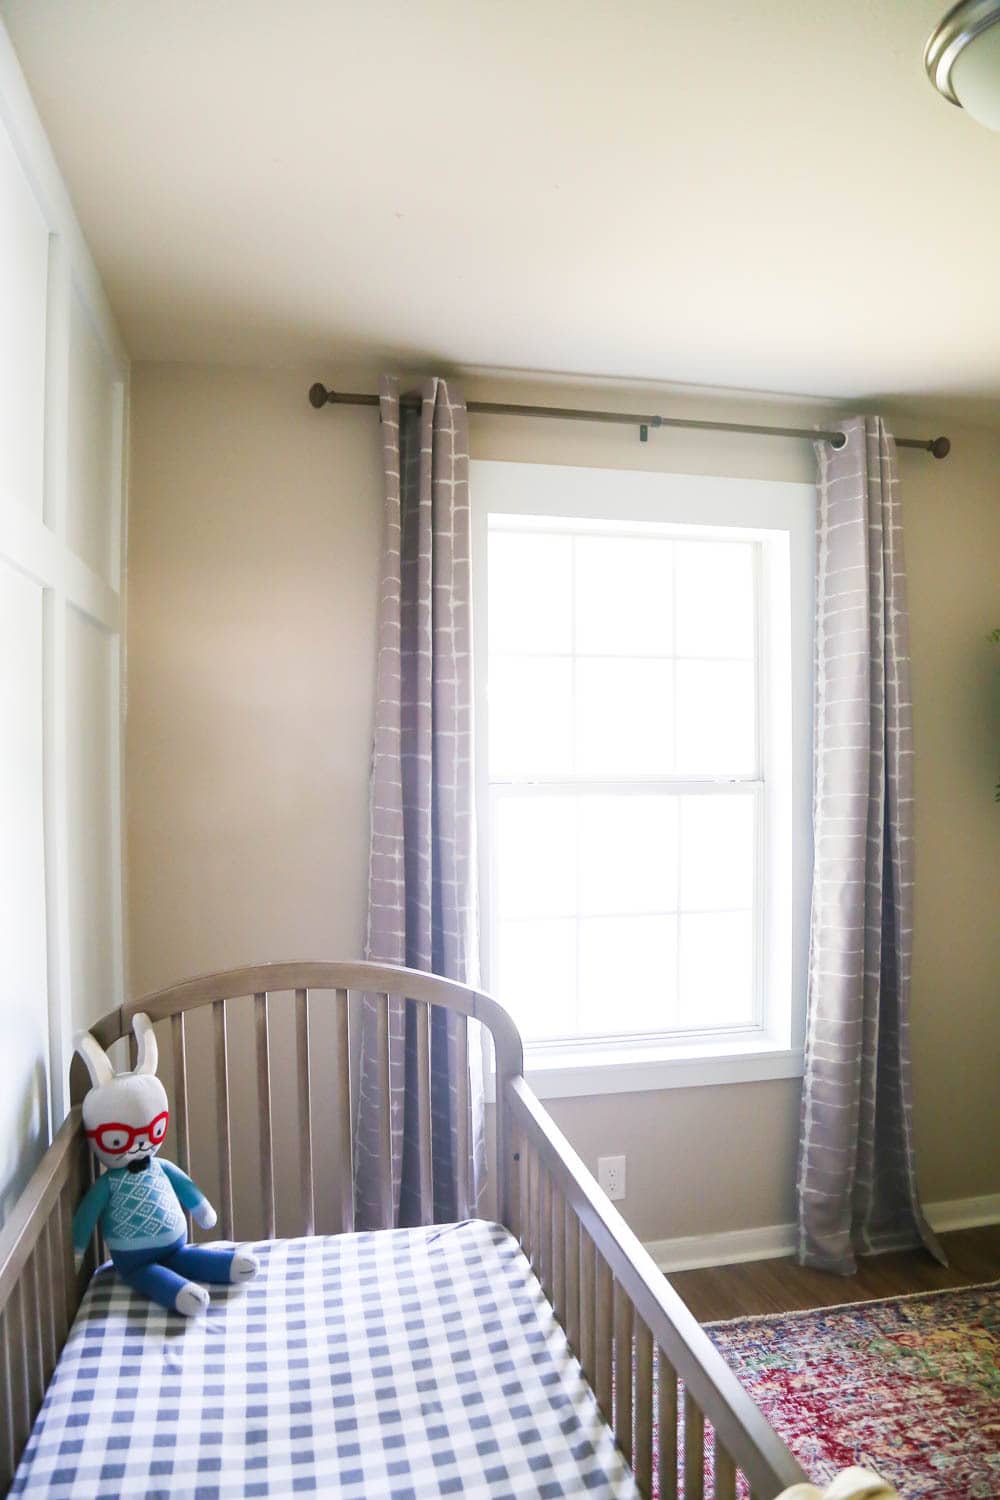
We hung these curtains from Target and I feel like it really helps the whole thing come together. The curtains play so well with the other patterns in the room, and they’re room darkening which is perfect for a nursery.
I’m so excited about how the nursery is coming together, and I can’t wait to share the full reveal. We’re really down to just a few more details that need to be completed! I’m finally feeling confident that we’ll be able to get this room done before our little boy makes his arrival.
Thank goodness. I was worried for a minute there.

Love this simple tutorial! So quick question: I know for the windowsill, you said you just used construction adhesive and then nails for extra support. Is that what you did for the trim too? Just construction adhesive and nails? Can you see the nails through the paint?
Hi Sara! Yes, we attached it all with construction adhesive and nails. And no, once you add caulk or wood filler to the nail holes and paint over them, you can’t see them at all.
I made roman shades for both of my bdrm windows and I lined them with special room darkening fabric. They look classy and they let in a lot of light during the day and none suring the night. They are not hard to make either.
We have JCP room darkening cellular blinds (DO NOT buy the Mirage style). I wait for a sale and google for a % off coupon. We love these and have put them in our entire house.
Good to know! Thanks, Carole!
Well done! Love the new look. For nursery, there are lots curtains match with the bedding. That’s my favorite.
I had one of the Ikea shades in my bathroom. It worked really well, but it was almost always closed because the window was right next to the toilet. I ended up going with a window film on the bottom window pane instead, and left the top pane see-through so you could see the trees in the yard, but I imagine that you wouldn’t want to do window film for a bedroom. I don’t know if you need a shade on this window, especially right now when the baby is young. Maybe wait and decide what, if anything, you want to use in the rest of your house so that it all matches. I don’t have any shades in my house now – only curtains.